For most patio stone projects, you want 4 to 6 inches of compacted gravel base, about 1 inch of bedding sand on top, and then either polymeric sand or regular jointing sand swept into the gaps between the stones. That's the core answer.
What to Put Between Patio Stones: Base and Joint Guide

Nolan Ellison
29 Apr 2026
If you do not have patio slabs on hand, there are several solid alternatives, like pavers, gravel, or stepping stones, depending on your base and how you plan to use the space That's the core answer. . Which specific materials you choose for each layer depends on your stone type, your climate, and how much foot traffic the patio will get.
This guide walks you through the whole stack from ground up, so you can make the right call for your situation and get the job done right the first time.
Choosing the Right Patio Stone First
Before you start digging or ordering materials, the stone type you pick directly affects what you'll put between and under it. Different stones call for different joint widths and different base approaches, and pairing the wrong jointing material with the wrong stone creates headaches down the road.
Concrete pavers are the most forgiving for DIYers. They're uniform in thickness, which makes leveling straightforward, and their tight joints (typically 1/8 to 1/4 inch) work perfectly with polymeric sand. Flagstone and natural stone are less predictable because of irregular shapes and thicknesses, which often means wider, more varied joints (3/16 to 3/8 inch or more) that need a flexible jointing approach. Mortared flagstone is a different category entirely: it's set on a concrete slab or rigid mortar bed rather than sand, so the base construction is completely different from a sand-set system.
| Stone Type | Typical Joint Width | Best Jointing Material | Base Approach |
|---|---|---|---|
| Concrete pavers | 1/8"–1/4" | Polymeric sand | Compacted gravel + bedding sand |
| Natural stone / flagstone (sand-set) | 3/16"–3/8" | Polymeric sand or coarse jointing sand | Compacted gravel + bedding sand |
| Flagstone (mortared) | 3/8" (approx.) | Mortar or sanded grout | Concrete slab or rigid mortar bed |
| Irregular/tumbled stone | 3/16"–3/8" | Coarse jointing sand (polymeric not ideal on heavily textured surfaces) | Compacted gravel + bedding sand |
| Porcelain/tile-format stone | 1/8"–3/16" | Unsanded or sanded grout, or polymeric sand | Mortar bed on concrete slab |
One important note: if your stone has deep texture or heavy surface relief, polymeric sand can get trapped in those grooves and leave a stubborn white haze that's very hard to remove. Stick with regular coarse jointing sand or a specialty product designed for irregular surfaces in those cases.
Base Prep: What Goes Under Patio Stones
Getting the base right is honestly more important than anything else. I've seen beautifully laid patios turn into a mess of sunken and tilted stones within two seasons because someone skimped on the base. The ground underneath a patio moves, especially in freeze-thaw climates, and your base is what absorbs that movement without wrecking the surface.
If you're wondering what to lay under patio slabs, the key is a properly compacted gravel base topped with bedding sand for a stable, level foundation. If you're deciding on the base under your patio stones, this setup also connects to the best underlay for patio stones depending on your soil, drainage, and climate.
If you are planning a fire pit on your patio, choose the same kind of stable base layers under the heat-safe landing area so it won't shift or crack over time what to lay under patio slabs.
The Full Excavation Depth
Your total excavation depth equals the thickness of your paving stone plus about 1 inch of bedding sand plus 4 to 8 inches of compacted gravel base. For paver bedding sand, ASTM C33 is commonly specified or marketed as the right-grade option. For a typical 2.5-inch concrete paver, that puts you at roughly 7.5 to 11.5 inches of total excavation. For thinner natural stone around 1.5 inches thick, you're still looking at 6.5 to 10.5 inches deep. Don't underestimate this: most of the work (and most of the cost) is in the base, not the stones.
Layer by Layer from the Bottom Up

- Excavate to the correct depth and remove all organic material. Never leave sod, roots, or topsoil under your base — they'll compress and cause sinking.
- If you have clay soil, install a geotextile (landscape fabric) directly on the subgrade before adding any gravel. The ICPI specifically recommends this for clay applications to stop soil particles from migrating up into your base and undermining it over time.
- Add 4 to 6 inches of compacted crushed aggregate base (sometimes called Class II base, road base, or crusher run depending on your region). Add it in 2-inch lifts and compact each layer with a plate compactor before adding the next.
- Spread approximately 1 inch of coarse bedding sand (concrete sand or ASTM C33 sand) evenly over the compacted base. Screed it level. This is your leveling layer, not a cushion — keep it close to 1 inch, not thicker.
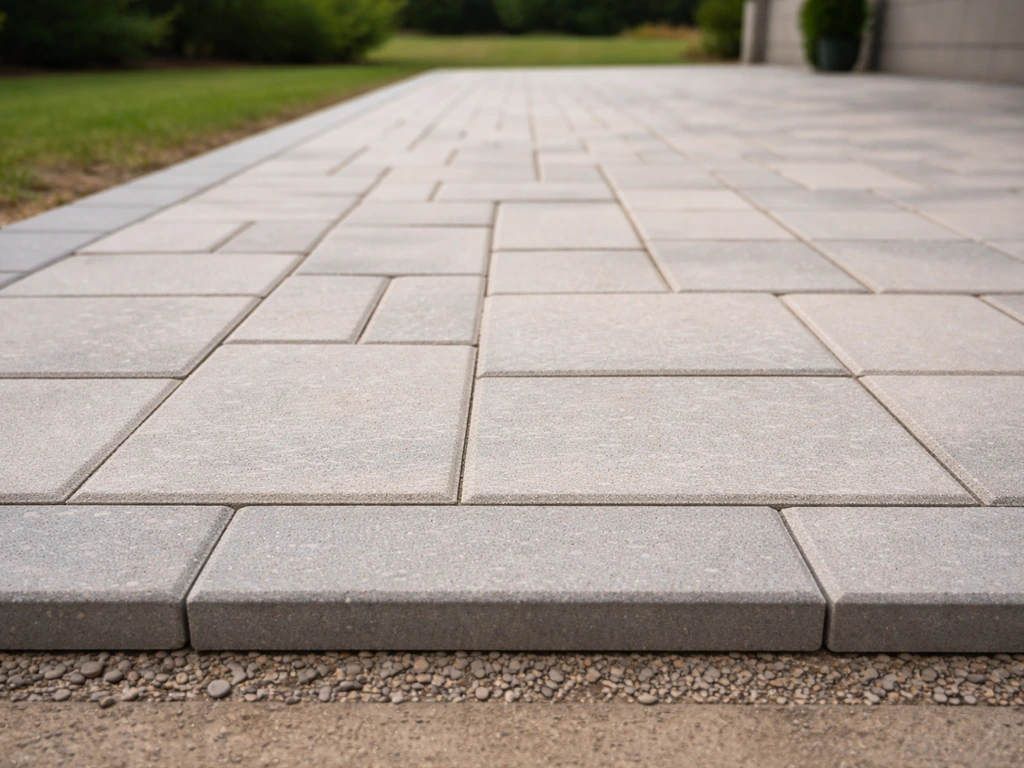
- Lay your paving stones on the bedding sand, maintaining consistent joint spacing as you go.
- Install edge restraints before you compact the finished surface.
- Compact the stones into the bedding sand with a plate compactor (use a rubber pad attachment on natural stone to avoid surface damage).
- Fill joints with your chosen jointing material and compact or activate as required.
The bedding sand layer often trips people up. One inch sounds thin, but going thicker actually makes the system less stable because deep sand compresses unevenly under load. Keep that layer to 1 inch, screeded flat, and let the gravel base do the heavy lifting.
Do You Need Geotextile Fabric?
If you have clay-heavy soil, yes, place geotextile fabric directly on the native subgrade before adding gravel. Clay is dense, doesn't drain well, and under wet or frozen conditions it can pump fine particles up into your gravel base, breaking down the whole system. The fabric acts as a separator, keeping the clay and gravel layers distinct. On sandy or well-draining soils it's optional, but it never hurts. Just make sure you're using a woven or non-woven geotextile designed for separation, not standard garden-center weed barrier fabric, which clogs easily.
Joint Infill: What to Put Between Patio Stones

This is the question most people are really asking when they search for advice on patio stones. For patio slabs, the right joint-mix choice depends on whether you’re using sand-set pavers or a mortared slab what mix for patio slabs. In general, the most common materials people put between patio bricks are jointing sand or polymeric sand, depending on the look and weed-control you want joint material you choose.
In particular, for a direct guide on what to put between patio slabs, see what to put between patio slabs. The joint material you choose affects how the patio looks, how much maintenance it needs, how well it resists weeds, and how it handles rain. Here are the main options.
Regular Jointing Sand (Paver Sand)
This is plain coarse sand swept into the joints. It's the traditional approach and works fine, but it has real trade-offs. It's cheap and easy to apply, but it washes out over time, needs periodic topping up, and does almost nothing to stop weeds once seeds find their way in. If you're doing a low-traffic area with wide, irregular joints or you want easy regrading in the future, regular sand works. For most patios, though, polymeric sand is a better long-term choice.
Polymeric Sand
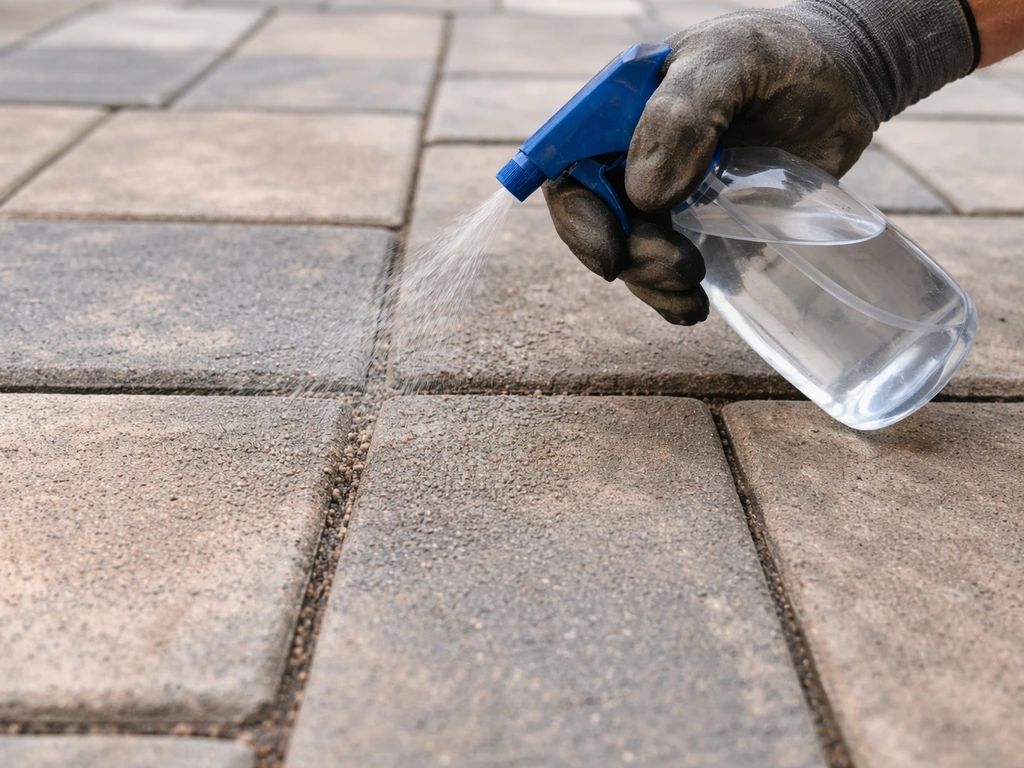
Polymeric sand is coarse sand mixed with polymer binders that activate when you mist the surface with water after installation. Once cured (typically 24 to 48 hours depending on conditions), it hardens into a semi-rigid joint that resists washout, significantly inhibits weed growth, and reduces ant infiltration. It's the most popular choice for concrete pavers and sand-set natural stone for good reason. That said, it has some real installation requirements you need to follow carefully.
- Joints must be at least 1/8 inch wide — polymeric sand doesn't work well in narrower joints.
- The stone surface must be completely dry before application. Any moisture on the surface before you're done sweeping will cause white haze that's very hard to remove.
- Don't apply if rain is forecast within 8 hours.
- After sweeping into joints and compacting, blow off all excess from the stone surface with a leaf blower before misting — this is the step most DIYers skip that causes haze problems.
- Fill joints to about 1/8 inch below the top of the stone surface (below the chamfer on chamfered pavers).
- Avoid using polymeric sand on heavily textured or rough-surfaced natural stone where the polymer particles can get trapped in the surface texture.
Mortar or Grout (for Mortared Settings)
If you're setting flagstone on a concrete slab or rigid mortar bed rather than sand, your joint filler changes completely. For mortared flagstone, you'll use sanded grout or a mortar mix in the joints, typically targeting about 3/8 inch joint width. The joints need to be cleared to at least 1 to 1.5 inches of depth for mortar to bond properly. Mortared joints look clean and elegant, but once they crack (and in freeze-thaw climates, they eventually do), repairs are more involved than with sand-set systems.
Pea Gravel or Decomposed Granite
For wide-set stepping stones in a garden or naturalistic flagstone layouts with large irregular gaps, loose gravel or decomposed granite between the stones can work well. It drains freely, looks natural, and is easy to maintain. The downside is it shifts with foot traffic, migrates over time, and doesn't lock the stones in place the way sand does. It's best reserved for occasional-use pathways and garden stepping stones rather than a patio with regular entertaining use.
Ground Cover Plants
Low-growing ground covers like creeping thyme, Irish moss, or Corsican mint are a beautiful option for wide-set flagstone in garden settings. They fill joints naturally, tolerate light foot traffic, and discourage weeds by outcompeting them. They do need watering to establish and can die back in extreme cold, leaving open joints in the meantime. Not practical for a formal patio with close-set stones, but genuinely great for naturalistic flagstone layouts where you want character over precision.
Weed Control in Joints and at Edges
Weeds between patio stones are one of the most common complaints homeowners have, and the solution really comes down to prevention first. Once weeds establish, you're playing catch-up.
Prevention: Your Best Tool
Polymeric sand is your single best weed-prevention tool for the joints themselves. Because it hardens after activation, it leaves little loose material for weed seeds to germinate in, and it blocks light and moisture at the joint level. It's not 100% weed-proof forever (airborne seeds can still land on top of a joint and germinate given enough moisture and time), but it dramatically reduces the problem compared with loose jointing sand.
At the edges of the patio, a solid edge restraint (plastic, aluminum, or concrete edging) combined with a clean gravel or mulched border helps prevent grass and weeds from creeping in from the sides. This is often more of a problem than weeds coming up from below.
Removing Weeds That Are Already There
For mechanical removal, a Cape Cod weeder, V-notch weeder, or soil knife works much better than a standard garden tool, the narrow head actually fits in a paver joint. Pull weeds when the soil is moist for cleaner removal of roots. For spot treatment, a diluted vinegar solution applied directly to the weed with a spray bottle or small brush works without introducing synthetic herbicides. Vinegar is non-selective though, so keep it off nearby plants and lawn grass. Boiling water poured directly into joints is another low-chemical option for occasional treatment. Whatever you use, the goal is targeted application, not broadcast spraying across the whole patio.
Drainage and Leveling: Getting Slope and Compaction Right
Poor drainage is the number one reason patios fail prematurely. Water that pools on the surface or under the base causes erosion, undermines the base, and accelerates freeze-thaw damage in cold climates. Getting slope and compaction right from the start prevents all of this.
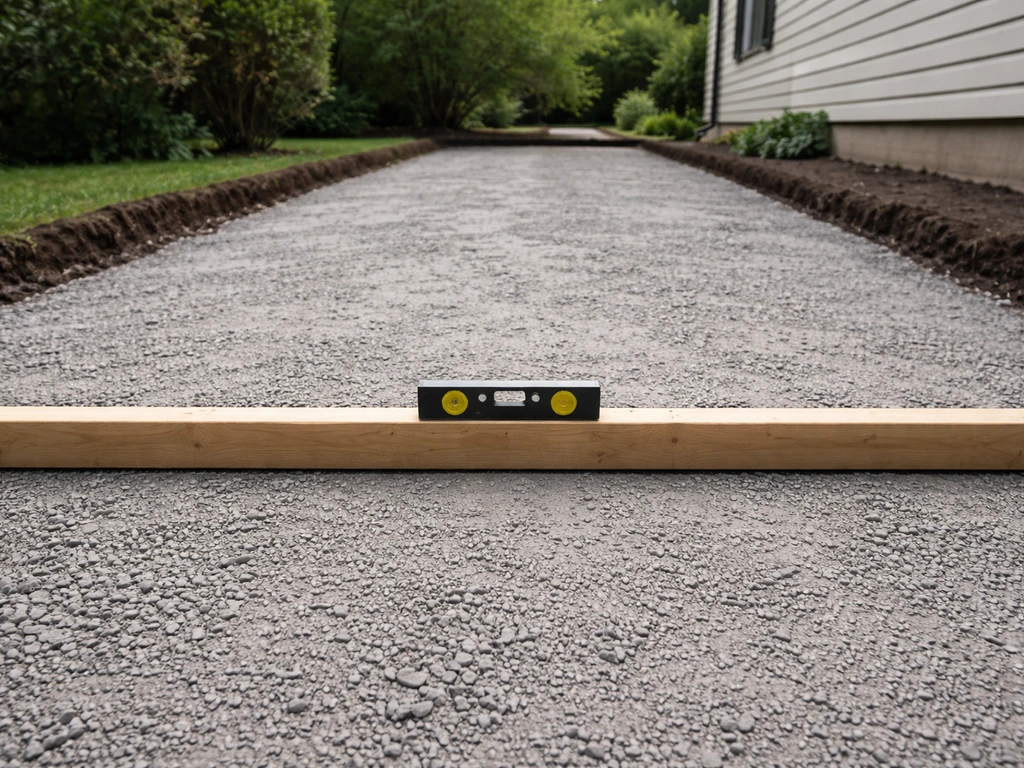
The Right Slope
Pitch your patio away from any structure (house, garage, wall) at a slope of 1/8 to 1/4 inch per foot. That's roughly a 1 to 2 percent grade. It sounds subtle but it makes a significant difference in how quickly water clears the surface after rain. Less than 1 percent and you'll get puddles after every shower. More than 2 percent and the patio starts to feel noticeably tilted underfoot. Set your slope in the base layer so the final paved surface naturally follows it.
Compaction
Proper base compaction is non-negotiable. Don't try to hand-tamp a gravel base and expect it to hold. Rent a plate compactor and compact every 2-inch lift of gravel before adding the next. The final base surface should feel rock solid when you walk on it. After laying the stones, compact the entire finished surface again with the plate compactor (using a rubber pad on natural stone) to set the pavers firmly into the bedding sand. This is what creates the true mechanical interlock that keeps the whole surface stable.
Freeze-Thaw Climates
If you're in a climate with hard winters, good drainage through the base is critical. Water in a base layer freezes and expands, and that expansion pushes stones up and out of alignment, this is called frost heave. A well-compacted, coarse crushed stone base (angular, not pea gravel) drains freely and doesn't retain the water that causes heave. In very cold climates, some installers go deeper on the base (up to 8 inches or more) to get below the frost line, or use open-graded drainage bases. Also, skip mortar joints if you're in a freeze-thaw zone, they crack and crumble. Sand or polymeric sand joints flex with movement and are far more durable in those conditions.
Maintenance: What to Do When Joints Wash Out or Settle
Even a well-built patio will eventually need joint attention. Sand washes out, polymeric sand cracks or erodes at edges, and a bad freeze-thaw season can displace a stone or two. Here's how to handle the most common issues.
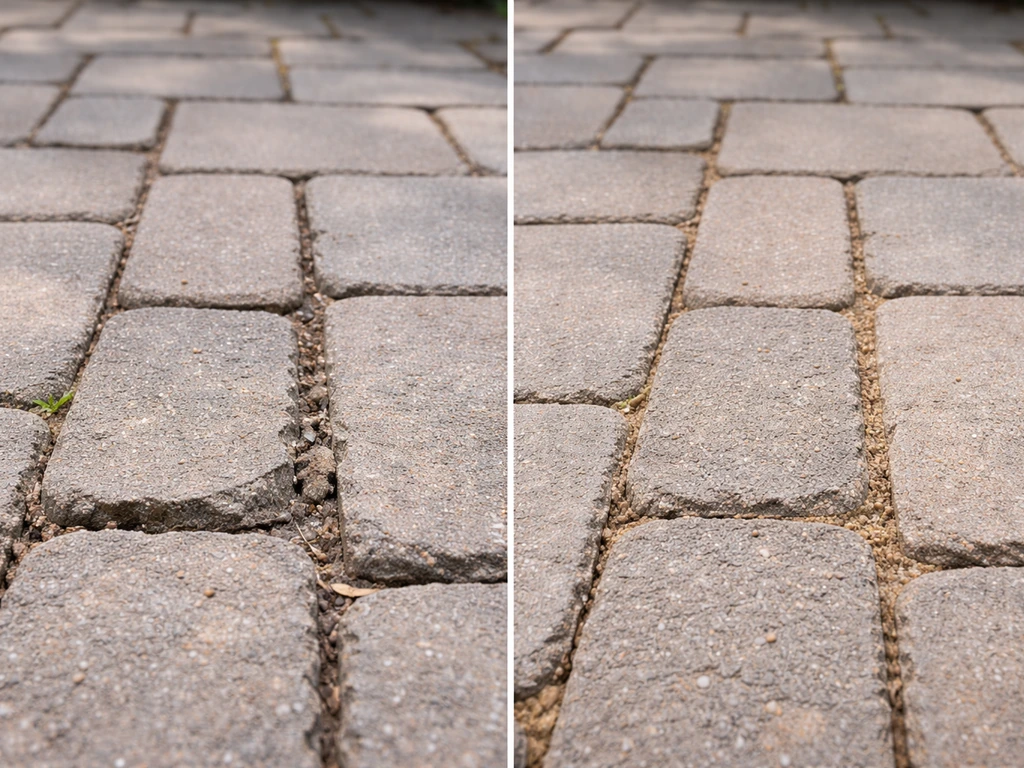
Replenishing Jointing Sand
If you used regular jointing sand, expect to top it up every year or two. Simply sweep new dry sand into the low joints, compact lightly, and sweep again. It's fast and cheap. If you want to upgrade to polymeric sand at the same time, blow or brush out as much of the old joint material as you can, let everything dry completely, then apply the polymeric sand following the manufacturer's steps carefully.
Repairing Polymeric Sand Joints
Polymeric sand joints that crack or pull away from stone edges (usually at the perimeter or near edge restraints) need to be cleared out before patching. Scrape or chisel out the old material to a depth of about 1 inch, blow clean with compressed air or a leaf blower, and refill with fresh polymeric sand on a dry day. Don't try to skim-coat over old material, it won't bond and will fail again quickly.
Resetting Sunken or Heaved Stones
A stone that has sunk or heaved is almost always a base problem, not a jointing problem. Pull the stone, check the bedding sand underneath, and look for what went wrong, usually it's either compaction failure, soil migration into the base (especially in clay soils without geotextile), or a drainage issue that's washing the bedding sand away. Fix the underlying cause before resetting: re-compact, add base material if needed, correct the drainage, then re-screed the bedding sand and reset the stone. If you skip the root cause, the same stone will move again within a season.
Ongoing Maintenance Routine
- Inspect joints every spring after the last freeze for erosion, cracking, or weed growth.
- Pull weeds by hand or with a narrow weeding tool as soon as you spot them — before they set seed.
- Check edge restraints annually and re-stake or reset any that have shifted or pulled away.
- Rinse the patio surface periodically to flush out debris from joints before it compacts and retains moisture.
- Re-seal polymeric sand joints or apply a joint stabilizer every 3 to 5 years depending on traffic and weather exposure.
- After severe winters, walk the entire patio and note any raised or sunken stones for early repair before the problem spreads.
A little attention each spring goes a long way. The patios that fall apart aren't usually the ones that were built wrong, they're the ones that had a small problem ignored until it became a big one. Catch a washed-out joint early and you're looking at 20 minutes of work. Ignore it for two winters and you might be resetting a whole section of stone.
FAQ
Can I use regular sand, or do I need coarse jointing sand or polymeric sand between the stones?
Avoid using fine play sand or masonry sand as the primary joint filler, these are too smooth and wash or blow out more easily. If your joints are narrow (about 1/8 to 1/4 inch), coarse jointing sand or polymeric sand is the safer match because it locks better after curing and leaves less loose material behind.
When should I choose polymeric sand versus regular jointing sand?
If you want the least maintenance and best weed resistance, polymeric sand is usually the default, but it depends on how flat and dry the patio can be during curing. Plan to do installation on a dry day, and do not hose the surface after misting beyond what the product instructions call for, over-watering can weaken the bond.
What joint material is safest in a freeze-thaw climate?
In freeze-thaw areas, don’t rely on mortar for typical sand-set patios because it tends to crack as the base moves. Use sand-based joints (regular coarse sand or polymeric sand) and focus on a well-draining, well-compacted gravel base with angular crushed stone rather than pea gravel.
Why do weeds keep coming back even when I filled the joints?
To prevent recurring weed growth, you still need edge restraint and clean side transitions. Even if your joints are filled well, gaps at the perimeter where soil can enter typically cause more weeds than what comes through from below.
Can I top up polymeric sand later, or do I have to replace it?
For polymeric sand, remove the spent material completely before switching, don’t just add more on top. The practical rule is to blow or vacuum out old sand deeply enough that you can’t feel a caked crust, then refill on a dry day so the binder can activate and cure correctly.
My patio stone is sinking, is it always a joint filler issue?
Don’t treat sunk stones as a joint-only problem. If a stone drops below its neighbors, lift it and re-check the bedding sand depth and base compaction, then re-screed to the same thickness before resetting, otherwise it will sink again after the next rain or freeze cycle.
How do I troubleshoot a patio that looks level during installation but later becomes uneven?
If the patio feels tilted, check the drainage and slope first, then verify the base is compacted. A common mistake is building level “from the top” without accounting for runoff, which later leads to water pooling, base erosion, and uneven settlement.
Should I use geotextile fabric under patio stones, especially on clay soil?
Geotextile should be the right type, woven or non-woven separation fabric intended for landscapes. Also place it on native soil as separation, not as a stand-in for base compaction, you still need compacted gravel in lifts and correct drainage.
What’s the correct thickness for bedding sand, and what happens if I add more to “fix” levelness?
Keep the bedding sand layer to about 1 inch and screed it flat, if you go thicker the sand can compress unevenly and create rocking. If you need leveling corrections, adjust by adding or removing gravel base below the bedding layer, not by adding more sand.
Do mortared flagstone joints use the same sand or polymeric products as sand-set patio stones?
For mortared flagstone set on a rigid bed, use the joint filler system designed for that mortar job, and target the recommended joint width. Also clear the joints deep enough for bonding, if the joints are left too shallow, grout or mortar will be prone to cracking and loss.
How do I repair cracked or pulled-away polymeric sand joints correctly?
Yes, you can do patching, but timing and surface dryness matter. Scrape the failed joint material out to roughly 1 inch depth, clean thoroughly, then refill with fresh polymeric sand only when the surface is dry, otherwise the binder may not cure properly and it can haze or fail early.