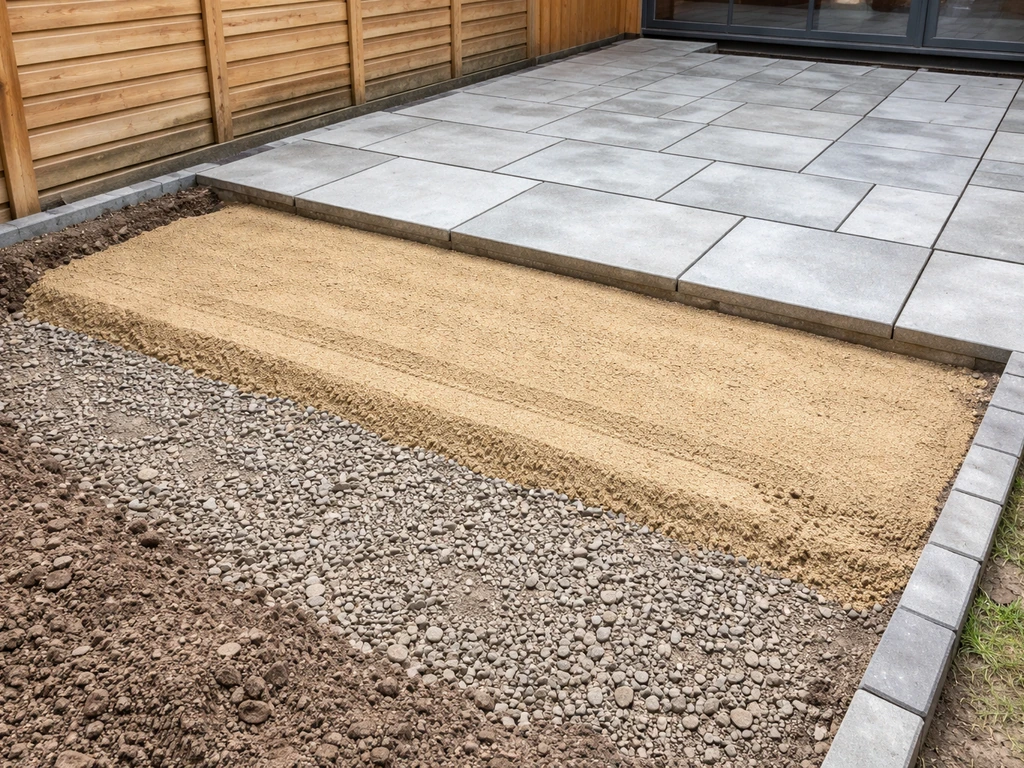
For most patios, you should lay slabs on a compacted Type 1 MOT sub-base (100–150mm deep) topped with either a sharp sand bed (around 30mm, for concrete or brick-look slabs) or a full mortar bed (50mm, for porcelain and natural stone). The exact build-up depends on your slab type, soil conditions, expected load, and climate. If you are also wondering what to put between patio slabs in terms of jointing, see what to put between patio slabs for the right choice for your setup. Get that decision right before you dig a single shovelful, because the base is what determines whether your patio looks perfect in five years or rocks and sinks by year two.
What to Lay Under Patio Slabs: Subbase, Bedding, Fit

Nolan Ellison
29 Apr 2026
Decide on the patio slab type and base approach first
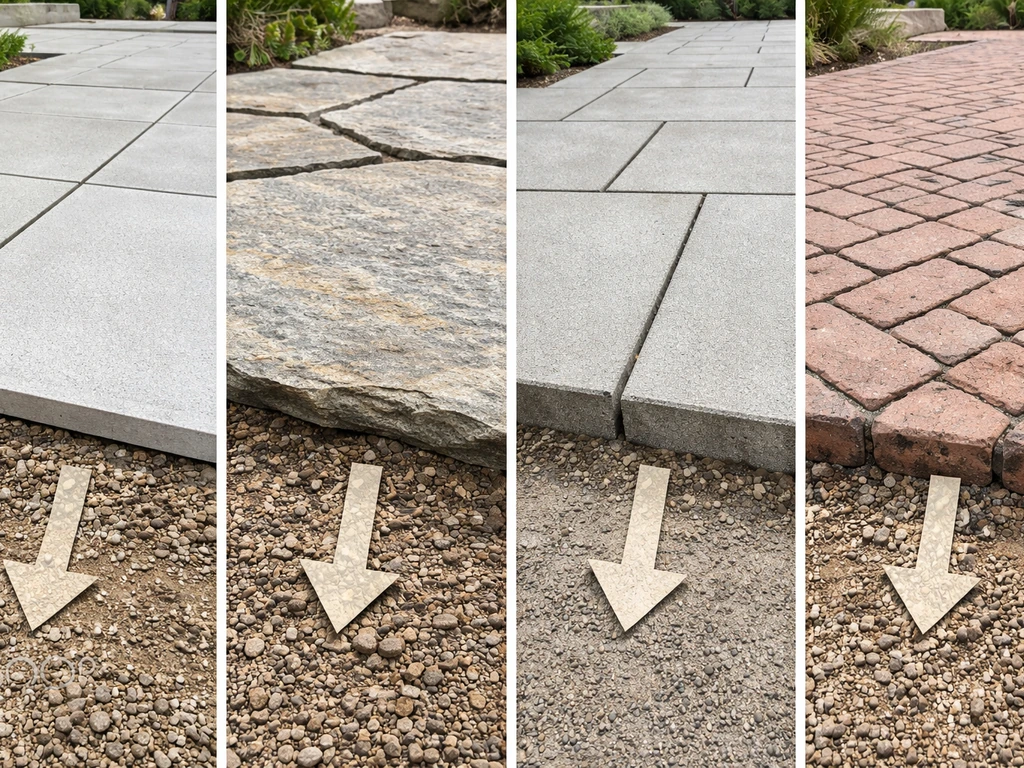
The base system you choose is driven almost entirely by the slab material you're installing. Porcelain and natural stone behave very differently from concrete paving or clay bricks, and the consequences of getting the base wrong are expensive to fix. So nail this decision before anything else.
There are two main approaches: unbound (dry) and bound (mortar or concrete). Unbound means the slabs sit on compacted sand or gravel with no cement involved. The patio is technically movable, drains freely, and is easier to repair. Bound means the slabs are set in mortar or on a concrete base with mortar, creating a rigid, load-bearing structure that handles heavier traffic, freeze-thaw cycles, and clay soils far better.
| Slab type | Recommended base approach | Bedding layer | Movable/Rigid |
|---|---|---|---|
| Concrete paving slabs | Type 1 MOT sub-base | 30mm sharp sand (unbound) or mortar | Movable or Rigid |
| Porcelain (20mm) | Type 1 MOT sub-base (100–150mm) | Full continuous mortar bed (50mm) | Rigid |
| Natural stone (flagstone, slate) | Type 1 MOT sub-base (100–150mm) | Full continuous mortar bed (50mm) | Rigid |
| Clay bricks / brick-look pavers | Type 1 MOT sub-base | 30mm sharp sand (unbound) | Movable |
| Large-format stone-look slabs | Type 1 MOT sub-base | Full continuous mortar bed | Rigid |
One mistake I see constantly: people put porcelain on a dry sand bed because they've heard it works for concrete pavers. It doesn't work for porcelain. Some porcelain installation guidance recommends a full mortar bed because porcelain is non-porous and needs strong bedding or adhesion, meaning it is not suitable for dry sand alone It doesn't work for porcelain.. Porcelain is non-absorbent, so sand under it stays loose and the slabs rock. Always use a full mortar bed for porcelain and natural stone.
Common base options: sand, gravel, MOT Type 1, concrete, and mortar
You'll hear a lot of different terms for what goes under slabs. Here's what each one actually is and when it makes sense.
Sharp sand
Sharp sand (also called grit sand or coarse sand) is the traditional dry bedding layer for concrete and brick pavers. You lay and compact it to around 30mm, screed it level, then place slabs directly on top. It's forgiving to work with, allows minor height adjustments, and drains reasonably well. The downside is that it's vulnerable to washing out in heavy rain and shifting under heavy loads. It's not suitable as the sole base material, it always needs a compacted sub-base underneath it.
MOT Type 1 sub-base
Type 1 MOT (Ministry of Transport specification crushed limestone or granite) is the gold standard sub-base for patios. If you are choosing the base, the best underlay for patio stones is typically a well-compacted Type 1 MOT sub-base. Choosing the right mortar bed and bedding build-up for your slab type is usually the key part of what mix for patio slabs. It's angular, self-binding hardcore that compacts to a dense, stable layer. For most residential patios, lay it 100mm deep on firm soil or 150mm on softer or clay soils. Always compact it in layers with a plate compactor. This is the single most important step in the entire build, a poorly compacted sub-base is the number one cause of sinking slabs.
Gravel / MOT Type 2
Rounded gravel and Type 2 MOT are sometimes used as a sub-base, but they don't compact as tightly as Type 1. If you're on a tight budget and your soil is firm and well-draining, they can work under a dry-laid system. For mortar-bedded patios, stick with Type 1.
Mortar bed
A mortar bed (typically 4 parts sharp sand to 1 part cement, mixed fairly dry) is the bedding layer that sits on top of the compacted sub-base. It should be laid as a full, continuous bed, not isolated dabs or blobs, at around 40–50mm thick before slabs are pressed in. This is non-negotiable for porcelain and natural stone. The continuous contact eliminates the hollow voids that cause cracking and rocking, and it gives frost no place to get purchase under the slab.
Concrete slab base
For very heavy-use areas (driveways doubling as patios, areas with vehicle access, or very soft ground), you can pour a concrete base (typically 100mm C20 or C25 concrete) and then mortar the slabs on top of that. This is overkill for most garden patios but genuinely useful where the ground is waterlogged, unstable, or where you expect significant weight. When you’re planning what to put under a fire pit on a patio, prioritize a stable, heat-safe base and proper drainage so the surrounding slabs do not shift or crack.
Preparing the ground: excavation, compaction, and drainage slope
Ground preparation is where most DIY patios fail. Do this part properly and everything else is manageable. Rush it and you'll be relaying slabs within a few years.
Excavation depth
Work backwards from your finished patio level. Add up: slab thickness + bedding layer + sub-base depth, and that's how deep you need to dig. As a rough guide for a standard porcelain or natural stone patio, you're typically looking at 250–300mm total excavation depth (150mm Type 1 + 50mm mortar bed + 20–40mm slab). For dry-laid concrete pavers, 200mm is often enough (150mm Type 1 + 30mm sand + 50mm slab). Remove all topsoil and any organic material, roots and organic matter decay and cause settlement.
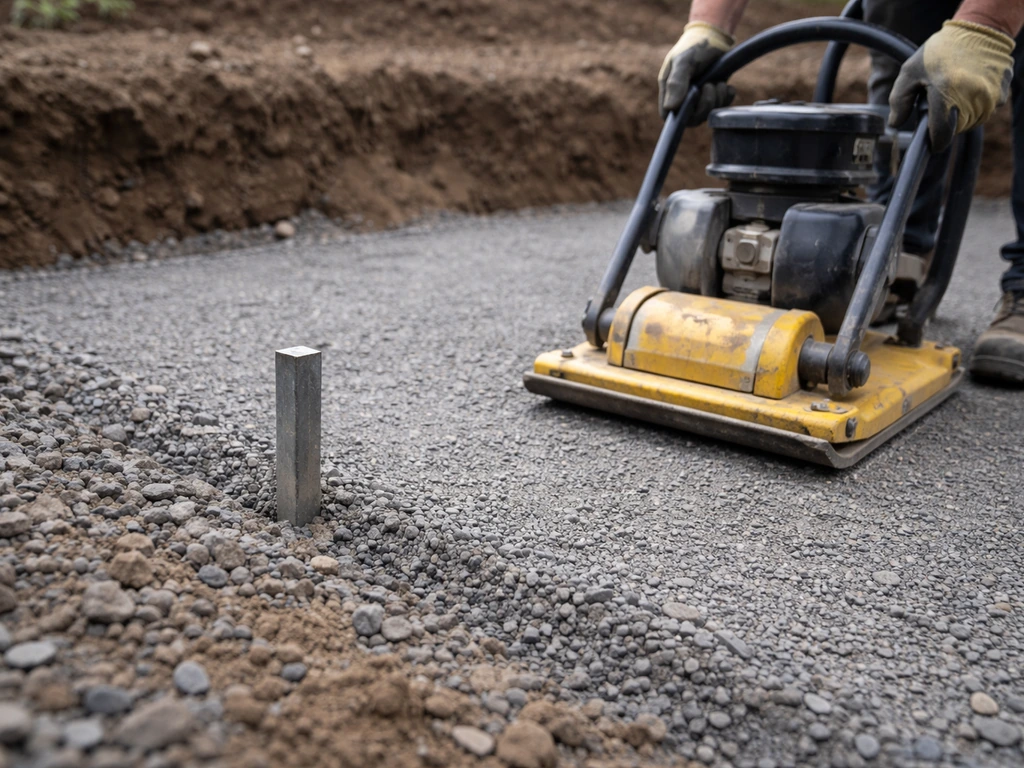
Compacting the sub-base
Lay Type 1 MOT in layers of no more than 75–100mm and compact each layer thoroughly with a plate compactor before adding the next. Don't try to compact 200mm all at once, you'll get a firm top layer with loose material underneath. Hire a plate compactor if you don't own one; it's worth every penny. After compaction, walk the surface and press down firmly with your foot. There should be virtually no give.
Drainage slope (fall)
Every patio needs a fall away from the house to prevent water pooling and damp getting into the structure. The standard recommendation is 1:60, that's a 1cm drop for every 60cm of patio length. On a 3-metre-wide patio, that's a 50mm fall from house to far edge. Set this slope into your sub-base and maintain it through the bedding layer. It sounds minor but it's the difference between a dry patio and one with standing water after every rain shower.
Managing drainage in problem areas
If you're on clay soil or an area that retains water, the sub-base alone won't solve drainage. Consider installing a perforated pipe drain along the lowest edge of the patio that connects to a soakaway or drainage channel. In very wet or heavy-clay situations, a layer of geotextile membrane between the native soil and the sub-base helps stop fine clay particles migrating up and contaminating the hardcore. This is especially important in freeze-thaw climates where trapped moisture causes the worst heave damage.
Laying slabs correctly: leveling, spacers, cutting, and bedding thickness
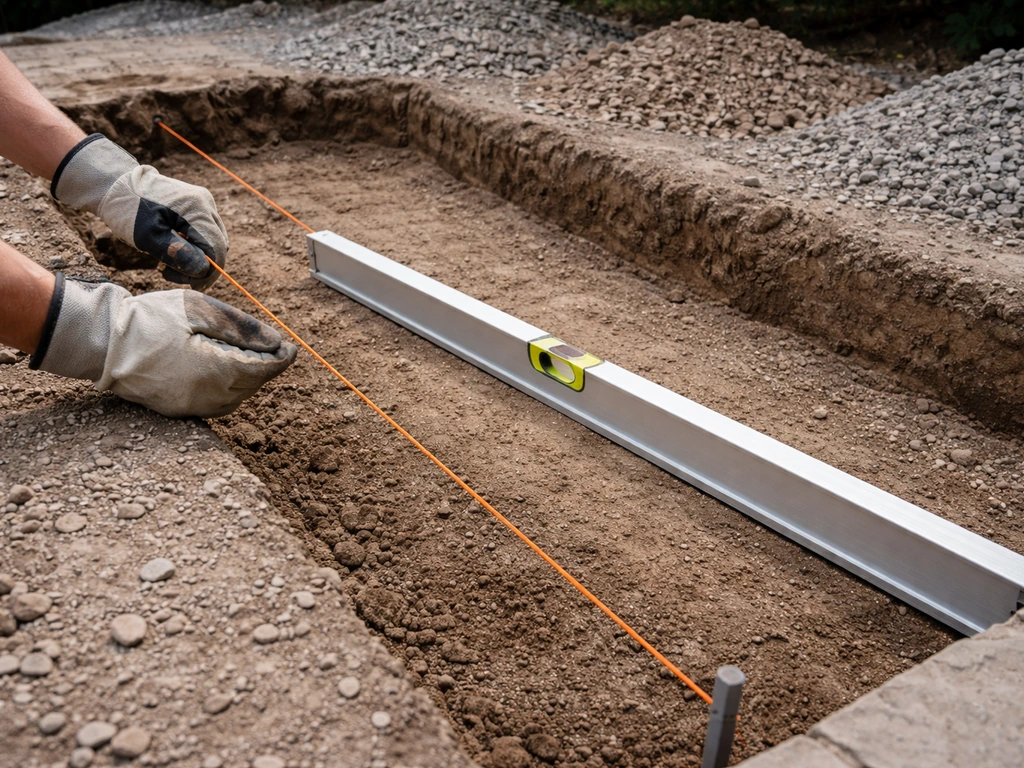
Setting your levels
Before you place a single slab, set string lines at your finished height along both axes. Use a builder's level and a long straight-edge to check across multiple rows as you go. String lines give you your horizontal plane; your spirit level confirms each individual slab is sitting flat within it. Start from the house edge or a fixed point and work outwards.
Screeding the mortar or sand bed
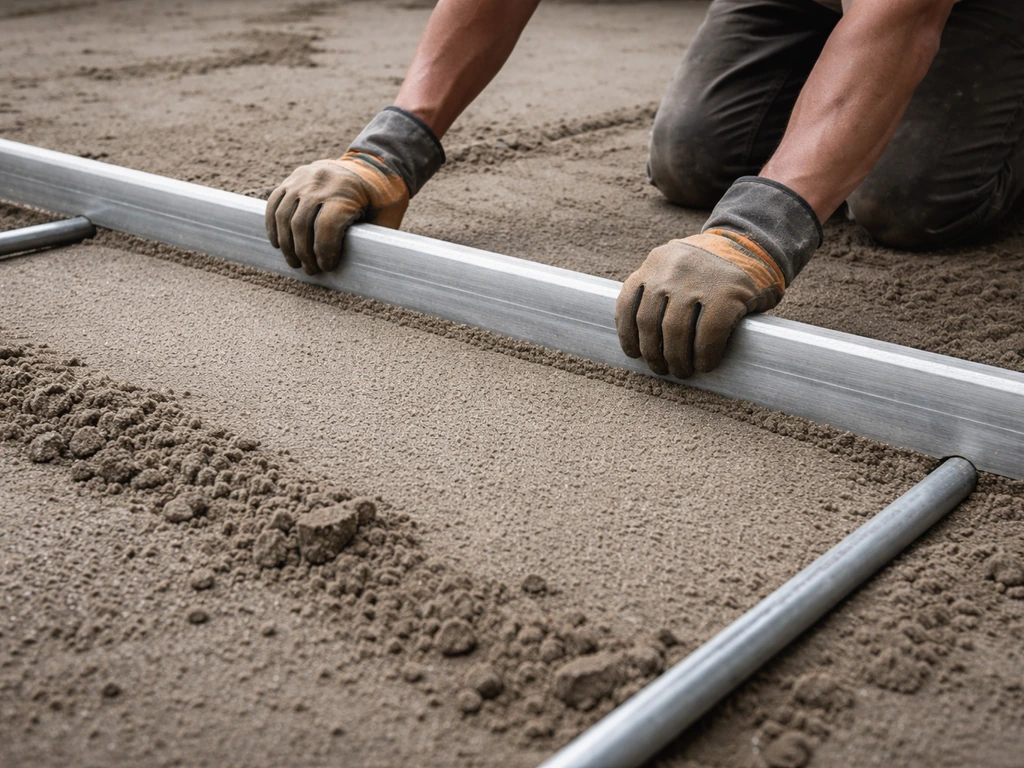
For a sand bed, use two lengths of metal conduit pipe set at the correct height as rails, then drag a screed board across them to create a flat, even surface. Remove the pipes once a section is screeded and fill the channels lightly. For a mortar bed, do the same but work in manageable sections (around 1–1.5 square metres at a time) so the mortar doesn't start to set before you place slabs. Your mortar bed should be around 40–50mm thick before slabs are pushed in.
Placing and bedding slabs
Lower slabs carefully onto the bed, don't drop them. For mortar-bedded installations, press and tap with a rubber mallet to achieve full contact across the entire base of the slab. Lift one occasionally to check the mortar is transferring evenly across 100% of the underside (called full contact or full adhesion). Any gaps mean potential rocking and frost damage later. For porcelain specifically, some installers also apply a thin layer of SBR bonding agent or primer to the back of the slab to improve adhesion because the non-porous surface resists bonding.
Spacers and cutting
Use plastic tile spacers or timber offcuts to maintain consistent joint widths (typically 10–15mm for mortar-jointed patios, 2–5mm for tightly fitted natural stone). For cutting, a diamond-blade angle grinder handles most straight cuts on concrete and stone. For porcelain, use a wet tile saw or a diamond disc rated for porcelain, porcelain chips badly with inferior blades. Always wear eye protection and a dust mask, and score before cutting where possible.
Jointing and edge details: pointing, sand/grout, restraints, and weed control
Jointing options
Once slabs are set and the mortar bed has cured (typically 24–48 hours), fill the joints. For natural stone and porcelain, use a proprietary flexible pointing mortar or an epoxy-based grout, these handle movement and weather better than standard mortar mixes. For dry-laid concrete or brick pavers, brush kiln-dried sand into the joints and compact it down, and if you are planning a different joint infill, see what to put between patio stones for the right options. For dry-laid concrete or brick pavers, brush kiln-dried sand into the joints and compact it down; you may need to top up after the first rain. When it comes to what to put between patio stones, the right option depends on whether you have dry-laid joints or mortar-set paving. If you're using brick pavers, see what to put between bricks on a patio for the best jointing approach based on whether your joints are dry-laid or mortar-set. Brush-in jointing compounds with a polymer binder are a better long-term solution for dry-laid systems because they resist weed growth and washing out.
Weed control
For dry-laid patios, lay a weed-suppressing geotextile membrane over the compacted sub-base before adding the sand bedding layer. This stops weed seeds germinating in the joints from below. It won't stop seeds blowing in from above, which is why keeping joints packed and tight matters. For mortar-jointed patios, well-pointed joints are themselves an effective weed barrier as long as they're not cracked or open.
Edge restraints
The edges of any patio are where movement starts. Without restraints, slabs at the perimeter slowly push outward under foot traffic, opening up the whole layout. Use concrete haunching (a thin concrete collar poured against the outer edge of border slabs), proprietary plastic edge restraint strips, or simply ensure border slabs are mortar-bedded even if the rest of the patio is dry-laid. A raised border of bricks or treated timber can also serve as edge restraints and give the patio a clean finish.
When to avoid sand and when concrete or mortar is the right call
Dry-laid sand bedding is perfectly adequate for many situations. But there are clear scenarios where it's not appropriate, and going in with the wrong approach is an expensive lesson. If you are replacing patio slabs, you can also consider alternatives like paving slabs, outdoor tiles, decking, gravel, or block paving depending on your ground conditions and budget.
- Use sand bedding for: concrete pavers, clay bricks, permeable/drainage patios, areas where you want easy future access (for pipes or cables underneath), and budget-focused projects on firm, well-draining soil.
- Use mortar bedding for: porcelain (all thicknesses), natural stone, large-format slabs over 600mm, high-traffic areas, and anywhere that will carry outdoor furniture, planters, or occasional vehicle weight.
- Use a full concrete base under mortar for: very soft or waterlogged ground, clay soils with severe frost-heave history, patios adjacent to house footings, or driveways that serve as patios.
Clay soil is the biggest wildcard. Clay expands when wet and contracts when dry, which means a dry-laid sand-bedded patio on clay will move seasonally almost no matter what you do. If you're on clay, either invest in proper drainage below the sub-base, use a thicker (150mm+) compacted Type 1 base, and mortar-bed everything, or accept that you'll need to re-level occasionally.
In freeze-thaw climates (anywhere that regularly drops below freezing), mortar-bedded patios with full continuous contact under each slab are significantly more resistant to frost heave. Water has nowhere to collect and freeze under the slab when there are no air voids. This is particularly important for porcelain, which doesn't absorb water but can lift dramatically if water gets trapped beneath it and freezes.
Maintenance and fixes after installation
Routine upkeep
A well-built patio needs very little maintenance. Brush or jet-wash the surface once or twice a year to remove algae and debris, especially in shaded areas. Re-sand joints on dry-laid patios every one to two years or whenever joints look depleted. For natural stone, consider resealing every two to three years with a suitable impregnating sealer, it prevents staining and makes cleaning easier. Porcelain doesn't need sealing, but inspect grout joints annually and repoint any cracked or open sections before moisture gets in.
Rocking or wobbling slabs
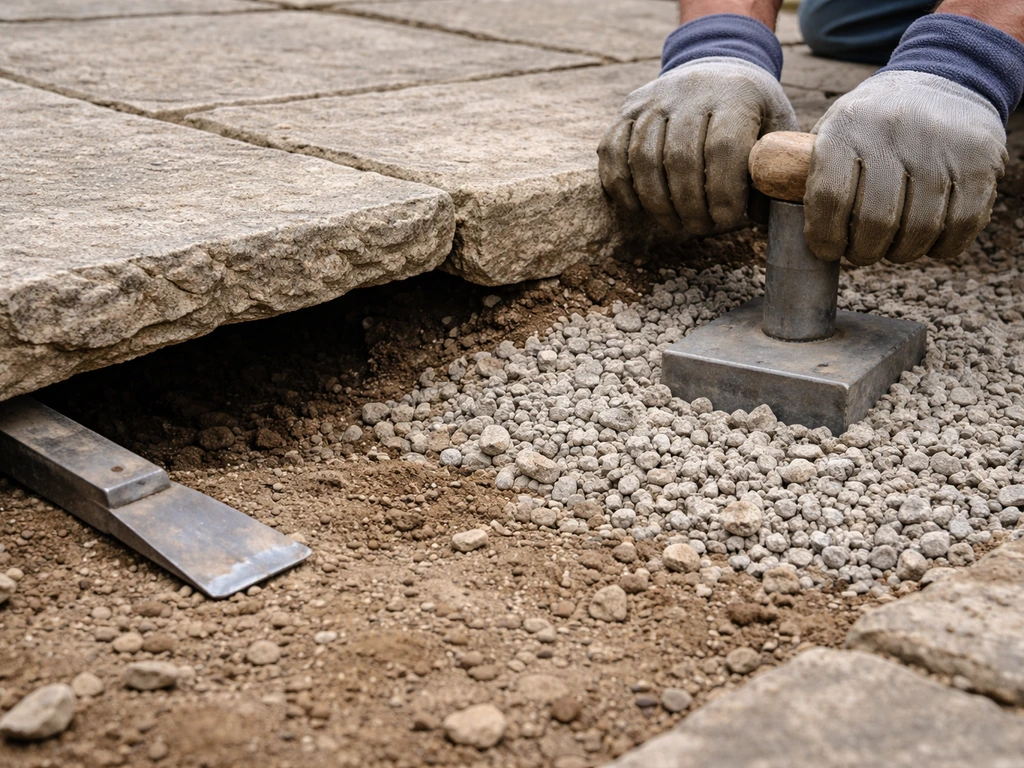
A rocking slab almost always means the bedding layer has a hollow spot underneath it. Lift the slab (a bolster chisel slipped under the edge usually does it), clean off the old mortar or sand, and re-bed with fresh mortar ensuring full contact across the entire underside. This is a straightforward fix and well worth doing promptly, a rocking slab stresses the surrounding joints and can cause a chain reaction of loosening.
Sunken or uneven slabs
Sinking usually points to sub-base settlement, not a bedding failure. Lift the affected slab, top up the sub-base underneath with fresh compacted Type 1, then re-bed. If multiple slabs are sinking in the same area, you may have a drainage issue that needs addressing first, water washing the sub-base material away. Dig down and check before you just relay, otherwise the problem repeats.
Cracked or crumbling pointing
Rake out any loose pointing with a cold chisel or angle grinder disc, brush clean, and repoint with a fresh flexible pointing mortar. Don't just apply new mortar over old crumbling joints, the bond will be poor and it'll just crack out again. For large patios with widespread joint failure, a brush-in resin jointing compound applied to the whole surface is an efficient solution.
Standing water

If water is pooling in one corner or along an edge, the patio either wasn't laid with enough fall, or the sub-base has settled unevenly. For minor cases, lifting and re-bedding the low slabs at a corrected height solves it. For systematic low spots across a larger area, you may need to install a drainage channel (a narrow linear drain with a grate) at the lowest point to carry water away, rather than relay the entire patio.
FAQ
Can I lay patio slabs directly on top of soil or hardcore without leveling it properly first?
No. Even if you use the right Type 1 MOT, you must remove topsoil and organic material, then compact the sub-base in layers. If you skip proper removal or compaction, you will still get uneven settlement, which shows up as rocking and cracked joints later.
Do I need a geotextile membrane under the Type 1 MOT on every patio?
Not always. It’s most useful when you have clay soils, lots of fine material migration, or you want extra separation where water movement could contaminate the hardcore. For free-draining, firm ground with clean aggregates, you can often omit it if drainage and compaction are correct.
What fall should I use if my patio is shorter than 3 meters?
Use the same 1:60 idea, just scaled to length. For example, a 2 meter run needs roughly a 33 mm drop from the house edge to the far edge. Keep the slope consistent across the full width while you set the sub-base level.
Is a mortar bed always stronger than dry bedding, or will it crack?
A mortar bed is less prone to frost-induced rocking because it creates full contact and reduces voids. It can still crack if the sub-base settles or if the joints are left rigid or poorly maintained, so edge restraints and proper jointing still matter.
How thick should the mortar bed be for natural stone and porcelain if my slab thickness is different?
Aim for the bedding thickness called out for your slab type, typically a 40 to 50 mm mortar bed before the slab is pressed in. Don’t compensate for missing thickness by skimping on sub-base depth, the total build-up and excavation depth are what keep the patio at the right height.
Can I use Type 2 MOT instead of Type 1 MOT under porcelain or natural stone?
Better not. Type 2 doesn’t compact as tightly, so it’s more likely to allow minor movement and voids to form beneath heavy or non-absorbent slabs. For mortar-bedded porcelain and stone, stick with Type 1 and compact in lifts.
What compaction method should I use, and how do I know I compacted enough?
Use a plate compactor and compact in lifts of no more than about 75 to 100 mm. After compaction, you should have virtually no give when you press with your foot. If you see pumping, shuffling, or a soft top layer, you haven’t achieved adequate density.
Can I partially mortar-bond porcelain instead of using a full continuous mortar bed?
No. Porcelain and natural stone need full, continuous contact under the whole slab. Using dabs or blobs increases the chance of hollow voids, rocking, and frost damage because water can collect and freeze under isolated high points.
What’s the easiest way to fix a rocking slab on an otherwise solid patio?
Lift the slab, remove the old sand or mortar, and re-bed with fresh mortar (for porcelain/stone) ensuring full underside transfer. Check the surrounding slabs and joints too, because rocking often stresses the edges and can start a wider loosening pattern.
Why do joints keep washing out on a dry-laid patio even after I re-sand them?
Most often it’s because the sand is moving due to weak sub-base compaction, insufficient edge restraints, or gaps that are too loose to lock. Use a jointing product appropriate to the system if available, and confirm the patio has the correct fall so water isn’t concentrating in low spots.
Do I need to seal natural stone joints and surfaces after installation?
Typically you should consider resealing natural stone every two to three years with a suitable impregnating sealer. The goal is stain resistance and easier cleaning, but the exact schedule depends on the stone type and how much traffic and rainfall exposure it gets.
Should I use plastic spacers for all patio slab types and joint widths?
Use spacers to control consistency, but don’t use the same width for every material. Tight natural stone often uses smaller joints, while mortar-jointed systems generally need wider joints, typically in the 10 to 15 mm range for mortar joints. Always match the joint width to the chosen jointing method.
Can I lay a patio on a slope unevenness and adjust it with bedding thickness?
You can adjust slightly within bedding, but you cannot correct major ground or sub-base levels by varying sand or mortar thickness. If one area starts significantly thicker, it often leads to weak contact, inconsistent slopes, and early joint failure.
If I’m building around a fire pit or heavy feature, do I still use the same bedding and base?
You still need the same principles, but you should prioritize stability and drainage. For high loads or damp ground, a more rigid build-up like a concrete base can be appropriate, and you should plan heat-safe clearances and ensure the surrounding slabs cannot shift.
My patio edge is opening up. What should I do first?
Check the restraints first. Install or improve concrete haunching, proprietary edge restraint strips, or ensure perimeter slabs are mortar-bedded even if the rest is dry-laid. Without restraints, foot traffic pushes slabs outward and widening joints become a maintenance cycle.