You can replace patio slabs with gravel, brick pavers, natural stone or flagstone, porcelain pavers, or composite/modular slab systems. Each one is a legitimate patio surface with its own cost range, install difficulty, drainage behaviour, and long-term upkeep. The right pick depends on your budget, how much you want to DIY, your climate, and honestly how much maintenance you're willing to do in five years, not just five weeks after you finish building. A common way to narrow your choice is to compare the right base and jointing materials for your patio slabs versus alternatives like gravel, pavers, or stone what mix.
What Can I Use Instead of Patio Slabs? Best Alternatives

Nolan Ellison
29 Apr 2026
Quick decision: your patio goals and constraints
Before you pull the trigger on any material, run through four questions. They'll cut the list in half before you spend a single dollar.
- What's your realistic budget per square foot installed? Under $5, $5–$15, or $15+?
- Do you get hard freezes in winter? Freeze/thaw cycling eliminates some options or changes how you install them.
- Is drainage a problem on your site? Poor drainage rules out mortared surfaces unless you engineer it out first.
- How much ongoing maintenance are you prepared to do? Gravel needs annual top-ups; porcelain needs almost nothing.
If you're on a tight budget and can tolerate a more casual look, gravel or crushed stone gets you a functional patio for as little as $1–$3 per sq ft for materials alone. If you want something that looks premium and lasts 30+ years with minimal fuss, porcelain or natural stone is worth the higher upfront cost. Brick pavers sit in a sweet middle ground on almost every metric. Keep these anchors in your head as you read through the options below.
Best alternatives to patio slabs
Gravel and crushed stone
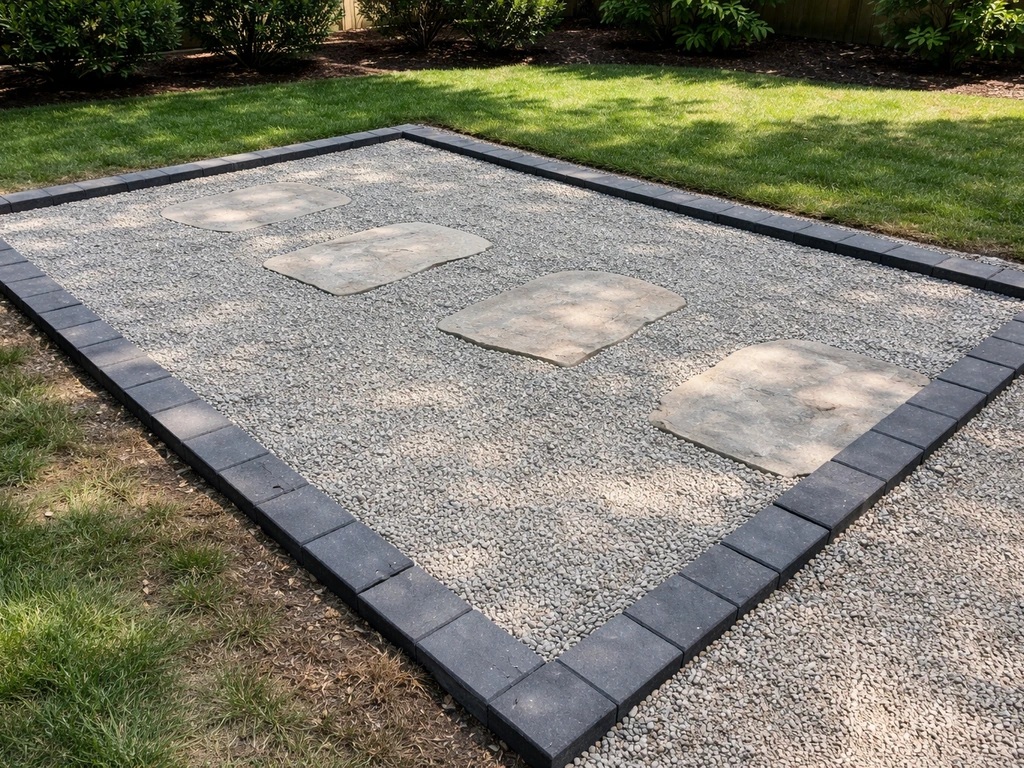
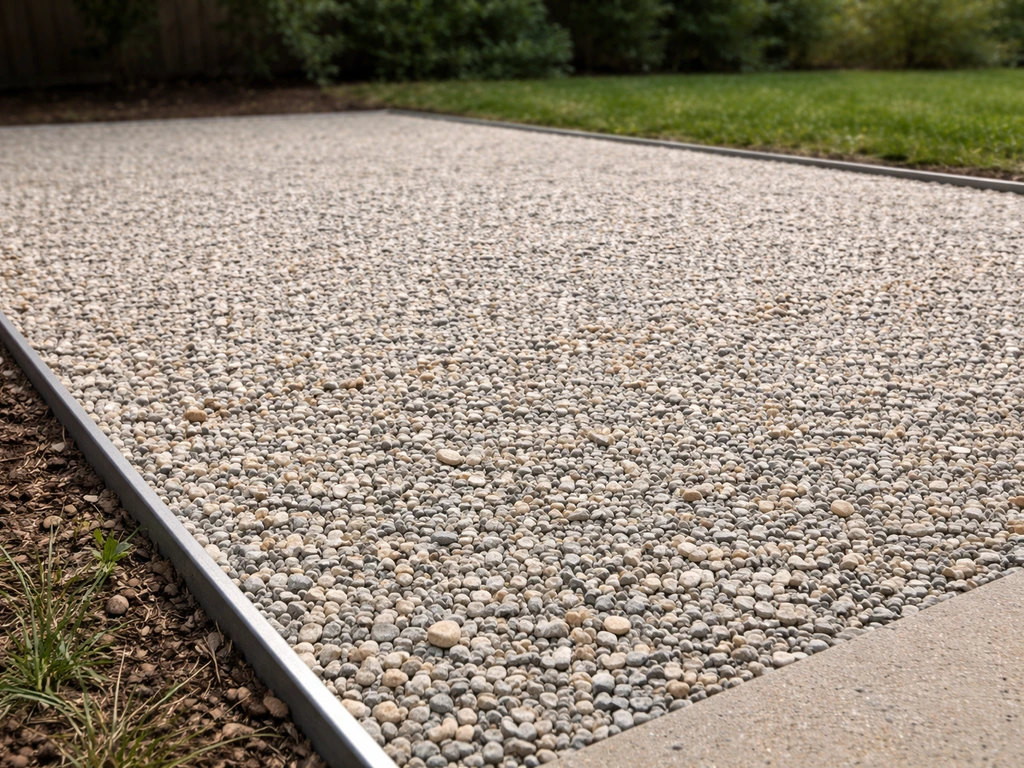
Gravel is the cheapest, fastest patio surface you can put down. Pea gravel, crushed granite, or decomposed granite all work. It drains beautifully, which makes it ideal for poorly graded sites where water pools. The downside is it moves underfoot, migrates over time, and needs an edging system to stay where you put it. Furniture legs sink slightly, so use wide-footed or sled-leg outdoor furniture. Plan on topping it up every year or two.
Brick pavers

Fired clay brick pavers are one of the most durable things you can put in a garden. They handle freeze/thaw cycles well when installed on a proper compacted aggregate base with bedding sand, and they're repairable: if one unit heaves or cracks, you pull it out and replace it without touching the rest of the surface. Installed costs typically run $10–$50 per sq ft depending on pattern complexity and labor rates. They need periodic joint sand maintenance to stay tight and weed-resistant, but that's a low bar compared to resealing concrete slabs.
Natural stone and flagstone
Flagstone (bluestone, slate, sandstone, limestone, travertine) gives you a look that no manufactured product fully replicates. Installed costs run roughly $15–$32 per sq ft, with stone type and sourcing driving a big chunk of that. You can lay it dry-set in compacted sand/gravel for a more rustic, flexible result, or mortar it for a cleaner, more formal finish. Dry-set is more forgiving in climates with ground movement; mortared joints can crack in heavy freeze/thaw regions unless the base is engineered correctly. The irregular shapes mean more cutting and fitting time, so DIY is slower but very achievable.
Porcelain pavers

Porcelain pavers have changed the outdoor paving market over the last decade. They're frost-resistant, extremely low maintenance, and available in large-format slabs that look like natural stone or concrete. Installed prices range from roughly $7 to $34 per sq ft, and the variance is mostly about slab size and complexity of the sub-base approach. You can mortar them onto a concrete base, set them in sand, or raise them on a pedestal system.
Pedestal installations are particularly smart for rooftop terraces or areas with drainage constraints because water flows freely through the gaps to a drainage layer beneath. One important note: in hard freeze/thaw regions, use a mortar rated to ANSI A118. 15 or an uncoupling membrane system so thermal movement doesn't crack the bond.
Composite and modular slab systems
Wood-plastic composite deck tiles and modular polypropylene paver bases (like Brock PaverBase panels) are a newer category that's genuinely useful for specific situations. Composite tiles click or stack together over an existing surface or compacted base, making them ideal for renters, temporary installs, or going over an existing concrete slab that's ugly but structurally sound.
Polypropylene panel systems like Brock serve as a drainage-managing sub-layer under traditional pavers, reducing how much aggregate base you need to dig and install while still giving you a stable, draining foundation. The Brock PaverBase workflow describes using a polypropylene panel drainage sub-layer under traditional pavers, then [sweeping joint sand into the paver joints](https://images. thdstatic. com/catalog/pdfImages/15/15f9c605-daff-4844-948c-e4003dbb0e90.
pdf) to help with long-term stability and weed resistance. These are more niche than the other options, but they solve real problems.
Quick comparison across all options
| Material | Approx. installed cost (sq ft) | DIY difficulty | Drainage | Freeze/thaw suitability | Maintenance level |
|---|---|---|---|---|---|
| Gravel/crushed stone | $1–$5 | Easy | Excellent | Good | Moderate (top-ups, edging) |
| Brick pavers | $10–$50 | Moderate | Good (permeable gaps) | Very good with proper base | Low–moderate (joint sand) |
| Natural stone/flagstone | $15–$32 | Moderate–hard | Good (dry-set) / Fair (mortared) | Good (dry-set); caution with mortar | Low–moderate (re-pointing, sealing) |
| Porcelain pavers | $7–$34 | Moderate–hard | Excellent (pedestal) / Fair (mortared) | Good with correct mortar/membrane | Very low |
| Composite/modular tiles | $5–$20 | Easy | Good–excellent | Varies by product | Low |
Cheap patio alternatives that still look good
If budget is the main driver, you have more good options than you might expect. The key is understanding where you can spend less without making a decision you'll regret.
- Decomposed granite or pea gravel with steel or aluminum edging: this looks clean, costs almost nothing per sq ft in materials, and you can do it in a weekend. Use a landscape fabric or geotextile beneath it (rated for puncture resistance per ASTM D6241 standards) to slow weed germination, then add 2–3 inches of compacted DG or gravel on top.
- Locally sourced flagstone set dry: sourcing stone regionally cuts transport costs dramatically. A dry-set flagstone patio with wide gravel-filled gaps looks intentional and rustic, and it costs far less than mortared natural stone.
- Basic concrete brick pavers in a simple running bond: skip the fancy patterns and use a straightforward brick in a standard size. Labor is the biggest cost driver for pavers, so simple layouts cut time and therefore money.
- Reclaimed brick: salvage yards often sell reclaimed clay brick pavers at steep discounts compared to new. They come with built-in character and patina. Check for spalling or delamination before buying.
- Composite deck tiles over an existing surface: if you already have a cracked or ugly concrete slab, snapping composite tiles on top costs a fraction of demolition and relaying. This is the fastest upgrade path for an existing bad surface.
The honest caveat on budget options: gravel and DG need regular maintenance. If you hate doing annual top-ups and edging adjustments, spend a bit more on pavers upfront. A gravel patio that's neglected for two years looks terrible, whereas a brick paver patio still looks good even if you ignore it for a few years.
Installation basics: sub-base, drainage, and laying each option

The sub-base is the part homeowners most often underestimate, and it's the part that determines whether your patio looks great in year ten or starts rocking, sinking, and cracking in year three. No surface material compensates for a bad base. What to put between patio stones depends on whether you're aiming for drainage, weed control, and flexibility versus a firmer, more decorative joint.
What to put between patio slabs depends on whether you're aiming for drainage, weed control, and flexibility versus a firmer, more decorative joint. What to put between bricks on a patio is a jointing decision that balances drainage, weed control, and flexibility versus a firmer, more decorative joint. The best underlay for patio stones depends on whether you need drainage, weed control, and flexibility, or a firmer joint.
The universal principle: slope and compaction
Every patio, regardless of surface material, needs to slope away from your house at a minimum of 1/4 inch per foot. That's non-negotiable. Water that sits under or against a building causes foundation problems over time. Get that slope right first, before you worry about anything else.
Sub-base for pavers (brick, natural stone, porcelain dry-set)
The standard build-up for dry-set pavers is: excavate to appropriate depth, lay compacted aggregate base, add bedding sand, set pavers, fill joints. The aggregate base should be compacted to a firm, level pad. Bedding sand sits on top of that, screeded to a consistent 1 inch (25 mm) thickness per ICPI standards, with an acceptable range of 1/2 to 1 inch. One thing worth knowing: the aggregate base depth mirrors the finished grade of your patio surface.
Think of it as building the base to match the finished slope and level, then adding sand and pavers on top. Belgard's approach describes the base as built to finished grade minus paver thickness and bedding sand thickness, which is a clean way to think about it. For residential patios on stable ground, 4–6 inches of compacted aggregate base is typical for lighter loads.
The CMHA notes that required concrete paver base depth depends on the application and expected loads, and it provides example minimums such as about 6 inches for residential driveways 4–6 inches of compacted aggregate base is typical for lighter loads.
Sub-base for gravel patios
Excavate 4–6 inches, install a geotextile fabric with adequate puncture resistance across the entire area, then compact a thin layer of crushed stone as a base before adding your finish gravel. The fabric is important: it separates the gravel from the soil beneath, preventing mixing over time while still allowing water to pass through. Install edging before filling. Without solid edging, gravel migrates in every direction.
Sub-base for porcelain pavers
Porcelain pavers give you three installation routes. Mortar-set onto concrete requires the concrete slab to be sound and the mortar to be suitable for exterior/frost conditions (ANSI A118.15-rated mortars perform better in outdoor freeze/thaw settings). Sand-set works similarly to other pavers. Pedestal systems are the most installation-friendly for uneven or drainage-compromised sites: the pavers sit on height-adjustable pedestals over a drainage layer, water flows through the gaps to drain below, and the system accommodates minor slope variations easily. For freeze/thaw regions specifically, pedestal systems with appropriate spacers allow for thermal expansion and drainage movement without stressing the tile.
Modular panel base systems
Polypropylene panel systems like Brock PaverBase sit between the compacted subgrade and the paver surface. They create a managed drainage plane and help distribute load, which can reduce the depth of aggregate base needed. The system still requires the ground to be compacted and graded correctly, and the critical slope spec (1/4 inch per foot away from structures) still applies. Think of these panels as a smarter, drainage-integrated alternative to a pure sand/gravel setting bed, not a shortcut around proper ground prep.
Climate and durability: freeze/thaw, wet areas, and slip risk
Climate is probably the single biggest factor that changes which material is actually right for you. What works in coastal California can fail fast in Minnesota.
Freeze/thaw climates
In regions with hard freezes, water in your paving system expands when it freezes and contracts when it thaws. Mortared joints and rigid surfaces bear the brunt of this movement. Dry-set systems (pavers on sand/aggregate, flagstone with gravel joints) handle freeze/thaw much more gracefully because individual units can shift slightly and be reset rather than cracking under pressure. If you're committed to mortared porcelain or stone, use a mortar system with verified freeze/thaw cycle performance and consider an uncoupling membrane between the substrate and tile. For straight brick or concrete pavers in cold climates, the layered aggregate/sand system is specifically designed for this: it flexes, drains, and recovers.
Wet climates and drainage
Wet climates favor permeable surfaces: gravel, open-jointed pavers, and pedestal porcelain all let water through rather than sending it across the surface. A perimeter drainage concept (aggregate base with a drainage perimeter to remove excess subgrade water) is worth implementing in any area where the water table is high or surface water accumulates. If you're in a wet area and you mortar a dense stone surface without managing drainage beneath it, you'll eventually deal with heaving, efflorescence, or surface staining.
Slip resistance
Slip resistance is often an afterthought until someone falls. Smooth polished stone and glazed tiles are genuinely slippery when wet: avoid them for outdoor patios unless they carry a meaningful outdoor slip rating. Textured and riven-face natural stone, tumbled brick pavers, and most porcelain pavers made for outdoor use have adequate slip resistance. Gravel is inherently non-slip but unstable underfoot, which is a different safety concern. If you have kids, elderly family members, or a pool nearby, prioritize surface texture in your selection criteria.
Maintenance, weed control, and long-term upkeep
Every paving material needs something from you over time. The question is how much, and how often.
Weeds: the universal challenge
Weeds grow in joints, not through solid pavers. The primary defense is keeping your joints full. For brick pavers and flagstone, the best approach is polymeric jointing sand: it's harder than regular sand, resists erosion from rain, and creates a less hospitable environment for seed germination. Sealing helps but isn't a silver bullet on its own. If you notice sand missing from joints, that's the signal to re-sand before weeds take hold, not after. Missing joint sand also lets adjacent pavers shift, which compounds the problem. For gravel patios, a quality geotextile under the gravel is your main weed barrier, and it degrades over 5–10 years, so it eventually needs replacing in sections.
Maintenance needs by material
| Material | Main ongoing task | Frequency | Effort level |
|---|---|---|---|
| Gravel | Top-up gravel, check edging, clear debris | Annually | Low–moderate |
| Brick pavers | Re-sand joints, occasional sealing, spot replacements | Every 2–4 years | Low |
| Natural stone/flagstone | Re-point joints or add sand, clear moss/algae, seal if desired | Every 2–5 years | Low–moderate |
| Porcelain pavers | Wash surface, check joint condition | 1–2x per year | Very low |
| Composite/modular tiles | Clean surface, check connectors, replace damaged tiles | Annually | Very low |
No paving surface is truly maintenance-free. Flagstone in particular benefits from keeping debris off the joints to reduce staining and moss growth, especially in shaded or damp areas. If a flagstone joint starts growing moss, clean it out and re-fill with sand or a mortar re-pointing mix before it lifts the stone. The same logic applies to brick: keeping debris out of joints is preventative maintenance, not optional.
Sealing: worth it or not?
Sealing concrete pavers and brick helps lock in joint sand, enhances color, and slows staining. It doesn't eliminate weed risk entirely, but it's a useful part of the overall maintenance plan. Natural stone may or may not benefit from sealing depending on the stone type: porous stones like travertine and sandstone genuinely need it to resist staining, while denser stones like bluestone can go without. Porcelain needs no sealing at all, which is one of its real practical advantages.
How to choose the right material and what to do today
Here's a decision flow that works for most homeowners. Run through it in order and you'll have a clear direction by the end.
- Measure your space and set a total budget. Not just per sq ft, but total project spend including base materials, edging, sand, labor if hiring, and tools if DIYing. This reality-checks your options immediately.
- Assess your drainage situation. Walk out after heavy rain and look for pooling. If water sits on your patio site, factor in a permeable surface and proper sub-base drainage design from the start.
- Check your climate. If you're in a freeze/thaw zone, commit to dry-set systems or verified freeze/thaw rated mortars. Don't guess on this.
- Decide your DIY comfort level. Gravel and modular tiles are genuine weekend projects. Dry-set brick or flagstone is achievable with patience. Mortared porcelain over concrete is better left to a professional unless you have tile-setting experience.
- Shortlist two options based on budget and climate, then compare them on maintenance and look. The material you'll actually maintain is better than the theoretically superior one you'll neglect.
- Get at least two material quotes (supply only) and one or two labor quotes before committing. Prices vary significantly by region and by how your site is graded.
- Order a sample or visit a supplier yard before buying. Colors and textures look different in person than online, especially for natural stone.
If you're planning the project and digging into installation specifics, the sub-base approach is the same core question regardless of which surface you choose. Understanding what goes under your chosen material, including the right aggregate depth, bedding layer, and jointing approach, is what separates a patio that lasts from one that shifts, sinks, or weeds over inside three years.
Once you've picked your surface, the related decisions around what to lay underneath it and what to fill the gaps with are worth giving proper attention before you buy anything. For a fire pit, you also need to plan what to put under it on the patio so the heat and embers do not damage the surface or base what to put under a fire pit on a patio.
If you want to get it right, focus on what to lay underneath it as part of the sub-base and drainage plan.
The bottom line: there is no single best alternative to patio slabs. Gravel wins on cost and drainage. Brick wins on repairability and resilience. Flagstone wins on natural beauty. Porcelain wins on low maintenance and modern aesthetics. Pick the one that fits your actual situation, build the base correctly, and you'll have a patio you're happy with for years. If you use patio stones, choosing the right filler between them matters just as much for stability, drainage, and weed control what to put between patio stones.
FAQ
Can I lay pavers or flagstone directly on top of existing patio slabs or concrete?
Usually you should avoid setting new paving directly on unsound concrete, because cracks and movement telegraph through. If the slab is structurally solid and mostly level, a workable option is a pedestal system over the concrete or a drainage-oriented underlayment, then the pavers on the specified base system. Before installing, check for spalling and active cracks, and verify the slope away from the house still meets the 1/4 inch per foot requirement.
What’s the fastest alternative to patio slabs if I want minimal digging?
Composite deck tiles or certain modular systems are often the quickest because they can sit over an existing surface or compacted base with less excavation. Pedestal porcelain is also faster than traditional mortar setups in uneven areas because you adjust height without rebuilding the entire slope with thick aggregate. Still, you must confirm water can drain away, otherwise “fast” becomes “frequent maintenance.”
How do I choose jointing material for brick or flagstone, polymeric sand vs regular sand?
Polymeric jointing sand is typically the better choice if you want fewer weeds and less joint erosion, especially where rain is frequent. Regular sand is cheaper but washes out more easily, which means you’ll re-fill sooner. If you use polymeric sand, follow the water-dosing guidance carefully, too much water can reduce performance and can haze staining on some paver finishes.
Is gravel actually stable enough for foot traffic and furniture?
Gravel is stable for walking, but it can be uncomfortable for furniture and occasional rolling loads, like patio chairs on wheels. Use edging to prevent migration, and consider a finer, well-graded gravel type (like decomposed granite) plus a deeper base layer for steadier footing. For lounge furniture, choose wide or sled-style legs to distribute weight and reduce sinking.
What’s the best option in areas with hard freezes if I don’t want joint cracking?
Dry-set systems usually perform better in freeze-thaw climates because pavers and stone can move slightly without breaking bonds. Avoid mortared joints unless your substrate and mortar are proven for exterior freeze-thaw use, and consider an uncoupling membrane between the substrate and tile for porcelain or stone. If you want the lowest risk with less maintenance, porcelain on pedestals with correct spacers is often a strong choice.
How do I prevent efflorescence or staining on porcelain or stone?
Staining is often caused by moisture movement through grout or mortar, trapped water, or inadequate drainage beneath the surface. Ensure the patio still slopes away from the house, and use the installation route (sand-set, mortar-set, or pedestal) that matches your drainage conditions. For natural stone, confirm whether that specific stone type is prone to staining and whether sealing is recommended before installation.
Do I need geotextile fabric under gravel, and what happens if I skip it?
Geotextile helps prevent soil from mixing into the gravel, which keeps the surface stable and maintains drainage. If you skip it, fine soils migrate upward, the patio becomes muddy, and weed control declines because seeds can move through and take hold. If you do use fabric, choose puncture-resistant material and install it across the full area before adding base gravel.
What’s the safest slip-resistance strategy if I’m near a pool or in rainy weather?
Prioritize textured, outdoor-rated surfaces rather than polished or glazed finishes. If you choose natural stone, avoid very smooth faces and confirm the stone finish is appropriate for exterior use. With gravel, slip risk is low but stability can be an issue, so pair gravel with solid edging and consider a perimeter path or stepping pads where people walk most.
Can I use a patio alternative under a fire pit, and do I need extra protection?
Yes, but you need more than just a “heat-tolerant” finish. Put a noncombustible fire pit base and consider a heat-resistant layer beneath the patio surface, especially if you’re using gravel, composite tiles, or materials that can hold embers or heat. Plan a fire-pit-specific clearance zone so radiant heat and falling embers do not damage the surface, base, or nearby drainage layers.
How much maintenance should I realistically expect for each alternative?
Expect maintenance to fall into three buckets. Gravel and DG typically need periodic top-ups and edging checks, sometimes annually. Brick and flagstone mainly require keeping joints full (often re-sanding) and debris removal to prevent moss and staining in damp shade. Porcelain generally needs the least, but still benefits from occasional joint and surface cleaning, and pedestal setups should be checked for rocking if the subgrade ever shifts.