The best thing to put between bricks on a patio is polymeric jointing sand. If you're comparing options, the most common choices are polymeric jointing sand and regular jointing sand, and the right pick depends on your climate and how permeable you want the patio to be what to put between patio stones. It sweeps into the joints, hardens when you wet it, and holds together through rain, freeze-thaw cycles, and foot traffic far better than plain sand. For the layer under the bricks, you want a compacted gravel base (typically 4 to 6 inches deep) with a 1-inch screeded bedding sand layer on top. Get both of those right and you'll have a patio that stays level, drains properly, and doesn't turn into a weed garden by summer.
What to Put Between Bricks on a Patio: Best Options

Nolan Ellison
29 Apr 2026
What the joint filler actually does
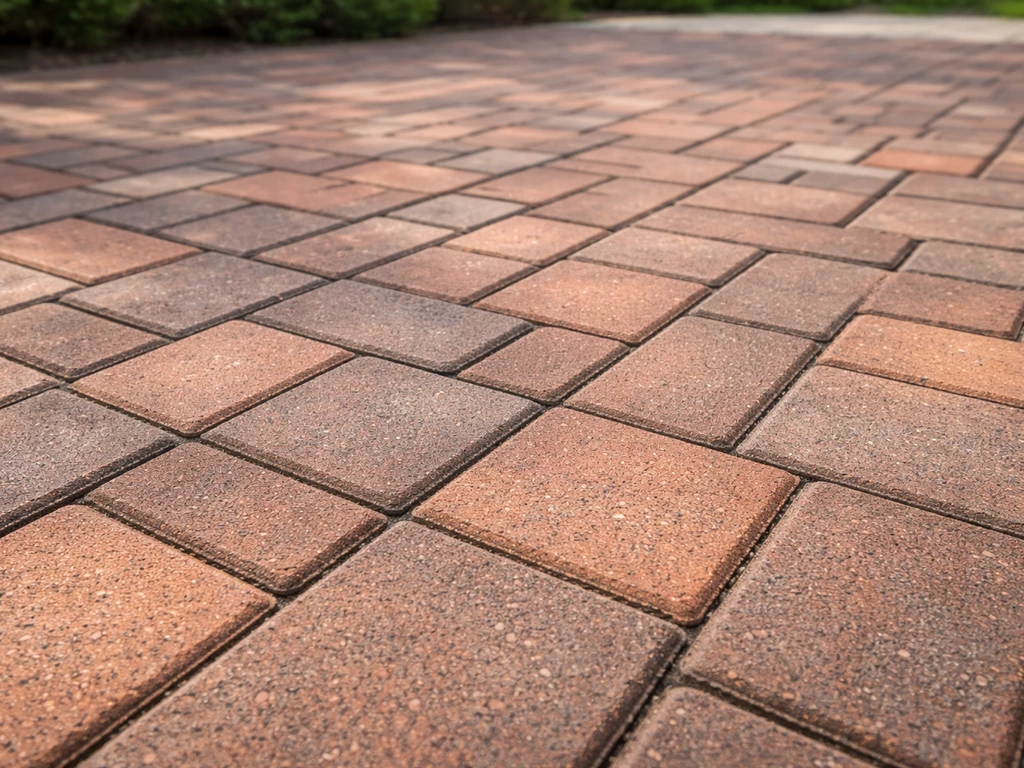
The material between your bricks isn't decorative filler. It's doing three real jobs at the same time. First, it locks the bricks together so they can't shift sideways under foot traffic or frost heave. Second, it controls weed growth by closing off the gaps where seeds germinate. Third, it manages drainage by letting water pass through or around the joints without washing the filler out. Skip this layer entirely and your bricks will creep, rock, and become a raised-bed garden within a season or two. If you skip this layer, the pavers can shift and settle, so it's a good comparison point to also review what to put between patio slabs for other joint-filler decisions.
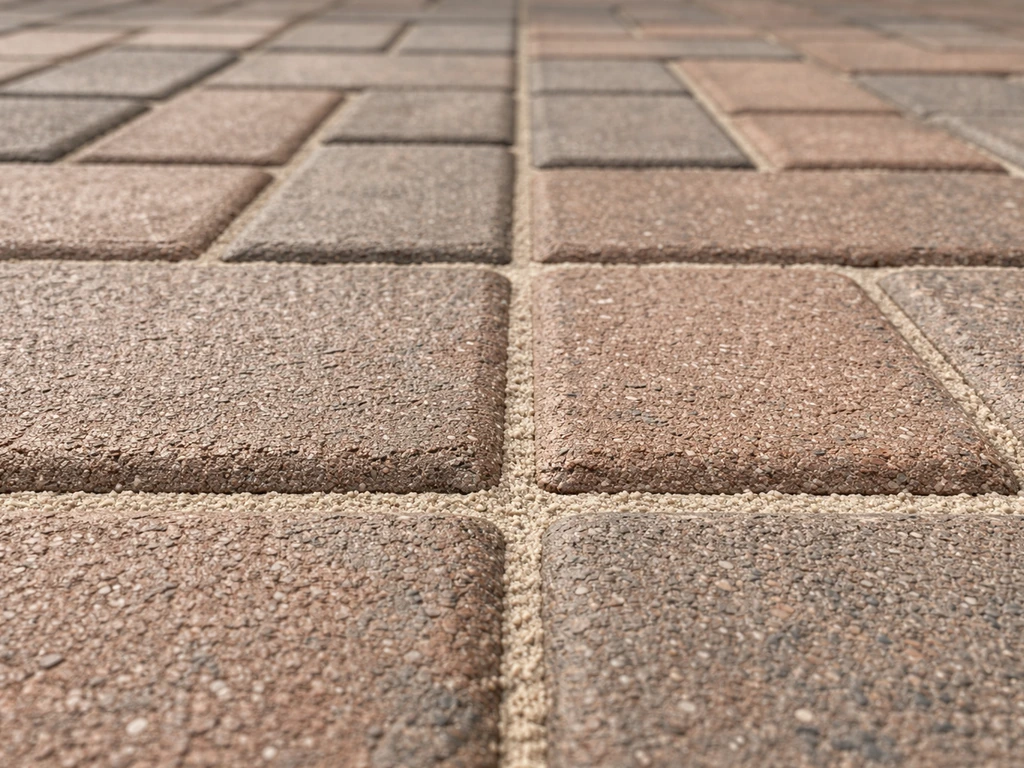
The joint layer also protects the bedding sand underneath. If water channels through open joints and into the bedding layer, it destabilizes the whole surface. That's why joint depth matters so much: the fill needs to go all the way down to close off that pathway, not just sit on top.
The best materials for between patio bricks
You have a few real options here. Each one suits a different situation, so it's worth understanding the trade-offs before you buy a bag.
| Material | Best For | Weed Resistance | Erosion Resistance | Freeze-Thaw Performance | Cost |
|---|---|---|---|---|---|
| Polymeric jointing sand | Most patios, especially in climates with rain or frost | High (polymer binders close joints) | High (hardens on wetting) | Good (expands/contracts with temperature) | Moderate ($20–$45/bag) |
| Regular jointing sand (sharp/coarse) | Dry climates, permeable patios, temporary installs | Low (open joints allow germination) | Low (washes out easily) | Acceptable if well-drained | Low ($5–$12/bag) |
| Stone dust / decomposed granite | Rustic or informal brick layouts with wide joints | Low–Moderate | Moderate | Poor in wet climates (heaves) | Low ($4–$10/bag) |
| Pea gravel (very fine) | Permeable patio designs, large joints | Low | Low (shifts freely) | Poor | Low ($5–$15/bag) |
Polymeric jointing sand: the go-to choice
Polymeric sand is a polymer-modified graded sand designed to fill joints up to 2 inches wide. Brands like Techniseal, SEK Surebond PolySweep, and Quikrete HardScapes all work on the same principle: sweep the dry sand into the joints, compact the pavers, then mist the surface with water to activate the polymer binders. Once cured, the joint holds together rather than washing out the next time it rains. The polymer binders also expand and contract with temperature extremes, which is why it handles freeze-thaw cycles far better than plain sand. If you're in a climate with cold winters, this is the only material I'd seriously recommend.
Regular jointing sand: where it still makes sense
Plain sharp sand (conforming to ASTM C-144 gradation) is cheaper and easier to apply, and it's still a reasonable choice in a few scenarios: very dry climates with minimal rain, patios with intentionally wide joints meant to stay permeable, or situations where you're doing a quick temporary fix before a full reinstall. If you're also working with patio slabs, the right mix can differ from jointing sand, so choose based on the slab type and how much drainage you need what mix for patio slabs. Plain sharp sand (conforming to ASTM C-144 gradation) is cheaper and easier to apply, and it's still a reasonable choice in a few scenarios: very dry climates with minimal rain, patios with intentionally wide joints meant to stay permeable, or situations where you're doing a quick temporary fix before a full reinstall regular jointing sand. The honest downside is that it migrates. Any surface runoff will gradually pull it out of the joints, and weeds will find their way in within a season or two. If you go this route, plan to top up the joints every spring.
When to consider alternatives
Stone dust and decomposed granite show up in a lot of DIY projects because they're inexpensive and easy to source. They can look good initially, but in wet climates they compact poorly, drain inconsistently, and tend to heave in frost. Save them for dry-climate informal patios or garden path bricks where movement isn't a big deal. For a proper patio with regular foot traffic, stick with polymeric sand. For a proper patio with regular foot traffic, stick with polymeric sand, and if you are trying to replace patio slabs with an easier or more forgiving option, consider other paving alternatives too like what can i use instead of patio slabs.
How to install joint filler correctly
Getting this right isn't complicated, but the order of steps matters. I've seen plenty of patios where someone skipped the compaction step or wet the sand too aggressively and ended up with a chalky haze on the brick surface or joints that crumbled after the first hard rain. Follow these steps and you'll avoid the most common mistakes.
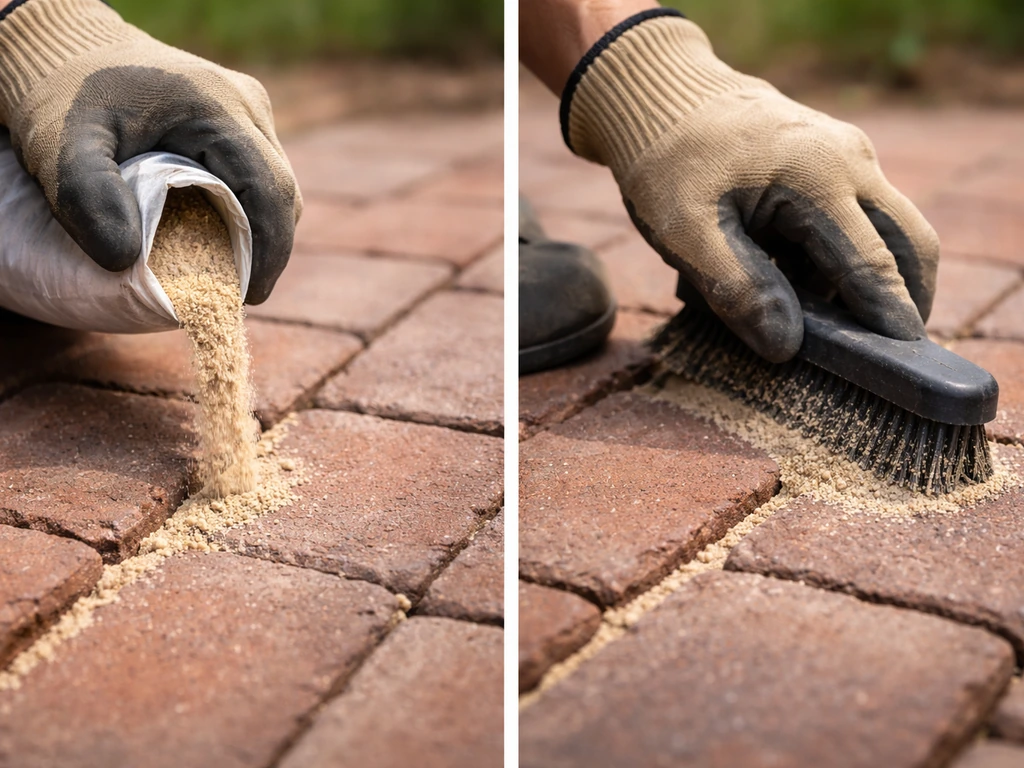
- Make sure the pavers are completely dry before you start. Never sweep polymeric sand over damp bricks. Moisture on the surface causes the polymer to activate prematurely, leaving a residue that's difficult to remove.
- Sweep a dry load of polymeric sand across the surface and work it into the joints with a push broom. The goal is to fill every joint completely down to its full depth. Minimum fill depth is around 1.5 inches (4 cm) according to Techniseal's specs.
- Run a plate compactor over the patio (or use a rubber mallet on smaller areas). This settles the sand deeper into the joints and locks the bricks more firmly in place.
- Sweep a second round of dry sand across the surface to top up any joints that settled during compaction. Keep doing this until joints are filled to within 1/8 inch (3 mm) below the top of the paver surface or just below the chamfer. Do not fill flush to the top.
- Use a leaf blower on low to remove all excess sand from the paver surface. Any sand left sitting on top of the bricks will bond there during activation and create a hazy film.
- Mist the entire surface with water using a gentle spray. You want moisture penetrating to the bottom of the joints, not a hard stream that washes the sand out. SEK Surebond describes the right amount as water that 'just starts to slightly sit on top of the joint.' If it's pooling, back off.
- Allow the joints to cure fully, typically 24 to 48 hours depending on temperature and humidity. Do not apply during temperatures below 32°F (0°C) or if rain is expected within an hour.
Edge restraints are part of this process too, not an afterthought. Plastic or steel edging secured with non-galvanized metal spikes into the base holds the perimeter bricks in place so the joint sand doesn't get undermined from the outside. Unilock recommends positioning the restraint about 1/2 inch below the top of the pavers. Without edging, the outer bricks gradually migrate outward under foot traffic and the whole surface loses its tight jointing over time.
What goes under the bricks: your base build-up
The joint filler only works if the bricks are sitting on a stable, properly drained base. If you want stable support, use the right base layers and consider what to lay under patio slabs before you start installing the joints. A common cause of joint failure isn't the joint material at all: it's a base that shifts, compresses unevenly, or holds water. The good news is that a correct base isn't complicated. It's just a few layers done in the right order.
The standard base build-up
- Excavate the area to a depth that accommodates your base layers plus the brick thickness, typically 8 to 12 inches total below finished grade.
- Compact the native subgrade soil. If it's soft, wet, or clay-heavy, this is where you consider laying a geotextile separation fabric. The fabric keeps the compacted gravel base from mixing with fine-grained soil below, which is especially important in wet climates where frost can push moisture upward.
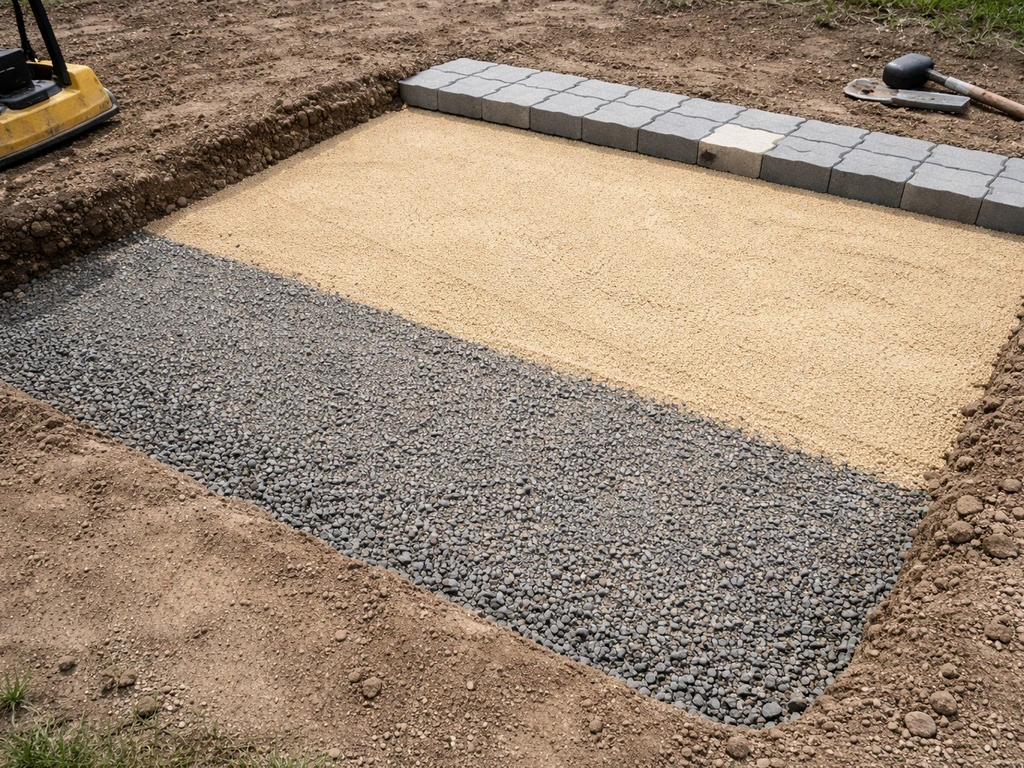
- Spread and compact a gravel base layer (crushed stone, not round pea gravel). For a residential foot-traffic patio, 4 inches is a common minimum; go 6 inches in freeze-thaw climates or on soft subgrades. Compact in 2-inch lifts if you're building up a deep layer.
- Slope the base at least 2% away from any structure (house, wall, retaining feature) so water drains outward rather than pooling under the bricks.
- Spread a 1-inch (25 mm) layer of clean coarse bedding sand over the compacted base and screed it level. ICPI guidance specifies this layer should not exceed 1.5 inches (40 mm); thicker bedding sand compresses unevenly under load.
- Lay bricks on top of the screeded bedding sand without disturbing it. Use kneeling boards if you need to work across the surface.
One thing worth noting: the bedding sand layer and the jointing sand layer are two different materials with two different jobs. Bedding sand supports the bricks from below; jointing sand locks them laterally. Don't confuse them or try to consolidate them into one step.
If you're also thinking through what to lay under other patio surfaces, the same base logic applies across most types, whether you're working with stone, porcelain, or concrete slabs. The specific materials and depths shift a little depending on the surface, but stable compacted base plus adequate drainage is the constant.
Troubleshooting: weeds, washout, settling, and pooling
Even well-installed patios run into problems over time, usually from one of four causes. Here's how to diagnose and fix each one.
Weeds growing through the joints
Weeds in brick joints almost always mean the joints weren't filled to full depth, or the original filler was plain sand and has since migrated out. The fix is to clear the existing joint material (a flat screwdriver or oscillating tool works), clean out any debris, let everything dry thoroughly, and reinstall polymeric sand from scratch. Techniseal specifically notes that for restoration projects you need to empty the joints first before refilling, and that minimum fill depth applies just as strictly to repairs as to new installs. A pre-emergent weed treatment over the patio before you refill can help knock back whatever's already germinating.
Joint sand washing out after rain
Washout is usually one of three things: the polymeric sand was wet-activated with too strong a stream and the polymer didn't have time to bond before getting displaced; it rained within an hour of activation; or the bricks themselves were damp during application. All three prevent the polymer from curing properly. The solution is the same as for weeds: remove remaining material, wait for dry conditions, and reinstall correctly. If your drainage slope is also pushing water across the surface in volume, check that your 2% crossfall is actually directing runoff away from the patio rather than across it.
Uneven settling or rocking bricks
Isolated rocking bricks usually point to a bedding sand problem, not a joint filler problem. Common causes are bedding sand that was too thick (over 1.5 inches), base gravel that wasn't compacted in lifts, or a soft spot in the subgrade underneath. To fix it, pull the affected bricks, remove and rescreen the bedding sand to a level 1-inch depth, and relay. If the issue is widespread rather than isolated, the base itself may need to be rebuilt.
Water pooling on or near the patio
Pooling water usually means either the crossfall is wrong (less than 2%) or the base isn't draining effectively. Check whether the perimeter has adequate drainage and whether there's anywhere for the water to go. For patios built against a house wall, weep holes in the edging or perimeter border (at least 1-inch diameter, spaced roughly every 10 feet) covered with geotextile can help relieve pressure and let water escape without washing bedding sand out. If you're dealing with a chronic drainage problem, sometimes the right answer is converting to a permeable design with open-graded base and appropriate jointing stone rather than fighting it with a conventional build.
Keeping it in shape: your maintenance schedule
A well-installed polymeric sand patio doesn't need constant attention, but a little annual maintenance goes a long way toward preventing the big repairs.
| Task | Frequency | Notes |
|---|---|---|
| Inspect joints for gaps, cracks, or missing material | Once a year (spring) | Look for any joints that have opened more than 1/8 inch at the surface |
| Top up recessed joints with polymeric sand | As needed (usually every 2–4 years) | Prep as a new install: dry bricks, fill, compact, leaf-blow, mist |
| Remove organic debris from patio surface | Several times per year | Leaves and organic matter sitting in joints accelerate weed germination and moisture retention |
| Clean brick surface with low-pressure wash or brush | Once a year or after heavy debris | Avoid high-pressure washing directly into joints; it blasts out polymeric sand |
| Inspect and top up plain jointing sand (if used) | Every spring | Plain sand migrates constantly; plan for annual refills |
| Apply a paver sealer (optional) | Every 3–5 years | Sealer protects brick color and can help reinforce joint stability; apply only to clean, dry, fully cured surfaces |
| Re-apply polymeric sand if sealer degrades joints | After sealer cycle or after significant repair work | If joints are crumbling after a sealer strip, clear and refill before resealing |
Sealing is optional but genuinely useful if you have colored or textured bricks you want to keep looking sharp. It doesn't replace good jointing: the joint needs to be solid before you seal over it. Sealing a degraded joint just traps moisture and makes the repair harder later.
Your action plan right now
If you're starting fresh: build your base with 4 to 6 inches of compacted gravel, a 1-inch screeded bedding sand layer, proper edge restraints, and blank" rel="noopener noreferrer">polymeric jointing sand filled to within 1/8 inch of the paver surface. When planning a patio fire pit, use the same kind of stable, well-drained base and jointing approach so the pavers or slabs stay level and don’t shift over time what to put under fire pit on patio. Activate it correctly on a dry day above 32°F and give it 48 hours before heavy use. SEK-Surebond (TB3) reiterates the controlled misting approach: blank" rel="noopener noreferrer">water until it “just starts to slightly sit on top of the joint.”.
If you're repairing an existing patio: assess whether the problem is in the joints (weeds, washout) or the base (settling, rocking). Joint problems are a dry-day weekend fix with a bag of polymeric sand. Base problems need the bricks pulled and the base rebuilt properly. Don't just fill over a bad base hoping it holds.
Either way, polymeric sand is the right material for most homeowners in most climates. It costs more than a bag of regular sand, but it lasts years longer and saves you the frustration of redoing the same joints every spring. Buy a quality brand, follow the installation steps exactly, and you're done.
FAQ
Can I use the same sand for both the bedding layer and the joint gaps?
Don’t do it. Bedding sand supports the bricks from below and jointing sand locks the joints laterally, so mixing them into one material usually leaves either weak support or weak lateral restraint. If you are missing one layer, rebuild with the correct base, then reinstall bedding at the proper depth and fill joints separately.
What if my patio bricks have joints wider than 2 inches?
Only to a limited extent, and only if the product is designed for it. Polymeric jointing sand is graded for joints up to about 2 inches wide, but the key is filling to full joint depth and to within about 1/8 inch of the paver surface (so you can compact, then cure). If your joints are larger, you may need to adjust the leveling or use a system designed for larger joint widths.
How long should I wait after misting the polymeric sand before using the patio?
Stop and let it cure properly. After activating with misting, avoid mowing, sweeping, or heavy foot traffic until the polymer has time to bond, typically about 48 hours before heavy use. If it rains early or you over-wet, plan to remove the failed joint material and refill under dry conditions.
Why did my polymeric joints turn chalky or crumble after the first rain?
Use a gentler application and control water timing. A strong jet can displace sand before binders activate, and misting should be light enough that the joints darken without washing out. Also avoid activation right before a downpour, since rain within about an hour can prevent proper curing.
Can I just top up polymeric sand if weeds come back in the joints?
No, because weeds are already set up to exploit gaps. If you see weeds, remove existing joint material down to the required depth, clean debris, let everything dry, then refill with polymeric sand (not just a top-up). A pre-emergent treatment can help reduce new germination before you refill, but it won’t replace proper joint fill.
Is polymeric sand always the best choice if I want good drainage through the joints?
Yes, but plan for it. If you want permeability, you can choose plain jointing sand or a more open approach, but you must accept more migration and more weed risk, meaning regular spring top-ups. Polymeric sand increases stability and longevity, especially in freeze-thaw areas.
Can I use stone dust or decomposed granite between patio bricks?
Not usually. Stone dust and decomposed granite can work only in dry, low-movement situations, and they often compact and heave poorly in wet or freeze-thaw climates. For a patio with regular foot traffic, polymeric sand is the safer long-term choice because it holds together instead of washing out.
What should I do if a few bricks rock even though the joints are filled?
If individual bricks rock while others don’t, it often points to bedding or base issues rather than joint filler. Pull the affected bricks, rescreen bedding to about a 1-inch target, and make sure gravel underneath is compacted in lifts. Refill joints after you relay, because any movement will quickly undermine new joint sand.
My patio has pooling water. Will better joint sand fix it?
You’ll need to address drainage, not just joints. Check slope (aim for around 2% crossfall away from the house), look for blocked discharge paths, and make sure perimeter edging isn’t creating a water trap. In wall-adjacent patios, adding properly sized weep holes at regular spacing can relieve pressure and reduce washout risk.
How should I approach joint repair on an existing patio before refilling polymeric sand?
For restoration, emptying matters. Remove the existing joint fill fully (not just surface scraping), clean out debris, let the joints dry thoroughly, then refill with fresh polymeric sand, following the minimum fill depth rules. This prevents you from trapping degraded material that won’t bond correctly.
Should I seal the patio after I put polymeric sand between the bricks?
No. Adding sealing can make future joint repairs harder because it can reduce adhesion and trap moisture if joints aren’t solid. Seal only after the joints have fully cured and the joint sand is intact, and avoid sealing over joints that are already degraded or washing out.