For most flagstone patios, polymeric sand is the best all-around filler. It locks joints against weeds, resists washout better than plain sand, and handles freeze-thaw movement without cracking the way mortar does. That said, the right choice depends on how your patio is built, your climate, and how much maintenance you want to deal with long-term. Stone dust is a solid runner-up for dry-laid patios with wider gaps, plain sand is fine for planted joints, and mortar pointing is the right call for mortared or very formal installations. Below is everything you need to pick the right product and install it so it actually holds.
Best Filler for Flagstone Patio Joints: Sand vs Polymeric

Nolan Ellison
6 Jun 2026
What 'filler' actually means for flagstone joints
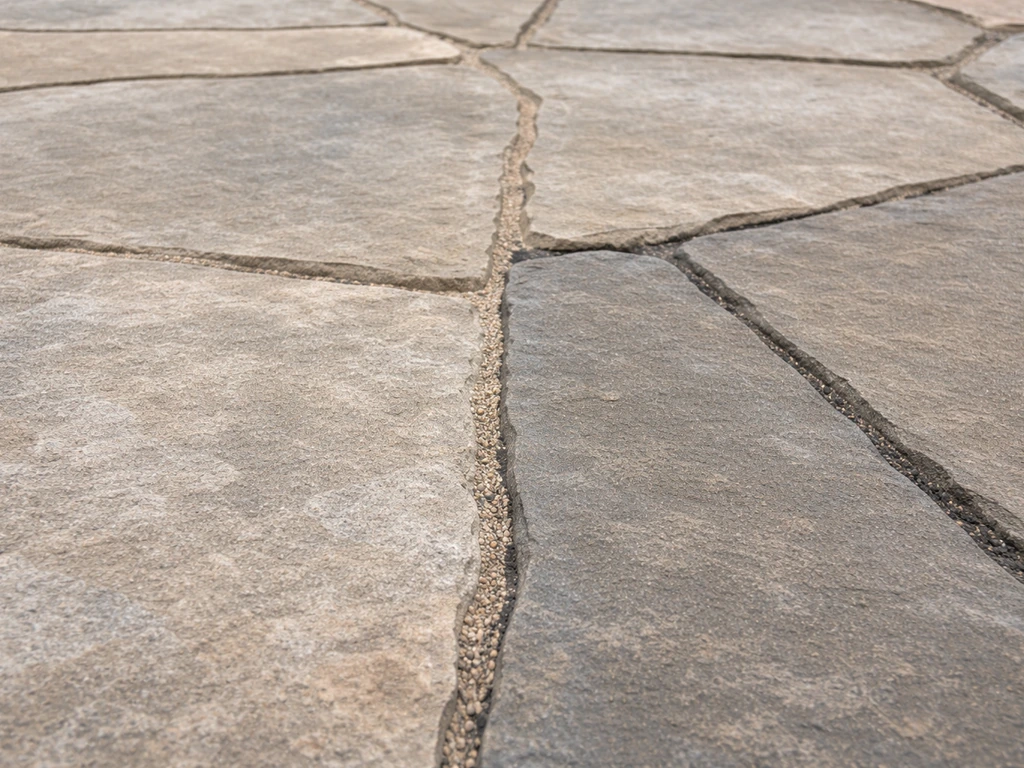
Flagstone is an irregular natural stone, so the gaps between pieces vary a lot, often from half an inch to two inches or more depending on how tightly the puzzle was fit together. Those gaps are called joints, and what you put in them does more than just look finished. A flagstone patio is typically installed by setting irregular flagstones and then filling the joints so the stones stay in place and drainage stays controlled gaps between pieces.
Joint filler holds the stones in position, prevents weeds from taking over, keeps water from pooling in gaps, and protects the edges of the flags from chipping and undercutting. The wrong filler, or a correctly chosen filler installed the wrong way, leads to weeds by summer, washed-out sand after the first heavy rain, or heaved stones after one freeze-thaw season.
Flagstone joints also behave differently depending on how the patio was built. A dry-laid patio (flags set on compacted gravel or a sand bed) moves slightly with temperature and moisture changes. A mortar-set patio is rigid and locked in place. The filler you choose has to match that behavior, because a rigid mortar joint in a dry-laid patio will crack and pop out every winter in a cold climate.
Best filler for your specific situation
Before diving into individual products, here is a quick decision guide based on common goals. These aren't rigid rules, but they'll steer you toward the right section to read more carefully.
- You want the best weed prevention without mortar: polymeric sand, swept to full joint depth
- You're in a hard freeze-thaw climate with a dry-laid patio: polymeric sand or coarse stone dust (both flex with movement; avoid mortar)
- Your joints are wider than 1.5 inches or very irregular in width: coarse stone dust or crushed gravel, possibly topped with polymeric sand
- You want a living patio with moss or creeping thyme between stones: plain coarse sand or stone dust, no polymeric binder
- Your flagstone is mortared on a concrete slab: mortar pointing compound or sanded grout, not polymeric sand
- You want the lowest possible long-term maintenance: polymeric sand on a properly drained base
The main fillers compared: sand, polymeric sand, stone dust, and mortar
Plain sand
Coarse builder's sand is the traditional choice for dry-laid flagstone and it works fine if you're okay with topping it up periodically and pulling the occasional weed. It's the cheapest option, it drains well, and it doesn't stain the stone. The downside is obvious: it washes out after heavy rain, weed seeds find it easily, and it offers minimal joint locking. If you want plants growing between the stones, this is actually the right product because it won't chemically resist root growth. Otherwise, upgrade to polymeric sand.
Polymeric sand
Polymeric sand is graded sand mixed with a polymer binder that activates when you mist it with water. Once it cures (usually about 24 hours, per manufacturer guidance), the joints firm up and resist weeds, insects, and washout significantly better than plain sand. It's the most popular upgrade for dry-laid flagstone and it's genuinely worth the extra cost for most homeowners.
Products like Techniseal EZSAND, Sakrete PermaSand, and Quikrete HardScapes Polymeric Jointing Sand are all designed for joints up to about 2 inches wide and work on natural stone. Just know the limitations: joints need to be at least 1/8 inch wide (narrow joints don't allow enough polymer to set properly), the base needs to drain well, and if you leave standing water on the surface during activation you'll get incomplete hardening or a hazy residue on your stone.
If you leave standing water on the surface during activation, Techniseal notes it can result in incomplete hardening or a hazy residue.
Stone dust and crushed gravel
Stone dust (also called crusher fines or decomposed granite depending on the material) is a fine, angular crushed stone that compacts well and interlocks tightly in wide joints. It's a strong choice when gaps are very irregular or wider than 1. 5 to 2 inches, where polymeric sand can struggle to harden at full depth.
Stone dust doesn't harden like polymeric sand, so weeds can still establish over time, but it packs so densely that germination is harder than with plain sand. Coarser crushed gravel works similarly in very wide gaps but offers less stability on its own. Neither stops weeds as well as polymeric sand, but both are more forgiving in freeze-thaw conditions because they just compact and shift without cracking.
Mortar and pointing compounds
Mortar pointing is the right filler when your flagstone is set on a concrete slab with a mortar bed underneath. If you want the best mortar for a flagstone patio, use it only when the flags are installed over a rigid concrete slab and mortar bed. A rigid joint makes sense on a rigid base. Cambridge Natural Stone's installation guidance, for example, calls for mortar joints in the 3/8 to 1/2 inch range for mortared installations.
For dry-laid flagstone, though, mortar is generally a mistake. It cracks and heaves with seasonal movement, water gets trapped behind failed joints, and re-pointing is more labor-intensive than re-sanding. If you're in a cold climate and your patio is dry-laid, stay away from mortar in the joints.
| Filler Type | Weed Resistance | Washout Resistance | Freeze-Thaw Performance | Best Joint Width | Cost (Relative) | Best For |
|---|---|---|---|---|---|---|
| Plain sand | Low | Low | Excellent (moves freely) | Any | $ | Planted joints, budget projects, temporary fills |
| Polymeric sand | High | High | Good (slight flex) | 1/8" – 2" | $$ | Most dry-laid flagstone patios |
| Stone dust / crusher fines | Medium | Medium | Excellent | 1" and wider | $ | Wide or irregular gaps, rustic dry-laid patios |
| Mortar / pointing compound | Very High | Very High | Poor on dry-laid (cracks) | 3/8" – 1" | $$–$$$ | Mortared flagstone on concrete slab only |
How to install flagstone joint filler correctly
Installation is where most projects go wrong. The filler itself is often fine; the prep work and technique are what fail. I'll walk through this specifically for polymeric sand since it's the most common choice and has the strictest requirements. Sand and stone dust follow the same prep steps but skip the activation/curing stage.
Step 1: Clean and prep the joints
Remove all existing joint material, weeds, and debris from the gaps. If you're re-doing existing joints, Sika's guidance is explicit: old polymeric sand must be removed to the full depth, with a minimum of 1.5 inches of empty joint before you re-fill. A flat screwdriver, oscillating tool, or joint scraper works for this. Blow out the dust with a leaf blower and let the joints dry completely. Do not apply polymeric sand to damp or wet joints, and do not work in rain or with rain forecast within 24 hours.
Step 2: Check joint depth and width
For polymeric sand to harden properly, most manufacturers require a minimum joint depth of 1 to 1.5 inches (Techniseal EZSAND specifies 1.5 inches / 4 cm; PolyXsand requires at least 1 inch). Polybind specifically warns against filling the bottom half of a joint with regular sand and topping with polymeric, because the polymer needs to work through the full depth. If your flagstone is thin and joints are shallow, stone dust is a better bet. Joint width should be at least 1/8 inch for most polymeric products.
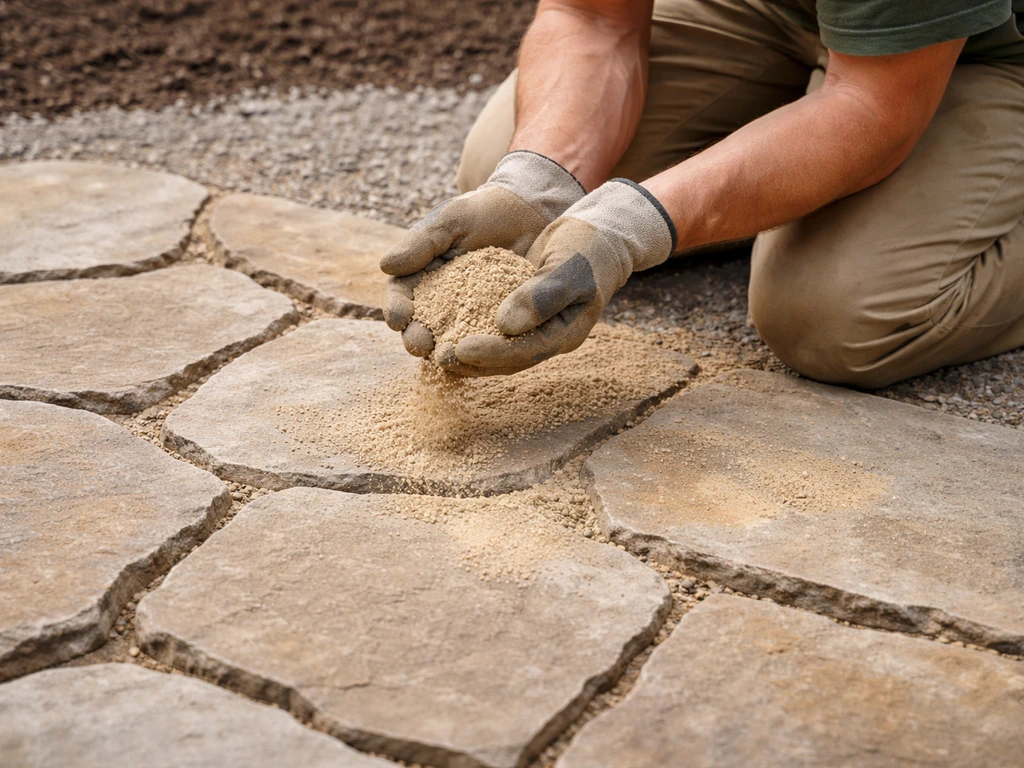
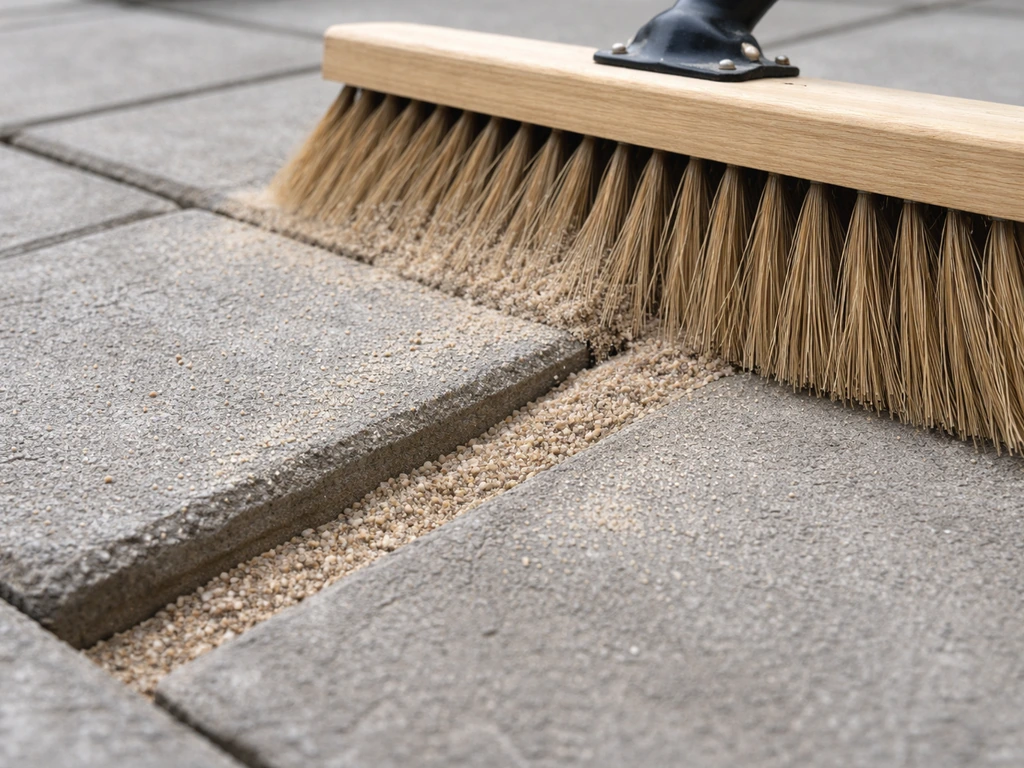
Step 3: Sweep in the filler
Pour the polymeric sand over the patio surface and sweep it into the joints with a stiff push broom. Work it in multiple passes from different directions so the sand compacts down into the gap. After the first pass, use a rubber mallet and a 2x4 or a plate compactor (with a rubber pad to protect the stone) to vibrate the flags and help the sand settle.
SEK Surebond recommends this compaction step specifically for natural stone because the irregular surface won't compact as evenly as manufactured pavers. Add more sand and sweep again until joints are filled to about 1/8 inch below the top of the stone surface. Overfilling leaves a film of polymer on the face of the stone that's hard to remove.
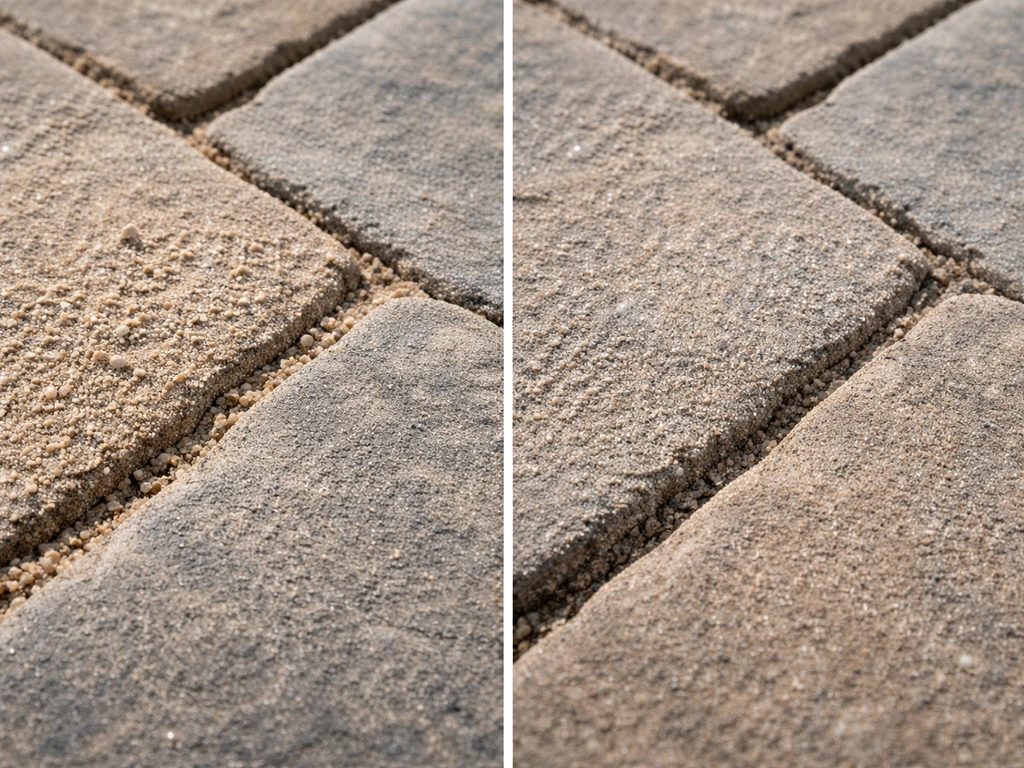
Step 4: Remove surface sand before activating
This step is critical and commonly skipped. Before you wet the sand, blow off all loose surface sand with a leaf blower set to low or idle speed. Techniseal's instructions specifically say to use a leaf blower at idle on textured surfaces to avoid disturbing the joint fill while clearing the surface. Any sand sitting on top of the flagstone face when you add water will bond there and leave a permanent haze. Blow, inspect, and repeat until the stone face is clean and only the joint fill remains.
Step 5: Activate with water (polymeric sand only)
Mist the entire surface with a gentle spray, not a blast. You want the water to soak down into the joints and activate the polymer without creating puddles or runoff that carries sand out of the gaps. Techniseal notes that EZSAND starts repelling water within a few minutes of activation, which is why controlled misting matters. If you see water pooling, use the leaf blower on idle to move it off the surface without disturbing the joints. Sakrete's PermaSand documentation warns that standing water during this phase can prevent the sand from hardening at full depth, so don't flood it.
Step 6: Cure and protect
Keep foot traffic off the joints for at least 24 hours after activation. Techniseal recommends a full 24-hour dry time before rain exposure. Wider joints take longer to harden fully, per Sakrete's guidance, so if your flagstone has unusually wide gaps, give it 48 hours before use. Don't rush this. I've seen homeowners walk on a just-activated polymeric sand patio to 'check it' and leave footprints that set permanently. The joints will feel slightly firm to the touch after 24 hours but reach full hardness over several days.
Common mistakes and how to fix them
Sand washing out after rain
Washout is the number one complaint with both plain sand and polymeric sand joints. With plain sand, it's expected over time. With polymeric sand, washout usually means one of three things: the sand wasn't properly activated before rain hit it, the base doesn't drain and water is pooling under the joints, or the product was applied to partially wet joints. Sika's product documentation explicitly notes heavy rainfall can wash away polymer sand if it hasn't cured. The fix for already-washed joints is to remove the remaining sand to full depth and start over properly, not just top-dress the existing fill.
Weeds growing through polymeric sand
Polymeric sand resists weeds but doesn't guarantee zero weeds, especially if the surface is heavily shaded and organic debris accumulates in the joints. Airborne seeds can germinate in the thin layer of dirt that builds up on the hardened surface. If you're seeing weeds regularly, apply a patio-safe weed preventer in early spring each year. If weeds are coming from below, the issue is usually that the joints didn't harden at full depth, which goes back to shallow joints, insufficient misting, or a split-fill method with regular sand underneath.
Hazy or stained stone surface
Polymer haze on flagstone faces comes from surface sand that wasn't blown off before wetting, or from activating the sand during hot direct sun which speeds up curing before water distributes evenly. It's particularly stubborn on porous stones like sandstone or limestone. Work in the shade or on a cool overcast day. If haze has already appeared, some manufacturers offer a polymeric sand haze remover, though natural stone can be tricky to treat without testing on a hidden area first. Unilock specifically cautions that heavily textured paving stones can trap polymer particles in surface grooves, which is worth knowing if your flagstone has a lot of surface relief.
Joint cracking in cold climates
If polymeric sand joints are cracking in winter, the base is the likely culprit, not the filler. An inadequately compacted base causes flags to shift unevenly, which cracks the joints regardless of product. Polymeric sand products like SEK PolySweep are designed to accommodate joint expansion and contraction from freeze-thaw cycles, so the product itself isn't the problem. The solution is a proper compacted gravel base (at least 4 to 6 inches in most cold climates) under the stone.
If you're building a new patio, the base article in this series covers that in detail. A great starting point for the best base for a flagstone patio is a properly compacted gravel layer with good drainage, since the base greatly affects joint cracking and washout proper compacted gravel base.
Overfilling joints
Overfilling is as problematic as underfilling. Polybind specifies that sand level should sit at least 1/8 inch below the top of the paver surface, and RCP Block & Brick echoes that you shouldn't overfill polymeric joints. Sand sitting proud of the joint will smear across the stone face during activation and cure into a rough, stained surface. Fill carefully, check depth with a screwdriver, and when in doubt leave the joint slightly low rather than flush or above the stone surface.
Maintenance and when to re-fill
No joint filler lasts forever, and the honest expectation is that you'll do some maintenance every few years regardless of which product you use.
With plain sand or stone dust, check the joints in fall after the growing season and again in spring. Pavingexpert recommends checking jointing sand 4 to 6 weeks after initial installation because settlement can leave joints partially empty. Top-dress low joints annually or whenever you notice significant gaps. A quick sweep of coarse sand and a light watering is all it takes.
With polymeric sand, a quality installation on a stable base should last 3 to 5 years before meaningful deterioration in most climates. Harsher freeze-thaw cycles, heavy foot traffic, or frequent pressure washing will shorten that timeline. When the hardened sand starts to crack or crumble in sections, don't try to top-dress over it. Remove it to the full depth (1.5 inches minimum), clean the joints, and re-apply fresh polymeric sand from scratch. Partial repairs rarely bond well to old hardened material.
For mortared joints on a mortared patio, cracked or missing pointing mortar should be re-pointed before water works behind the joint and undermines the mortar bed. Chip out loose material to a depth of at least 3/4 inch, brush the joint clean, dampen it slightly, and trowel in new mortar mix. Color-matching is the challenge here since new mortar is lighter before it cures, so buy a slightly darker shade than you think you need or accept that it'll blend after a season or two of weathering.
One maintenance habit that extends every filler's life: keep the surface clean. Leaves and organic debris decomposing in joints create soil and moisture that accelerate joint breakdown regardless of whether you've used sand, polymeric sand, or mortar. A leaf blower pass after each season change takes five minutes and adds years to your joint filler's lifespan.
Quick-reference: which filler to buy
If you're standing in the store or about to place an order, here is the condensed version. For a standard dry-laid flagstone patio with joints between 1/8 inch and 2 inches wide: buy polymeric sand from a brand with clear TDS documentation (Techniseal, Sakrete, Quikrete, or SEK Surebond are all legitimate options).
If you're wondering where to buy flagstone for patio projects, the same retailers that stock polymeric sand for joints are usually a good place to start buy polymeric sand. For very wide or deep joints on a rustic dry-laid patio: start with compacted stone dust and optionally top-dress with polymeric sand once the base stabilizes. For flagstone mortared to a concrete slab: use a flexible sanded grout or a purpose-made pointing mortar, not polymeric sand.
For a planted or moss patio: use coarse builder's sand and skip all binders entirely. The best joint filler for flagstone is ultimately the one that matches how your patio was built, not necessarily the most expensive or most marketed product on the shelf.
FAQ
Can I use polymeric sand if my flagstone joints are narrower than 1/8 inch?
Most polymeric products need enough space for the binder to set through the full depth. If your joints are consistently under about 1/8 inch, the polymer may not harden properly, leading to early washout. In that case, consider stone dust for irregular wide gaps, or switch to a different jointing approach based on how the patio base was built.
What’s the best way to remove old polymeric sand before re-filling?
Do it to full depth, not just the top layer. Leave at least about 1.5 inches of empty joint before adding new material, then blow out dust thoroughly and let everything dry. If old hardened sand remains, it can create weak spots where the new sand will not lock in.
Do I have to compact the area after sweeping polymeric sand into the joints?
Yes, compaction is a major reason polymeric joints perform well on irregular flagstone. Use vibration carefully (for example, with a compactor that has a rubber pad, or a controlled mallet) so the joints settle and the sand packs down. Skipping this step often results in shallow fill, which later cracks or washes out.
How do I avoid leaving a haze or residue on the flagstone face?
Blow off every bit of surface sand before misting, and avoid flooding. Also, activate in shade or on cool conditions because hot direct sun can speed curing before the binder distributes evenly. If your stones are porous, haze is more likely, so surface cleanup before wetting is extra important.
Is it okay to water polymeric sand lightly during activation, or do I need a specific amount?
Mist gently with enough water to activate the polymer inside the joints, without creating puddles or runoff. If you see water pooling, use a leaf blower on idle to move water off the surface so it does not carry loose sand out of the joint.
What should I do if polymeric sand still washes out after a heavy rain?
Treat it as a failed activation or joint condition issue. If the sand did not cure before rain, if the base drains poorly and water pooled under joints, or if joints were damp when filled, top-dressing over the existing hardened area usually will not fix it. Remove the remaining material down to full depth and re-install with proper dry conditions and activation timing.
How can I tell whether cracking is caused by the filler or the patio base?
If cracks appear in winter, suspect base or movement first. An inadequately compacted gravel base can cause uneven shifting and joint separation regardless of filler. A properly compacted, well-draining base is critical, because polymeric sand is meant to accommodate expansion within reasonable limits, not to compensate for a failing base.
Can polymeric sand be pressured-washed to clean the patio later?
Frequent pressure washing can shorten the joint life by breaking down the hardened fill over time. If you must clean, use gentler methods and avoid blasting directly into the joints, especially on newer installations that are still nearing their full cure.
What if I’m getting weeds even with polymeric sand?
Polymeric sand reduces weed growth but does not guarantee zero weeds. If weeds show up despite intact, hard joints, look for organic debris buildup or shading that helps seeds germinate. For repeated weed issues, apply a patio-safe weed preventer in early spring. If weeds come from below, it often points to joints not hardening fully, such as shallow fill or incomplete activation.
When should I re-do the joints, and is partial repair ever a good idea?
When polymeric joints start cracking and crumbling in sections, avoid simply topping them off. Remove the material to the stated minimum depth (often about 1.5 inches) and reapply fresh polymeric sand. Partial repairs tend to bond poorly to already hardened product, so they fail sooner.
For mortared flagstone installed on a concrete slab, should I use polymeric sand instead?
Generally no. If the patio is rigid with a concrete slab and mortar bed, you typically want mortar pointing or a purpose-made sanded grout designed for that joint system. Using polymeric sand where a rigid joint is expected can mismatch movement behavior and can lead to water being trapped behind failed joints.
What’s the safest filler choice if I want plants to grow between the stones?
Use coarse builder’s sand and avoid binders. Without polymeric or other locking agents, joints stay more plant-friendly, and you will also have less weed pressure from a hardened joint. Expect more maintenance, such as re-sanding and occasional weed pulling.