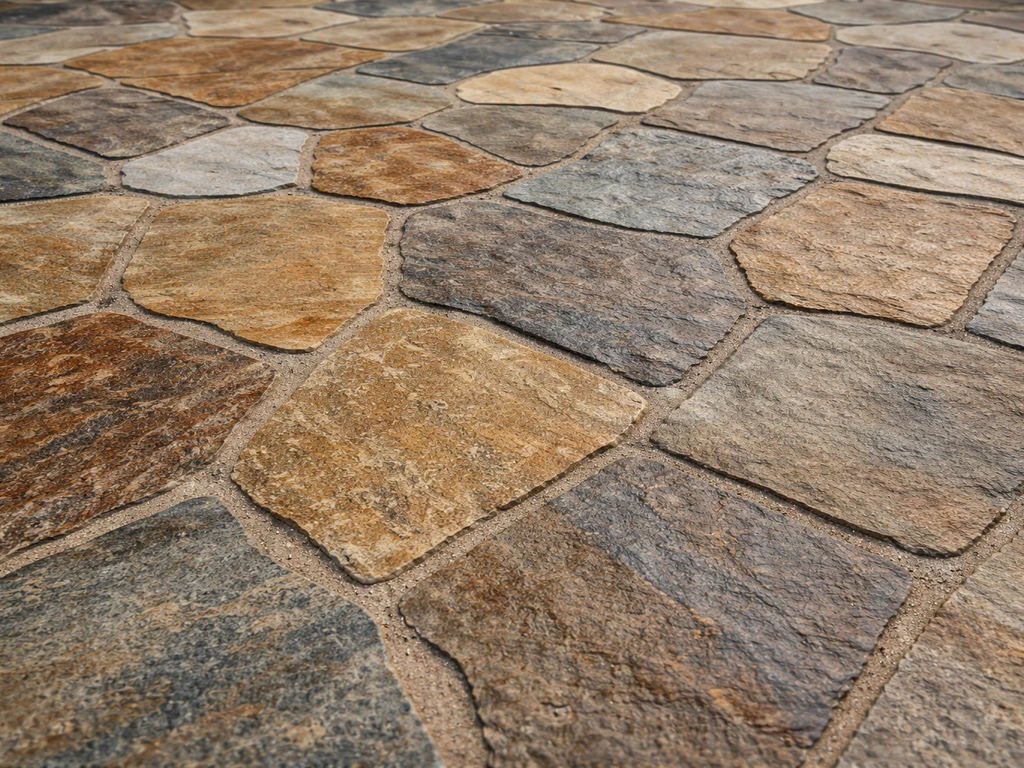
A flagstone patio is an outdoor surface built from flat, naturally occurring stone slabs laid in a pattern directly on the ground. blank" rel="noopener noreferrer">The word 'flagstone' refers to the flat-slab format, not a single rock type. You can have flagstone made from bluestone, limestone, sandstone, slate, or quartzite, and they all qualify as long as they're split or cut into flat pieces suitable for walking on. What sets a flagstone patio apart from a generic 'stone patio' is that combination of natural variation in color and texture, irregular or cut shapes laid in a deliberate pattern, and a setting method that can range from completely dry-laid on sand to fully mortared on a concrete slab.
What Is a Flagstone Patio? Types, Costs, Installation

Nolan Ellison
15 May 2026
What flagstone actually is (and what it isn't)
Flagstone is technically a sedimentary rock that splits naturally along its bedding planes, which is exactly why it ends up as flat pieces. Quarries exploit those natural cleavage lines to produce slabs of relatively consistent thickness. The key point for homeowners: 'flagstone' is a format descriptor, not a single material. So when you see flagstone at a stone yard, you're looking at a category that includes several different rock types, each with its own hardness, porosity, color range, and climate suitability.
This is different from, say, a concrete paver patio (manufactured, uniform, predictable) or a poured concrete slab (monolithic, seamless). Flagstone's appeal is its natural, one-of-a-kind look. Every slab has different veining, color shifts, and surface texture. The trade-off is that you're managing variability, both in the material itself and in how it performs over time.
Flagstone types and how they affect look and performance
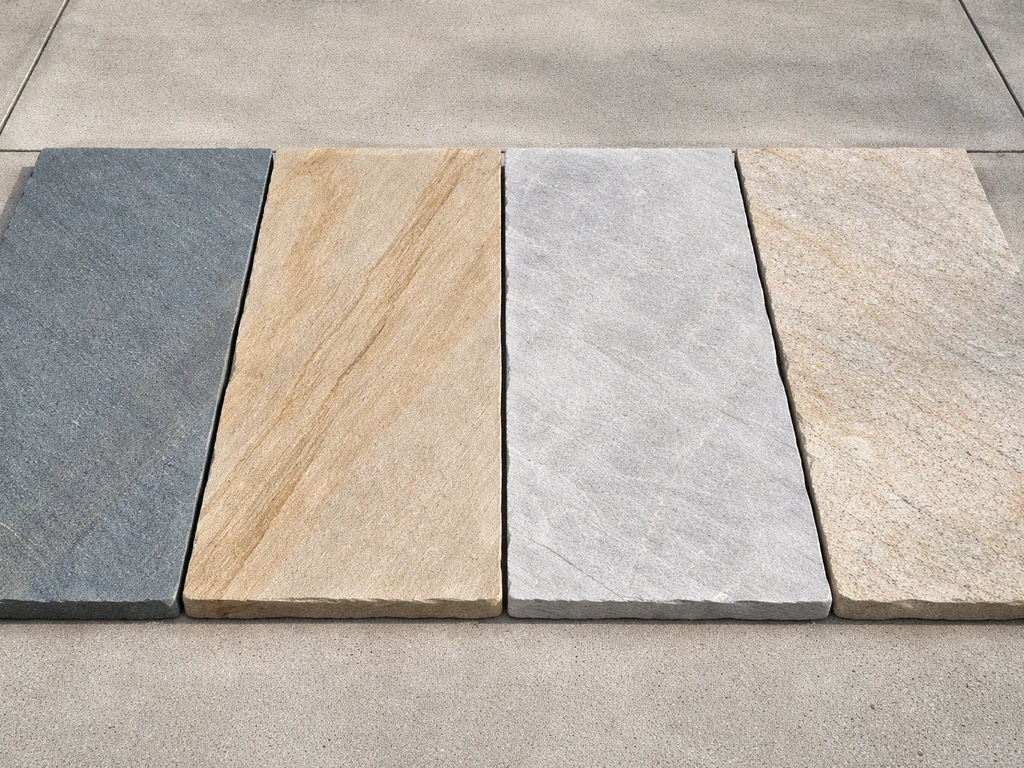
Choosing the right stone type is the single biggest decision you'll make for a flagstone patio. The stone affects color, texture, slip resistance, how it handles freeze-thaw cycles, and how much maintenance you'll be doing five years from now. Here's a practical breakdown of the most common options.
| Stone Type | Look | Hardness | Porosity | Best Climate | Notes |
|---|---|---|---|---|---|
| Bluestone | Blue-gray, sometimes buff tones | Hard | Low-medium | Cold/freeze-thaw climates | Very popular in Northeast US; excellent durability; natural cleft surface is slip-resistant |
| Limestone | Creamy, tan, gray, or coral | Medium | Medium-high | Dry or mild climates | Can pit and stain more easily; avoid in heavy-acid-rain or freeze-thaw zones unless sealed |
| Sandstone | Warm reds, tans, browns | Medium-soft | High | Dry, warm climates | Beautiful but porous; absorbs water readily; can flake in freeze-thaw; needs sealing |
| Slate | Dark grays, greens, purples | Medium-hard | Low | Most climates | Naturally layered; can delaminate over time if thin; very low water absorption when intact |
| Quartzite | Whites, silvers, warm tans | Very hard | Very low | All climates | Extremely durable; harder to cut; premium cost; excellent freeze-thaw resistance |
| Travertine | Ivory, beige, walnut | Medium | Medium (filled) | Warm, dry climates | Popular in Southwest/Florida; unfilled holes trap debris; slippery when wet if honed |
Thickness matters as much as stone type. For a patio that gets foot traffic, 1.5 inches (about 38mm) is the practical minimum for dry-laid installs. Thinner pieces (3/4 inch to 1 inch) are better suited to mortared applications over a concrete slab where the slab, not the stone, carries the structural load. If you go thin on a sand-set patio, you'll crack slabs under concentrated weight like furniture legs or a grill.
Surface finish also directly affects slip resistance. Natural cleft (the stone split along its natural plane) leaves a slightly rough, grippy texture. Thermal or sandblasted finishes are also safe. Honed or polished finishes look beautiful in catalog photos but become dangerously slippery when wet outdoors. Stick to natural cleft or thermal for any patio surface.
Design choices and layout options
The look of a flagstone patio comes down to two main decisions: the shape of the stones and how you arrange them. These choices affect not just aesthetics but also installation difficulty, cost, and how well the patio drains.
Stone shapes
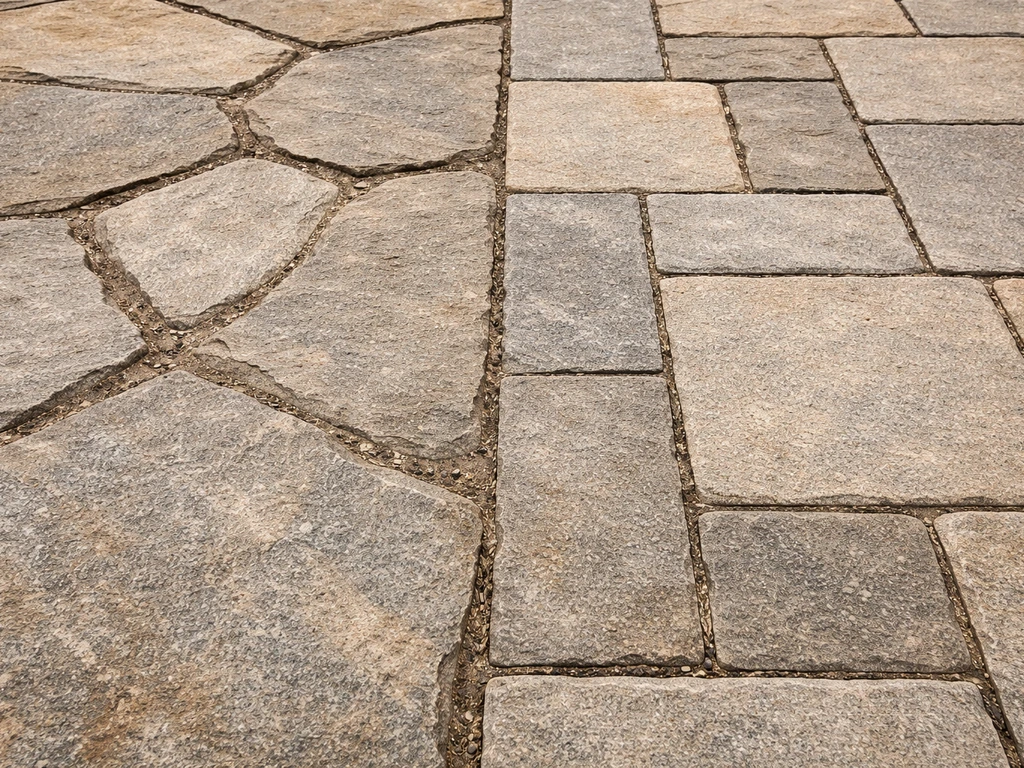
- Irregular/natural: Stones with organic, uncut edges. Less expensive per square foot, more puzzle-like to lay, wider joints that need filling. Great for a relaxed, naturalistic look.
- Cut/square/rectangular: Machine-cut to straight edges. More expensive but much easier to lay in consistent patterns. Tighter joints. Works well for modern or formal outdoor spaces.
- Crazy paving: Random irregular pieces fitted tightly together like a mosaic. Labor-intensive but visually striking; common in cottage or traditional garden styles.
- Stepping stone style: Individual large flagstones set with open planting beds or gravel between them. Not a full patio surface, but a very achievable DIY project.
Layout patterns
- Random ashlar: Rectangular and square pieces of varying sizes arranged without a repeating pattern. Looks organic but structured. Very popular.
- Running bond: Rectangular pieces offset like brickwork. Clean, traditional look.
- Opus pattern (versailles): Four piece sizes arranged in a set repeating pattern. Formal and elegant, common with cut limestone or travertine.
- Irregular freeform: Natural-edge stones fitted together organically. Maximum natural character, maximum fitting time.
Joints and drainage
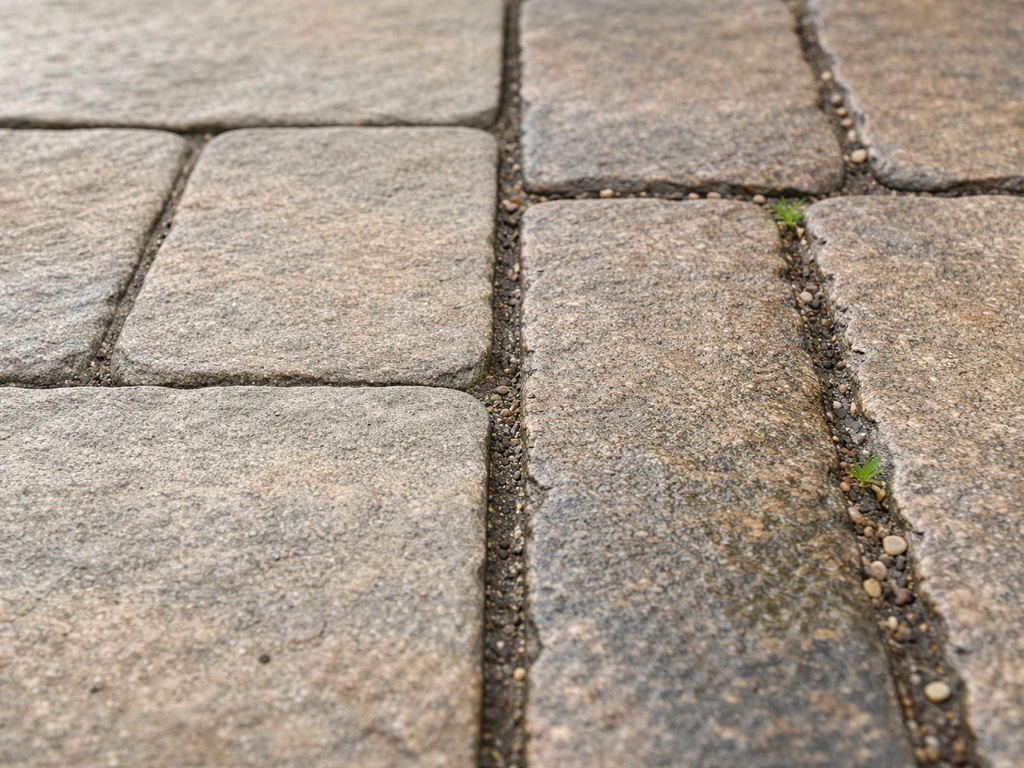
Joint width affects drainage, weed control, and the overall aesthetic. Tight joints (under half an inch) with cut stone give a cleaner look but leave no room for error in cutting and fitting. Wider joints (1 to 3 inches) are more forgiving with irregular stones and allow for planting low ground covers like creeping thyme between stones, which many people love.
For drainage, a properly sloped base (at least 1 inch of drop per 8 feet away from the house) matters far more than joint width. Joint filler choice, whether polymeric sand, regular joint sand, or mortar, also affects long-term weed control and stability. Choosing the best grout for a flagstone patio helps with stability, weed control, and long-term durability best grout for flagstone patio. The right joint material deserves its own research before you commit.
The best filler for a flagstone patio depends on whether you’re using a dry-set joint setup or a more mortar-based approach.
How a flagstone patio is actually installed
There are two fundamentally different installation methods: dry-set (no mortar, stones on a gravel and sand base) and mortar-set (stones mortared onto a concrete slab). Dry-set is the most common approach for residential patios and is absolutely the more DIY-friendly of the two. Here's how it works from start to finish.
- Excavate and grade: Dig out 6 to 8 inches of soil across the patio area, plus a foot beyond the planned edges. Slope the grade away from the house at roughly 1 inch per 8 linear feet for drainage.
- Compact the subgrade: Rent a plate compactor and compact the exposed soil. This is the step most DIYers skip and regret. Skipping it leads to settling and uneven stones within a season or two.
- Install a gravel base: Add 4 to 6 inches of compacted crushed gravel (3/4-inch crushed stone, not smooth river gravel). Compact in two-inch lifts. This base provides drainage and structural support.
- Add a sand bedding layer: Spread 1 to 1.5 inches of coarse builder's sand or stone dust over the compacted gravel. Screed it level with the correct slope built in. Do not use fine play sand, it shifts too easily.
- Lay the stones: Set each flagstone onto the sand bed, pressing and wiggling slightly to seat it. Use a rubber mallet to tap stones flush. Check with a straight edge across neighboring stones to avoid trip hazards. Leave consistent joint gaps as you go.
- Cut and fit: Use an angle grinder with a diamond blade or a cold chisel and hammer for smaller adjustments. Cut stone produces silica dust, so always wear an N95 respirator and eye protection.
- Fill the joints: Sweep polymeric sand or joint sand into the gaps. For polymeric sand, follow the manufacturer's wetting instructions carefully to activate the binders. For a more natural look, use regular sand or a sand-soil mix and plant low ground covers.
- Edge restraints: Install plastic or aluminum landscape edging, or use mortared stone border pieces to lock the perimeter and prevent stones from migrating outward.
Mortar-set installation follows a different sequence: pour and cure a 4-inch reinforced concrete slab first, then set stones in a mortar bed on top of that slab. This method is more permanent, better for heavy furniture or hot tubs, and mandatory in very cold climates where the extra thermal mass can help. But it costs more, requires more skill, and is harder to repair if a stone cracks or shifts.
The base you build under any flagstone install is one of the most important decisions you'll make, and it's worth spending time on that research before you start digging. Choosing the best base for a flagstone patio starts with the right thickness, drainage slope, and a well-compacted granular layer base you build under any flagstone install.
What it actually costs
Flagstone patios are not cheap. The material variability and labor-intensive fitting process mean you're paying more per square foot than for concrete pavers or poured concrete. But the range is wide, and understanding what drives costs helps you budget realistically.
Material costs
Flagstone is typically sold by the ton or by the square foot. Expect irregular/natural flagstone to run roughly $2 to $5 per square foot for common materials like sandstone or limestone in areas where it's quarried locally. Bluestone and quartzite run $4 to $8 per square foot. Cut and calibrated (consistent thickness) flagstone adds 30 to 50 percent to material cost but saves significant labor time. Premium imported materials like travertine or exotic quartzite can hit $10 to $20 per square foot for material alone. Always add 10 to 15 percent overage for cuts, breakage, and fitting waste.
Labor and total installed cost
Professional installation of a dry-laid flagstone patio typically runs $15 to $30 per square foot all-in for a straightforward project, including base prep, materials, and labor. Complex layouts, irregular stone, or difficult access can push that to $35 to $50 per square foot. A 200-square-foot patio, a reasonable size for a dining area, might cost $3,000 to $7,000 professionally installed with mid-range materials. At the premium end with quartzite or elaborate patterns, $10,000 or more is realistic.
DIY vs. hiring a pro
DIY is genuinely viable for a dry-set flagstone patio if you have the physical capacity and time. The work is heavy, slow, and detail-oriented, but it doesn't require specialized trade skills. A motivated homeowner can save 40 to 60 percent on a small to medium patio by doing the labor themselves, typically bringing total cost down to $4 to $8 per square foot in materials, sand, and gravel.
The honest caveat: base prep done wrong is the number one cause of flagstone patio failure. If you cut corners on compaction or base depth, you'll be re-laying stones within a few years. Hire a pro for mortar-set work over a slab, any project over 400 square feet without prior experience, or if your site has drainage issues that need professional grading.
Keeping a flagstone patio in good shape long-term
Flagstone patios are durable but not maintenance-free. What you actually have to deal with depends heavily on which stone you chose and how the joints were filled, but some level of ongoing attention is part of owning a natural stone surface.
Cleaning
Annual cleaning with a mild stone-safe cleaner and a stiff brush handles most dirt, algae, and mildew buildup. Avoid acidic cleaners like vinegar on limestone or marble-based stones since they etch the surface. A pressure washer on a low setting (under 1,500 PSI) works well for general cleaning but can blast out sand joints, so you may need to re-sweep joint sand afterward. For oil stains from a grill, apply a poultice of baking soda and dish soap, let it sit, and scrub off.
Weed and moss control
Weeds in flagstone joints are the most common complaint I hear from homeowners. Polymeric sand (activated with water after installation) bonds into a firm, weed-resistant filler that holds up significantly better than plain sand. It still needs re-application every three to five years as it breaks down. For existing weed problems, boiling water is surprisingly effective and doesn't leave chemical residue. Persistent weeds usually signal that the joint sand has eroded, so the real fix is re-filling joints properly.
Cracks, chips, and settling
Some movement and minor cracking over time is normal for natural stone, especially in freeze-thaw climates. A dry-set patio actually handles ground movement better than a mortared patio because individual stones can shift slightly without cracking. If a stone settles noticeably, you can lift it, add or remove sand beneath, and re-set it. Chipped edges on irregular flagstone often go unnoticed because the stone already has natural irregular edges. A severely cracked stone can usually be replaced by one matching piece sourced from the same quarry, which is worth keeping in mind when ordering: buy extra and store a few pieces.
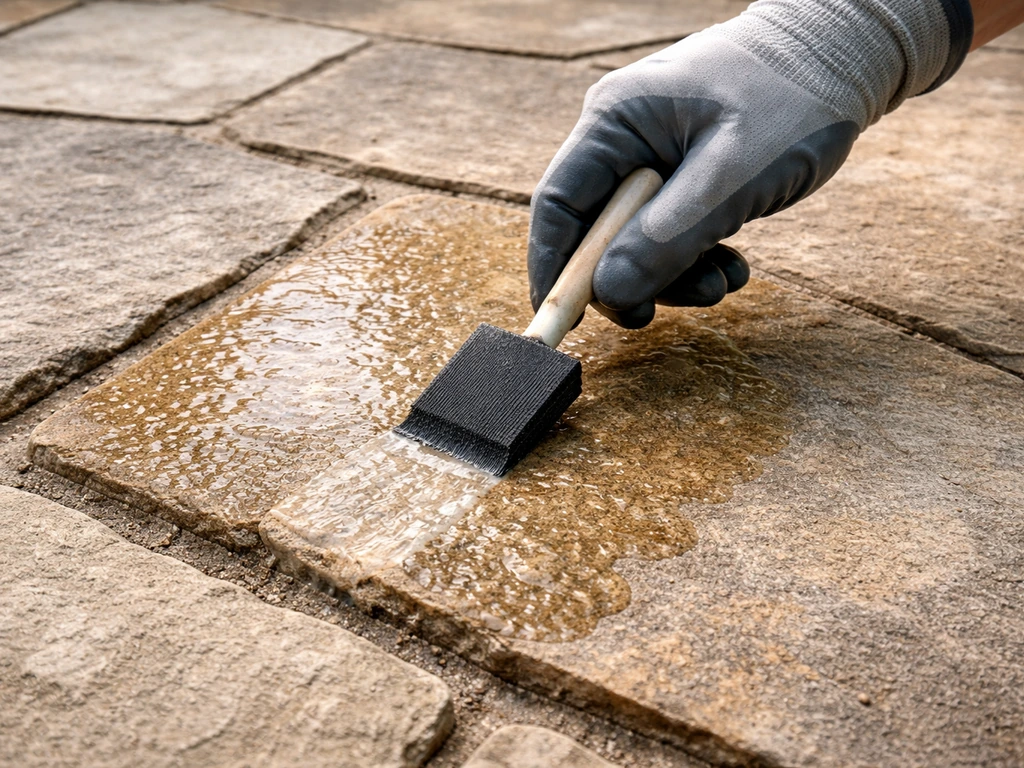
Sealing: when it helps and when it hurts
Sealing is worth doing on porous stones like sandstone, limestone, and travertine. A penetrating impregnating sealer (not a topical film sealer) soaks into the stone and repels water and oil without changing the texture. Apply to clean, dry stone and re-apply every two to three years depending on traffic. For hard, low-porosity stones like bluestone, quartzite, or slate, sealing is optional and mainly helps with stain resistance rather than structural protection. One warning: topical film sealers (the shiny, wet-look products) can make stone slippery when wet and tend to peel or yellow over time outdoors. Stick to penetrating sealers for any outdoor patio surface.
Flagstone vs. other patio surfaces: which one fits your situation?
Flagstone is a strong choice but it's not automatically the best choice for every yard or budget. Here's an honest comparison with the alternatives most homeowners are weighing.
| Material | Cost (installed, per sq ft) | Durability | Maintenance | DIY Friendliness | Best For |
|---|---|---|---|---|---|
| Flagstone | $15–$35+ | Excellent (stone-dependent) | Moderate (joints, sealing) | Moderate | Natural look, long-term investment, irregular or organic garden spaces |
| Porcelain tile | $20–$40+ | Excellent (if properly installed) | Low (easy to clean) | Low (requires mortar/slab) | Modern/contemporary look, low-maintenance preference, warmer climates |
| Concrete pavers | $10–$20 | Good | Low-moderate | High | Budget-conscious, uniform look, DIY projects, replaceable units |
| Poured concrete | $6–$15 | Good (can crack) | Low | Low (needs forms/finishing skill) | Largest budget stretch, covered patios, utilitarian spaces |
| Brick | $12–$25 | Very good | Low-moderate (joint weeds) | Moderate | Traditional/colonial style, good freeze-thaw performance |
| Gravel/decomposed granite | $3–$8 | Moderate | Low-moderate (raking, edging) | High | Informal spaces, drought landscapes, tight budgets |
| Natural stone tile (marble, travertine) | $20–$50+ | Good-excellent | Moderate-high (porous) | Low | Premium look, warm dry climates, professional install recommended |
Porcelain tile is the closest competitor to flagstone in the premium outdoor space market right now. It offers a very consistent look, extremely low porosity, and almost no staining issues. Where it falls short: it must go over a concrete slab (no sand-set), it can be slippery depending on the finish, and it lacks the organic warmth of real stone. If you want something that looks like stone but behaves more predictably, large-format porcelain with a textured surface is worth a look. If you want the real thing and are willing to manage natural variability, flagstone wins on character and repairability.
Common mistakes that come back to haunt you
I've seen enough flagstone projects go sideways to know where things go wrong. Avoid these and your patio will look good for decades.
- Skimping on base depth: Four inches of gravel base is the minimum; six is better. Going thinner to save money leads to frost heave, settling, and rocking stones within one or two seasons.
- Using the wrong sand: Fine play sand or all-purpose sand shifts and erodes. Use coarse builder's sand or stone dust (crusher fines) for the bedding layer.
- Choosing thin stone for a dry-set install: Anything under 1.5 inches thick for dry-set patios is asking for cracked stone under furniture or concentrated loads.
- Ignoring drainage: Water pooling under or on your patio is the enemy. Grade properly from day one. Adding drainage channels after the fact is a major rework.
- Using a honed or polished finish: Natural cleft or thermal only for outdoor patio surfaces. Slippery wet stone is a liability.
- Not sealing porous stone before use: Sandstone and limestone can absorb stains from the first barbecue or rainstorm. Seal before any outdoor entertaining.
- Buying only exactly what you need: Order 10 to 15 percent extra. Stone from the same quarry batch matches better, and you'll want spares for future repairs.
- Skipping edge restraints: Without a physical border to contain the perimeter, stones gradually migrate outward over years, especially in wet soil.
Your next steps
Start by visiting a local stone yard, not a big box store, to see actual flagstone samples in person. Bring a photo of your house and outdoor space so you can hold stone samples up and judge color compatibility. Ask about locally quarried stone first since it's usually cheaper and better suited to your regional climate. Get measurements of your patio area and ask the yard to help you estimate tonnage. From there, the decisions about base construction, joint filler, and whether to seal are all solvable with the right information, and each of those topics is worth digging into before you put shovel to ground.
FAQ
How do I choose flagstone thickness if I’m putting heavy items on the patio?
A good rule is to match stone thickness and installation method to the load. For a dry-laid patio, keep pieces at about 1.5 inches or thicker for typical foot traffic, and avoid putting concentrated loads (like a grill, umbrella base, or heavy furniture legs) on isolated thin stones. For heavier uses or very cold sites, mortar-set over a properly built concrete slab is often more forgiving because the slab carries most of the structural load.
Will wider joints help my patio drain better, or is the base doing the real work?
Most backyard drainage failures are base-related, not joint-related. Even with wider joints, you can get pooling if the patio surface lacks slope or the subbase is under-compacted. Plan for at least about 1 inch of fall per 8 feet away from the house, then confirm the base is packed in layers so it does not settle unevenly.
Why do weeds keep returning even after I install new joint sand?
If you’re using dry-set construction, it is common to expect some weed growth early if the joint sand washes out. Polymeric sand can reduce weeds once activated, but it still needs replacement as it degrades over time. If weeds keep coming after re-filling, the root cause is usually eroded or missing joint filler, not a one-time cleaning issue.
Can I pressure wash a flagstone patio without ruining the joints?
You should generally avoid pressure washing right after installation, especially on sand-set patios, because it can dislodge joint filler. When cleaning later, use a low PSI setting and keep the nozzle angle controlled so you do not dig into joints. If joint material is disturbed, re-sweep in fresh joint sand or repair the joints before expecting weed control to last.
What’s the best way to repair a cracked or sunken flagstone section?
Yes, but the “repair” route depends on whether the crack is in the stone or the base. Small gaps or minor movement can often be fixed by lifting the affected stone(s) and re-leveling with compacted sand. If a slab is significantly cracked, especially on a mortar-set system, replacing the stone piece is usually safer than trying to patch over it.
Which flagstone surface finishes are safest when the patio is wet?
For outdoor patios, honed or polished finishes can be aesthetically pleasing but become slick when wet, especially if moss or algae forms. If you want a smoother look with safer traction, ask for a thermal or sandblasted finish, or choose cleft/natural cleft surfaces that retain grip in rain.
Do I have to seal flagstone, and how do I avoid making it more slippery?
Not necessarily. Some stones are naturally more porous and benefit from sealing, but over-sealing or using the wrong product can cause slip or peeling issues. A penetrating impregnating sealer is the right category for most patio use, and film-forming sealers should be avoided outdoors because they can create a shiny, slippery surface and degrade over time.
If all stones are called flagstone, how can they perform so differently?
Yes, because “flagstone” is a format, not one rock. Bluestone, limestone, sandstone, slate, and quartzite can behave differently in freeze-thaw climates and under staining exposure. Before you buy, confirm local performance for your region (freeze-thaw, rain level, and typical grit or de-icing use) and choose stones that suit your climate and maintenance comfort level.
What’s the most common DIY mistake that causes a flagstone patio to fail early?
For DIY projects, base prep is the make-or-break step. If you skip proper excavation depth, reduce base thickness, or under-compact, stones can shift or settle and the patio will loosen within a few years. Plan the layout, excavation, drainage slope, and compaction carefully before setting any stone, then keep the stone count and tonnage aligned with realistic waste.
How much extra flagstone should I buy, and should I save leftovers for repairs?
A reliable approach is to order extra to account for breakage, fitting waste, and future repairs. Because slab shapes and sizes vary, even a small patio can require more pieces than the “square foot” estimate. Store leftover stones from the same lot or quarry if possible, so replacement matches color and texture later.