
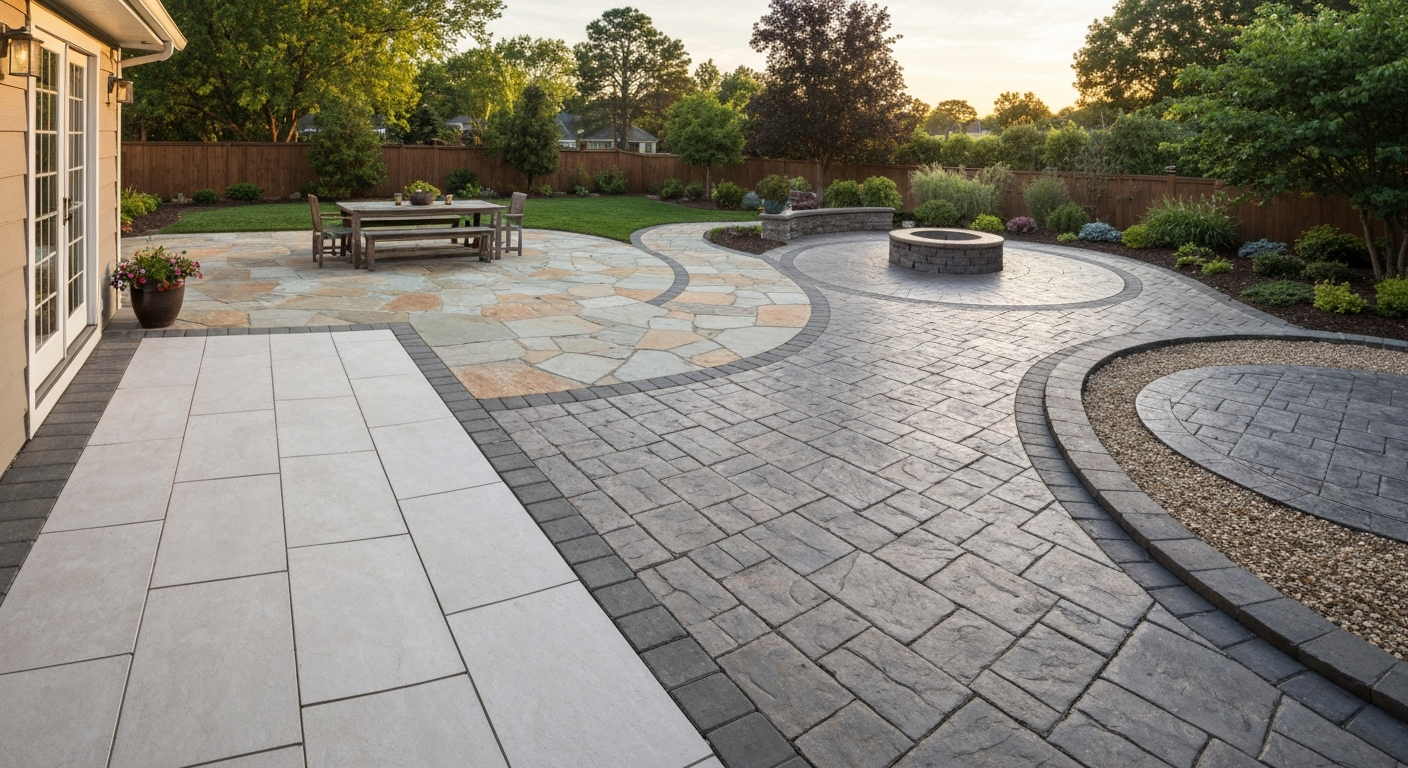
For most homeowners, concrete pavers or porcelain tile hit the best balance of durability, appearance, and long-term value. If you're still undecided, read our guide to the best patio surface for a side-by-side comparison of durability, cost, and suitability for different climates. Concrete pavers typically run $10–$30 per sq ft installed, tolerate freeze-thaw cycles well, and can be individually reset if a section settles. Porcelain tile (outdoor-rated, DCOF ≥0.42) gives you a clean, contemporary look with near-zero water absorption, but it costs more to install correctly and needs a rock-solid substrate. If budget is the priority, poured concrete at $4–$16 per sq ft is the most cost-effective hard surface. Flagstone and natural stone sit at the premium end ($16–$30+ per sq ft) and reward you with character and longevity when installed on proper drainage. Gravel is the cheapest of all at $1–$4 per sq ft installed and works surprisingly well as a casual patio surface if you manage edging and weed control.
Best Patio Floor Material: Climate & Budget Choices

How to use this guide
This guide is built for homeowners who are at the planning or replacement stage and need a single, honest reference before committing to a material. The scope covers the six most common hard-surface patio materials: flagstone, porcelain tile, poured and stamped concrete, concrete pavers, gravel, and brick/natural stone. For each material I cover pros and cons, slip resistance, cost ranges, base and drainage requirements, installation difficulty, maintenance, realistic lifespan, and the most common mistakes I see on job sites. The goal is not to push a single answer but to match you to the right surface for your climate, budget, and how you actually use your patio.
Start with the quick decision checklist below to narrow your shortlist to two or three materials. Then jump to the detailed section for each of those materials to pressure-test your choice. The comparison table in the next section gives you a side-by-side view across key factors so you are not reading five full sections just to compare cost or slip resistance.
Quick decision checklist: picking your patio floor material
Work through the questions below in order. By the time you reach the end, you should have a clear shortlist. These are not hard rules but practical filters based on what actually fails in the field.
- Do you get hard freezes in winter (USDA Zone 6 or colder)? If yes, eliminate any high-porosity stone (soft sandstone, porous limestone) and any tile rated below 0.5% water absorption. Stick with porcelain (≤0.5% absorption per ASTM C373), concrete pavers, flagstone made from dense slate or granite, or poured/stamped concrete with a quality sealer.
- Is your patio surface wet most of the year (rainy climate, poolside, or covered by shade that keeps it damp)? If yes, slip resistance is your first filter. Prioritize materials with a wet DCOF ≥0.42 (ANSI A326.3 standard), textured flagstone, or brushed/exposed-aggregate concrete.
- What is your installed budget per square foot? Under $5: gravel only. $5–$12: poured concrete slab or basic concrete pavers. $12–$20: stamped concrete, mid-range porcelain, or brick. $20–$30+: flagstone, premium porcelain large-format slabs, or natural stone.
- How much ongoing maintenance are you willing to do? Concrete pavers and flagstone need periodic joint sand refresh and occasional re-leveling but no sealing if you choose the right materials. Poured and stamped concrete needs resealing every 2–5 years. Porcelain needs almost no maintenance once joints are grouted or pointed. Gravel needs top-dressing every 2–3 years.
- Is DIY installation realistic for you? Gravel and basic sand-set concrete pavers are genuine DIY projects. Poured or stamped concrete almost always needs a contractor. Porcelain over a structural substrate requires tile-setting experience. Flagstone in mortar also needs contractor skill; dry-set flagstone is more DIY-accessible.
- Do you have drainage concerns (clay soil, low-lying yard, HOA impervious-surface limits)? If yes, seriously consider permeable interlocking concrete pavers or a gravel/decomposed granite surface. EPA-recognized permeable paving systems reduce stormwater runoff and can count toward green-infrastructure requirements.
- Is appearance and entertaining style important? Flagstone and large-format porcelain tile score highest on visual impact. Stamped concrete offers decorative looks at a lower price. Gravel and plain concrete are functional but plain.
- How long do you plan to stay in the home? If fewer than 5 years, poured concrete or concrete pavers deliver the best ROI. If 10+ years, invest in porcelain, flagstone, or quality pavers because the lifespan difference pays off.
At-a-glance comparison: all major materials side by side
| Material | Typical Installed Cost ($/sq ft) | Slip Resistance (Wet) | Freeze-Thaw Suitability | Durability / Lifespan | Maintenance Level | DIY Difficulty | Best Climate Fit |
|---|---|---|---|---|---|---|---|
| Flagstone (dense slate/granite) | $16–$30+ | Good (textured surface) | Good if low-absorption stone selected | 30–50+ years | Low-Medium | Medium (dry-set); Hard (mortar) | All climates with proper stone selection |
| Porcelain tile (outdoor-rated) | $8–$25+ | Good if DCOF ≥0.42 rated | Excellent (≤0.5% absorption) | 30–50+ years | Very Low | Hard (requires substrate + membrane) | All climates; best in wet/freeze zones |
| Poured concrete (plain) | $4–$10 | Fair (smooth finish) | Good with proper slope + sealer | 25–40 years | Medium (seal every 2–5 yrs) | Hard (contractor recommended) | All climates |
| Stamped concrete | $8–$28 | Fair–Good (depends on finish) | Good with proper sealer | 20–35 years | Medium-High (seal + repair) | Hard (contractor only) | Moderate climates; avoid heavy freeze |
| Concrete pavers | $10–$30 | Good (textured face) | Excellent (individual units flex) | 30+ years | Low | Medium (DIY-accessible) | All climates including heavy freeze |
| Natural stone (granite, slate) | $16–$30+ | Good–Excellent (textured) | Good for dense types; poor for porous | 40–50+ years | Low-Medium (seal porous types) | Medium–Hard | Cold climates: dense stone only |
| Brick | $10–$20 | Good (textured) | Good (quality pavers only) | 25–40 years | Low-Medium | Medium | Moderate climates; avoid saturated freeze |
| Gravel / Decomposed Granite | $1–$4 | Fair (loose surface) | Excellent | Refresh every 2–3 yrs | Low (top-dress + weed control) | Easy (DIY-friendly) | All climates; not ideal for heavy furniture |
Scenario-based recommendations: matching material to your situation
Best for wet climates
Outdoor-rated porcelain tile is the top pick for consistently wet patios, poolside areas, and Pacific Northwest or Gulf Coast climates. Its water absorption of ≤0.5% (ASTM C373) means moisture does not penetrate the tile body, so mold, staining, and frost damage are minimal. The critical specification: look for tiles rated DCOF ≥0.42 (ANSI A326.3) for wet-foot environments, and ask the manufacturer specifically for their 'Exterior, Wet' classification because DCOF testing can understate slip risk on heavily textured surfaces. Concrete pavers are a close second: their permeable joint system channels water away naturally, and individual pavers can flex slightly without cracking the way a monolithic slab can when soil shifts under saturation.
Best for hot and sunny climates
Light-colored flagstone (limestone, travertine, pale granite) or light-toned concrete pavers stay the coolest underfoot in desert southwest and hot-summer climates because they reflect more solar radiation than dark materials. Avoid dark porcelain or black stamped concrete in climates like Phoenix or Las Vegas: surface temperatures on dark materials can exceed 140°F on a July afternoon, which is genuinely painful to walk on barefoot. Porcelain in lighter tones is fine thermally but can feel uncomfortably reflective. In UV-intense climates, stamped concrete sealers degrade faster and need reapplication every 2–3 years rather than the 3–5 years you get in milder regions.
Best budget option
If keeping costs down is the main priority, a brushed or broom-finished poured concrete slab at $4–$10 per sq ft installed is the most economical hard surface you can put down. It is not glamorous, but it is durable and easy to keep clean. For something cheaper still, compacted gravel or decomposed granite at $1–$4 per sq ft is a legitimate patio surface for casual seating areas, and it handles drainage better than any hard surface. If you want a step up in appearance without jumping to flagstone prices, basic 4x8 concrete pavers in a running bond pattern can be installed by a motivated DIYer for around $10–$14 per sq ft in materials and a weekend of labor. Readers looking specifically at cheap patio flooring options will find a detailed breakdown of low-cost surfaces worth exploring further. If you need a quick answer to what is the cheapest patio flooring, see the detailed breakdown of low-cost surfaces and their trade-offs.
Best non-slip option
For slip safety, textured flagstone and exposed-aggregate concrete are the most forgiving because the surface texture is physical rather than a coating that can wear off. For tile, specify outdoor porcelain with a documented wet DCOF ≥0.42 and confirm the manufacturer rates it for exterior wet exposure. Brushed or hammered natural stone finishes also perform well. The worst slip offenders are smooth-polished porcelain or marble (beautiful indoors, dangerous outside when wet), smooth-troweled concrete with a silicone-based sealer, and old brick that has been sealed with a shiny film sealer. If you are building near a pool or in a rainy climate and slip resistance is the top priority, non-slip patio flooring deserves its own deep-dive before you finalize a choice. See our guide to the best non slip patio flooring for a detailed comparison and buying tips.
Best low-maintenance option
Outdoor-rated porcelain tile wins on pure maintenance simplicity: no sealing required, no staining from organics, clean with a hose and occasional mild detergent. The catch is that getting to that low-maintenance finish requires correct installation upfront (proper substrate, flexible grout, movement joints). Concrete pavers are a close second: they rarely need sealing, joint sand can be refreshed every few years with polymeric sand for about $50–$100 in materials, and any settled pavers can be lifted and re-leveled without demolishing the whole surface. Poured concrete and stamped concrete require the most ongoing attention because sealer maintenance is not optional if you want to prevent surface spalling and staining.
Best for style and entertaining
Large-format flagstone or large-slab porcelain tile (24x24 or 24x48) makes the biggest visual impact for an outdoor entertaining space. Flagstone has warmth and natural variation that photographs well and impresses guests in a way that concrete pavers simply do not. Large-format porcelain gives a sleek, modern look that connects visually with contemporary interiors. Stamped concrete with a quality pattern and two-tone color treatment is the budget-conscious entertainer's option: you can get a cobblestone or slate-look finish for $8–$18 per sq ft rather than paying $20–$30+ for the real thing. Brick works beautifully for traditional and cottage-style homes and ages gracefully in a way that stamped concrete does not.
Flagstone: everything you need to know
Pros and cons
- Pros: Natural, high-end appearance with unique variation in each piece; long lifespan of 30–50+ years when properly installed; good slip resistance on textured surfaces; works beautifully in both formal and informal landscapes; dense types (slate, granite, quartzite) are highly freeze-thaw resistant.
- Cons: High material and labor cost ($16–$30+ per sq ft installed); heavy and requires strong base; porous varieties (sandstone, some limestone) can stain, spall in freeze climates, or require regular sealing; irregular shapes make DIY installation slow and skill-dependent; not all stones sold as 'flagstone' are equal in durability.
Slip resistance and durability
Natural cleft (split-face) flagstone provides excellent wet slip resistance because the textured surface gives foot traction without any added coating. Honed or polished flagstone finishes, which are sometimes used on premium patios, behave more like tile when wet and should be avoided in rain-heavy climates or poolside. In terms of durability, dense granites and slates have water absorption comparable to porcelain (≤0.5% in the best specimens) and handle freeze-thaw stress well. The Natural Stone Institute specifically warns that freeze-thaw cycling combined with high water absorption is one of the primary causes of exterior stone failure. Natural Stone Institute technical guidance warns that freeze‑thaw cycling and water absorption are primary causes of exterior stone failure and recommends petrographic testing and selection of low‑absorption stones for cold climates Natural Stone Institute — Technical Resources / Freeze‑Thaw guidance. This makes stone selection critical: always ask the supplier for the stone's absorption rate before buying for a cold climate, and avoid soft sandstones or highly porous limestones in USDA Zone 6 or colder.
Suitable climates
Dense flagstone varieties (slate, quartzite, granite-family stones) are suitable for all climates including harsh freeze-thaw regions. Softer or more porous stones like sandstone, travertine, and some limestone are better suited to mild or dry climates (Zone 7+, low rainfall). In the mid-Atlantic and New England states, bluestone is the traditional choice because it strikes a balance between natural appearance and reasonable durability in wet, cold conditions, though it still benefits from sealing in shaded areas where moisture lingers.
Cost and installation difficulty
Expect to pay $16–$30+ per sq ft installed, with the wide variance driven by stone type, slab thickness, pattern complexity, and regional labor rates. Bluestone/flagstone installed pricing commonly reported by multiple estimating services clusters around $16–$30 per sq ft installed (stone grade, site prep and pattern drive the variance) Aggregating estimates from services like HomeAdvisor and Fixr shows bluestone/flagstone installed pricing commonly clusters around $16–$30 per sq ft installed.. Dry-set flagstone (set in a sand-and-gravel bed) is the more DIY-accessible approach and runs cheaper on labor, but the joints require ongoing weed control and can shift over time. Mortar-set flagstone on a concrete base is more permanent and cleaner looking but requires a contractor skilled in stone work. Material-only costs for flagstone typically run $4–$12 per sq ft depending on type, with premium bluestone and imported varieties at the high end.
Base, drainage, and installation basics
For dry-set flagstone, the standard base is 4–6 inches of compacted crushed aggregate (gravel) topped by 1 inch of coarse sand or stone dust. The base must be graded to slope away from the house at a minimum 1/8 to 1/4 inch per foot (roughly 1–2%) to ensure sheet drainage. For mortar-set flagstone, you need a reinforced concrete slab base (typically 4 inches for residential patios), with the slab itself properly sloped before the stone is laid. Edge restraints are important for dry-set work to prevent lateral creep. Always excavate to undisturbed soil or compact fill to ≥95% Standard Proctor density before building up your base.
Maintenance and refinishing
Dense flagstone in dry-set installation needs very little beyond annual weeding of joints and occasional re-leveling of stones that have settled. For porous varieties like sandstone or unsealed limestone, apply a penetrating stone sealer (not a film-forming sealer) every 2–3 years. Avoid film-forming sealers on natural stone because they trap moisture and peel. If individual flagstones crack (rare on quality stone but it does happen on thin pieces under point loads), they can be individually replaced without disturbing the rest of the patio.
Life expectancy and warranty notes
Quality flagstone properly installed on a good base routinely lasts 40–50 years or more. The stone itself does not degrade; what fails is usually the base, the mortar joints, or the wrong stone choice for the climate. Most stone suppliers do not offer formal warranties on the installed product, though they may warranty against fabrication defects. Always keep a few extra pieces of your specific stone from the original order because matching quarry lots years later is genuinely difficult.
Common mistakes
- Buying on looks alone without checking the stone's absorption rate for freeze-thaw suitability.
- Using thin flagstone (under 1.5 inches) in a dry-set application on clay or unstable soil: thin slabs crack under point loads.
- Skipping edge restraints on dry-set work, which allows the perimeter stones to kick out over time.
- Using a glossy or film-forming sealer on natural stone outdoors: it peels, traps moisture, and makes surfaces slippery when wet.
- Inadequate base compaction: flagstone is heavy and will settle unevenly if the base is not properly compacted.
Porcelain tile (outdoor-rated): the full picture
Pros and cons
- Pros: Water absorption ≤0.5% (ASTM C373) makes it highly resistant to freeze-thaw damage and staining; extremely low maintenance once installed; wide range of sizes and finishes including realistic stone and wood looks; does not require sealing; very long lifespan if substrate is solid.
- Cons: Highest installation skill requirement of any patio material: needs a crack-free, properly sloped substrate, uncoupling or isolation membrane, correct thinset, and movement joints; smooth-finished tiles can be dangerously slippery when wet if not properly specified; any substrate movement will crack grout or tile; material cost ranges widely from $3–$20+ per sq ft and installation labor can double or triple that.
Slip resistance
Slip resistance is the single most important specification to check when buying outdoor porcelain tile. The TCNA and ANSI A326.3 standard establishes a wet DCOF (Dynamic Coefficient of Friction) threshold of 0.42 as a minimum for level surfaces expected to be walked on when wet. Any tile you spec for an exterior patio should meet or exceed this threshold in wet conditions. But there is an important nuance the Tile Council of North America itself acknowledges: DCOF is just one data point. Slip risk also depends on contamination (algae, pollen, fine debris), footwear type, surface slope, and maintenance. For poolside or shaded/damp areas, look for tiles the manufacturer explicitly rates for 'Exterior, Wet' use, and choose textured or matte finishes over polished or lappato (semi-polished) finishes.
Suitable climates
Outdoor porcelain is suitable for all climate zones when correctly installed, including severe freeze-thaw regions. The ≤0.5% absorption specification is the reason: there is almost no water in the tile body to freeze and expand. The installation method matters more in freeze climates: use a polymer-modified thinset rated for exterior use, include movement joints at 8–10 foot intervals and at all changes in substrate, and never skip the isolation membrane if there is any risk of substrate cracking.
Cost and installation difficulty
Tile material alone ranges from about $3–$8 per sq ft for standard-format outdoor porcelain to $15–$25+ per sq ft for large-format 24x48 or 48x48 slabs. Installed costs typically run $8–$25+ per sq ft once you factor in substrate prep, uncoupling membrane or crack-isolation layer, polymer-modified thinset, grout or pointing mortar, movement joint sealant, and labor. This is not a casual DIY project. I have seen homeowners attempt large-format porcelain installation only to end up with lippage (tiles not level with each other) and cracked tiles at movement joints because the substrate was not flat to within 1/8 inch over 10 feet. If you want porcelain, either hire a tile contractor with documented exterior experience or start with a small, low-stakes area to develop the skill.
Substrate and drainage
Porcelain tile outdoors requires a solid, non-moving substrate: either a reinforced concrete slab or a structural pedestal system (for elevated decks). The slab must slope at 1/8–1/4 inch per foot for drainage and be flat enough for tile work (within 1/4 inch over 10 feet for standard tile, within 1/8 inch over 10 feet for large-format). An uncoupling or crack-isolation membrane between the slab and tile layer is strongly recommended, especially in climates with significant thermal cycling. This membrane allows the tile layer and concrete slab to move slightly independently, protecting grout joints and tile edges.
Maintenance and refinishing
Porcelain requires almost no maintenance: sweep or blow off debris, rinse with a hose, and occasionally scrub with a pH-neutral cleaner if algae builds up in shaded areas. No sealing needed. Grout joints (if used) may stain over time and can be cleaned with a grout cleaner or carefully refreshed with a grout colorant. If a tile chips or cracks (usually from a sharp point load like a dropped tool), individual tiles can be replaced, though matching the original batch is easier if you kept spare tiles from the original order.
Life expectancy and warranty notes
The tile itself can last 50+ years; the practical lifespan of the installed system is usually governed by the substrate and installation quality. Many porcelain tile manufacturers offer 10–25 year product warranties against manufacturing defects (not installation failures). Always read the warranty fine print: most require installation per TCNA and ANSI A108 guidelines, which means deviating from those methods (skipping a membrane, using the wrong thinset) voids coverage.
Common mistakes
- Specifying polished or lappato porcelain for outdoor use without checking the DCOF rating for wet conditions.
- Installing over a cracked or inadequately sloped concrete slab without a crack-isolation membrane.
- Skipping movement joints, which leads to grout cracking and eventually tile delamination as the substrate expands and contracts.
- Using interior-grade thinset or grout outdoors: exterior use requires polymer-modified, frost-resistant products.
- Buying cheap, unrated porcelain from suppliers who cannot confirm the water absorption spec: always ask for ASTM C373 test data or manufacturer freeze-thaw certification.
Concrete: poured slabs, stamped finishes, and overlays
Pros and cons
- Pros: Most cost-effective hard surface ($4–$10/sq ft poured, $8–$28/sq ft stamped); wide availability of contractors; durable and structurally sound with proper base; stamped concrete offers decorative stone, brick, or tile patterns at lower cost; overlays can refresh an existing slab without demolition.
- Cons: Cracks over time regardless of quality of installation: control joints help but cannot prevent all cracking; sealer maintenance is required every 2–5 years to protect surface especially for stamped work; repairs can be visible because color-matching existing concrete is difficult; smooth-troweled finish is slippery when wet; stamped finishes fade and chalk without regular sealing.
Slip resistance
Plain broom-finished concrete has reasonable slip resistance because the brushed texture provides grip. Smooth-troweled concrete is a slip hazard when wet and should never be used for exterior patios. Stamped concrete sits somewhere in between: the pattern texture helps, but a glossy stamped sealer can be very slippery when wet, especially on flatter patterns. If you go with stamped concrete near a pool or in a wet climate, specify a matte or low-sheen sealer and add a non-slip aggregate to the final sealer coat. Exposed-aggregate concrete (where the surface paste is washed away to reveal the coarse aggregate) offers the best slip resistance of any concrete finish because the rounded stones provide consistent grip.
Appearance options
Poured concrete ranges from plain broom-finish gray to integral color, exposed aggregate, salt finish, and acid stain. Stamped concrete can replicate flagstone, slate, cobblestone, tile, and wood-plank patterns with integral color and release agents for two-tone depth. Overlays applied over an existing slab can add texture and color without a full replacement, though the overlay is only as good as the bond to the underlying slab. A delaminating overlay looks worse than bare concrete and is expensive to correct.
Suitable climates
Poured concrete works in all climates but needs more care in severe freeze-thaw zones. Specify a minimum 4,000 psi mix with air entrainment (4–7% air content) for freeze climates: the air entrainment creates microscopic voids that give expanding water somewhere to go rather than spalling the surface. In harsh freeze climates, avoid de-icing salts on concrete patios; they accelerate surface scaling. A penetrating concrete sealer (silane or siloxane chemistry) applied after the concrete cures is more appropriate for freeze climates than a film-forming sealer. Stamped concrete sealers are particularly vulnerable to UV degradation in high-sun climates and need more frequent reapplication.
Cost ranges and DIY vs. pro
Plain poured concrete runs about $4–$10 per sq ft installed for a residential patio. Add broom or exposed-aggregate finish and you might add $1–$3 per sq ft. Stamped concrete jumps to $8–$28 per sq ft depending on pattern complexity, number of colors, and regional labor. Concrete is not a realistic DIY option for slabs larger than about 100 square feet: you need to work quickly before the mix sets, get the slope right, place control joints in the right locations, and finish the surface consistently. Mistakes on a concrete pour are expensive to fix. Overlays are more forgiving as a DIY project for handy homeowners, but surface prep (grinding, profiling, repairing cracks) still needs to be done correctly for the overlay to bond.
Base, subgrade, and drainage
A properly prepared subgrade is the difference between a concrete patio that lasts 30 years and one that cracks in five. Excavate to undisturbed soil, remove all organic material, and compact fill to ≥95% Standard Proctor density. A 4-inch gravel base (compacted) under the slab is standard for residential patios in most regions and improves drainage beneath the slab. The finished slab surface must slope a minimum of 1/8 to 1/4 inch per foot (roughly 1–2%) away from the house, which is both a best practice and a requirement under the International Residential Code. Underslab drainage is especially important in clay soils where water does not infiltrate quickly.
Sealing, repair, and refinishing
Plain poured concrete benefits from a penetrating sealer applied after 28 days of curing. Reapply every 3–5 years. Stamped concrete needs a film-forming acrylic sealer that must be maintained every 2–3 years because UV and foot traffic degrade it. To reseal stamped concrete: strip the old sealer with a chemical stripper, clean the surface, let it dry fully, and apply two thin coats of the appropriate solvent- or water-based acrylic. If hairline cracks appear, fill them with a flexible polyurethane caulk before resealing. Deeper structural cracks need epoxy injection. Color fading in stamped work can be addressed with a fresh integral-color sealer, but perfect color matching to the original is rarely achievable.
Life expectancy and warranty notes
A well-built poured concrete patio on a proper base lasts 25–40 years. Stamped concrete is generally 20–35 years because the sealer-dependent surface degrades faster than plain concrete. Concrete contractors typically offer a 1-year warranty on labor and workmanship; some extend to 5 years for structural defects. Almost no contractor warranties against cracking, which is universally acknowledged as an inherent property of concrete. Get any warranty terms in writing and confirm what specifically is and is not covered.
Common mistakes
- Pouring concrete over uncompacted or organic-laden fill: differential settlement is the leading cause of patio cracking.
- Skipping control joints or spacing them too far apart (more than 10 feet in either direction for a 4-inch slab), which forces the slab to crack randomly rather than at planned locations.
- Applying a film sealer to uncured concrete (before 28 days): the residual moisture causes the sealer to cloud and delaminate.
- Using de-icing salts on a concrete patio in winter: this accelerates surface scaling and spalling, especially in the first two winters.
- Choosing a stamped pattern without factoring in how it will look when the sealer wears unevenly in high-traffic areas.
Concrete pavers: the reliable workhorse
Pros and cons
- Pros: Individual units flex with minor ground movement without cracking the whole surface; easy to repair (lift and reset individual pavers without patching or color-matching); long lifespan of 30+ years; no sealing required (though sealing with polymeric sand jointing is an option); highly DIY-accessible compared to other hard surfaces; wide range of shapes, colors, and patterns available; permeable options available for stormwater management.
- Cons: Higher initial cost than plain poured concrete ($10–$30/sq ft vs. $4–$10/sq ft); joint sand can wash out over time if polymeric sand is not used or is not maintained; weeds can grow in joints without polymeric sand or proper maintenance; appearance is not as seamless or high-end as large-format porcelain or flagstone; not ideal for areas with high point loads (like heavy planters) without a strengthened base.
Slip resistance and durability
Concrete pavers have naturally textured surfaces that provide good wet-foot traction for most residential applications. The textured or tumbled finishes popular in residential work are more slip-resistant than smooth-faced pavers. In terms of durability, ICPI (Interlocking Concrete Pavement Institute) research shows properly installed unit pavers commonly last 30+ years in pedestrian and residential applications. Unlike poured concrete, pavers do not crack under minor ground movement: the flexible sand-set system distributes stress across the joints rather than concentrating it at a single fracture point.
Suitable climates
Concrete pavers are well suited to all climate zones, including severe freeze-thaw regions. The individual unit construction allows the system to move with frost heave without catastrophic failure. Permeable interlocking concrete pavers (PICP), which use open joints filled with stone chips rather than sand, are an EPA-recognized green-infrastructure solution for sites where stormwater management is a concern. If your municipality has impervious-surface limits or you want to reduce runoff, PICP is worth exploring seriously.
Cost and installation difficulty
Installed costs range from about $10–$30 per sq ft depending on paver type, pattern, and region. Basic rectangular concrete pavers at the low end run $10–$15 installed; premium shaped or tumbled pavers in complex patterns can reach $25–$30 installed. This is a genuine DIY-accessible project for a motivated homeowner: the main requirements are physical labor for excavation and base compaction, a plate compactor (rentable for $60–$80 per day), and careful attention to base depth and slope. ICPI technical standards specify a minimum 4-inch compacted aggregate base for pedestrian patios, topped by approximately 1 inch of bedding sand, with ≥95% Standard Proctor compaction on the subgrade and ≥98% on the aggregate base.
Bedding and drainage system
The standard ICPI sand-set system works as follows: excavate to undisturbed soil at the right depth to achieve your target finished grade; compact the subgrade; install a 4-inch layer of dense-graded crushed aggregate (not round river gravel, which cannot compact properly) in lifts and compact each lift; screed a 1-inch layer of coarse concrete sand (not fine play sand); lay pavers in your chosen pattern; compact with a plate compactor over the pavers; sweep polymeric sand into joints; compact again; mist with water to activate the polymeric binder. Edge restraints (plastic or aluminum paver edging spiked into the base) must go in before the sand screed to prevent lateral spreading at perimeters. Slope the entire system at 1–2% away from the building, established at the base-grading stage.
Maintenance and repair
Concrete pavers are the easiest hard patio surface to maintain over a 30-year period. Annual maintenance consists of: inspecting edge restraints for any movement or damaged spikes; sweeping or blowing off debris; checking that joint sand is still full (top up with polymeric sand if needed). Every 5–7 years, spot-level any pavers that have settled or heaved by lifting them, adjusting the sand bed, and resetting. Stained pavers can be pressure-washed (3,000 PSI maximum to avoid damaging the paver face). Optional sealing with a paver sealer locks in joint sand and enhances color but is not structurally necessary.
Life expectancy and warranty notes
Concrete paver manufacturers commonly offer 30–50 year product warranties against structural defects (freeze-thaw damage, color fade to a defined threshold). ICPI data supports 30+ year performance for properly installed residential patio systems. Keep documentation of your paver product line and color because most reputable manufacturers maintain consistent production for 15–20 years, making repairs and additions easier to match.
Concrete pavers vs. poured concrete and stamped finishes: when to choose which
Choose poured or stamped concrete when: budget is the primary driver, you want a seamless monolithic look, you are willing to commit to periodic sealer maintenance, and you are hiring a contractor (not DIYing). Choose concrete pavers when: long-term repairability matters, you are in a severe freeze-thaw climate, you want a DIY-accessible project, or your site has drainage or stormwater management requirements that benefit from permeable paving. Stamped concrete delivers a similar decorative impact to pavers at lower upfront cost, but it cannot be locally repaired when it cracks (and it will crack eventually), and color-matching a stamped repair is genuinely difficult. Pavers always win on long-term repairability and maintenance flexibility. In my experience, homeowners who prioritize low lifetime cost over low first cost nearly always end up preferring pavers.
Common mistakes
- Using the wrong base material: round river gravel or pea gravel cannot compact properly and will cause settling. Use angular dense-graded crushed stone.
- Skipping or under-spiking edge restraints: within one or two winters, the perimeter pavers will fan out and create a gap at the edge.
- Setting bedding sand too thick (more than 1 inch): excess sand compresses unevenly and causes pavers to rock.
- Using regular mason's sand for joints instead of polymeric sand: regular sand washes out and encourages weed growth.
- Not compacting after joint sand application: uncompacted joints allow sand to settle and pavers to shift more than necessary.
A few words on gravel, brick, and natural stone
Gravel and decomposed granite deserve more credit than they get. At $1–$4 per sq ft installed, they are the only patio surface that actively improves drainage, requires no specialized labor, and can be installed over a weekend. The trade-offs are real: loose gravel is uncomfortable for furniture legs without a stabilizer product, it migrates into the lawn, and it is not suitable for households with young children who will scatter it everywhere. Pea gravel and crushed granite are the most popular choices; both work well with landscape edging and a weed-barrier fabric layer underneath.
Brick is a classic material that suits traditional and cottage-style architecture naturally. Quality face brick or specifically made paving brick (thicker, denser, and rated for freeze-thaw exposure) is genuinely durable: 25–40 years in a sand-set system, similar to concrete pavers. Avoid using standard wall brick as paving; it is not made to handle surface abrasion and freeze-thaw cycling in a horizontal position. Installed costs typically run $10–$20 per sq ft. The base and installation method for brick is essentially identical to concrete pavers (ICPI-style compacted aggregate base with bedding sand), and the same mistakes apply.
Natural stone beyond flagstone covers a wide range: granite cobbles, slate tiles, quartzite slabs, travertine, and limestone. As the Natural Stone Institute technical guidance emphasizes, the critical variable is the stone's absorption rate: dense granite and quartzite behave almost like porcelain (very low absorption, excellent freeze-thaw resistance), while travertine and many limestones have high porosity and need sealing and careful climate matching. Always ask your stone supplier for an absorption figure, not just a visual description, before committing to a cold-climate installation.
Sourcing your material: questions to ask before you buy
Whether you are buying from a local stone yard, tile showroom, or big-box home center, there are five questions worth asking every supplier before you commit: (1) What is the water absorption rate of this material, and is it appropriate for my climate? (2) For tile, what is the wet DCOF rating and does the manufacturer rate it for exterior/wet use? (3) What base system and installation method does the manufacturer recommend, and do you carry the compatible setting materials? (4) Is this product line expected to remain available for 5+ years so I can get matching pieces for repairs or additions? (5) What does the manufacturer's warranty cover, and what installation method is required to maintain warranty validity?
For natural stone, buy from a supplier who can tell you the quarry or region of origin and the stone species. Generic labels like 'slate' or 'flagstone' cover a huge range of actual rock types with very different performance characteristics. A good stone yard will have cut samples and can show you absorption test results or refer you to the Natural Stone Institute's technical data. For concrete pavers, ICPI-member manufacturers are the most reliable source for technical documentation and product consistency.
Final thoughts on making your choice
If I had to give one piece of advice to summarize everything in this guide: do not let first cost alone drive your decision. The cheapest surface to install is rarely the cheapest surface to own over 20 years when you factor in maintenance, repairs, and potential replacement. A poured concrete slab at $6 per sq ft is a good value if you maintain the sealer; if you neglect it for 10 years in a freeze climate, you are looking at a spalling, stained surface that costs nearly as much to repair as to replace. Concrete pavers cost more upfront but require almost no structural maintenance and can be repaired indefinitely. Porcelain tile costs the most to install correctly but nearly nothing to maintain for decades.
Use this guide alongside the more detailed material-specific pages on this site for flagstone installation methods, porcelain tile laying techniques, concrete paver base systems, and maintenance how-tos. For a quick answer to what is the best surface for a patio, see our concise comparison page that summarizes pros, cons, and cost for each option. For a quick comparison across climates, costs, and maintenance, see our guide to the best material for outdoor patio flooring. If cost is your starting filter, the detailed breakdown of cheap patio flooring options will help you understand exactly what you get at each price point without glossing over the trade-offs. See our guide to the best ideas for patio flooring for illustrated options and design inspiration. For a quick comparison of top options, see our best patio flooring guide. The right patio floor is the one that fits your actual climate, your realistic maintenance commitment, your budget, and how you genuinely use the space. Get those four variables right and almost any material on this list will serve you well for decades.
FAQ
What are the top patio floor materials and the short pros/cons of each?
Common patio materials: 1) Flagstone/natural bluestone — Pros: premium natural look, good slip resistance when textured, long lifespan; Cons: costly, irregular pieces need more cutting/weed control, variable freeze‑thaw performance by stone type. 2) Porcelain tile (outdoor/porcelain pavers) — Pros: very low water absorption (≤0.5%), wide color/finish choices, stain‑resistant; Cons: needs proper substrate/movement joints, some finishes can be slippery when wet if not textured. 3) Poured concrete (plain/stamped/colored) — Pros: economical for large areas, highly customizable (stamping, staining), durable when reinforced; Cons: can crack, refinishing can be costly, slab needs correct slope/drainage. 4) Concrete pavers/interlocking pavers — Pros: modular, repairable (replace single unit), wide styles; Cons: requires compacted base and edge restraint, joints can allow weeds/sand loss if not sealed. 5) Gravel/aggregate — Pros: lowest material cost, excellent drainage and permeable, easy to DIY; Cons: less comfortable for barefoot, shifts/needs periodic regrading and weed control. 6) Brick — Pros: classic look, good non‑slip texture, long service life if set on proper base; Cons: can spall in freeze climates if poor quality, mortar joints require maintenance. 7) Natural stone varieties (granite, slate, limestone, sandstone) — Pros/cons vary: granite and slate often low absorption and durable; limestone and some sandstones can be porous and require sealing. 8) Composite/wood alternatives (composite decking, Ipe, cedar) — Pros: warm look, comfortable, many low‑maintenance composites; Cons: wood needs periodic refinishing, composites can be pricier and have heat retention in full sun.
Which material is best for wet or freeze‑thaw climates?
Best choices for wet/freeze climates: porcelain pavers (properly rated and installed per TCNA/ANSI), dense natural stones with low absorption (granite, some slates), and properly installed interlocking concrete pavers on a compacted/engineered base. Avoid highly porous stones (some sandstones, limestones) unless tested and sealed. Key: select materials with low water absorption, allow for good drainage/slope, and follow freeze‑thaw installation guidance (air gap where needed, proper bedding/backing, movement joints).
Which patio floor material is best for hot, sunny climates?
In hot sunny climates prioritize materials that stay cooler and resist UV: light‑colored porcelain pavers, natural stone with light tones, and some lighter concrete finishes (broom finish or light stain). Avoid dark composite/plastic surfaces that absorb heat and can be uncomfortable barefoot. For wood decking alternatives, choose heat‑resistant composites and ventilated installation to reduce heat buildup.
What's the best budget/cheap patio flooring option?
Lowest cost options: gravel/aggregate ($1–$4/sq ft installed) and plain poured concrete ($4–$16/sq ft depending on finish). Basic concrete patios or compacted gravel are the most affordable for materials and labor. Expect tradeoffs in finish and long‑term maintenance (gravel needs regrading/weed control; plain concrete may crack and be less decorative).
Which patio material offers the best non‑slip performance?
Best non‑slip options: textured natural stone (rough cleft slate, certain flagstones), broom‑finished concrete, textured or high‑traction porcelain with a tested wet DCOF ≥0.42 (and exterior classification), and brick with textured faces. Remember slip resistance depends on contaminants, slope, footwear and maintenance — DCOF is one lab data point; request wet DCOF data and ask suppliers about exterior, wet‑slip classifications for tiles.
Which patio material is lowest maintenance?
Lowest maintenance: porcelain pavers (stain‑resistant, easy to clean), quality composite decking (no sanding/painting), and properly installed concrete pavers (sweep and occasional joint sand/topseal). Gravel requires periodic regrading and weed control; natural stone and brick may need resealing or repointing depending on climate and exposure.