
Concrete pavers and porcelain tile are the best all-around patio flooring ideas for most homeowners: pavers handle freeze-thaw cycles well, cost $10–$25 per sq ft installed, and are easy to repair; frost-rated porcelain delivers a clean look with a 25–50+ year lifespan for a similar price. Flagstone and natural stone are the premium pick for character and longevity. Gravel and poured concrete are the budget anchors at $6–$14 per sq ft. The right choice depends on your climate, how the space will be used, your maintenance tolerance, and what you want to spend, and this guide walks through all of it. For a quick recommendation on what is the best surface for a patio, see this concise guide. For a quick comparison and my top pick for the best patio surface, see the linked guide. For a quick comparison of options and recommendations, see our guide to the best patio flooring.
Best Ideas for Patio Flooring: Materials, Costs & Tips

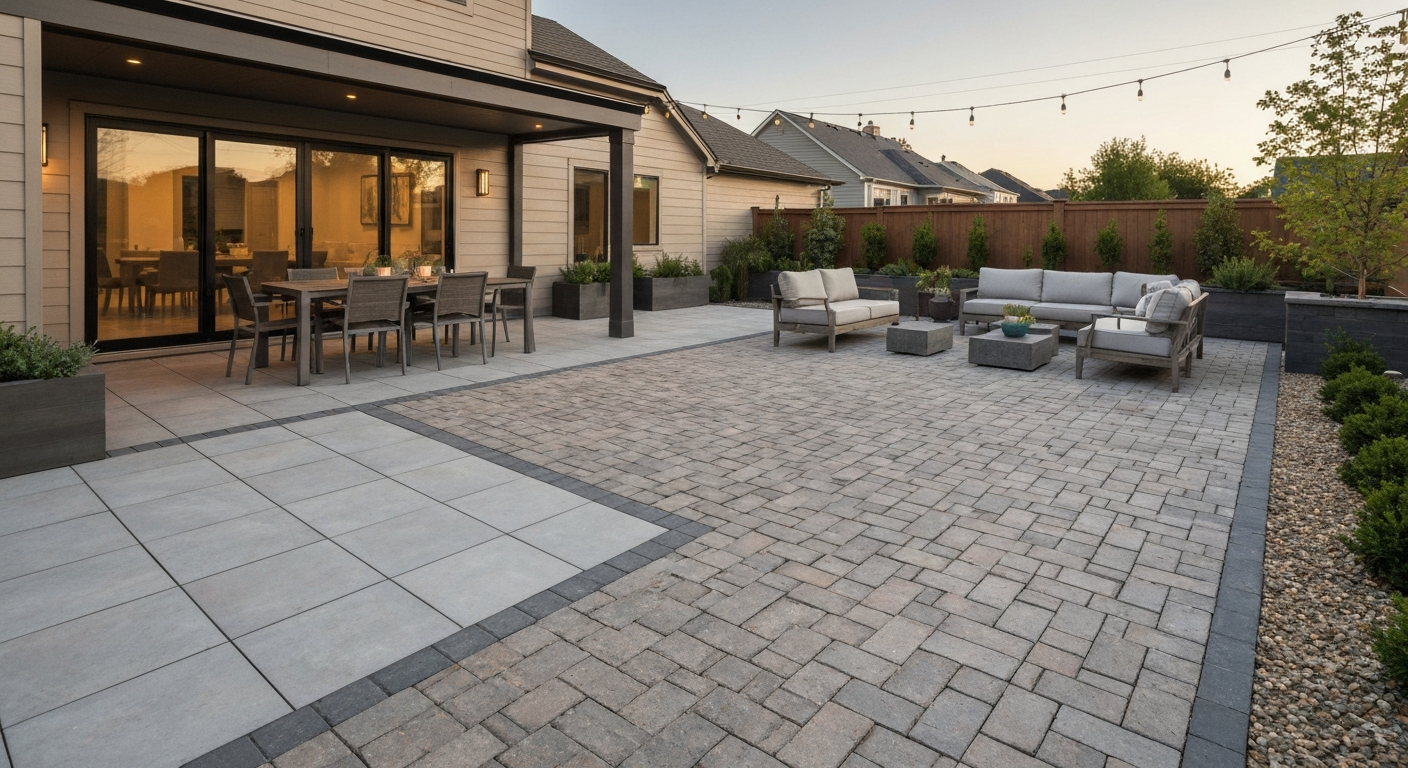
Quick picks: best patio flooring by use-case and budget
If you just want a fast answer before digging into the detail, here are the materials I reach for first depending on the situation. These recommendations hold up across the bulk of real-world homeowner projects, though the decision flow section below will help you refine the call for your specific conditions.
| Use-case / Priority | Top pick | Runner-up | Why |
|---|---|---|---|
| Tightest budget (under $10/sq ft) | Gravel (decomposed granite or pea gravel) | Poured concrete DIY | Lowest material + labor cost; gravel especially forgiving of DIY errors |
| Budget-conscious but durable | Poured concrete slab | Concrete pavers | Concrete at $6–$12 installed is hard to beat for a permanent, low-maintenance surface |
| Best value for long-term use | Interlocking concrete pavers | Brick | Repairable unit-by-unit, excellent lifespan, wide style range |
| High-traffic entertaining area | Porcelain tile (frost-rated) | Concrete pavers | Hard-wearing, easy to clean, resistant to staining from food and drink |
| Cold/freeze-thaw climate | Concrete pavers or dense natural stone (granite, quartzite) | Frost-rated porcelain | Low-absorption materials survive repeated freeze-thaw without spalling |
| Hot/dry or desert climate | Flagstone or concrete pavers | Stamped concrete | Both handle heat and sun without degrading; flagstone stays cooler underfoot |
| Coastal/salt-spray environment | Dense granite or quartzite flags | Concrete pavers (quality mix) | Resist chloride-driven spalling; avoid porous limestone or travertine here |
| Poolside / wet area | Frost-rated textured porcelain | Brushed/tumbled concrete pavers | High slip resistance when wet; porcelain resists chlorine and algae |
| Accessibility / ADA-friendly | Broom-finished concrete or flat concrete pavers | Porcelain (smooth-set, level) | Flush, level surface; minimal joints; consistent friction |
| Best curb appeal / premium look | Natural stone (flagstone, bluestone, granite) | Stamped concrete | Natural variation and character that composites and concrete can't fully replicate |
| Eco-conscious / permeable | Gravel or permeable concrete pavers | Flagstone with open joints | Allows stormwater infiltration; reduces runoff |
How to choose the right patio surface for your situation
Before you fall for a material on Instagram, run through four filters: budget, climate, how the patio will actually be used, and the look you're going for. Most mistakes I see happen when someone skips the climate and use questions and jumps straight to aesthetics. A travertine patio looks gorgeous in a showroom photo, and then it spalls apart after two winters in Michigan.
Budget
Set your all-in budget before pricing materials. Installed cost is always higher than material-only cost because you have base prep, compaction, drainage, labor, and waste factor (typically 10–15% extra material for cuts and breakage). A 300 sq ft patio at a mid-range $15/sq ft installed comes to $4,500 before any contingency. Add 10–15% for unexpected site issues like soft spots, tree roots, or poor drainage, and budget $5,000–$5,200 as a working number.
Climate
Freeze-thaw cycles are the biggest material killer in cold climates. Water gets into pores, freezes, expands, and cracks the surface. Dense, low-absorption materials survive this; porous ones don't. In hot, dry climates the concern flips to UV and thermal expansion. Coastal areas add salt spray, which accelerates corrosion in reinforcement and causes crystallization damage in porous stone. Know your climate category before picking a material.
Use and traffic
A quiet reading corner used twice a week has very different demands from a patio that hosts summer cookouts for 30 people every weekend. Think about furniture weight, foot traffic, pet claws, grills, and whether kids will be running across it wet. Heavy-use patios need harder, more abrasion-resistant surfaces and better slip resistance. If you have elderly family members or anyone with mobility challenges, level, jointless or fine-jointed surfaces without lips or height differences matter a lot.
Aesthetics
Style matters, but treat it as the final filter, not the first. Once you've narrowed down by budget and climate, you'll likely have two or three viable materials to choose from. Within that shortlist, look at colors, patterns, joint styles, and edge treatments to match your home's architecture. A modern home usually pairs well with large-format porcelain or clean concrete pavers; a cottage-style house suits brick or irregular flagstone; a Mediterranean courtyard calls for natural stone or terracotta-look tile.
Quick-check checklist before you commit
- Do you get hard freezes (below 20°F / -7°C) in winter? If yes, rule out porous natural stone, non-frost-rated tile, and any material with water absorption above ~0.5%.
- Is the area near a pool, sprinkler zone, or in a wet climate? Prioritize slip resistance — look for DCOF above 0.42 (wet) and textured or brushed surfaces.
- Will heavy furniture, planters, or a hot tub sit on it? Dense concrete, pavers set on a proper compacted base, and thick natural stone handle point loads; gravel and thin stamped concrete do not.
- Does stormwater runoff concern you or is the site in a drainage-restricted municipality? Consider permeable pavers or gravel.
- Is this a DIY project or are you hiring out? If DIY, interlocking pavers, gravel, and dry-laid flagstone are most forgiving; poured concrete and mortar-set tile are not.
- How much time can you commit to maintenance? Gravel needs annual replenishment; poured concrete needs sealing every 2–3 years; pavers just need a seasonal sweep and joint sand check.
- Are there accessibility requirements? Need a flat, level, stable surface with consistent friction — choose concrete, level-set pavers, or flush porcelain.
- What's your target lifespan? Gravel needs replacement in 10–15 years without care; dense stone and quality pavers can last 50 years with modest attention.
Side-by-side material comparison
The table below covers the eight core patio flooring materials. Climate suitability uses a simple three-tier scale: Good (suitable with standard installation), Caution (works but requires additional steps), and Limited (not recommended without significant mitigation). Slip resistance ratings are based on standard surface finishes, textured or coated versions of each material can improve the rating.
| Material | Installed cost ($/sq ft) | Climate suitability (freeze-thaw / hot-dry / coastal) | Slip resistance (standard finish) | Durability | Maintenance | Typical lifespan |
|---|---|---|---|---|---|---|
| Concrete pavers (interlocking) | $10–$25 | Good / Good / Caution (avoid deicing salts) | Good (tumbled/textured); Fair (smooth) | Very high — unit replacement possible | Low: sweep, rinse, recheck joint sand annually; reseal every 3–5 yrs (optional) | 25–50+ years |
| Porcelain tile (frost-rated) | $15–$20 | Good if frost-rated / Good / Good | Good–Excellent (textured/R11+); Fair (polished) | Very high — prone to edge chip if unsupported | Low: mop, mild detergent; grout/joint check annually | 25–50+ years |
| Flagstone (natural) | $15–$40+ | Caution (dense stone only) / Good / Caution | Fair–Good (rough-split face) | High for dense stone; moderate for soft stone | Moderate: reseal porous stone every 2–3 yrs; reset shifted flags | 20–50 years (dense); 10–20 years (soft) |
| Natural stone (granite, bluestone, quartzite) | $15–$30 | Good (dense, low-absorption) / Good / Good | Good (flamed/brushed); Fair (polished) | Excellent — among the most durable options | Moderate: annual clean, seal porous varieties, reset if settling | 50+ years |
| Brick | $12–$20 | Caution (quality SW/SX brick needed) / Good / Caution | Good (tumbled/wire-cut); Fair (smooth) | High — depends heavily on brick grade | Low-moderate: annual sweep, weed joint sand, reseal if desired | 25–50 years |
| Gravel / decomposed granite | $6–$14 | Good / Good / Good | Poor–Fair (loose surface) | Low — shifts, displaces, compacts unevenly over time | Moderate: annual rake, edge containment check, top-up every 1–3 yrs | 10–15 years (before major refresh) |
| Poured/stamped concrete | $6–$30 (plain–stamped) | Caution (control joints critical; deicing salt damage) / Good / Caution | Fair (broom finish Good; stamped varies) | Moderate — cracks over time without proper joint spacing | Moderate: reseal film sealers every 2–3 yrs; repair cracks promptly | 20–40 years (varies by quality) |
| Composites / wood-plastic (WPC) | $15–$30 | Good (quality boards) / Good / Good | Good (grooved deck profile) | Moderate-High — fades, can swell if low quality | Low: rinse seasonally, mild soap annually; check fasteners | 15–30 years |
A few things worth calling out from the table: stamped concrete costs overlap with natural stone at the high end, but natural stone will outlast it and is easier to repair, if you're spending $22–$30/sq ft, stone or quality pavers are usually the better long-term investment. Gravel is the only material with genuinely poor slip resistance; it's not suitable for the primary path from a house to a pool or for any ADA application. Composites are the right call when you need the warmth of a wood look without wood's rot and splinter issues, particularly in humid coastal environments.
Cheapest patio flooring options and when they make sense
The three cheapest installed patio surfaces are gravel ($6–$14/sq ft), poured concrete ($6–$17/sq ft), and concrete pavers at the lower end of the range ($10–$15/sq ft if you DIY the install). If you want a quick rundown of what is the cheapest patio flooring, see the section titled 'what is the cheapest patio flooring' for a simple comparison and cost ranges. Each makes sense in specific situations, and each has real trade-offs you should understand before committing.
Gravel and decomposed granite
Gravel is the cheapest patio flooring you can install, and it works well as a low-use garden or informal entertaining space. Decomposed granite compacts better than loose pea gravel and gives a more stable walking surface. The downsides are real though: it migrates out of the area over time, it's a poor surface for furniture legs (which sink in), it's not safe around pool edges, and it needs annual top-ups. It also isn't accessible for wheelchairs or walkers. Use it for secondary spaces, fire pit areas away from the main patio, or as a transitional surface between pavers. Lay a proper edging border, metal, plastic, or stone, to contain it, and consider a weed membrane underneath, though note that membranes don't eliminate weeds over time.
Poured concrete
A broom-finished poured concrete slab is genuinely affordable and very durable when done right. The catch is that 'done right' matters a lot here, a poorly prepared base or missing control joints will produce a cracked slab within a few years, and concrete cracks are a permanent eyesore that are expensive to properly repair. The minimum slab thickness for a residential patio is 4 inches; don't let any contractor pour less than this. Control joints should be cut at intervals no more than 2–3 times the slab thickness in feet (so roughly 8–10 ft apart for a 4-inch slab). If you're in a freeze-thaw climate, never use deicing salts on concrete, they accelerate surface scaling dramatically.
Concrete pavers at the entry-level price
Standard 4x8 or 6x6 concrete pavers at big-box prices can get you into the $10–$13/sq ft range if you're doing the install yourself. This is the sweet spot for budget-conscious homeowners who still want a long-lasting, repairable surface. The material cost is modest; you're paying for base aggregate (about 4 inches of compacted gravel), bedding sand, edge restraints, and your own labor. The trade-off versus poured concrete is that pavers take longer to install yourself and need periodic joint-sand maintenance, but they never crack in one irreparable sheet, and you can pull up and relay any settled section.
Where you can and can't cut costs
- Cut: material grade for low-traffic secondary spaces (standard concrete pavers vs. premium natural stone).
- Cut: decorative upgrades like stamping, color staining, or exotic stone varieties.
- Cut: professional labor if you have the time and are choosing a DIY-appropriate material (pavers, gravel, dry-laid flagstone).
- Don't cut: base preparation depth and compaction — this is the single most common cause of patio failure.
- Don't cut: drainage slope — always slope 1/4 inch per foot (~2%) away from the house.
- Don't cut: edge restraints for pavers — uncontained pavers spread outward and the whole installation degrades.
- Don't cut: frost-rated tile or dense stone in freeze-thaw climates — budget tile will fail within 2–3 winters.
Non-slip safety: finishes, coatings, and drainage
Slip resistance is one of those things homeowners don't think about until someone falls. For a quick checklist of top choices, see our guide to the best non slip patio flooring. For any patio surface that gets wet, rain, irrigation, poolside splash, morning dew, the wet coefficient of friction matters. ANSI A137.1 sets a minimum wet DCOF (Dynamic Coefficient of Friction) of 0.42 for tile in wet-walked interior spaces; for exterior use and especially poolside areas, experienced designers specify higher thresholds. Textured and anti-slip coated surfaces can push wet COF into the 0.66–0.85 range compared to smooth wet stone or concrete at 0.3–0.6.
Finish and texture choices by material
- Concrete: broom finish gives the best slip resistance for poured slabs — the brush creates fine ridges that break the water film underfoot. Smooth trowel finishes are slippery when wet.
- Porcelain tile: look for R10 or R11 slip resistance ratings (German DIN 51130 ramp test), or specify tiles with a minimum wet DCOF of 0.42 per ANSI A137.1 — 0.50+ is better for outdoor use. Matte and textured surfaces outperform polished ones significantly.
- Natural stone: specify 'flamed,' 'bush-hammered,' or 'sandblasted' finishes rather than 'honed' or 'polished' for outdoor use. A flamed granite has about twice the traction of a polished one.
- Pavers and brick: tumbled or wire-cut surfaces are safer than smooth-faced ones. Exposed aggregate concrete pavers offer excellent wet traction.
- Stamped concrete: the pattern texture helps somewhat, but stamped concrete finished with a high-gloss sealer can become dangerously slippery when wet. Always use a sealer with a non-slip additive (aluminum oxide grit is common) or use a matte finish sealer.
- Composites/WPC: grooved deck profiles provide decent slip resistance. Check the manufacturer's wet slip rating before buying, as it varies between products.
- Gravel: technically has friction but is unstable underfoot for running or for mobility-impaired users — don't rely on it as a primary safe walking surface.
Anti-slip coatings and additives
If you've already installed a surface and it's slippery, there are aftermarket solutions. Anti-slip tape works for targeted areas like steps. Etching compounds open up the surface of smooth concrete or tile slightly to increase texture. Non-slip sealer additives (aluminum oxide, rubber grit, or silica sand broadcast into wet sealer) are the most durable option for large areas, they cure into the sealer film and last several years before reapplication. For natural stone, a penetrating impregnator sealer doesn't change the surface texture but helps prevent algae and mold growth, which is a common secondary cause of slipping.
Drainage and ADA considerations
Good drainage is as important as surface texture. Standing water on any surface increases slip risk and accelerates material degradation. The industry standard is a minimum slope of 1/4 inch per foot away from the house, approximately 2%. On a 12-foot-deep patio, that means the outer edge is 3 inches lower than the house edge. For ADA compliance (useful whether or not you have legal obligations, it's just smart design for aging-in-place), the key criteria are: surface slopes no greater than 1:48 (~2%) in any direction, a firm and stable surface (no gravel, no loose material), and joints no wider than 1/2 inch with no vertical lips greater than 1/4 inch between pavers or tiles. Lighting at ground level along paths and step edges is the lowest-cost safety upgrade that's often overlooked.
Installation approaches: DIY vs. hiring a professional
The most expensive patio mistake I've seen is spending money on premium materials installed on a bad base. The base is unglamorous, it's buried, and it's where the project succeeds or fails. Everything visible, the tile, the stone, the pavers, is just the topping. If the base settles unevenly or drains poorly, the top surface will crack, shift, or flood within a few years no matter how much you paid for it.
Base preparation: what every patio needs
- Excavate to the correct depth. For interlocking pavers on a standard pedestrian patio: excavate 8–9 inches below the desired finish grade (4 inches compacted aggregate base + 1 inch bedding sand + paver thickness of 2.375–3.125 inches). For a 4-inch poured concrete slab: excavate 4 inches below finish grade minimum (more if sub-base soil is soft).
- Check and improve the subgrade. Compact the exposed native soil to at least 95% Standard Proctor density (ASTM D698). Soft, organic, or clay-heavy soil may require removal and replacement with clean fill, or the addition of a geotextile fabric.
- Install the aggregate base. Use crushed angular stone (not round river gravel) — typically a 3/4-inch crusher run or road base. Angular stone compacts and interlocks; round stone doesn't. Compact in lifts of 3–4 inches maximum.
- Set slope from day one. Establish a 1/4-inch-per-foot slope away from the house at the base layer. It's nearly impossible to correct drainage slope after installation.
- For pavers: screed 1 inch of coarse bedding sand over the compacted base. Don't compact the sand after screeding — just keep it level and undisturbed until the pavers are placed.
- Install edge restraints before laying pavers. Plastic, aluminum, or concrete edge restraints pinned into the base prevent lateral spread. This is non-negotiable for interlocking systems.
- For poured concrete: place expansion/isolation joint material against the house and any fixed structures. Set control joints at maximum 8–10-foot spacing in both directions for a 4-inch slab.
- For mortar-set tile and stone: use a 3/4-inch minimum mortar bed on a properly prepared concrete sub-slab, or use a suitable outdoor adhesive rated for exterior use over the substrate type.
DIY-friendly pathways
Interlocking concrete pavers, dry-laid flagstone, brick-on-sand, and gravel are all legitimate DIY projects if you're physically capable of the work and have access to a plate compactor (rental is fine, roughly $80–$120/day). The process is methodical rather than highly skilled. Key tools you need: plate compactor, hand tamper for edges, string lines and stakes, screed rails (conduit works), rubber mallet, paver saw or angle grinder with diamond blade, and a level. Budget two full weekends for a 300-square-foot paver patio if you haven't done it before.
When to hire a professional
- Poured concrete: mixing, timing, and finishing a slab requires experience. One bad batch or too-slow a finishing pass produces a permanently flawed surface. This is the job to hire out.
- Mortar-set tile or stone: getting a flat, lippage-free mortar-set installation over a large area is a skilled tile-setting trade. DIY attempts often produce uneven surfaces and premature bond failure.
- Stamped concrete: the stamping must happen within a narrow window of concrete cure time. Mistakes can't be undone. Always hire a concrete contractor with specific stamping experience.
- Sites with complex drainage problems: if water currently flows toward the house, pools in the yard, or the site has a significant grade change, a landscape contractor or civil engineer should assess drainage before any patio work begins.
- Large-format natural stone (slabs over 24 inches): heavy, expensive, and unforgiving of level errors. Professional setters have the suction cups, lifting equipment, and experience to lay them correctly.
Common installation pitfalls to avoid
- Using round river gravel as base material — it won't compact properly and creates an unstable base that shifts under load.
- Skipping edge restraints on a paver installation — the perimeter pavers will spread laterally within 1–2 seasons.
- Laying pavers or tile in cold weather without accounting for frost — compacted sand in a frozen state will settle when it thaws, causing uneven surfaces.
- Not accounting for waste — order 10% extra for standard installations, 15% for diagonal patterns or irregular cuts.
- Installing over existing concrete with cracks — cracks in a substrate reflect through into new tile or stone (called 'reflective cracking'). Either repair the concrete properly or use a crack-isolation membrane.
- Forgetting to check slope with a level during installation — catching a slope problem on row three is easy; catching it on row 30 is a major redo.
Maintenance schedules and repair tips
Most patio surfaces need less maintenance than people fear, but the maintenance they do need has to happen on schedule. Deferred maintenance, especially in freeze-thaw climates, compounds quickly. A crack ignored through one winter often doubles in the next.
Routine cleaning by material
- Pavers and brick: sweep debris off seasonally. Light rinse with a garden hose works for general dirt. An annual gentle power wash (1,200–1,500 PSI, fan tip, not direct jet) removes embedded grime without dislodging joint sand. Avoid harsh acid cleaners unless specifically dealing with efflorescence.
- Porcelain tile: a mild pH-neutral detergent and mop handles most cleaning. Grout joints can darken with algae in shaded or damp areas — a diluted oxygen bleach solution (not chlorine bleach) applied with a stiff brush and rinsed off handles this well.
- Natural stone: use only stone-safe cleaners (pH-neutral). Acidic cleaners (vinegar, citrus) etch limestone, travertine, and marble permanently. For granite and quartzite, acidic cleaners are less damaging but still best avoided.
- Poured/stamped concrete: rinse seasonally, power wash as needed. If a film sealer is used, avoid excessive scrubbing that can dull the surface.
- Gravel: rake annually to redistribute displaced material and remove leaf debris. Top up with fresh material every 1–3 years depending on displacement rate.
- Composites/WPC: rinse with a garden hose seasonally; a mild soap scrub annually handles most staining. Check fastener and clip corrosion annually.
Sealing schedule
Sealing is optional for many materials but extends appearance life and eases cleaning. For film sealers on stamped or poured concrete, plan to reapply every 2–3 years, these sealers wear off the surface and can peel if left too long. ICPI Tech Spec 5, Cleaning, Sealing and Joint Sand Stabilization (maintenance guidance) recommends a typical homeowner schedule: gravel, annual raking and top‑up; pavers/stone, seasonal sweep and rinse, light power‑wash annually, reseal every 3–5 years and check/replenish joint sand as needed; concrete (poured/stamped), seasonal cleaning and reseal every 2–3 years for film sealers (penetrating sealers longer) and prompt crack repair ICPI Tech Spec 5 — Cleaning, Sealing and Joint Sand Stabilization (maintenance guidance). Penetrating (impregnating) sealers for natural stone and porous pavers last 3–5 years before reapplication is worthwhile. Porcelain tile with tight grout joints generally doesn't need sealing, but unglazed porcelain and cement-based grout can benefit from an impregnating sealer. Joint-stabilizing sealers for paver sand (they harden the sand and resist weeds and ant activity) are worth using on exposed patios and typically last 3–5 years.
Freeze-thaw care
Never use rock salt (sodium chloride) or standard deicing salts on concrete, brick, or natural stone. Chloride salts accelerate surface scaling on concrete dramatically, even on sealed surfaces, and cause salt crystallization damage in porous stone. Natural Stone care and climate considerations (industry guidance) notes that porous stones (limestone, travertine, some sandstones) are vulnerable to salt crystallization and freeze–thaw unless thicker, frost‑rated flags and penetrating sealers are used, while dense granites and quartzite are the most freeze‑thaw and abrasion resistant. Use sand for traction, or calcium magnesium acetate (CMA) if you need a chemical deicer, it's much less aggressive on masonry. Remove standing water and ice carefully with a plastic shovel rather than a metal blade, which can chip pavers and tile. In fall, check that all drainage channels are clear before the freeze season begins.
Repairing pavers and tiles
- Sunken or raised pavers: mark the affected area, pull up the pavers by inserting two flat screwdrivers or paver pullers into adjacent joints. Remove the bedding sand, re-screed fresh coarse sand to the correct level, and relay the pavers. Compact lightly and refill joints.
- Cracked concrete slab: clean out the crack completely (compressed air or vacuum), remove any loose material, and fill with a flexible polyurethane or epoxy crack filler rated for exterior concrete. Wide cracks (over 1/2 inch) or structural cracks (vertical displacement) need a contractor assessment.
- Chipped porcelain tile: a single cracked tile in a mortar-set installation can be replaced. Score around the grout joint with a grout saw, break the tile carefully (safety glasses required), chip out the mortar bed, and set the replacement tile with fresh adhesive mortar. Allow to cure fully before grouting.
- Efflorescence on pavers or concrete: the white haze is mineral salts migrating to the surface. It's mostly cosmetic. Use a diluted muriatic acid wash (1 part acid to 10–12 parts water, applied carefully with PPE) or a commercial efflorescence remover, then rinse thoroughly and allow to dry before any sealing.
- Weed growth in paver joints: pull weeds, apply a patio-safe herbicide if needed, allow to dry, then brush in polymeric joint sand and compact lightly. Sealing over the new sand helps inhibit regrowth.
Realistic cost ranges and budget planning
The cost figures below are installed costs in the U.S. as of 2026, meaning they include both material and typical labor for a standard residential patio installation. Complex sites, premium materials, intricate patterns, and challenging access all push toward the high end. These numbers are a planning baseline, not a quote.
| Material | Low ($/sq ft) | Typical ($/sq ft) | High ($/sq ft) | 300 sq ft typical total | Lifecycle cost note |
|---|---|---|---|---|---|
| Gravel / decomposed granite | $6 | $10 | $14 | ~$3,000 | Lowest upfront; highest long-term per use-year due to frequent replenishment |
| Poured concrete (plain) | $6 | $12 | $17 | ~$3,600 | Low upfront; repair costs accumulate if cracking occurs |
| Stamped concrete | $15 | $22 | $30 | ~$6,600 | Mid upfront; sealing every 2–3 yrs adds $200–$500 each cycle |
| Concrete pavers | $10 | $17 | $25 | ~$5,100 | Good lifecycle value; individual paver replacement keeps long-term cost low |
| Brick | $12 | $16 | $20 | ~$4,800 | Durable; avoid deicing salts to prevent early spalling |
| Porcelain tile (frost-rated) | $15 | $18 | $20 | ~$5,400 | High initial; very low maintenance cost over 25–50 yr life |
| Natural stone / flagstone | $15 | $22 | $40+ | ~$6,600 | High upfront but excellent 50+ yr lifespan offsets cost per year |
| Composites / WPC | $15 | $22 | $30 | ~$6,600 | Mid upfront; board replacement and fastener checks every 10–15 yrs |
Sample budget breakdown for a 300 sq ft paver patio (DIY)
- Concrete pavers (standard 4x8, including 10% waste): ~$600–$900
- Crushed aggregate base material (4 inches, ~4 tons): ~$200–$320
- Bedding sand (1 inch, ~1 ton): ~$40–$60
- Polymeric joint sand: ~$80–$120
- Edge restraints (perimeter): ~$80–$120
- Plate compactor rental (2 days): ~$160–$240
- Miscellaneous (stakes, string, sand screed rails): ~$30–$50
- Total DIY estimate: ~$1,190–$1,810 (vs. $3,000–$5,100 hired out)
Contingency and lifecycle planning
Always budget a 10–15% contingency on any patio project for unexpected site conditions, soft spots in the subgrade, additional drainage work, or extra material needed for cuts. On a $5,000 project that's $500–$750 set aside, which is usually enough to cover most surprises. For lifecycle planning, the true cost of a patio is the installed cost divided by the years of useful service, plus annual maintenance costs. A $6,600 natural stone patio lasting 50 years with $100/year in maintenance averages $232/year. A $3,600 concrete slab that needs a $1,500 repair at year 10 and replacement at year 25 averages considerably more. Dense, well-installed materials at a higher upfront cost almost always win on a lifecycle basis.
Sourcing, buying, and sustainable material choices
Order samples before committing to any material. Colors look different in the sun than under store lighting, and texture variations in natural stone can be significant. Most suppliers will send or loan samples for a small deposit. For porcelain tile, always get a sample batch from the actual production lot you'll order from, color can vary between manufacturing runs. When ordering, buy all material from the same production lot (same 'shade' or 'caliber' code on the box) to ensure consistency.
Quantity calculations
Measure your patio area (length x width for rectangles; break irregular shapes into rectangles and add them up). Add 10% for waste on straight-cut rectangular installations, 15% for diagonal or herringbone patterns, and up to 20% for irregular-shaped flagstone projects. For natural stone, weight also matters for delivery, a 300 sq ft order of 1.5-inch flagstone can weigh 4–5 tons. Confirm delivery access and where material can be offloaded.
Sustainable and low-impact options
- Permeable pavers: allow stormwater infiltration, reducing runoff and easing local drainage. Some municipalities offer stormwater fee credits for permeable installations.
- Reclaimed brick and salvaged stone: lower embodied carbon than new manufactured material; check condition carefully for structural integrity and frost resistance ratings.
- Locally quarried stone: reduces transport emissions and often supports regional suppliers. Ask your stone yard where material is sourced.
- Composite/WPC with recycled content: many composite deck and patio products include 50–100% recycled plastics and wood fiber. Check the manufacturer's recycled content disclosure.
- Gravel with no-mortar or no-concrete base: minimal embodied carbon and fully reversible — if you remove the patio, the materials can be reused.
Warranties to look for
Concrete paver manufacturers typically offer lifetime limited warranties against structural failure. Porcelain tile warranties vary widely, 10–25 years for frost resistance is standard from quality manufacturers. Composite decking products commonly carry 25-year or lifetime fade/stain warranties, though reading the fine print matters (many require specific cleaning products to maintain warranty coverage). Natural stone has no manufacturing warranty since it's a natural product, but buying from a reputable supplier with quality documentation (absorption rates, freeze-thaw test results) is your protection.
Design, pattern, and finish choices
Once you've picked a material, the design decisions significantly affect both the final look and the installation cost. Complex patterns cost more in labor and waste, but they can transform a plain material into something distinctive.
Pattern options and their impact
- Running bond (brick-style offset): classic, easy to install, minimal waste — good for DIY paver or brick projects.
- Herringbone (45° or 90°): excellent structural interlock for driveways and heavy-use areas; 45° herringbone increases waste to ~15%; requires more cuts at edges.
- Ashlar / mixed-size pattern: uses two or three paver sizes in a modular pattern; looks upscale, moderate difficulty.
- Random / irregular flagstone: requires more skill to fit stones with consistent joint width (1–2 inches is typical); dry-laid is DIY-possible, mortar-set is better hired out.
- Large-format slab layout: minimal joints, contemporary look; requires very precise base prep and level setting; best for professional installation.
Joint and grout options
For paver joints, standard polymeric sand is the go-to, it hardens with water, resists weeds and ants, and stays in place. Wider joints (over 1/2 inch) in flagstone are sometimes filled with pea gravel, ground cover plants, or fine decomposed granite for a naturalistic look, though planted joints need weeding. For tiled surfaces, sanded grout suits joints over 1/8 inch; non-sanded for narrower joints. Epoxy grout is the most stain-resistant option for heavily used entertaining surfaces but is harder to apply and more expensive.
Edging and border treatments
A clean edge defines the patio and contains the surface material. Options include: a soldier course of pavers or brick set perpendicular to the field (classic and structural); a contrasting stone or porcelain border strip (design accent); concrete curbing (permanent and very clean); or metal landscape edging (low profile, good for informal settings). The edge treatment also affects perceived size, a darker border color around a lighter field patio makes the space look larger and more intentional.
Final material recommendation
For most homeowners, interlocking concrete pavers are the best all-around patio flooring choice: they handle most climates, are repairable, last 25–50+ years, work for DIY installation, and come in enough styles to suit almost any home. For a deeper comparison of options and pros and cons, see our guide to the best material for outdoor patio flooring. If budget is the primary constraint, a plain broom-finished concrete slab is honest, durable, and affordable, just do it right with proper thickness and joints. If you're willing to spend more for a premium result, natural stone or frost-rated large-format porcelain delivers looks and longevity that justify the higher upfront cost over a 30–50 year horizon. The material you don't see, the base, the compaction, the drainage slope, matters more than the material you do.
FAQ
Which patio flooring is best for my priorities (budget, climate, heavy use, safety, accessibility)?
Match priorities to materials: - Budget/temporary: Gravel or compacted decomposed granite (cheap, DIY, good drainage; requires topping-up and not ideal for wheelchairs). - Low maintenance, durable, freeze/thaw climates: Porcelain pavers (frost-rated) or dense natural stone (granite, quartzite); higher cost but long life. - Classic look, moderate budget: Concrete pavers or brick (good durability, repairable). - Smooth, continuous surface, wheelchair‑friendly: Poured concrete (smooth finish) or large-format porcelain set on mortar/adhesive with tight joints. - Natural/organic aesthetic: Flagstone or natural irregular stone (requires skillful base prep; may be uneven). - Wood look, low splinters: Composite decking or WPC pavers (resists rot; can be slippery when wet unless textured). - Pool/outdoor wet areas needing non-slip: Textured porcelain, honed natural stone with high pendulum rating, or concrete with broom finish. If safety/accessibility is priority choose surfaces with higher wet COF and install shallow joints, small gaps, and ramps rather than steps.
What are the realistic installed cost ranges per sq ft for common patio materials (U.S.)?
Typical installed cost ranges (low–typical–high per sq ft): - Gravel: $6–$10–$14 - Poured concrete: $6–$12–$17 - Concrete pavers: $10–$17–$25 - Brick pavers: $12–$16–$20 - Porcelain/outdoor tile: $15–$18–$20 - Natural stone/flagstone: $15–$22–$30 (can exceed $40 for mortar-set, irregular patterns) - Stamped concrete: $15–$22–$30 Notes: Ranges include typical labor; complexity, site prep, drainage needs and local labor rates can raise costs. (Sources: Fixr, HomeAdvisor.)
Side‑by‑side: How do flagstone, porcelain tile, brick, gravel, concrete/pavers, natural stone, composites/wood‑plastic and stamped concrete compare (pros, cons, climate suitability, slip resistance, durability, maintenance, lifespan)?
Flagstone: Pros—attractive natural look, durable; cons—uneven surface, higher installation labor; climate—use dense frost‑resistant stone in cold areas; slip—variable (cleft/rough better); durability—very good if dense rock; maintenance—occasional re-leveling, reseal every 3–5 years; lifespan—25–50+ yrs. Porcelain tile/pavers: Pros—wide colors, frost-rated options, low water absorption; cons—needs proper installation/adhesive, can chip at edges; climate—good for freeze/thaw if rated; slip—choose textured DCOF-rated tiles for wet areas; maintenance—sweep/rinse, grout care, reseal grout as needed; lifespan—25–50+ yrs. Brick pavers: Pros—classic, durable, easy to replace; cons—can effloresce or spall in harsh salts, limited colors; climate—works broadly but pick frost‑resistant brick; slip—textured surface moderate; maintenance—re-level, replenish joint sand, seal optional; lifespan—25–50 yrs. Gravel (loose): Pros—cheapest, excellent drainage, DIY-friendly; cons—not wheelchair-friendly, weeds, migrates; climate—works everywhere but can wash in heavy rains; slip—loose underfoot; maintenance—annual raking/top-up; lifespan—indefinite with maintenance. Concrete/poured: Pros—versatile, smooth accessible surface, lowest mid-range cost; cons—cracking potential, needs control joints and proper mix; climate—works if cured and jointed properly; slip—broom or textured finish for traction; maintenance—cleaning, crack repairs, reseal every 2–3 years for film sealers; lifespan—25–50 yrs with repairs. Concrete pavers (interlocking): Pros—modular, easy repair, good drainage with joints; cons—needs proper base and edge restraints; climate—good across climates with correct base; slip—textured faces have moderate grip; maintenance—sweep, joint sand top-ups, reseal optional; lifespan—25–50+ yrs. Composites/WPC: Pros—wood look, rot-resistant, comfortable; cons—can fade, may be slippery when wet, cost varies; climate—resists moisture but high heat can warp lower‑quality products; slip—choose textured boards; maintenance—cleaning, avoid harsh chemicals; lifespan—10–25 yrs depending on quality. Stamped concrete: Pros—patterned, continuous surface, lower cost than high‑end stone; cons—can crack, looks less authentic, requires resealing; climate—needs proper joints/mixture for freeze areas; slip—can be slippery unless textured or sealed with anti‑slip additive; maintenance—cleaning, reseal every 2–3 years; lifespan—20–40 yrs.
What are the cheapest patio flooring options and their trade‑offs?
Cheapest options: - Gravel/decomposed granite: lowest installed cost, excellent drainage, very DIY-friendly. Trade-offs: uneven, not wheelchair-friendly, weeds and migration, frequent topping up. - Basic poured concrete (smooth broom finish): low‑cost, accessible surface. Trade-offs: visible cracks without joints, less decorative without stamping/finishes. - Concrete pavers on compacted base (DIY-friendly kits): low-to-mid cost and repairable. Trade-offs: requires proper base compaction and edge restraint or settling occurs. For the cheapest durable option choose concrete with simple finishing or compacted gravel with edge restraints; budget a little extra for drainage and weed barrier to reduce long‑term maintenance.
How do I make a patio non‑slip and safe (finishes, textures, coatings)?
Non‑slip strategies: - Choose inherently textured materials (broom finish concrete, textured porcelain, cleft flagstone, tumbled pavers). - For smooth surfaces add anti‑slip coatings or grit additives to sealers (use manufacturer‑approved products). - Use narrow grout/joint widths and polymeric sand to reduce algae growth. - Ensure slope/drainage to avoid standing water (minimum 1/4 in per ft away from structures). - Add slip‑resistant mats at transitions and thresholds. - For pool areas use materials with published wet‑surface friction tests (DCOF or pendulum values) and aim for higher wet COF (consult manufacturer data). - Maintain surfaces: remove algae/moss and clean oils promptly—slip hazards grow with contamination.
Should I DIY or hire a professional? What are the key installation steps and common pitfalls?
DIY vs Professional: - DIY suitable for: gravel, simple poured concrete (small slabs with good forms), basic paver patios if you have tools and can follow base compaction guidance. - Hire a pro for: large-format porcelain/mortar-set tile, complex flagstone patterns, stamped concrete, poor drainage sites, or when local code/foundation proximity requires engineered work. Key installation steps: 1) Evaluate site and get permits if required. 2) Achieve subgrade stability and positive drainage (slope ≥1/4 in/ft away from house). 3) Install appropriate compacted base (pavers/ICPI: 4 in compacted aggregate for pedestrian patios; deeper for heavier loads). 4) Bedding layer (screeded sand for pavers), mortar/adhesive for tiles, or pour concrete with control joints (4 in slab min). 5) Edge restraint for pavers/gravel. 6) Joint filling (polymeric sand for pavers) and compaction. 7) Seal where appropriate. Common pitfalls: inadequate base compaction, poor drainage/slope, missing edge restraint, using non‑frost‑rated materials in freeze zones, incorrect adhesive/setting methods for porcelain, insufficient joint control leading to cracking.