Gravel is the cheapest patio flooring you can install, typically running $1 to $4 per square foot all-in, including materials and basic labor. But whether it stays the cheapest option for your situation depends on your climate, how you use the space, and what base prep your soil actually needs. A $2-per-square-foot gravel patio on clay soil with no drainage plan can cost you more in fixes over three years than a properly installed concrete slab would have. So the real answer to "cheapest" is: gravel wins on upfront cost, concrete overlay wins on long-term value for most climates, and basic pavers split the difference when you need something that looks decent and lasts.
What Is the Cheapest Patio Flooring Total Cost Guide

Nolan Ellison
8 Jun 2026
What 'cheapest' actually means for patio flooring
Upfront cost and total cost are two completely different numbers, and most patio budget mistakes come from confusing them. A bag of pea gravel is cheap. A bag of pea gravel plus proper edging, landscape fabric, compacted base gravel, and drainage grading is still relatively cheap, but the gap between the two is where projects go sideways. The same logic applies to every material on this list.
When you're comparing patio flooring costs, you need to account for four things: material cost per square foot, base prep and drainage (grading, compaction, fabric, aggregate), installation labor (yours or a pro's), and ongoing maintenance over a realistic lifespan. A material that costs $3 per square foot but needs resealing every two years and re-grading every five years is not cheaper than a material that costs $8 per square foot and needs nothing for a decade. Run the math over ten years, not just the first afternoon.
Also worth knowing: per-square-foot costs are less meaningful on small patios. Contractors often charge minimum mobilization fees, so a 100-square-foot patio might cost the same total as a 200-square-foot one in labor. That makes DIY much more attractive for smaller spaces, which we'll cover below.
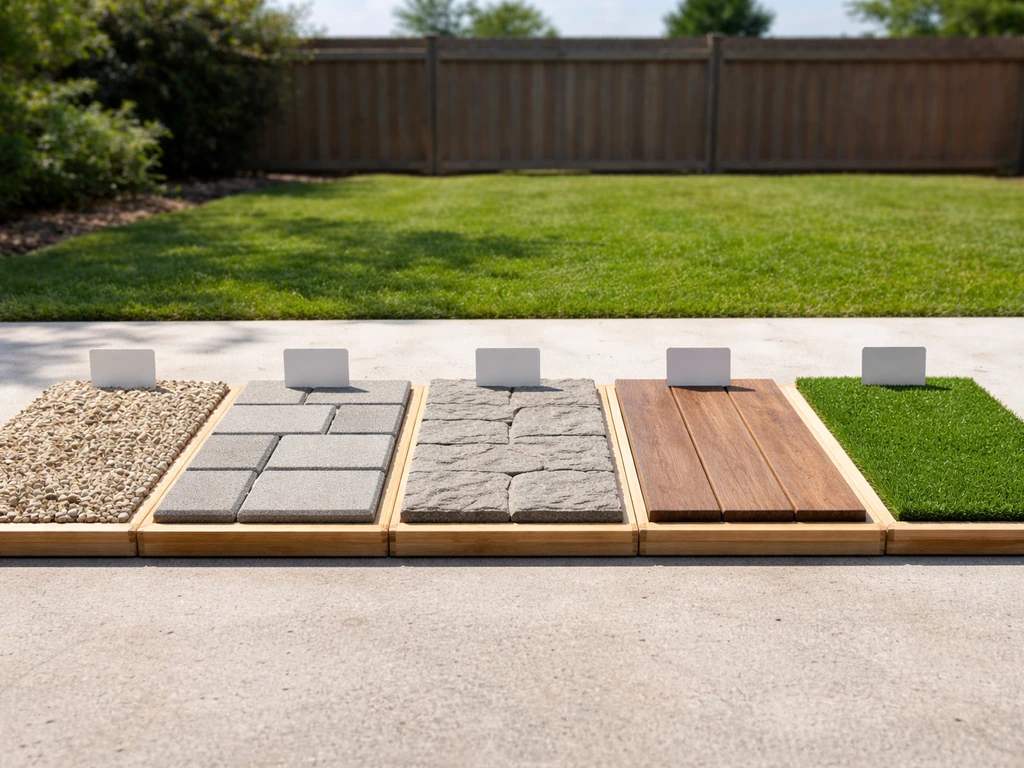
The lowest-cost patio flooring options, ranked
Here's a straight comparison of the main budget-friendly patio materials. These numbers reflect typical installed costs in the US as of mid-2026, including a basic base layer but not extraordinary drainage work or sloped site prep.
| Material | Typical Installed Cost (per sq ft) | DIY Feasibility | Expected Lifespan | Maintenance Level |
|---|---|---|---|---|
| Gravel / pea gravel | $1 – $4 | Very easy | Indefinite (with upkeep) | Medium (raking, topping up, weeds) |
| Basic concrete patio | $5 – $10 | Moderate | 25 – 40 years | Low (seal every 5–10 years) |
| Concrete overlay / resurfacing | $3 – $7 (over existing slab) | Moderate | 10 – 20 years | Low–medium |
| Standard pavers / brick | $10 – $17 | Moderate–hard | 25 – 50 years | Low–medium (sand, sealing) |
| Pressure-treated wood deck | $25 – $50 | Hard | 15 – 25 years | Medium–high (staining, boards) |
| Artificial turf | $4 – $9 (pro install) | Moderate | 15 – 20 years | Low–medium (brushing, infill) |
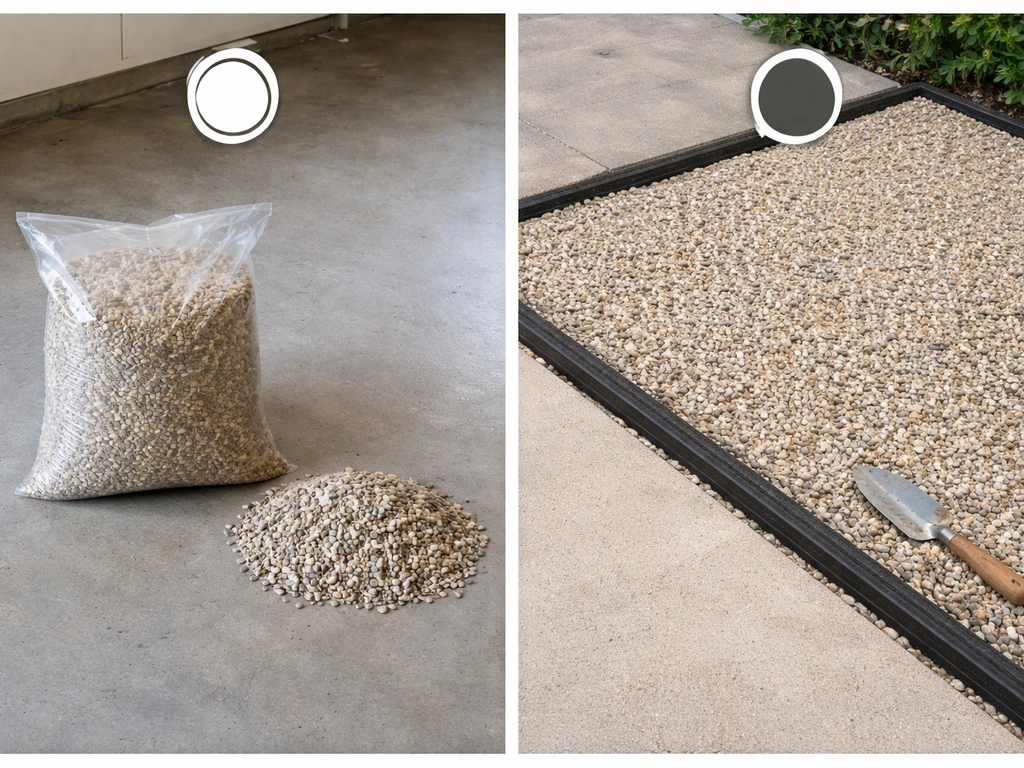
Gravel: the clear upfront winner
At $1 to $4 per square foot installed, gravel is the least expensive patio surface by a wide margin. Pea gravel and crushed stone are the most common choices. Pea gravel is rounder and more comfortable underfoot; crushed stone compacts better and stays put more reliably. For a proper installation, you need at least 4 inches of compacted base gravel, a layer of landscape fabric underneath (stapled every 2 feet along the edges per University of Maine Extension guidance), and some form of edging to keep the material from migrating. Skip any of those steps and you'll be spending money on top-ups and weed control every season.
Concrete: the best long-term value
A basic poured concrete patio runs $5 to $10 per square foot installed, which looks more expensive than gravel until you factor in that it lasts 25 to 40 years with minimal upkeep. Penetrating sealers last 5 to 10 years before needing reapplication, which is a pretty light maintenance commitment. If you already have an old concrete slab, a concrete overlay or resurfacer brings that cost down to $3 to $7 per square foot and gives you a fresh surface without full demolition. Concrete does need control joints to manage cracking, especially in freeze/thaw climates, so this is one area where cutting corners on installation really does come back to bite you.
Pavers and brick: good value, higher upfront
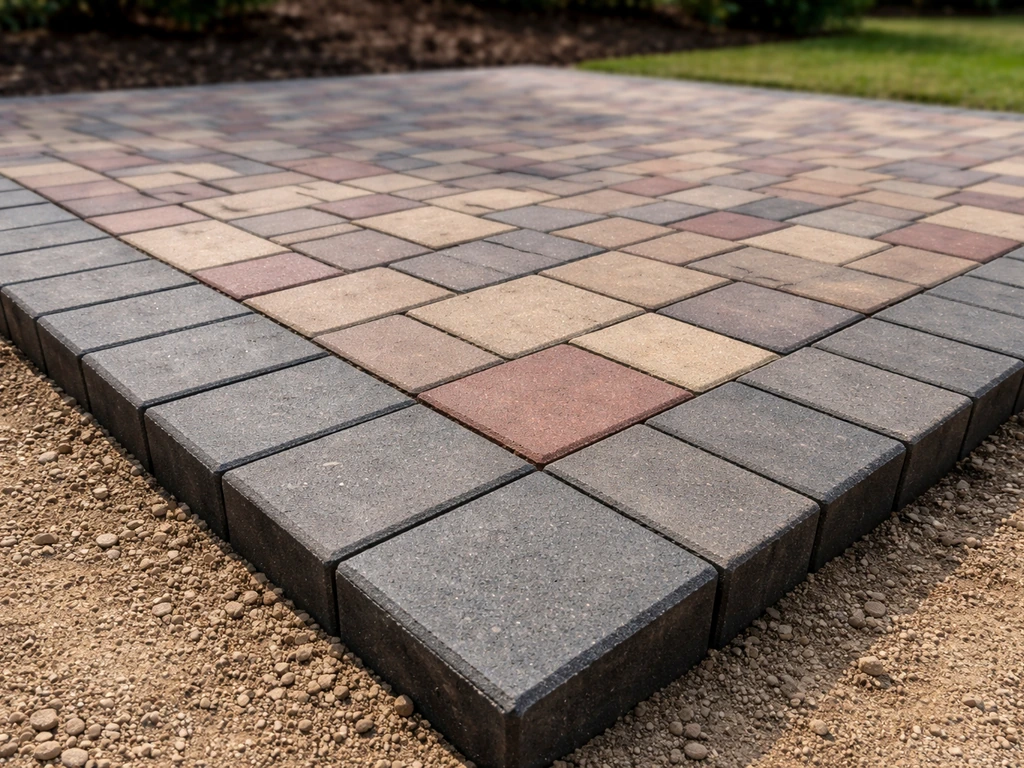
Installed paver patios run $10 to $17 per square foot on average, which is clearly more expensive upfront. But pavers last 25 to 50 years, individual units can be replaced if one cracks, and they handle freeze/thaw cycles better than a monolithic slab when properly installed with the right base and drainage. Labor represents a big share of that cost: professional installation alone runs $4 to $11 per square foot, so DIY paver installation is one of the better ways to close the gap with concrete. If pavers or flagstone are on your radar as a step up from pure budget territory, the material comparisons on best patio flooring and best material for outdoor patio flooring go deeper on those trade-offs. For a deeper breakdown of the top-performing options, see our guide to the best patio floor material best patio flooring. If you're still comparing materials, these best ideas for patio flooring can help you choose what will last in your specific conditions. If you want the best material for outdoor patio flooring overall, start by matching your climate and drainage needs to the surface type best patio flooring.
Pressure-treated wood: usually the most expensive 'budget' option
Pressure-treated decking runs $25 to $50 per square foot installed because it requires structural framing, footings, and skilled labor. It's not really a patio flooring option in the same sense as the others, it's a deck, and it's listed here only because people sometimes compare it to ground-level patio surfaces. For pure cost purposes, it's rarely the cheapest choice. Where it wins is on sloped sites where building a ground-level patio would require significant grading.
Artificial turf: worth a look for specific situations
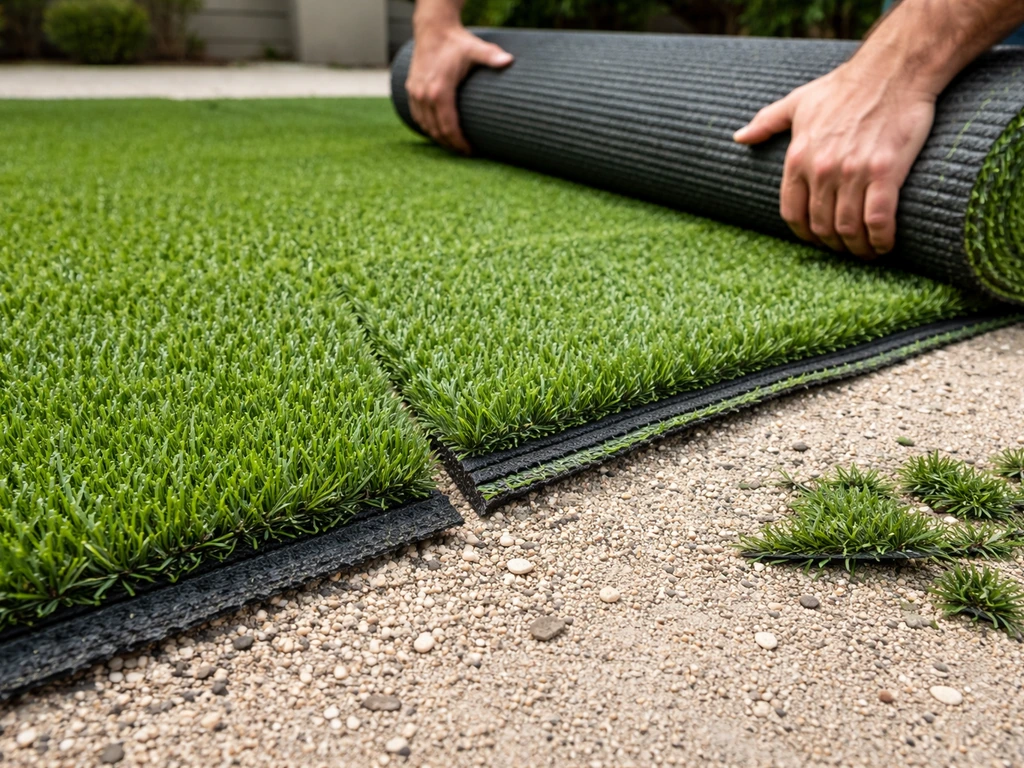
Professional artificial turf installation runs $4 to $9 per square foot, which puts it in a middle range. It lasts 15 to 20 years with proper care (routine brushing, debris removal, occasional infill top-ups, and seam inspections). It's not great for areas with furniture because legs sink in and leave permanent impressions. It also gets very hot in direct sun in warm climates. Where it genuinely makes sense is for pet-friendly spaces or play areas where comfort underfoot matters and you don't want the maintenance of real grass or the hardness of pavers.
How your climate and use case change the math
The cheapest material on paper can become the most expensive material in practice if it's wrong for your conditions. Here's how to think through the main variables.
Freeze/thaw climates
If you're in a region with hard freezes, gravel is still a solid choice because it's flexible and won't heave or crack. Concrete is fine too, but only with proper control joints and a well-drained base. Monolithic concrete slabs without control joints in freeze/thaw zones crack, sometimes badly, within a few winters. Pavers actually handle freeze/thaw very well when the base is done right: a geotextile fabric under the aggregate base prevents clay and silt from migrating up into the base layer and undermining it, which is exactly the failure mode that causes paver surfaces to become uneven and wobbly. A saturated bedding layer under pavers is the freeze/thaw enemy, so drainage design is non-negotiable in cold climates.
Wet areas and poor drainage
Gravel is actually one of the best choices for areas with drainage problems because water passes straight through it. A 2% crossfall minimum is the standard recommendation for any hard patio surface to move water away from the house. For concrete and pavers in wet areas, that drainage slope is critical: standing water under a paver installation leads to efflorescence, bedding layer erosion, and pump failure under load. If your yard is low-lying or you're on clay, budget for a proper gravel drainage layer and potentially a French drain, because skipping that step will cost more later.
Hot, dry climates
Concrete and pavers both work well in dry climates and need less frequent sealing when UV and moisture exposure are lower. Artificial turf can get uncomfortably hot in direct sun in these areas (surface temperatures can reach 150°F or more in peak summer), which is worth knowing before you commit. Gravel also stays cooler than solid surfaces and can be a practical, low-cost option in arid regions where weed pressure is lower and the surface stays stable without much maintenance.
Pets, kids, and heavy foot traffic
Gravel can be uncomfortable on bare feet and paws, and small stones track into the house constantly. If the patio is a heavily used living space, a hard surface like concrete or pavers is more practical even if it costs more. Artificial turf is comfortable for pets and kids but requires more maintenance in pet-heavy situations (urine drainage, odor, regular hosing). For shaded areas, watch for moss and mold on wood and concrete: shaded concrete benefits from an anti-slip textured finish, which is also discussed on the best non slip patio flooring topic if that's a priority for your space.
DIY vs. hiring a pro: where the real savings are
Labor represents roughly 50% of total installed patio cost across most materials. That means a competent DIYer can cut their total project cost nearly in half, and for materials like gravel and basic pavers, the installation isn't technically difficult. Here's how to think about which path makes sense.
- Gravel: DIY is easy and highly recommended. Rent a compactor for the base layer, buy landscape fabric and edging at any home center, and you can do a 200-square-foot patio in a weekend. This is the single best DIY value on the list.
- Basic concrete: Pouring concrete is manageable for a DIYer on small patios, but it requires renting a mixer or ordering ready-mix, getting the grade right, and placing control joints correctly. Mistakes are hard to fix. Consider hiring for anything over 200 square feet.
- Concrete overlay: Reasonably DIY-friendly if you have an existing slab in decent shape. Surface prep (cleaning, etching, patching) is the critical step.
- Pavers: DIY is feasible and the savings are significant given that pro labor runs $4 to $11 per square foot. The base prep (compaction, sand bedding kept to 1 inch thick per ICPI guidance, polymeric sand joints) takes patience but not special skills. Rent a plate compactor and a wet saw for cuts.
- Pressure-treated decking: Requires structural knowledge, proper footing depths, and local permits in most jurisdictions. Hire a pro or only tackle this if you have real carpentry experience.
- Artificial turf: The prep work (excavation, compacted base, drainage layer) is the hard part. The turf installation itself is manageable DIY if the base is solid. Pro installs are worth it if your site has drainage complexity.
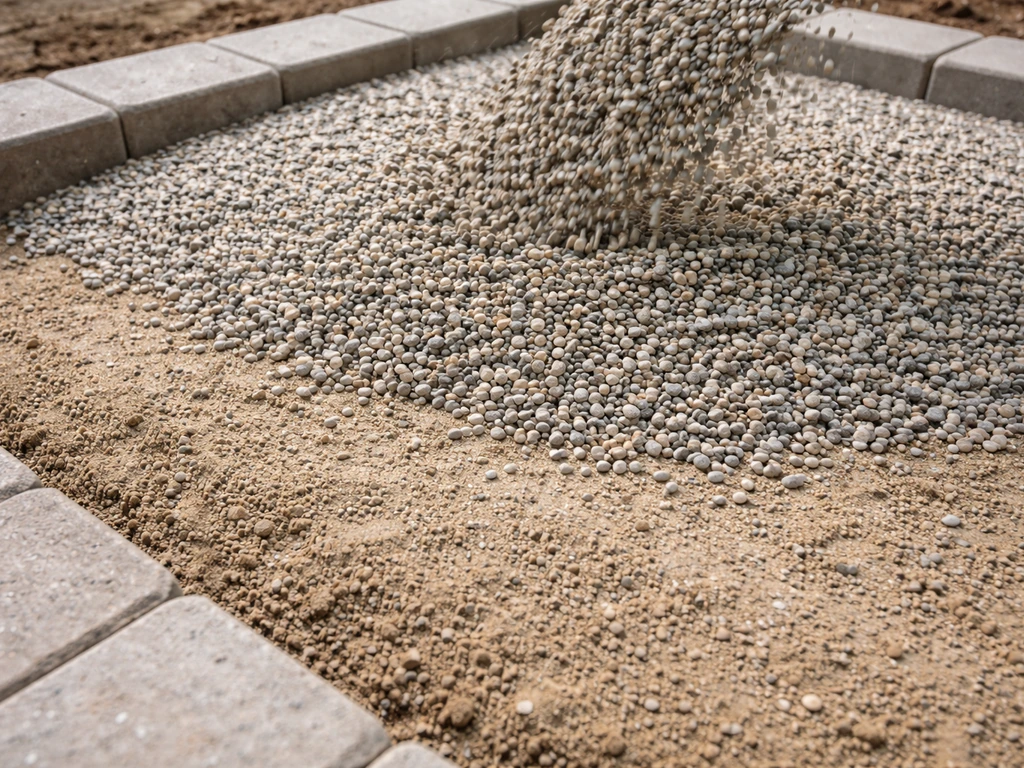
Base prep, drainage, and leveling: where cheap projects fail
I've seen more failed cheap patios caused by bad base prep than by any material choice. A $500 gravel patio that sinks, grows weeds through it, and develops ruts within two years isn't a gravel problem, it's a base problem. This is the section most budget-focused guides skip, and it's the most important one.
Every patio surface needs a stable, well-drained subgrade. For soft, clay-heavy, or regularly saturated soils, a geotextile fabric between the subgrade and the aggregate base layer is the right call. Without it, fine clay particles migrate up into your gravel base over time, reducing drainage and causing settlement. This is especially critical in freeze/thaw climates and anywhere the soil stays wet for extended periods.
The base aggregate layer needs to be properly compacted, not just dumped and raked. Renting a plate compactor for a day (typically $50 to $100) is one of the best investments in a patio project. Compaction testing on larger projects is recommended to verify you've actually achieved the required density before laying anything on top.
Drainage slope matters regardless of material. A minimum 2% crossfall (roughly 1/4 inch per foot) away from your house is the standard target. If your yard slopes toward the house, you may need a channel drain or French drain as part of the project, which adds cost but prevents far more expensive problems with foundation moisture and waterlogged surfaces. For pavers specifically, weep holes every 10 feet along any retaining edge help move water out of the system.
For gravel specifically: 4 inches of compacted base gravel under your decorative stone layer, plus landscape fabric underneath (stapled every 2 feet along edges), gives you a surface that drains well and resists weed pressure. Skip the compaction and the fabric and you're re-doing the project in three years.
Sealing, maintenance, and making your cheap patio last
The cheapest patio over ten years is one that you maintain correctly. Each material has a specific maintenance rhythm, and knowing it upfront helps you decide if the upkeep suits your lifestyle.
| Material | Key Maintenance Tasks | Typical Maintenance Frequency | DIY Friendly? |
|---|---|---|---|
| Gravel | Rake to redistribute, top up stone, spot-treat weeds, check edging | Annually, or as needed | Yes |
| Concrete | Reseal with penetrating sealer | Every 5–10 years (penetrating); every 2–3 years (acrylic/surface) | Yes |
| Pavers/brick | Re-sand joints with polymeric sand, reseal, reset any sunken units | Every 3–5 years | Yes |
| Pressure-treated wood | Clean, sand, re-stain or re-seal annually or biannually | Every 1–2 years | Yes, but time-intensive |
| Artificial turf | Brush against grain, remove debris, top up infill, inspect seams | Monthly brushing, annual infill check | Yes |
For concrete, penetrating sealers are worth the slightly higher upfront cost because they chemically bond into the concrete rather than sitting as a film on top. They last 5 to 10 years in most conditions, versus surface sealers like acrylics that need attention every 2 to 3 years. On stamped or colored concrete, the sealing schedule tightens up because the finish layer is more vulnerable to UV and foot traffic.
For pavers, polymeric sand in the joints is a better long-term choice than regular jointing sand because it resists washout and ant activity. After sweeping it in, tamp it down with a rubber mallet or plate compactor and mist with water to activate the binding agent. Skipping the compaction step is a common mistake that leads to joint failure and erosion within a season or two.
Gravel patios have an underrated maintenance task: re-grading. Over time, foot traffic redistributes stone toward the edges and creates low spots. A quick rake every spring keeps the surface level and looking good. If you have pets, plan for more frequent raking and possibly a monthly debris pass.
How to pick the cheapest option for your actual patio
There's no single right answer for everyone, but this decision framework gets you to the right choice for your situation in a few steps.
- Measure your patio area accurately. Length times width in square feet. For irregular shapes, break it into rectangles and add them up. This number drives every cost estimate.
- Identify your constraints first. Do you have drainage issues or clay soil? Are you in a freeze/thaw zone? Is this a high-traffic living space or a low-use utility area? Do you have pets or kids who'll use it barefoot? Each of these factors can rule out or rule in a material.
- Check whether you have an existing slab. If you do, a concrete overlay or resurfacer is almost always the cheapest path to a refreshed surface, and it sidesteps most base prep costs.
- Decide on DIY vs. pro. If you're DIYing gravel or basic pavers, your material cost on a 200-square-foot patio might be $400 to $800 total. The same project hired out could be $2,000 to $3,400 for pavers or $800 for gravel. Know your comfort level before picking a material.
- Get at least two quotes and ask contractors to separate base prep costs from material and installation. Base prep is often where scope creep happens, and knowing what's included protects you from surprises.
- Ask your supplier about regional material costs. Gravel, crushed stone, and sand prices vary significantly by region based on what's locally quarried. In some areas, decomposed granite is cheaper than pea gravel; in others, the reverse is true. A local landscape supply yard will give you real pricing in about five minutes.
If you're still on the fence, here's a quick decision summary. Go with gravel if budget is the absolute top priority, you don't mind occasional maintenance, and the patio isn't a primary barefoot living space. Go with concrete if you want a set-it-and-forget-it surface that lasts decades and you're willing to spend a little more upfront. Go with basic pavers if you want durability, repairability, and decent looks without committing to premium materials like natural stone or porcelain tile, which are explored in more depth in the best patio surface and what is the best surface for a patio guides if you're considering those options. Gravel, concrete, pavers, or something else can be the best patio surface depending on your climate, how much drainage you need, and how you plan to use the space best surface for a patio.
One last thing: get quotes before you finalize your material choice. A contractor in your area may have leftover paver stock, a concrete supplier may be running a mix promotion, or the local landscape yard may have bulk pricing that changes the math entirely. The cheapest patio flooring is the one that fits your conditions, your skills, and your real local costs, not just the one with the lowest sticker price per square foot.
FAQ
What should I confirm in a contractor quote so I’m really getting the cheapest patio flooring total cost?
If a quote only gives a per-square-foot number, ask for a line item that includes base depth, fabric, edging, and drainage (crossfall and any drain). Two patios with the same surface material can differ by hundreds in base and drainage work, which is where the “cheapest” claim usually breaks.
Why is the cheapest patio flooring per square foot sometimes not the cheapest choice for a small patio?
Yes, especially for small patios. Many contractors have a mobilization or minimum labor charge, so a 100 sq ft job can cost close to a 200 sq ft job. If your patio is under about 150 to 200 sq ft, DIY edging and base work (or materials-only quotes) often changes the total cost outcome.
What are the most common reasons the cheapest gravel patio ends up costing more later?
Many “cheap” gravel installs fail because the decorative top layer is placed directly on poor subgrade, with little or no fabric and inadequate compaction. Verify the plan includes geotextile where your soil is clay or stays wet, at least 4 inches of compacted base aggregate, and a defined slope away from the house.
When is concrete actually the cheapest patio flooring choice, especially in freeze/thaw climates?
Concrete can be the cheapest over time only if the slab includes control joints and the base is properly drained and compacted. In freeze/thaw climates, skipping joints or using a saturated base increases the risk of cracking and uneven heave, which turns “cheapest” into redo costs.
What should I look for to make pavers (which cost more upfront) truly the cheapest option long-term?
For pavers, the biggest hidden cost driver is often the drainage and base build, not the paver material. Ask whether the installation includes a geotextile barrier on clay soils, proper bedding thickness, and polymeric sand in joints (plus compaction and misting), since washout and settlement typically cause premature failure.
How do drainage requirements change what the cheapest patio flooring really is for my yard?
If you want a truly low-cost option, avoid setups that trap water under the surface. Many yards need a channel drain or French drain when they slope toward the house, and the cost is often lower than repeated repairs from efflorescence, erosion, and foundation-related moisture issues.
Is artificial turf ever the cheapest patio flooring if I have pets or kids?
Artificial turf can be cheaper only when you account for ongoing tasks that keep it flat and clean. If you have heavy pets, plan for frequent rinsing to address urine odor and debris management, plus occasional infill top-ups and seam checks, which add time and small recurring costs.
Does the cheapest patio flooring choice depend on how often people walk on it barefoot?
For bare-feet comfort and stability, gravel is usually the least expensive but not the most comfortable, and it tracks indoors. If you have frequent barefoot use or want minimal debris inside, consider whether concrete or pavers reduce ongoing cleanup costs that aren’t reflected in the initial material price.
How should I compare total cost when maintenance time matters as much as the initial install?
The decision flips if you’re unwilling to do maintenance. Gravel typically needs seasonal re-grading to fix low spots from foot traffic, pavers require keeping joints intact with the right sand, and concrete needs periodic resealing. If you want minimal upkeep, factor that labor time into your “total cost” decision.
What time horizon should I use when calculating what the cheapest patio flooring is?
Start by using your realistic lifespan instead of a one-year budget. For example, if one surface needs resealing or re-grading every few years, multiply the maintenance cost by your planned time horizon (like 10 years) before deciding what’s “cheapest.”
What’s the single best way to avoid accidentally buying the wrong “cheap” patio flooring?
Do not under-size the base. A common mistake is using too little aggregate depth or skipping compaction, which causes ruts and settlement regardless of whether the top layer is gravel, pavers, or concrete. Rent the right compactor and build the base to the specified thickness, then verify compaction on larger projects when possible.