
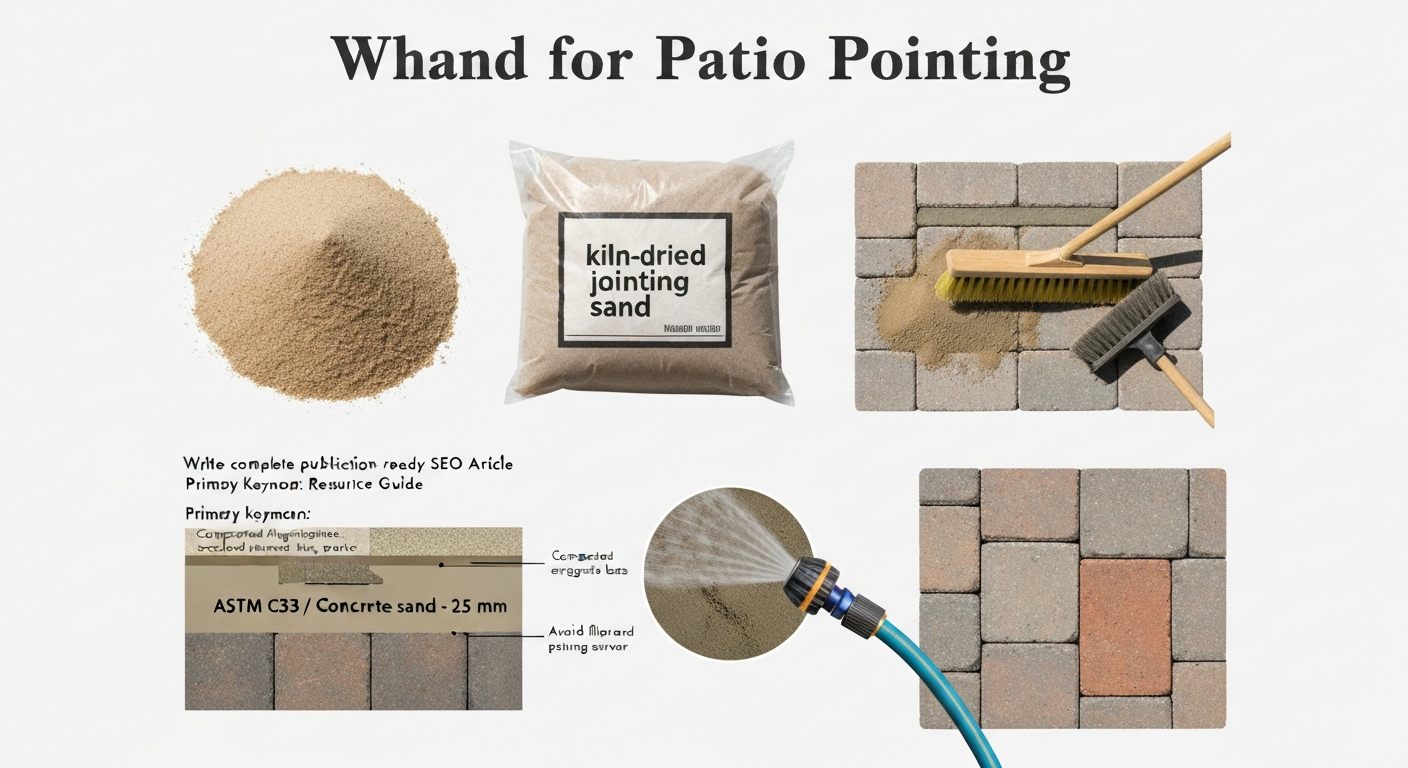
For dry jointing (filling the gaps between pavers), use sharp/brasher jointing sand or a kiln-dried jointing sand. For laying pavers on a sand bed, use a coarser concrete sand (ASTM C33 or equivalent). For mortar pointing on brick or stone patios, use masonry sand (ASTM C144 / BS EN 13139) mixed into a Type N or Type S mortar. Play sand and general-purpose building sand are not suitable for any of these jobs. Getting this right matters more than most homeowners expect: the wrong sand causes joint erosion, weed ingress, sinking, cracking, and failed pointing that needs redoing within a season.
What Sand for Patio Pointing: Types, Uses & How-to Guide

Nolan Ellison
26 Jul 2026
At-a-Glance Recommendations
If you are short on time, here is the practical answer by task. For a quick guide, see our recommendations on the best sand for patio. Full explanations of why, and how to apply each sand, follow in the sections below. For a concise buying recommendation, see our guide to the best sand for patio joints.
| Task | Sand to Use | Standard / Grade | Notes |
|---|---|---|---|
| Dry jointing (filling gaps between pavers) | Sharp/brasher jointing sand or kiln-dried jointing sand | BS EN 13139 / ASTM C144 | Sweep into joints; compact; top up as needed |
| Polymeric jointing (lock-in joints) | Polymeric jointing sand | ASTM C144 grading + polymer binder | Activate with water; requires correct joint depth and dry conditions |
| Bedding sand (laying course under pavers) | Concrete/paving sand (coarse) | ASTM C33 / BS EN 12620 | Screeded to ~25 mm (1 in); do not compact before laying pavers |
| Mortar pointing on brick patios | Masonry/bricklayer's sand | ASTM C144 / BS EN 13139 | Mixed into Type N or Type S mortar |
| Mortar bed for natural stone or porcelain | Sharp sand or masonry sand blended with cement | BS EN 13139 | Typically 1:3–1:5 cement:sand ratio for bed; separate pointing mix |
The Sand Types You Will Encounter (and What They Actually Are)
Sharp / Brasher Jointing Sand
Sharp sand has angular particles that lock together under compaction, which is exactly what you want when filling paver joints. Brasher jointing sand is essentially a graded sharp sand screened to a consistent particle size, typically passing a 4 mm sieve with limited fines. It sweeps cleanly into joints without bridging across the top and compacts firmly enough to resist washing out in moderate rain. This is the traditional, go-to choice for standard permeable paving and is what most professional paving contractors in the UK will reach for on a straightforward project.
Kiln-Dried Jointing Sand
Kiln-dried jointing sand is simply sand that has been dried in a kiln to remove virtually all moisture content, which makes it extremely free-flowing. That flowability is the whole point: dry, fine particles trickle into narrow joints where damp sand would bridge and clog. It is sold in small bags, often at builder's merchants and DIY stores, and is the product most homeowners buy for a quick re-joint. One important note from manufacturers (Kilsaran, Cretesol, and others): kiln-dried jointing sand contains no cement and must not be mixed with cement, as doing so prevents the product from performing as intended. It is a sweep-in, compact-down, top-up product, nothing more.
Polymeric Jointing Sand
Polymeric sand is a graded sand (typically meeting ASTM C144 grading standards) blended with water-activated polymer binders. Once swept into joints and activated with a controlled application of water, the binders cure over several hours to days (depending on temperature and humidity) and bind the particles together into a semi-rigid, erosion-resistant joint. Brands like Gator MAXX G2 and Techniseal HP NextGel are well-known examples. Polymeric sand resists weeds, ants, and washout far better than plain jointing sand, but it has strict installation requirements that many DIYers underestimate. I will cover those in detail later.
Masonry / Bricklayer's Sand
Masonry sand (also called bricklayer's sand or soft sand in the UK) is a fine, well-graded sand with a smooth, slightly round particle shape. In the US it conforms to ASTM C144, and in the UK/EU it should meet BS EN 13139. It is designed to be workable in mortar mixes: the fine particles provide cohesion and plasticity when mixed with cement and lime. You use this sand when making mortar for pointing brick joints or setting stone on a mortar bed. It is not suitable for dry jointing or as a bedding sand on its own, because it is too fine to drain freely and will compact unevenly under paver loads.
Paving / Bedding Sand (Concrete Sand)
Bedding or paving sand is a coarser, clean, well-graded material conforming to ASTM C33 (fine aggregate for concrete) in the US or BS EN 12620 in the UK/EU. The Interlocking Concrete Pavement Institute (ICPI) specifies ASTM C33 for the bedding course under interlocking pavers, screeded to a nominal 25 mm (1 inch) thickness. The coarser, consistent grading resists compaction under a screed board, holds its level well during laying, and still allows drainage. For a concise guide on what sand to use under patio stones, see this practical recommendation. Do not use masonry sand or kiln-dried sand here; both are too fine and will shift.
Play Sand: What It Is and Why It Does Not Belong on a Patio
Play sand is washed, rounded, and very fine, processed specifically to be safe for children to handle. It has poor locking characteristics, allows significant fines content, and will wash and blow out of paver joints almost immediately. It is not graded to any paving or mortar standard. The only context where it comes up on a patio project is if you have chickens or small children using the space and want to understand whether paving sand around the area is safe. For the patio structure itself, leave play sand on the sandpit.
Reading Sand Product Labels and Understanding the Specs
When you pick up a bag or order a bulk load of sand, the label or product data sheet will reference grain size, grading curves, fines content, and whether the sand is kiln-dried or damp. Here is what those terms mean in practice.
Grain Size and Grading
Grading describes the spread of particle sizes in a sand. A well-graded sand has a controlled mix of sizes that interlock and compact tightly. A poorly graded sand (uniform size) leaves more void space. ASTM C144 specifies that masonry sand must pass 100% through a No. 4 sieve (4.75 mm), with tightly controlled percentages through finer sieves down to No. 200 (75 micron), and a maximum of around 5% passing No. 200 to limit dusty fines. ASTM C33 for bedding sand is slightly coarser with its own sieve distribution. When a product label says 'graded to C144' or 'graded to C33,' it is telling you the particle size distribution has been tested against those standards.
Fines Content
Fines are the very small particles (passing No. 200 / 75 micron sieve). Too many fines in bedding sand cause settlement and poor drainage. In mortar sand, a controlled amount of fines actually helps workability. For jointing sand, excess fines mean the material will wash out or crust on the paver surface. This is why you should not improvise with topsoil, sharp sand from a general skip, or builder's sand that has not been tested and graded for the specific use.
Kiln-Dried vs Damp Sand
Kiln-dried sand flows freely and is sold in sealed bags because it picks up moisture from the air. Damp sand is heavier, sticks together slightly, and is typically sold in bulk by the tonne. For dry jointing, kiln-dried is easier to sweep into joints. For bedding, damp concrete sand is fine as long as it is not saturated (wet, saturated bedding sand will not screed consistently). For mortar, damp sand is perfectly normal; you adjust water content in your mix accordingly.
What to Check on the Label
- Standard conformity: look for ASTM C144 (mortar/jointing), ASTM C33 (bedding), BS EN 13139 (mortar/UK-EU), or BS EN 12620 (concrete aggregate/UK-EU)
- Maximum particle size: for narrow paver joints (under 6 mm), check max particle is smaller than the joint width
- Fines content (%): under 5% passing No. 200 / 75 micron for jointing and bedding; slightly higher acceptable for mortar sand
- Kiln-dried confirmation: sealed bags with moisture content stated if relevant
- Polymer content: polymeric sands must state activation method and installation temperature range
Bedding Sand vs Mortar Bed: Which One Do You Need?
This is one of the questions I get most often from homeowners who have watched a few YouTube videos and ended up confused. The bedding method you choose affects the entire build-up of your patio, how it performs over time, and which pointing options are open to you.
Sand-Set (Screeded Bedding Sand)
Sand-set is the standard approach for interlocking concrete pavers, clay brick pavers, and many flagstone applications. You screed a 25 mm (1 inch) layer of ASTM C33 / BS EN 12620 bedding sand over a compacted aggregate base, lay your pavers directly on it, and compact everything down with a plate compactor. ICPI specifies the 25 mm nominal thickness because thicker bedding layers compress unevenly. The sand-set method is forgiving (you can lift and relay individual pavers easily), relatively low cost, and naturally permeable if you use appropriate jointing. The trade-off is that it requires a proper compacted sub-base; skipping that step causes sinking regardless of how good your sand is.
Mortar Bed
A mortar bed (wet or semi-dry) is used for thin natural stone like slate or limestone, porcelain pavers (which cannot flex without cracking), pool copings, and anywhere you need a rigid, perfectly flush surface. In the UK, BS 7533 gives laying course guidance of 25 to 40 mm for rigid and moist beds. Mortar beds lock pavers in place, which means no individual paver adjustment after curing, and any future repair requires breaking out the mortar. The benefit is that it handles irregular stone thicknesses and gives a solid, durable result when done correctly. The pointing material must also be rigid (mortar or resin-based), not loose sand.
| Feature | Sand-Set Bedding | Mortar Bed |
|---|---|---|
| Best for | Concrete pavers, clay brick, regular flagstone | Porcelain, thin stone, irregular natural stone |
| Bedding material | ASTM C33 / concrete sand (25 mm) | Sand:cement mortar or semi-dry mix |
| Permeability | Naturally permeable (with correct jointing) | Impermeable |
| Repair ease | Easy: lift and relay | Difficult: break out mortar |
| Skill level required | Moderate (screeding is learnable) | Higher (mortar consistency matters) |
| Cost | Lower | Higher (cement, more labour) |
| Jointing options | Loose sand, kiln-dried, polymeric | Mortar pointing or resin grout |
Mortar Pointing on Brick Patios: Mix Guidance and Sand Choice
Brick patios with mortar joints need a different approach to flagstone or concrete paver jointing. The sand you use here is masonry sand (ASTM C144 in the US, BS EN 13139 in the UK/EU), and it gets mixed with Portland cement and optionally hydrated lime to create a mortar that adheres, flexes slightly, and weathers without crumbling. For more detail on what sand for patio mortar, see the guide on choosing the right sand and mortar mixes.
Choosing the Right Mortar Type
ASTM C270 defines mortar types M, S, N, and O by strength and exposure. For most above-grade residential brick patios, Type N mortar is appropriate: it has a compressive strength around 750 psi (5.2 MPa), enough durability for exterior use, but with enough flexibility that it does not over-stress the brick face through thermal movement. Type S (approximately 1800 psi / 12.4 MPa) is the right choice for below-grade work, patios subject to vehicle loading, or coastal exposures with freeze-thaw cycling. In the UK/EU, BS EN 998-2 governs mortar specification; for severe exposure or sulfate-risk sites (near coastal areas or heavy clay soils), always select a sulfate-resistant designation.
Mortar Mix Proportions
A standard Type N proportion mix by volume is: 1 part Portland cement, 1 part hydrated lime, and 6 parts masonry sand. A Type S mix is typically: 1 part Portland cement, 0.5 parts hydrated lime, and 4.5 parts masonry sand. The lime improves workability and adds a small amount of self-healing capacity as the mortar weathers. If you are using a pre-blended bagged masonry mortar (labelled Type N or Type S), the sand is already included at the correct ratio; just add water per the bag instructions. I have seen homeowners add extra cement to pre-blended bags thinking it will make the joint stronger. It does the opposite: an overly rich mix shrinks more and cracks faster. Use the product as specified.
Repointing an Existing Brick Patio
- Rake out old joint material to a minimum depth of 15 mm (about 5/8 in) using a plugging chisel or oscillating tool
- Brush out all loose material and dust; dampen the joint faces with clean water (do not saturate)
- Mix masonry sand mortar to a stiff but workable consistency (it should hold its shape when squeezed in your fist)
- Press mortar firmly into the joint in layers if depth exceeds 20 mm, allowing each layer to stiffen before adding the next
- Tool (strike) the joint to match the original profile before the mortar fully sets
- Protect from rain for 24 hours and from frost for 48 hours minimum
- Allow full cure (28 days) before sealing or heavy use
Matching Sand to Your Patio Surface
Different patio surfaces have different joint widths, structural requirements, and sensitivities to moisture. Here is how the sand choice changes per surface type.
Flagstone
Natural flagstone typically has irregular joints ranging from 10 mm to 30 mm or wider. For dry-jointing irregular flagstone, sharp jointing sand or kiln-dried sand works well but will need regular topping up as it washes and settles. A better long-term result comes from a semi-dry mortar pointing mix (masonry sand and cement, 4:1 or 5:1 by volume, semi-dry consistency) rammed into wide joints, which is more stable than loose sand. For a sand-set flagstone patio, use ASTM C33 bedding sand at 25 mm depth. Flagstone set on a mortar bed needs mortar pointing rather than sand jointing.
Porcelain Pavers
Porcelain pavers must be set on a mortar bed (or a specialist adhesive mortar) because they have very low water absorption and will not bond to a loose sand bed long-term. The joint width is typically narrow (3 to 5 mm), which rules out most standard jointing sands. Use a polymer-modified tile grout or a fine polymeric jointing sand specifically rated for porcelain (Techniseal makes a porcelain-grade product) for narrow joints. Never use standard kiln-dried jointing sand in a 3 mm porcelain joint on a mortar bed; it will not compact and will wash out immediately.
Brick Patios
Clay or concrete brick pavers are the most versatile surface in terms of joint options. Sand-set bricks on a C33 bedding course can be jointed with sharp jointing sand, kiln-dried sand, or polymeric sand. For more on selecting the best sand for brick patio, see our detailed guide. Mortar-set bricks require masonry mortar pointing as described above. Typical joint width for brick pavers is 3 to 10 mm, well within the workable range of all standard jointing products.
Natural Stone (Limestone, Sandstone, Slate)
Natural stone is absorbent and sensitive to cement staining. Use a lime-based or low-cement mortar for pointing to reduce staining risk and to allow the mortar to be slightly softer than the stone (which is the correct approach; if the joint mortar is harder than the stone, freeze-thaw cycling will crack the stone face, not the joint). A 1:2:9 (cement:lime:masonry sand) mix is commonly used for softer stones like sandstone. For harder stone like granite setts, a Type N or Type S mortar is fine.
Gravel Patios
Gravel surfaces do not require jointing sand in the conventional sense, but if you are using a grid/cell system to stabilise the gravel, sharp bedding sand beneath the grid provides drainage and a level base. No jointing sand is needed in the gravel itself.
Composite Decking Interfaces
Where composite decking meets a paved patio edge, there is no jointing sand in the gap itself. However, the paved section adjacent to decking should still use the appropriate jointing sand for its surface type. The transition edge may be finished with a flexible mastic or left as an expansion gap; sand jointing right up to decking framing can cause moisture retention against the timber subframe, so leave a small gap and do not pack it with sand.
Polymeric and Kiln-Dried Jointing Sands: Installation Details and When to Use Each
Both polymeric and kiln-dried sands are often sold at DIY stores with similar-looking packaging, and homeowners sometimes confuse them or treat them as interchangeable. They are not. Here is the honest breakdown of when each one is the right call and what the installation requirements actually involve.
Kiln-Dried Jointing Sand: Best Use Cases
Kiln-dried sand is the lower-cost, lower-permanence option. It is ideal for straightforward sand-set patios with joints wider than about 6 mm where you want a permeable surface, do not mind topping up every year or two, and are not dealing with heavy weed pressure. It is also the correct choice for any permeable paving system where through-joint drainage is a planning or drainage requirement, because blank" rel="noopener noreferrer">polymeric sand would block that drainage. BS 7533, the UK paving standard, is clear that impermeable jointing materials like polymeric sand should not be used where surface infiltration is required. BS 7533, Guide: Design & installation of modular permeable pavements gives UK guidance on laying and jointing and specifies that impermeable jointing should not be used where through-surface permeability is required blank" rel="noopener noreferrer">BS 7533 — Guide: Design & installation of modular permeable pavements.
Polymeric Sand: When It Is Worth It
Polymeric sand is worth the extra cost and effort when you have a standard, non-permeable sand-set patio and want to significantly reduce weeds, ant disturbance, and joint washout. The performance difference is real. However, it has non-negotiable installation conditions:
- Minimum joint width: approximately 3 mm (1/8 in) for most products; some Techniseal grades allow as narrow as 1.6 mm (1/16 in)
- Minimum joint depth: typically 38 mm (1.5 in) for standard products; check your specific brand's TDS
- Cured sand level: must sit at least 3 mm (1/8 in) below the top of the paver or chamfer edge to avoid haze and erosion
- Surface and air temperature: most products require a minimum of around 2°C to 10°C (36–50°F) depending on brand; installation below minimum temp causes improper curing
- Dry surface condition: pavers must be completely dry before application; even light dew on the surface will cause the polymer to haze and bond to the paver face
- No rain for 24 hours after activation: check the forecast; a heavy shower within the curing window will wash polymer to the surface and leave permanent staining
How to Install Polymeric Sand (Step by Step)
- Ensure all joints are clean, dry, and compacted to the minimum depth specified on the product TDS
- Pour polymeric sand across the paver surface and spread evenly with a stiff broom
- Sweep the sand into joints using a plate compactor with a rubber pad (or hand tamper for small areas) to vibrate and settle the sand; this is the step most DIYers skip and regret
- Sweep a second or third application into joints and re-compact until joints are filled to 3 mm below the paver top
- Blow or sweep all excess sand off the paver surface completely; any residue left on the surface will haze permanently once activated
- Mist the surface with a gentle spray (not a jet); work in 3-metre sections, allowing water to saturate joints without pooling
- Allow to cure undisturbed for 24 to 48 hours (or per manufacturer TDS); keep off traffic and away from rain during this window
- After full cure, test joint firmness by pressing with a finger; the joint should feel solid, not crumbly
Polymeric Sand in Freeze-Thaw Climates
Research on freeze-thaw cycling shows that repeated wet/dry and freeze-thaw action can degrade granular and cement-stabilized joint materials over time. For climates with hard winters, choose a polymeric sand product that has been specifically tested for freeze-thaw durability (look for this claim on the TDS), ensure the minimum joint depth is met (shallow joints have less resistance to frost heave), and always follow ICPI guidance on the sub-base depth for your frost penetration depth. Shallow bedding on an inadequate base will heave regardless of the jointing sand used.
Troubleshooting: Weeds, Erosion, and Sinking
Even with the right sand, things go wrong. Here are the most common problems and their actual causes.
Weeds Growing Through Joints
Weeds in paver joints rarely grow up from below (most pavers sit on a compacted base that roots cannot penetrate easily). They grow from seeds blown onto the surface that germinate in the organic debris that accumulates on top of the sand. The fix is partly material choice (polymeric sand makes germination harder) and partly maintenance: brush joints clear of leaf litter and debris in autumn. If weeds are established, apply a non-residual weedkiller, allow to die, then rake out and top up the jointing sand.
Joint Sand Washing Out
This is almost always caused by using the wrong sand (too fine, not angular enough), insufficient joint depth, or inadequate compaction during installation. Kiln-dried sand will always erode from exposed edges over several years; this is normal and expected. If you are losing sand every season, switch to polymeric sand or use a semi-dry mortar pointing mix in the worst-affected areas.
Pavers Sinking or Rocking
Sinking is almost never a jointing sand problem. It is a bedding or sub-base problem. If the sub-base was under-compacted, too shallow, or the bedding sand was too thick (more than 40 mm), you will see settlement. The fix is to lift the affected area, re-compact the sub-base, re-screed bedding sand at 25 mm, and relay the pavers. No jointing sand, however good, will stabilise a sinking area.
Quantity Calculation and What Things Cost
Calculating how much sand you need avoids both wasted spend and mid-job trips to the merchant. For bedding sand, the formula is: area (m²) x 0.025 m (25 mm depth) = volume in m³; multiply by the bulk density of the sand (typically 1.6 to 1.7 tonnes per m³) for weight. For jointing sand, a rough rule of thumb is 3 to 5 kg of kiln-dried jointing sand per m² of standard paving with average 10 mm joints; polymeric sand bags typically cover 9 to 18 m² per 22 kg bag depending on joint width and depth (check the coverage table on the product label).
| Sand Type | Typical Retail Form | Approximate Cost (UK) | Approximate Cost (US) | Coverage |
|---|---|---|---|---|
| Kiln-dried jointing sand | 20–25 kg bag | £5–£10 per bag | $8–$15 per bag | Approx. 4–6 m² per bag |
| Sharp/brasher jointing sand | Bulk tonne bag or 25 kg bag | £35–£60 per tonne | $40–$70 per ton | Approx. 50–70 m² per tonne (jointing) |
| Polymeric jointing sand | 22–27 kg bag | £25–£45 per bag | $20–$40 per bag | 9–18 m² per bag (product-specific) |
| Concrete/bedding sand (C33) | Bulk tonne bag | £30–£55 per tonne | $35–$60 per ton | ~16 m² at 25 mm depth per tonne |
| Masonry/mortar sand (C144) | 25 kg bag or bulk | £4–£8 per 25 kg bag | $6–$12 per 50 lb bag | Varies by mortar mix ratio |
Bulk purchasing from a builder's merchant or quarry is significantly cheaper per tonne than bagged material from DIY stores for large patio areas. For anything over 20 m², price a bulk tonne bag of bedding sand and jointing sand separately rather than buying individual bags.
Where to Buy Patio Sand
Builder's merchants (such as Travis Perkins or Jewson in the UK, or local masonry supply yards in the US) stock the full range of graded sands and are usually the cheapest source for bulk quantities. Large DIY chains like B&Q, Wickes, Home Depot, or Lowe's carry kiln-dried jointing sand and polymeric sand in bags, which is convenient for smaller jobs or top-ups. For more details on where to buy patio sand and how to choose between bagged and bulk options, see our purchasing guide. Landscaping specialists and paving suppliers often carry branded polymeric sands and can advise on compatibility with specific paver products. For mortar sand, most builder's merchants will have masonry sand in stock; always confirm it meets BS EN 13139 or ASTM C144 before buying.
Safety Notes: Children, Chickens, and General Handling
Standard jointing and bedding sands are inert mineral materials and are not toxic. However, silica dust (released when dry sand is disturbed or cut) is a respiratory hazard with prolonged exposure; always wear a dust mask when working with dry sand in enclosed spaces or on a windy day. Polymeric sands contain polymer binders that can be irritating to skin and eyes before curing; wear gloves and eye protection during application. Once cured, polymeric sand is inert. Regarding chickens: standard paving sand (sharp jointing sand, concrete sand) is not inherently toxic to poultry, but very fine dusting sand is unnecessary when there are purpose-made dust-bathing materials available. Keep chickens off freshly applied polymeric sand until it has fully cured.
Ongoing Maintenance
Sand joints require periodic maintenance regardless of type. For kiln-dried and sharp jointing sand, inspect joints every spring and top up any areas where sand has washed or blown away. Brush in fresh jointing sand, compact it with a rubber mallet or plate compactor, and sweep off any excess. For polymeric sand, joints typically last 5 to 10 years before needing renewal; spot repairs are possible by raking out the affected area to minimum depth, re-applying polymeric sand, and re-activating with water. For mortar-pointed surfaces, check for cracks or debonded sections annually and repoint as described in the brick patio section above before water ingress causes frost damage behind the joint.
FAQ
What sand should I use to point (fill joints) on a patio?
For standard patio jointing use a well‑graded, sharp or 'brasher' jointing sand (conforming to ASTM C144 / EN 13139 grading for masonry/joint sand). For narrow joints (≤3 mm) use kiln‑dried/polymeric jointing sand formulated for small gaps; for wider joints (3–25 mm) a coarse jointing sand or grit that compacts into the gap is suitable. Don’t use play sand (too fine and rounded) for permanent jointing unless mixed with a binder — it won’t lock or drain properly.
When should I use polymeric (water‑activated) sand vs plain jointing sand?
Use polymeric sand when you want a locked, low‑maintenance, weed‑resistant joint that is acceptable for impermeable patios (concrete, porcelain, clay/brick where through‑drainage is not required). Avoid polymeric sand for permeable paving or where surface infiltration is required — standards (BS 7533 / ICPI guidance) require free‑draining joint aggregates for permeable systems. Also follow manufacturer constraints on minimum joint width/depth and temperature during installation.
What sand is best for bedding under pavers and flagstones?
Use a coarser, concrete/screed style sand (ASTM C33 / coarse aggregate for concrete) for a 25–40 mm screeded sand bed (sand‑set). This bedding sand is coarser than masonry sand, provides good interlock and drainage, and resists excessive settlement. For beds that require rigidity or to set irregular natural stone you may need a mortar/concrete bed instead of sand‑set.
When should I use a mortar (wet) bed instead of a sand bedding?
Use a mortar (wet) bed when: stones are thin/irregular and need full support (thin natural stone), you require a rigid, immovable surface (pool copings, steps), or you need flush/level finish with tight joints. For typical interlocking concrete pavers and flagstones that can tolerate small movements, a sand‑set bedding (per ICPI/BS guidance) is usually preferred.
Which sand or mortar mix should I use for repointing brick patios?
For repointing bricks, use a masonry sand conforming to ASTM C144 / EN 13139 mixed into an appropriate mortar type per ASTM C270 / EN 998‑2. For most above‑grade patios use Type N (general, flexible) mortar; for structural/retaining or heavy load areas use Type S or M. Match historic mortar strength and colour where relevant, and select mortar exposure class per EN 998‑2 (coastal/sulfate exposure may need special mortars).
How do climate and drainage affect sand choice?
In freeze‑thaw and high rainfall climates choose jointing and bedding materials with proven freeze‑thaw durability and follow minimum joint depths to reduce washout and heave. In areas needing surface infiltration (SUDS/permeable paving) select free‑draining joint aggregates (no polymeric/cementitious binders). In coastal/salty environments use mortars and aggregates rated for sulfate/chloride exposure per EN/ASTM guidance.