For most residential patios, polymeric sand is the best choice for filling paver joints. It locks pavers together, resists washout, and chokes out weeds far better than plain concrete sand or bedding sand. That said, it is not the right call for every situation, and installing it wrong is one of the most common (and costly) DIY mistakes I see.
Best Sand for Patio Joints: Polymeric vs Bedding Sand

Nolan Ellison
3 Jun 2026
If you are worried about keeping chickens on a patio paver surface, it is also important to choose a jointing sand that is poultry-safe and properly sealed or cured before allowing access is patio paver sand safe for chickens. If your joints are narrower than 1/8 inch, your base drains poorly, or you just need a quick, low-cost fill for a casual gravel-set patio, classic coarse jointing sand or concrete sand can still do a solid job.
The guide below walks you through which sand works for which setup and exactly how to get it right.
How patio paver joints work and why sand choice matters
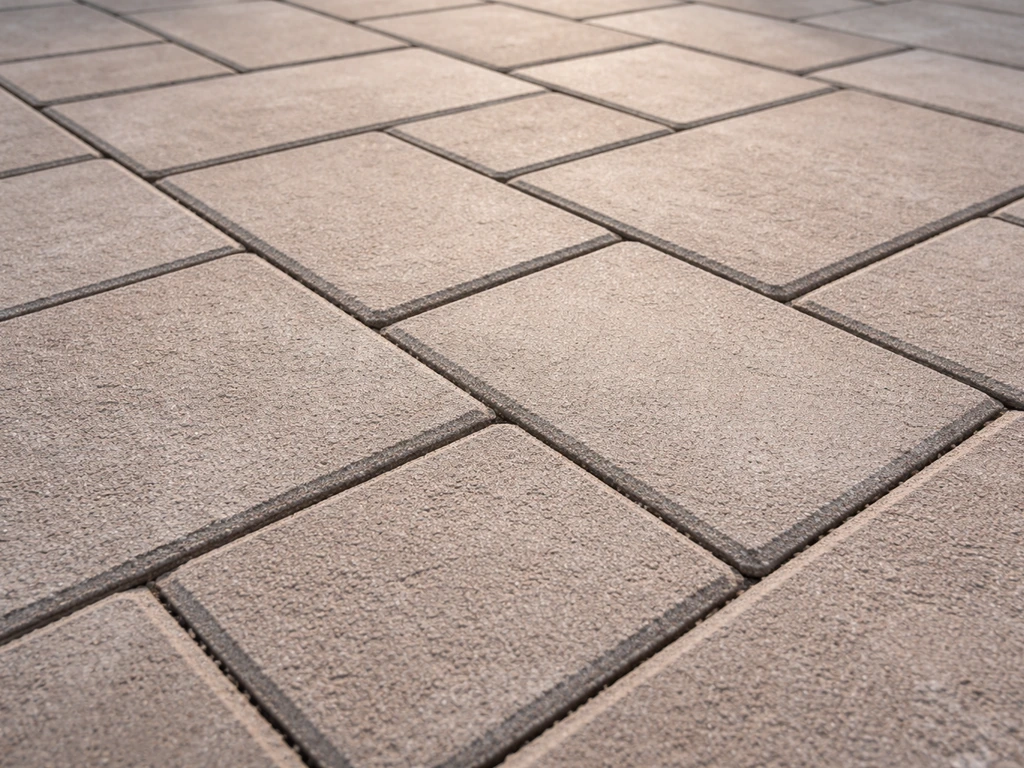
Paver joints are not just cosmetic gaps. They are a functional part of the pavement system. Interlocking concrete pavers transfer loads through edge-to-edge contact and lateral restraint, and the jointing sand filling those gaps is what keeps that interlock intact. When sand migrates out of the joint, pavers start rocking, shifting, and eventually cracking. So the sand you choose directly affects how long your patio stays level and stable.
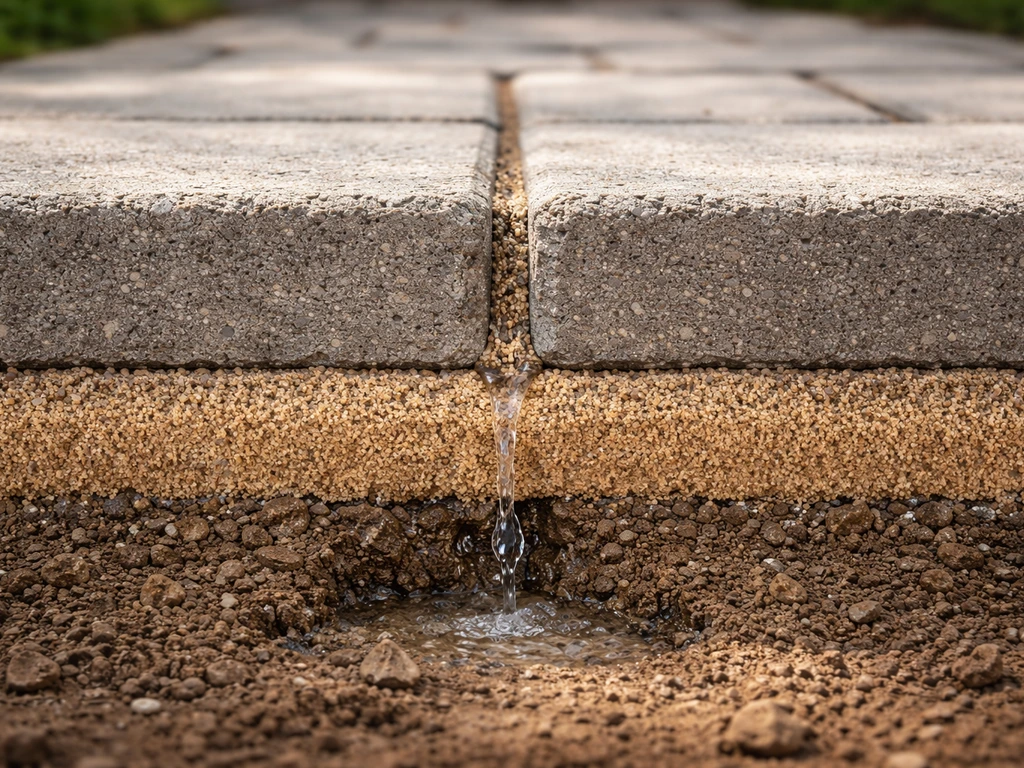
The joint also has to manage water. A well-drained bedding layer under the pavers lets water move down and away, which keeps the joint sand from becoming saturated and heaving in freezing weather. If water can't escape downward, it pools in the joints, accelerates erosion, and in freeze-thaw climates causes real structural damage over a single winter. This is why many polymeric sand manufacturers specifically state that good drainage under the pavers is a prerequisite for the product to perform correctly.
Weed and ant pressure also comes through the joints. Seeds land in open, loose sand and germinate quickly. Ants excavate fine sand to build galleries under pavers, and the resulting voids cause sinking. The sand type you choose either makes this worse or dramatically reduces it.
Best sand options for patio joints
There are three main categories worth knowing: polymeric sand, concrete sand (sometimes called coarse jointing sand), and bedding sand. Each has a different job and a different failure mode.
Polymeric sand
Polymeric sand is regular joint sand blended with polymer binders that activate when you add water. Once cured, the joint hardens into a firm but slightly flexible mass that resists washout from rain, pressure washing, and runoff. It is by far the most weed-resistant option because there is almost no loose material for seeds to root into. Most formulations also resist ant excavation.
The tradeoff is that installation is more demanding. The surface must be completely dry before you start, temperature must be above 32 degrees F, and you need to get the water activation step right or you end up with haze on the paver surface. It also costs more than plain sand, typically two to four times more per bag. For a high-traffic patio, a formal flagstone layout, or any project in a climate with significant rainfall, that premium is worth it.
Concrete sand and coarse jointing sand
Concrete sand is a coarse, angular sand that meets ASTM C144 gradation requirements, making it suitable for paver joints that need to be filled quickly and economically. If you are working with mortar on patio work, you’ll want to match the sand type to the mortar mix and the job conditions what sand for patio mortar. It compacts reasonably well, drains freely, and is forgiving to work with. The downside is it has no binder, so it can wash out in heavy rain or under a pressure washer, and weeds will find it.
For a casual backyard patio with low foot traffic or an informal flagstone path, it is a practical and low-cost option. If you're curious about the broader differences between sand types used around patios, including under the surface as a bedding layer, that is a related but separate topic from jointing.
If you are specifically trying to figure out what sand to use for patio pointing, focus on the joint width and the drainage beneath the pavers differences between sand types used around patios.
Bedding sand
Bedding sand (typically a coarser, screeded sand like ASTM C33) belongs under the pavers, not in the joints. I mention it here because I regularly see people confused about which sand goes where. Bedding sand is too coarse and variable in gradation to fill narrow paver joints effectively. If you are researching what sand to use under patio stones, that is a different question with a different answer from jointing sand.
| Sand Type | Best For | Weed Resistance | Washout Resistance | Climate Fit | Relative Cost |
|---|---|---|---|---|---|
| Polymeric sand | High-traffic patios, formal layouts, brick and concrete pavers | Excellent | Excellent | All climates, best in wet/freeze-thaw zones | High |
| Coarse jointing / concrete sand | Low-traffic, informal patios, budget installs | Poor | Fair (dry climates only) | Best in dry or semi-arid climates | Low |
| Bedding sand | Under-paver base layer only | N/A | N/A | N/A | Low |
Step-by-step: installing sand in paver and stone patio joints
Whether you are filling joints on a new install or re-sanding an older patio, the process is similar. The steps below apply primarily to polymeric sand since it is the most commonly used and the most unforgiving if done out of order. Notes on concrete sand are included where the process differs.
- Check conditions first. Pavers must be completely dry. Do not start if rain is forecast within 24 hours for an overlay application, or within at least 1 hour for a standard install. Temperature must be 32 degrees F or above. With concrete sand you have more flexibility, but still avoid wet surfaces.
- Inspect and prep joints. Clear out any existing debris, old sand, weeds, or organic material from the joints. Blow or sweep the surface clean. Check that paver edges are even and that no pavers sit higher than their neighbors, which would prevent sand from entering the joint evenly.
- Check joint dimensions. Polymeric sand requires a minimum joint width of 1/8 inch (some products specify 1/4 inch minimum) and a minimum joint depth of 1.5 inches. The target fill level is the bottom of the chamfer, or at least 1/8 inch below the top surface of the paver. If your joints are shallower than 1.5 inches or narrower than 1/8 inch, polymeric sand is not the right product.
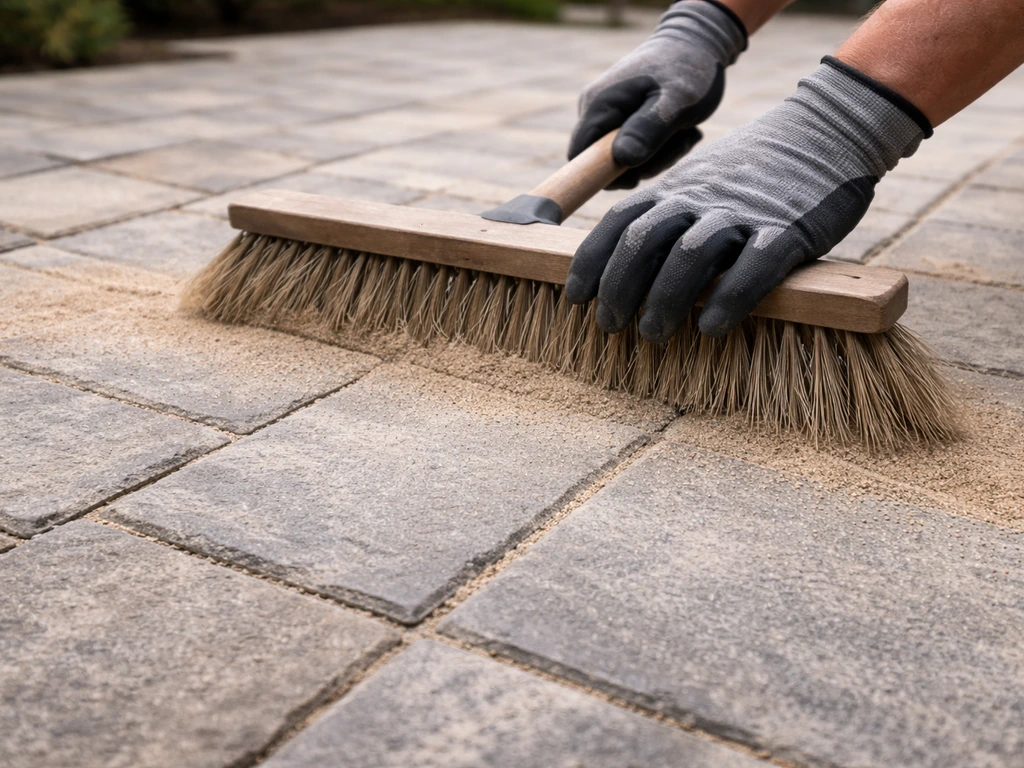
- Pour and spread. Dump bags of sand onto the patio surface and spread with a broom, pushing sand diagonally across joints to fill them efficiently. Work in sections of about 200 to 300 square feet at a time.
- Compact with a plate compactor. Run a plate compactor (with a rubber pad protector on the plate) over the paved area to vibrate sand down into the joints. This is a critical step, especially for polymeric sand, because compaction consolidates the material and ensures it fills the full depth of the joint. Do not skip this.
- Sweep again. After compaction, add more sand and sweep a second time to fill any voids created by settling. Level sand to 1/8 inch below the paver top or to the bottom of the chamfer.
- Remove surface residue. Use a blower or a stiff broom to remove all loose sand from the paver surface before adding water. Any sand left on the surface will bond there when activated, creating haze that is difficult to remove.
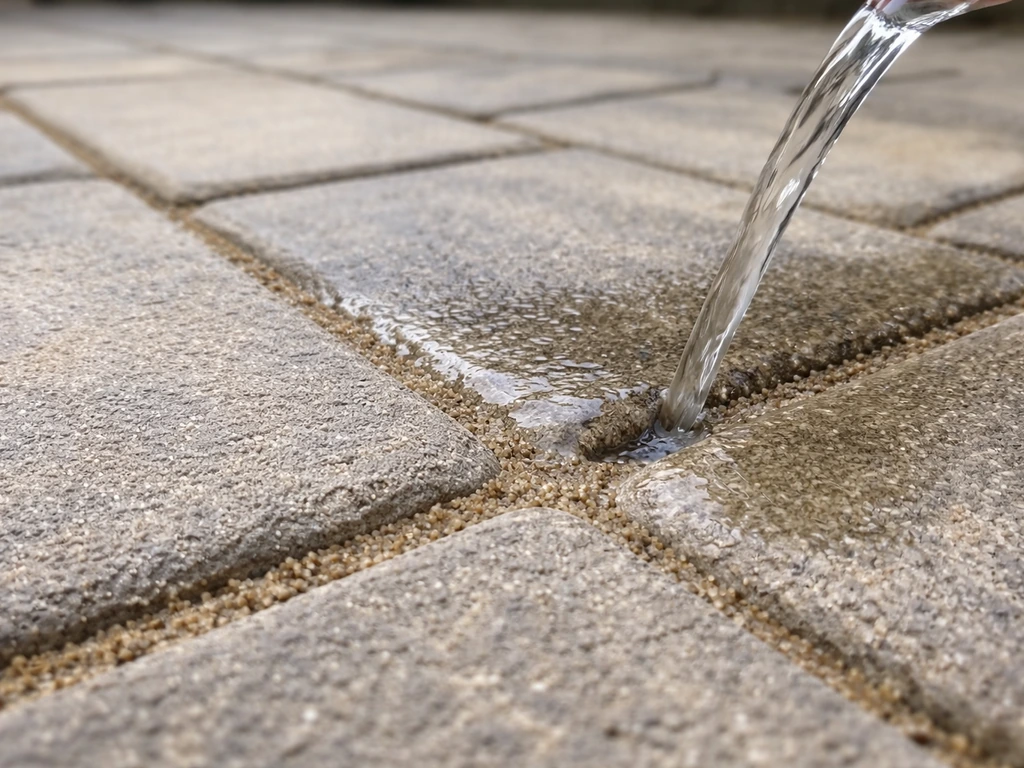
- Activate with water (polymeric sand only). Using a gentle mist setting, wet the surface thoroughly without flooding it. Let the water absorb, then mist again. Repeat two to three times. The goal is to saturate the sand in the joints without washing it out or letting water pool. Avoid jet or fan spray settings. Concrete sand does not require this step.
- Allow to cure. For polymeric sand, keep the surface dry and free of traffic for at least 24 hours. Full cure typically takes 24 to 72 hours depending on temperature, humidity, and wind.
Thickness, coverage, and joint prep for best results
Getting the depth and quantity right is where a lot of DIYers underestimate the project. Polymeric sand needs a minimum of 1.5 inches of joint depth to form a strong bond. If your joints are shallower than that, the hardened mass is too thin and tends to crack or pop out under thermal movement or foot traffic.
For coverage, a 40-pound bag of polymeric sand typically covers 45 to 55 square feet for joints in the 1/8 to 1/2 inch width range. Techniseal’s EZSAND TDS lists a similar coverage band for interlocking paver joints in the 1/8 in to 1/2 in range, around 45, 55 sq. ft. per bucket depending on geometry [coverage for 1/8 to 1/2 inch joints](https://www.
techniseal. com/pub/media/catalog/product/pdf/t/d/tdsezsandbucketusen. pdf). Wider joints eat through bags quickly.
For joints in the 3/4 to 1. 25 inch range, coverage can drop to 22 to 42 square feet per bag. Always buy about 10 to 15 percent more than your calculation suggests to account for waste, compaction settling, and refill after the second sweep. If you are ready to shop, check where to buy patio sand based on the type you need and how much coverage you will require.
If you are filling wider joints, standard coarse jointing sand is much more cost-effective and sometimes more appropriate anyway.
Joint prep matters as much as the sand itself. Joints must be free of old organic material. On an existing patio being re-sanded, use a stiff wire brush, a pressure washer on a low setting, or a joint scraper to clear out the old sand. Let everything dry completely for at least 24 to 48 hours before starting. Wet joints are one of the top causes of polymeric sand failure and surface haze.
Sealing, joint stability, and long-term maintenance by sand type
Polymeric sand: sealing and seasonal care
Polymeric sand does not require a sealer to function, but sealing the paver surface after the sand has fully cured (usually 30 days out) adds UV protection and enhances the paver color. If you do seal, wait until efflorescence and any surface residue have fully cleared, and do not apply efflorescence cleaner before the curing period ends. Sealing can also help lock the top layer of joint sand in place, which is a minor bonus.
On a seasonal basis, check joints in early spring after the freeze-thaw cycle ends. Frost heave can fracture hardened polymeric joints, especially in areas where water infiltration is high. Any cracked or missing sections should be refilled before weeds or water erosion make the problem worse. Avoid pressure washing polymeric joints at high pressure. A gentle rinse is fine, but a direct jet at close range will excavate even well-cured polymeric sand.
Concrete and coarse sand: maintenance expectations
Plain jointing sand needs to be topped off every one to two years in most climates. After heavy rain seasons or any pressure washing, check joint depth and refill low spots. Applying a paver sealer over concrete-sand-filled joints helps reduce washout by binding the surface particles slightly, but it is not a substitute for polymeric sand in wet or high-traffic areas. Keep an eye on joints near downspouts or drainage points, as these areas erode first.
Common problems and how to fix them
Sand washing out
If sand is washing out regularly, the likely cause is either poor drainage under the pavers or the wrong sand type for the site. First, check that the base layer has adequate slope (typically 1 to 2 percent away from structures) and that water is not pooling on or around the patio. If drainage is the issue, fix that before re-sanding, because no jointing sand performs well where water sits. Then re-sand with polymeric sand.
Avoid using polymeric sand in areas where water pools and does not drain away, as saturation defeats the binder and causes the joint to fail. Black Diamond Coatings similarly warns that polymeric sand is not ideal where water pools and does not drain away properly, since saturation undermines the joint binder.
Weeds sprouting through joints
Weeds in joints almost always mean either the jointing sand has been depleted or you used plain sand in the first place. Remove weeds by hand or with a targeted weedy-joint treatment, then clear the joint, let it dry, and re-fill with polymeric sand. If weeds are persistent, check whether your base layer has enough weed barrier fabric beneath it.
Paver movement and rocking
Pavers that rock or shift indicate joint sand loss or a compromised base. Remove the affected pavers, inspect the bedding layer, and address any voids or saturated base material before reinstalling. Re-sand joints with polymeric sand once pavers are reset and the surface is dry.
Polymeric sand haze on paver surface
Haze is a white or milky film left on the paver surface after polymeric sand activation. It happens when loose sand particles on the surface get wet and the polymer binder bonds them to the paver face. The fix is to remove the haze with a dedicated polymeric haze cleaner after the joints have fully cured (wait the full curing window before cleaning). Prevent it next time by being thorough with blower cleanup before any water touches the surface. Also note that efflorescence (white salt residue from moisture movement through the concrete) can look similar. Efflorescence tends to reappear over weeks, while polymer haze is typically a one-time post-install issue.
Joint cracking or sand popping out
Cured polymeric sand that cracks or pops out in chunks is usually a depth problem. If the joint was not filled to at least 1.5 inches deep, the hardened material has no mechanical grip and breaks out under thermal movement. The fix is to remove the failed material, confirm your joint depth, and refill. If the joint depth is insufficient because of shallow pavers, use a fine coarse jointing sand instead of polymeric, or address the overall paver installation.
Cracking can also come from oversaturation during activation. If you drenched the joints instead of misting, the polymer can migrate unevenly, leaving a brittle crust on top with soft material underneath. Remove, dry fully, and re-apply.
A quick checklist before you buy sand
- Measure your joint width: under 1/8 inch means polymeric sand will not fit; 1/8 to 1/2 inch is the sweet spot for most polymeric products
- Measure joint depth: polymeric sand needs at least 1.5 inches of depth to hold
- Check drainage: if water pools on or under the patio, fix that first
- Check forecast: no rain for at least 24 hours after install for polymeric sand
- Check temperature: above 32 degrees F is required for polymeric sand activation
- Confirm pavers are fully dry before starting
- Buy 10 to 15 percent more sand than your square footage calculation suggests
- Have a plate compactor ready, either rented or borrowed
FAQ
Can I use polymeric sand in joints wider than 1/2 inch or 3/4 inch?
Yes, but you need to match the product to the joint width and confirm the labeled minimum and maximum depth. For very wide joints, many installers switch to coarse jointing sand because coverage drops sharply and polymeric sand can’t build enough bond thickness without overfilling. If you do use polymeric, fill in layers only if the manufacturer allows it, and avoid compressing it so hard that you create voids below.
What happens if I don’t get the joints completely dry before activating polymeric sand?
You risk permanent surface haze, weak bonding, and faster washout. If you start with damp joints, the binder can activate prematurely or unevenly, trapping moisture in the joint. The practical next step is to stop, let the joints dry fully, then reopen and clean out any wet or partially activated material before re-filling.
Is it okay to use polymeric sand and then seal right away?
Usually no. Even if polymeric sand does not require a sealer to work, sealing too soon can trap residues or interfere with how the polymer cures uniformly. Wait for the full cure window the manufacturer specifies, confirm efflorescence and haze are fully cleared, then apply sealer to the paver surface (not as a substitute for proper jointing sand choice).
How much joint depth should I target if my pavers are set too low or the joints are shallow?
Target at least the manufacturer’s minimum depth, the article notes polymeric typically needs about 1.5 inches. If your patio design leaves shallower joints, trying to “force” polymeric in often leads to cracking and pop-outs. In that case, address the installation height, or consider a fine coarse jointing sand approach that matches your available depth and joint width.
Can I top up polymeric sand later without removing the old layer?
Avoid topping up on top of unsettled or contaminated material. Polymerization and bonding depend on clean, dry joints and the correct activation. If old sand is present, it can prevent proper bonding. The safer approach is to brush out and clean the joints to remove loose or degraded material, then re-fill with fresh sand.
How do I tell the difference between polymeric sand haze and concrete efflorescence?
Polymeric haze tends to be a one-time white or milky film soon after activation, while efflorescence usually reappears over time as moisture moves through the pavers and bedding. If you see new spotting weeks later, treat it as efflorescence and extend your wait time rather than immediately cleaning aggressively.
Will pressure washing always ruin polymeric sand?
A direct high-pressure blast can excavate joint material, but it is not just pressure, it is also nozzle distance and angle. If you must clean, use a gentle rinse, keep the nozzle farther away, and avoid focusing on joint lines. Also check and top off joints after cleaning in most climates to prevent rocking and settling.
What if I keep getting ants or weeds even after installing polymeric sand?
Weeds usually mean the jointing sand is depleted or not actually polymeric, or the joint region has underlying conditions like insufficient weed barrier fabric. For ants, excavation may still occur if joints are left with loose material or if water keeps loosening the top. Remove affected joints, clear and dry them, re-fill with the correct polymeric product, and if infestations persist inspect the base for barrier fabric.
Should I ever use bedding sand in the joints to make up depth?
No. Bedding sand is too coarse and variable for reliable joint formation, and it generally does not fill narrow joints effectively. If you lack joint depth, the better fix is correcting the installation or using a compatible jointing sand type and grain size that matches the joint width and depth requirements.
My patio joints wash out after heavy rain, what’s the first thing to check besides the sand type?
Check drainage and water pooling first. If the base is flat or water collects, any jointing sand can fail because it stays saturated too long, especially for polymeric. A practical order is, confirm the base has proper slope away from structures, inspect downspout or grading runoff points, then re-sand only after fixing drainage.
Can polymeric sand be used in freeze-thaw climates without problems?
It can, but the article emphasizes that good drainage is a prerequisite because trapped water undermines performance. Frost heave can fracture joints if water infiltrates and freezes. After freeze-thaw season, inspect early spring, remove any cracked sections, re-fill with fresh sand, and avoid letting water pool near low spots or drainage points.