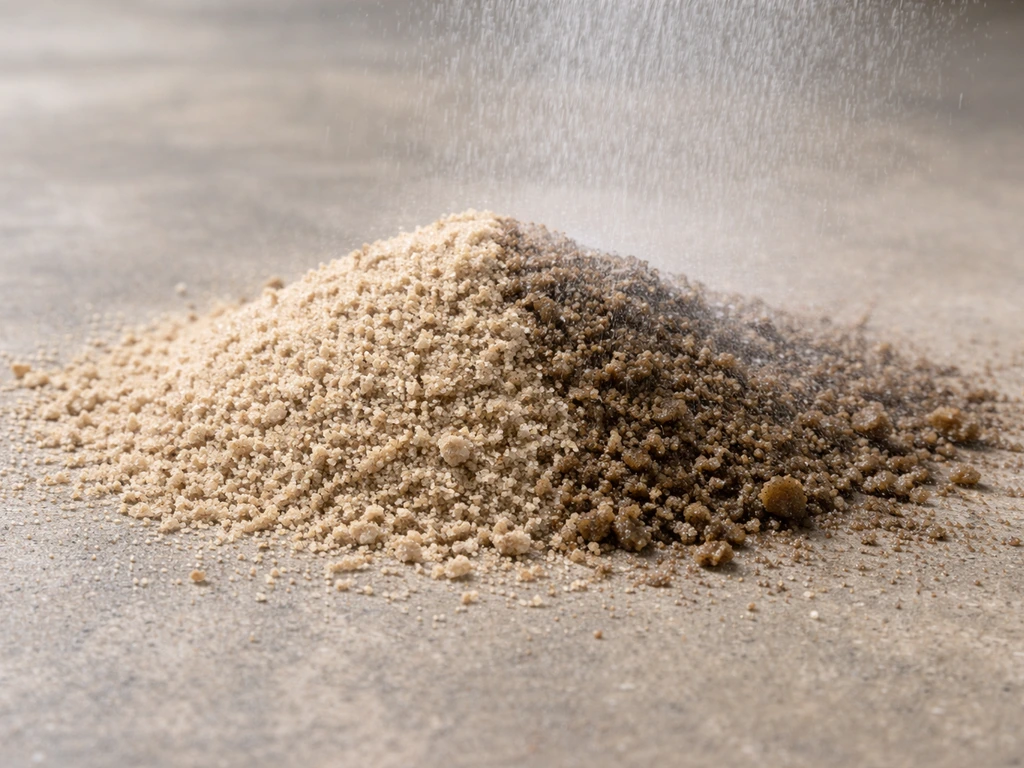
For most brick patios, polymeric jointing sand is the best choice for filling joints. It locks hard when activated with water, resists washout, suppresses weeds, and holds up through freeze-thaw cycles far better than plain sand or stone dust. That said, regular jointing sand or fine screenings still have a place in certain situations, and choosing the wrong product for your climate or joint width can cause the exact problems you're trying to avoid: voids, weed lines, and joints that empty out after the first rainstorm. If you also keep chickens outside, choose a jointing sand that is appropriate for poultry safety and avoid products with harmful additives paver sand.
Best Sand for Brick Patio Joints: Choose, Install

Nolan Ellison
10 Jun 2026
Why the sand in your brick joints matters more than you'd think
Joint sand does a lot of quiet work. It transfers load between bricks so your patio surface moves as a unit instead of individual pieces rocking and shifting. It fills the gaps that would otherwise collect water, debris, and weed seeds. And it keeps the whole surface locked in place so the bedding layer beneath doesn't get undermined by water washing through from the top. When joint sand fails, you don't just get an ugly patio. You get bricks that rock underfoot, edges that migrate, and base erosion that eventually means resetting the whole section. Getting the joint fill right from the start is one of the highest-leverage decisions in a brick patio build.
The three types of sand used in brick patio joints
There are really three categories of material you'll encounter when shopping for joint fill: polymeric jointing sand, regular jointing sand (sometimes sold as paver sand), and bedding sand or stone screenings. They're used at different layers and behave very differently once installed.
Polymeric jointing sand
Polymeric sand is a graded fine sand mixed with water-activated polymers. Brands like QUIKRETE HardScapes, Sakrete PermaSand, and Techniseal HP NextGel all work on the same principle: sweep it into the joints dry, then activate with water and the polymers bind the particles into a semi-rigid, flexible mass. It handles joints up to about 2 inches wide, resists erosion from rain and surface runoff, creates a nearly airtight seal that blocks weed germination, and deters insects and pests from tunneling through the joints. When installed correctly, it can realistically last 10 to 15 years before you need to think about reapplication.
Regular jointing sand
Regular jointing sand is a fine, washed, angular sand graded for joint filling. It doesn't bind, which means it stays somewhat permeable and flexible. That sounds like a downside, but it has real advantages in certain applications: it's forgiving on heavily textured or tumbled brick surfaces where polymeric sand can leave a haze that's hard to clean, and it's much cheaper per bag. The trade-off is that it washes out more easily under heavy rain, needs more frequent top-ups, and does very little to stop weeds.
Bedding sand vs. joint sand
Bedding sand (coarser, ASTM C33-graded material like concrete sand) goes under the bricks as a setting layer, typically 1 inch thick screeded flat. If you are deciding between patio sand vs play sand, the key point is whether the material is meant to lock in the joints or simply set the pavers bedding sand. It is not meant for joints.
If you mean mortar between patio bricks, use the right joint mortar mix rather than joint sand, since sand and mortar are not interchangeable. Some people try to sweep leftover bedding sand into joints and wonder why it washes out immediately. Joint sand is finer and more angular, designed to pack tightly into the narrow space between bricks.
Joint sand is finer and more angular, designed to pack tightly into the narrow space between bricks, which is what most people mean when they ask what sand for patio pointing. If you're focused on what goes under your bricks rather than between them, that's a different topic with its own set of considerations.
| Sand Type | Best Use | Weed Resistance | Washout Resistance | Durability | Cost (approx.) |
|---|---|---|---|---|---|
| Polymeric jointing sand | Standard brick joints, most climates | Excellent | Excellent | 10-15 years | $20-$30 / 50 lb bag |
| Regular jointing sand | Textured/tumbled brick, low-traffic areas | Poor | Fair | 2-4 years | $5-$10 / 50 lb bag |
| Stone dust / screenings | Rustic dry-lay with wide joints | Poor | Poor | 1-3 years | $4-$8 / 50 lb bag |
| Bedding/coarse sand | Setting layer only, under bricks | N/A | N/A | N/A | $5-$9 / 50 lb bag |
For most homeowners building a standard brick patio with 1/4 inch to 3/4 inch joints, polymeric sand is the right call. Regular jointing sand is worth considering only if your brick surface is heavily textured and you're worried about haze, or if you're doing a very informal rustic installation where some joint looseness is acceptable.
Matching your sand choice to your climate and conditions
Climate is the single biggest factor after joint width when picking joint sand. Here's how to think through it.
Freeze-thaw climates (zones 3-6)
If you get hard winters with repeated freeze-thaw cycles, polymeric sand earns its price premium quickly. Plain joint sand that absorbs water and freezes will heave and crack, creating gaps that invite more water the next cycle. Polymeric sand's semi-rigid matrix flexes slightly rather than fracturing, and because it sheds water rather than absorbing it, there's less freeze expansion pressure in the joint. In cold climates, look for a polymeric product rated for freeze-thaw performance and avoid applying it when temperatures are expected to drop below 32°F within 24 hours of installation.
High-rainfall and drainage-heavy areas
In wet climates (Pacific Northwest, Southeast, anywhere with regular heavy downpours), joint washout is your main enemy. Polymeric sand's binding action is critical here. Regular sand in high-rainfall conditions will migrate out of joints within a season or two. If you're in a drainage-heavy area and have set your patio on a permeable base that passes water through intentionally, confirm that your polymeric product is compatible with permeable/open-graded bases. Some polymeric sands are designed for traditional compacted bases; permeable paver systems use a different formulation that stays somewhat flexible and allows water movement.
Hot, dry, and UV-heavy climates
In desert and sun-belt climates, the main concerns are UV degradation and the sand drying out before the polymers fully activate. In very dry conditions, the water you apply during activation can evaporate too fast. Plan to work in the morning or evening and mist the joints more gently over a longer period rather than soaking quickly. Premium polymeric products with higher polymer content tend to hold up better under prolonged sun exposure.
Shaded, damp areas and moss-prone patios
Heavily shaded patios that stay damp are a tough environment for any joint material. Moss and algae will grow on the brick surface regardless of what's in the joints, but polymeric sand's tight seal gives weeds and organic growth fewer entry points than open regular sand. If moss is a major concern, pair polymeric sand with a patio-appropriate surface sealant applied at least 30 days after joint installation.
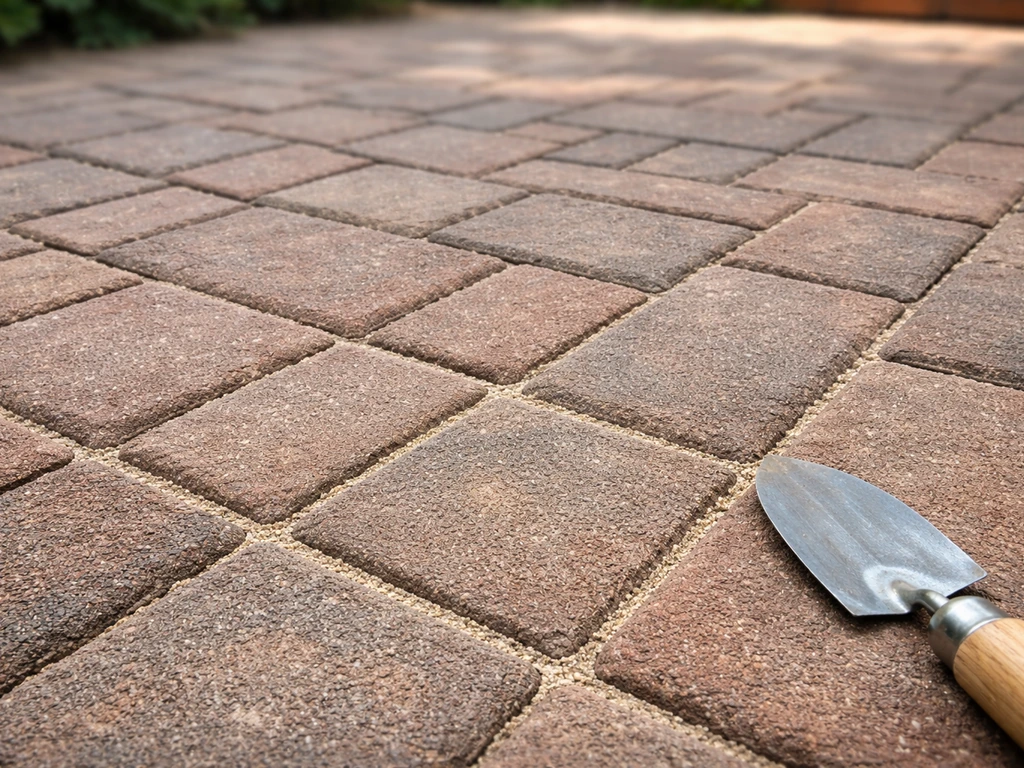
How to install sand in brick patio joints, step by step
Getting this right is mostly about following a careful sequence. I've seen more joint failures from rushed installation than from poor product choice. Give yourself half a day for a typical 200-400 sq ft patio.
Step 1: Prepare the surface
The brick surface must be completely dry before you start sweeping polymeric sand. Any moisture on the bricks when you sweep will cause the polymers to activate prematurely and stick to the surface as a white haze. If your patio was rained on recently, wait at least 24 to 48 hours for full surface drying. Blow out any debris, dirt, or old sand from the existing joints using a leaf blower. If you're re-sanding old joints, use a joint chisel or stiff wire brush to clear out any crumbling material before you start.
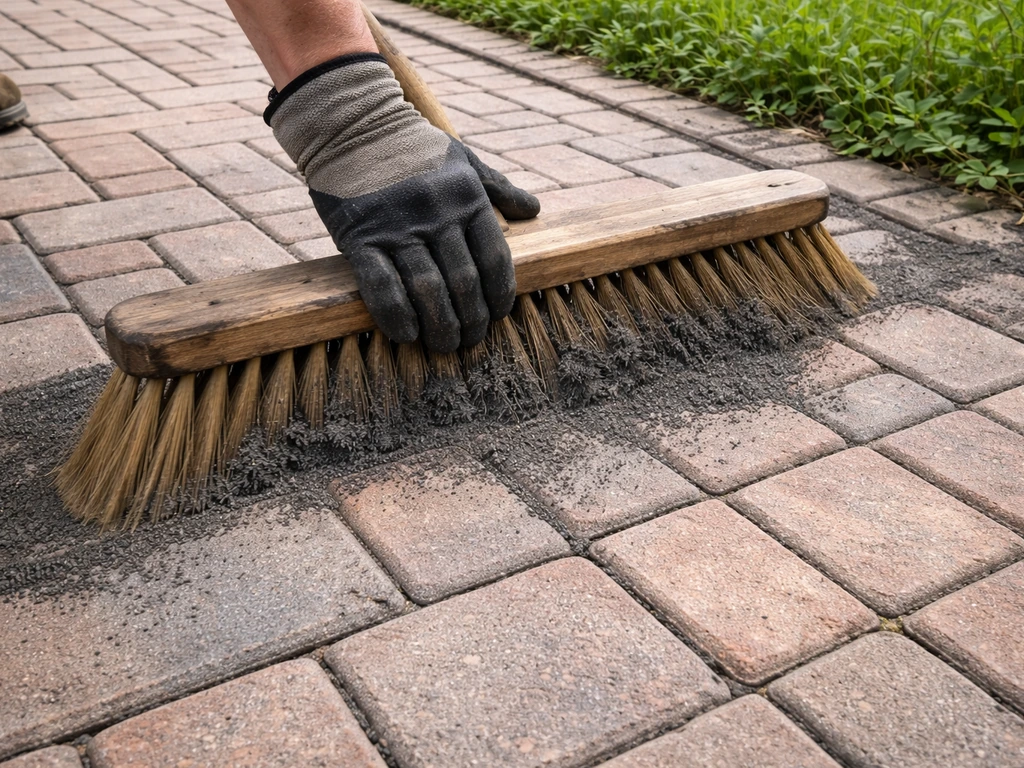
Step 2: Pour and sweep sand into joints
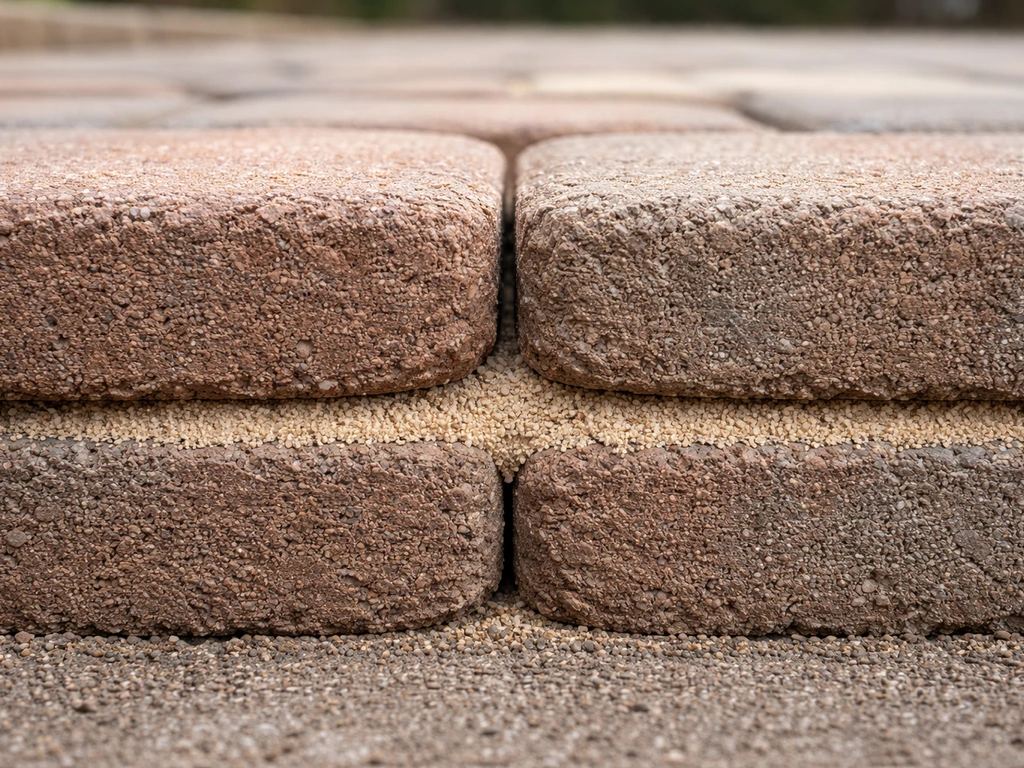
Pour polymeric sand onto the dry surface and use a stiff-bristle push broom to work it into the joints in multiple directions, crossing diagonally as well as along the rows. Keep sweeping and adding sand until each joint is filled to within 1/8 inch of the top of the paver surface. That 1/8 inch target matters: fill too high and you end up with haze on the surface; fill too low and the joint won't lock correctly and will wash out at the edges. Once joints are filled, blow the excess off the surface with a leaf blower. Get it clean. Any sand film left on the brick face will activate with water and create haze.
Step 3: Compact (if applicable)
For larger patios or areas that will see regular foot or vehicle traffic, run a plate compactor over the surface after the initial sweep-in. Use a rubber pad or a piece of carpet under the plate to protect the brick faces. Compacting settles the sand deeper into joints, so you'll need to sweep in a second round of material to bring it back up to the 1/8 inch target. Don't skip the second sweep after compacting.
Step 4: Final dust-off
Before you touch water, do one more thorough pass with the leaf blower. This is the step most people rush, and it's where surface haze comes from. Blow across the entire surface until there is no visible powder or sand film on the brick tops. A fine-bristle brush works well for any material stuck in texture grooves on the brick face.
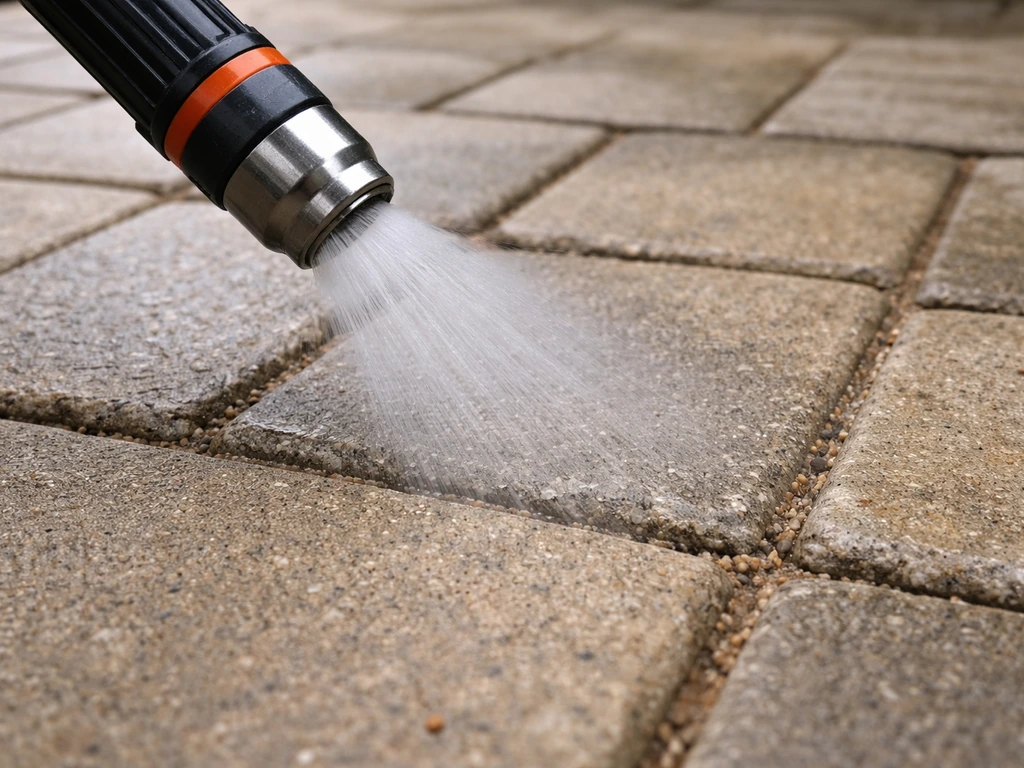
Step 5: Water activation
Use a garden hose with a gentle shower or fine-mist nozzle. You want to wet the joints thoroughly without flooding the surface. Start at one end and work your way across in sections, applying water until the joint stops absorbing it. Stop the moment water starts pooling on top of the joint.
Oversaturation is what lifts the polymers out of the joint and onto the brick surface as a white film. If you see any water pooling or sheeting across the top of the sand in the joints, stop immediately. Some installers recommend a quick second pass with the blower immediately after misting to remove any surface foam or polymer residue before it dries, then a second misting pass a few minutes later.
Step 6: Curing and traffic restriction
Keep foot traffic off for at least 24 hours. Block vehicles for a minimum of 48 to 72 hours to allow joints to dry and cure completely. Techniseal’s installation guide for HP NextGel also instructs you to block vehicular traffic for at least 48 to 72 hours so the joints can fully dry and cure Block vehicles for a minimum of 48 to 72 hours. Don't let sprinklers run over the area during this window. If rain is in the forecast within 24 hours, postpone the water-activation step. Partially activated polymeric sand that gets rained on before it cures can wash right back out.
How much sand you actually need
Coverage varies significantly based on joint width, brick thickness, and paver size. Smaller bricks mean more linear feet of joints per square foot of patio, which means more sand. Here are realistic estimates to work from.
| Joint Width | Paver Thickness | Coverage per 50 lb Bag |
|---|---|---|
| 1/8 inch | 2.5 inch | 20-35 sq ft |
| 1/4 inch | 2.5 inch | 30-45 sq ft |
| 3/8 inch | 2.5 inch | 25-40 sq ft |
| 1/2 inch | 2.5 inch | 20-30 sq ft |
| 3/4 inch | 2.5 inch | 15-25 sq ft |
As a working rule, a standard 50 lb bag of polymeric sand covers roughly 30 to 60 square feet for typical 1/4 to 3/8 inch joints on a 2.5 inch thick brick paver. For a 200 sq ft patio with 3/8 inch joints, budget for 5 to 8 bags and buy an extra bag or two for touch-ups. Always round up rather than running short mid-job, because matching bag lots matters less for joint sand than for pavers, but you still want consistent product throughout.
To calculate more precisely: estimate the total linear feet of joints (square footage of patio divided by average paver face dimension gives you a rough count), multiply by joint width in inches, then divide by the volume per bag from the manufacturer's coverage table. Most manufacturer data sheets include coverage by joint size and paver depth, so check the specific product before buying.
What to do right, what to avoid, and how to fix common problems
Do's
- Work on a dry day with no rain forecast for at least 24 hours after activation.
- Fill joints to within exactly 1/8 inch of the paver surface.
- Blow the surface completely clean of sand dust before adding any water.
- Use a gentle shower or mist nozzle, never a jet spray, for activation.
- Wait the full cure time before allowing traffic.
- Buy 10-15% more product than your estimate to account for settling and touch-ups.
Don'ts
- Don't apply polymeric sand on a damp or moist brick surface.
- Don't flood the joints with water during activation.
- Don't skip the post-sweep dust-off step.
- Don't apply when temperatures will drop below freezing within 24 hours.
- Don't use polymeric sand on heavily textured surfaces without testing a small area first.
- Don't apply sealant until at least 30 days after jointing sand installation.
Sand washing out
If joint sand washes out after a rain event, the most common cause is incomplete water activation during installation. The polymers didn't fully bind because the joints weren't fully saturated, or activation water was applied too fast and ran off the surface before soaking in. The fix is to clear the remaining loose sand from the joints, dry the surface completely, and re-apply fresh polymeric sand following the correct sequence. Partial top-up of washed-out joints with new sand rarely works well because the new material won't bond properly to whatever remnant material is still there.
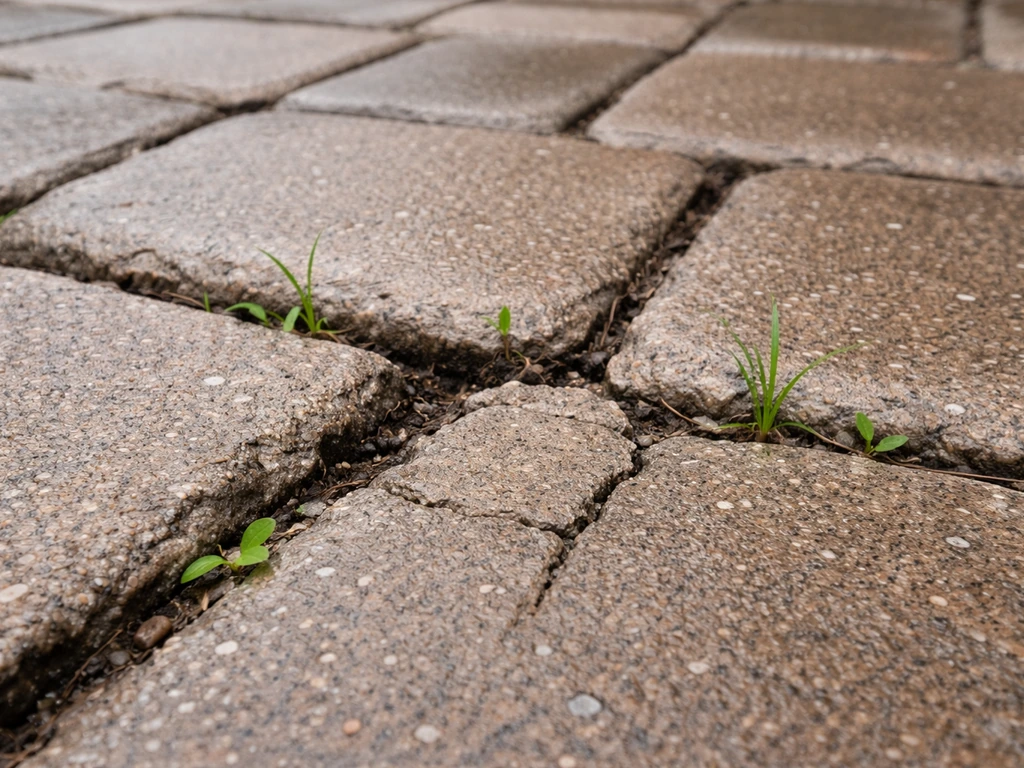
Weed growth in joints
Weeds in polymeric sand joints usually mean the sand was installed too loosely (low fill level), was never fully activated, or has degraded over time and developed cracks. Airborne seeds can germinate in cracks on the surface of even well-activated polymeric sand. Treat with a targeted weed killer, let it work, then clear the dead material and assess whether the joint surface is still intact or needs full removal and re-sanding. A well-sealed joint is far more resistant but not 100% weed-proof after the first few years.
White haze on brick surface
White haze is either polymer residue (from excess water activating sand that wasn't fully blown off the surface) or natural efflorescence (mineral deposits from the brick or concrete curing process). Polybind also emphasizes sequencing around efflorescence cleaning and sealing, including waiting for the polymeric product to dry and using specific cure and maturation time guidance (for example, a 24-hour wait time) before moving on efflorescence cleaners and timing around sealing.
Polymer haze can typically be removed with an efflorescence cleaner or a hot-water pressure wash. Unilock notes that efflorescence itself won't compromise the structural integrity of the pavers, though it looks bad. If the haze appeared right after installation and the surface wasn't thoroughly cleaned before water activation, that's polymer residue. If it appeared weeks later, it's more likely efflorescence from the brick material itself.
Voids and sunken joints
Voids that appear months after installation (not right after the first rain) usually indicate insect or pest tunneling, or settlement of the base layer beneath the bricks pulling the sand down. If the voids are evenly distributed, check whether the base has settled. If they appear concentrated near the edges or in irregular patterns, look for ant or other insect activity. Polymeric sand's tight seal significantly reduces pest tunneling risk. For void repair, clear the joint as deep as possible, pack in fresh material in layers, and re-activate carefully.
Keeping your joints in good shape over time
Good polymeric sand, correctly installed, is low-maintenance for years. Here's what to watch for and when to act.
Annual inspection routine
Every spring, walk the patio and look for joints that have sunken below the 1/8 inch threshold, cracks running along the joint surface, areas where sand has eroded back from the paver edge, or weed seedlings taking hold. Small areas of damage caught early are easy to repair. Ignored for a full season, they tend to expand because water gets in and undermines the surrounding material.
When to top up vs. when to re-sand completely
If less than 20% of your joint surface is showing wear, cracking, or low fill, spot repairs with fresh polymeric sand are reasonable. Clear the damaged section down to firm material, clean and dry thoroughly, and fill fresh sand to the correct depth before re-activating. If more than a third of your joints look degraded, or if the surface has cracked extensively after several years, a full re-sand is more cost-effective than piecemeal repairs. For most patios in moderate climates, expect a full re-sand roughly every 8 to 12 years if the original installation was solid, or every 3 to 5 years if you used regular jointing sand.
Sealing and maintenance timing
If you plan to seal your brick patio surface, wait at least 30 days after polymeric sand installation before applying sealant. Sealing too early traps moisture in the joints and can interfere with complete polymer curing. Once the patio is sealed, the seal coat adds another layer of protection to the joint edges and makes the whole surface easier to clean. Re-seal every 2 to 4 years depending on traffic and climate exposure.
Seasonal care in freeze-thaw zones
Avoid using metal shovels directly on the patio surface in winter. Metal blade contact can chip the brick surface and the joint edges. Use a plastic shovel or a rubber-edged blade. Sand-based de-icers are fine. Avoid calcium chloride products directly on concrete pavers, though brick is generally more tolerant. Inspect joints each spring after the last hard freeze, as this is when any crack propagation from the winter becomes visible.
FAQ
What’s the difference between jointing sand and bedding sand, and why does it matter for a brick patio?
Jointing sand is meant to lock the narrow spaces between bricks, it stays in the joint through rain and temperature swings. Bedding sand (sometimes called concrete sand or screenings) is the setting layer under the bricks, it does not bind the surface together. If you use bedding sand in the joints, it typically washes out faster and you can get loose bricks and edge migration sooner.
Can I use polymeric sand if my patio joints are smaller than 1/4 inch or larger than 3/4 inch?
Polymeric sand works best in the ranges the product is rated for, commonly up to about 2 inches wide, but the exact joint width guidance is brand-specific. If your joints are underfilled, even good polymeric sand may not lock properly. If joints are wider than the rating, you may need a different jointing sand formulation or a different approach (for example, staged filling) rather than forcing a product outside its spec.
Do I need to wet the patio before installing polymeric sand, or should it be completely dry?
For polymeric jointing sand, the paver surface must be dry when you sweep it in. Any moisture on the brick tops during the dry-sweep phase can activate the polymer prematurely and cause haze. After sweeping and blowing off excess, you wet only the joints, with a gentle mist, until the joint stops absorbing.
How do I avoid white haze when using polymeric sand?
Two things prevent most haze: keep the brick faces clean before activation (blow off every sand film) and do not oversaturate. Stop misting as soon as water starts pooling on the joint tops, and if foam is visible, remove it with a light blower pass before it dries. If haze appears weeks later, it may be efflorescence rather than polymer residue.
Can I partially top off joints after rain washout, or do I have to remove all the loose material?
In most cases, you should remove loose and failing sand rather than simply add new sand. The polymers typically will not form a proper bond to remnant material that is contaminated, partially activated, or already degraded. The reliable fix is to clear the joint down to firm material, re-clean, dry, then re-sand and re-activate following the full sequence.
What should I do if I see weeds or grass growing from between bricks even with polymeric sand?
If weeds appear, the joint may be low, not fully activated, or it may have cracked over time. Treat weeds, then inspect the joint depth and integrity. If the joint surface is intact and only the top is disturbed, targeted clearing and re-sealing or re-sanding can be enough. If cracks and voids are present, plan on removing the compromised material and re-installing joint sand to restore the seal.
My polymeric joints look low right after installation, can I fix it without fully redoing the patio?
Usually you can adjust only if the patio has not gone through activation and initial cure yet. If the joint is still in the dry-sweep stage, add sand to hit the specified fill target (often filled to within about 1/8 inch of the paver surface) and then proceed with activation. If the joints are already activated, adding sand on top often fails to lock because the polymer bond and joint profile are already set.
Is it okay to run a plate compactor on the patio after installing joint sand?
Yes, for larger patios and high traffic areas, compacting after the first sweep-in can improve seating and reduce future movement, but it usually requires a second sweep to restore the joint fill level. Use a rubber pad or protective layer under the plate to avoid chipping brick corners and damaging joint edges.
How soon can I walk on the patio after activation, and what about sprinklers and rain?
Keep foot traffic off for at least 24 hours. Block vehicles for roughly 48 to 72 hours so joints can dry and cure. Avoid sprinklers entirely during the window, and do not start activation if rain is expected within about 24 hours, partially activated polymeric sand can wash out and you’ll likely need to redo the joints.
Can polymeric sand be used on an open-graded or permeable base?
It can be, but you should confirm compatibility with permeable or open-graded bases based on the product’s instructions. Permeable paver systems rely on controlled drainage through the base, so the polymer formulation needs to tolerate water movement without washing out. If the product is designed only for traditional compacted bases, it may not perform as intended.
What if my joints are hazy immediately after installation, is it always polymer residue?
Haze right after installation is often polymer residue from excess sand left on the brick faces or over-wetting during activation. If haze shows up later, weeks after, it’s more likely efflorescence from minerals in the brick or concrete curing process. Timing matters because polymer residue cleaning is usually easier than dealing with established mineral deposits.
How often should I re-sand, and what indicates I should do a partial repair vs a full re-sand?
If less than about 20% of the joint area is affected, spot repairs are often worthwhile. If damage is widespread, or joints are extensively cracked after multiple seasons, a full re-sand is usually more cost-effective. Also check for the practical symptom of ongoing settlement or undermining, if bricks are rocking, you often need more than just refilling the surface joints.
Can I seal my brick patio, and does sealing change how long polymeric sand lasts?
You generally should wait until after polymeric sand has cured, commonly at least 30 days, before applying a surface sealant. Sealing too early can trap moisture in the joints and interfere with full polymer performance. After sealing, re-seal on a schedule based on traffic and climate, typically every 2 to 4 years, to keep joint edges protected and the surface easier to clean.
What de-icer or salt is safest for brick patios with polymeric joint sand?
Use sand-based de-icers, they are generally safer for paver materials. Avoid calcium chloride products directly on concrete pavers, brick is usually more tolerant but still not ideal. After hard freezes, inspect joints in spring because cold-weather micro-cracking can show up right after the freeze period.