
The best stone patio material for most homeowners is flagstone or bluestone for a natural look, porcelain pavers for low maintenance and frost resistance, or concrete brick pavers for budget-conscious durability. Which one wins for your yard depends on four things: your climate, your budget, how much upkeep you're willing to do, and whether you're going DIY or hiring a crew. This guide walks through every major stone patio surface, what each one actually costs installed, how to build a base that lasts, and how to keep things looking good for decades.
Best Stone Patio Ideas: Materials, Designs, Costs & How-To

Nolan Ellison
26 Jul 2026
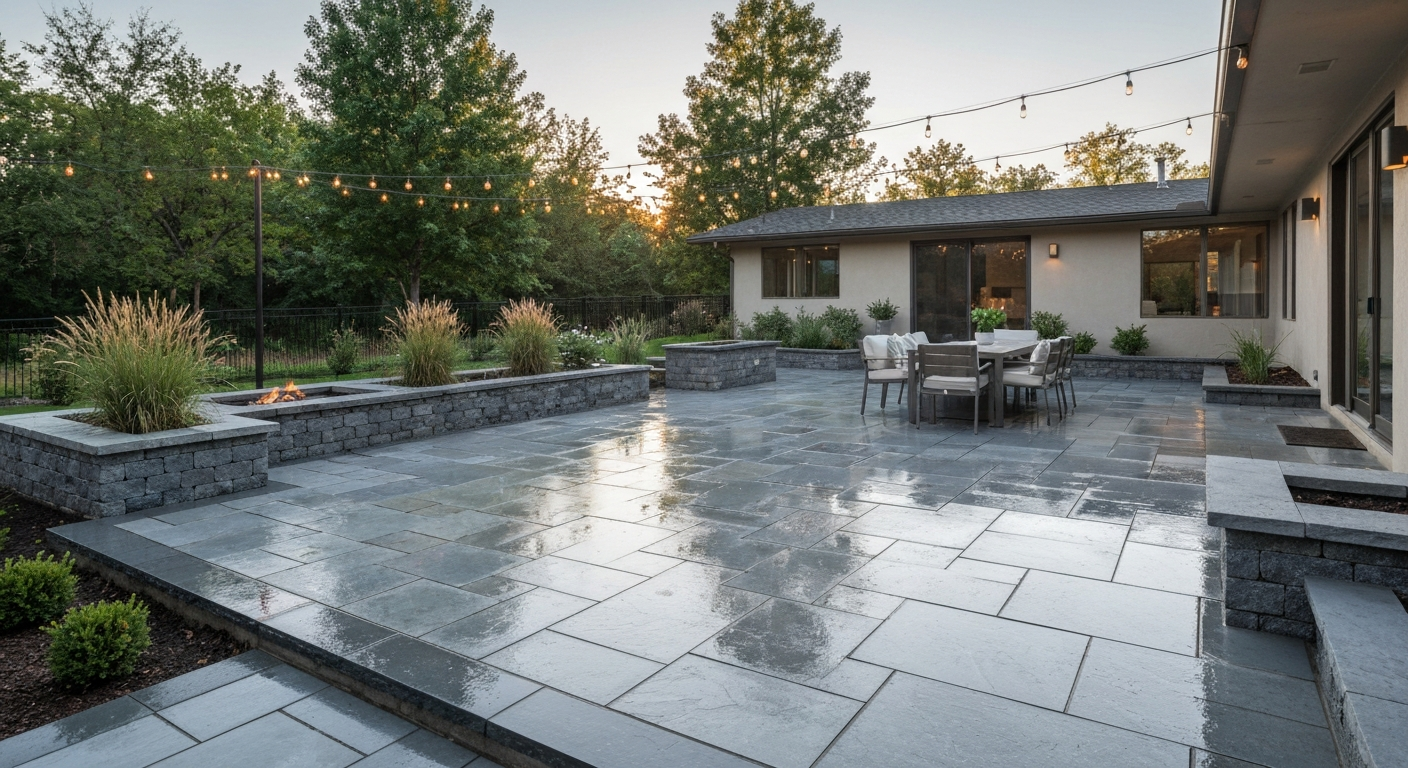
Who this guide is for and what it covers
If you're standing in your backyard trying to decide between flagstone, pavers, porcelain tile, or some kind of gravel situation, this is the article for you. It's written for homeowners in the planning or early construction phase who want clear, unbiased information rather than a sales pitch. I've worked with most of these materials across different climates and project scales, so I'll tell you what holds up and what causes headaches five years down the road. We cover material selection, installation methods, drainage, jointing, finishing, maintenance, costs, and when to call a professional versus doing it yourself.
Quick take: what to pick for common needs
If you're short on time and just need a starting point, here are the most practical one-line recommendations based on the most common homeowner priorities.
- Best on a tight budget: concrete brick pavers or gravel with a solid edging system, installed cost typically $8–$15/sq ft.
- Best for cold climates (freeze-thaw zones): dense bluestone, granite, or frost-rated porcelain pavers (water absorption below 0.1% for porcelain, below 1% for quality granite).
- Best natural look: irregular flagstone laid in a dry-set sand bed, or large-format bluestone slabs for a cleaner aesthetic.
- Best low-maintenance surface: 2 cm outdoor porcelain pavers on a compacted base, sealed joints, virtually zero weed intrusion.
- Best for resale appeal and durability: bluestone or granite, wet-set in mortar on a concrete subbase.
- Best for drainage and eco-conscious builds: permeable interlocking concrete pavers (PICP) or open-set flagstone over a gravel reservoir.
- Best DIY project: dry-laid flagstone or concrete pavers on a compacted sand/gravel base with polymeric jointing sand.
Decision checklist: things to figure out before you pick a material
Picking the sexiest stone you saw on Pinterest without answering these questions first is how you end up with a cracked, weedy, or flooded patio two seasons later. Work through this list before you call a supplier or pull a permit.
- How will you use the space? Dining and foot traffic only, or do you park a golf cart, tractor, or heavy grill on it? Pedestrian patios need a minimum 4-inch compacted aggregate base; anything heavier needs 6–12 inches and much thicker stone (75 mm+ for vehicular stone per Natural Stone Institute specs).
- What's the slope and drainage situation? You need a finished surface slope of at least 1–2% (roughly 1/8 to 1/4 inch per foot) away from your house. Flat yards with clay soil may need a permeable paver system or subsurface drain.
- What's your climate? Freeze-thaw cycles are brutal on porous stone. If you're in USDA zones 3–6, prioritize low water-absorption materials (granite, porcelain, dense bluestone). Sandstone and some limestones can absorb 2–12% water and crack if water freezes inside them.
- What's your realistic budget, all-in? Stone-only material costs don't reflect installed prices. Natural stone installed professionally runs $15–$50+/sq ft. Concrete pavers run $8–$25/sq ft installed. Factor in base prep, edging, drainage, jointing, and sealing.
- How much maintenance will you actually do? Flagstone needs periodic joint weeding and re-sanding. Unsealed limestone or sandstone stains easily. Porcelain needs almost nothing except occasional cleaning.
- Do you need a permit? Many municipalities require a permit for patios over a certain square footage or within a setback. Impermeable surfaces over a set threshold may also trigger stormwater requirements. Check before you dig.
- Are you DIYing or hiring? Irregular flagstone cutting and wet-set mortar work are genuinely skilled trades. Concrete paver installation on a flat lot is a realistic DIY project. Be honest about your skill level and tool access.
Stone patio materials at a glance
| Material | Durability | Installed Cost (US, 2026) | Slip Resistance | Maintenance Level | Best Climates | Visual Style |
|---|---|---|---|---|---|---|
| Flagstone (irregular) | Good–Very Good | $7–$35+/sq ft | Good (textured) | Medium (weeding, re-sanding) | Most climates; seal in freeze-thaw | Rustic, organic, informal |
| Bluestone (sawn or thermal) | Very Good–Excellent | $18–$45/sq ft | Very Good (thermal finish) | Low–Medium | All climates incl. cold | Clean, classic, versatile |
| Granite | Excellent | $20–$50+/sq ft | Good–Very Good (flamed) | Very Low | All climates; ideal for cold | Formal, upscale, durable |
| Limestone | Moderate–Good | $15–$35/sq ft | Moderate (honed can be slippery) | Medium (staining, sealing) | Warm/dry; caution in freeze-thaw | Soft, warm, Mediterranean |
| Sandstone | Moderate | $10–$30/sq ft | Good (rough texture) | Medium–High | Warm/dry; avoid wet-freeze zones | Earthy, casual, Southwest |
| Porcelain pavers (2 cm) | Excellent | $15–$40/sq ft installed | Very Good (DCOF ≥0.42) | Very Low | All climates; frost-resistant | Modern, uniform, sleek |
| Concrete/brick pavers | Good–Very Good | $8–$25/sq ft | Good | Low | All climates | Traditional, flexible patterns |
| Gravel/crushed stone | Good (surface) | $3–$10/sq ft | Moderate | Low–Medium (raking) | All climates | Informal, cottage, natural |
| Large stone slabs | Very Good–Excellent | $20–$55+/sq ft | Good–Very Good | Low | All climates (check stone type) | Contemporary, minimal, bold |
| Composite pavers | Good | $12–$30/sq ft | Good | Very Low | Most climates | Modern, uniform |
Top material picks: a short overview
Here's a plain-language rundown of every major surface before we go deeper on each one. Think of this as the preview before the full breakdown.
- Flagstone: the classic natural-look choice. Irregular shapes, tons of personality, and a wide price range depending on species and how it's set. Best for informal or cottage-style spaces.
- Granite, bluestone, limestone, sandstone: the premium natural stone family. Each behaves differently in cold or wet climates, so stone selection really matters here.
- Porcelain pavers: the modern workhorse. Factory-controlled water absorption below 0.1% means these are freeze-thaw proof by design. The trade-off is a more manufactured look.
- Brick: timeless, widely available, and proven. Technically a manufactured clay paver, but it reads visually like stone. Great for traditional home styles.
- Gravel/crushed stone: the budget-friendly and permeable option. Works brilliantly as a base infill between larger stones or as a stand-alone surface for casual spaces.
- Large stone slabs: the architectural move. Oversized format (often 24x48 inches or larger) in granite, limestone, or bluestone creates a clean, contemporary look with fewer joints.
- Composites: engineered materials combining aggregates and binders. Consistent sizing, decent durability, and very low maintenance, though they lack the character of natural stone.
Flagstone and natural stone: the full picture
Flagstone is a broad term for any flat, irregularly shaped natural stone used for paving. It's usually sandstone, slate, quartzite, limestone, or bluestone, split or cut into slabs typically 1.5 to 2.5 inches thick for pedestrian use. The Natural Stone Institute recommends a minimum nominal thickness of about 30 mm (1.25 inches) for exterior pedestrian stone pavers, and that's roughly where most flagstone products land for residential use.
Pros of flagstone
- Natural beauty and variation: no two slabs are identical, which creates an organic look that manufactured products can't fully replicate.
- Wide availability: sourced regionally in most parts of the US, which can reduce shipping cost.
- Good slip resistance: the natural texture of split-face or thermal-finished flagstone provides solid grip even when wet.
- Repairability: individual stones can be lifted and reset if they shift or crack.
- Dry-laid option: a well-prepared sand-and-gravel bed without mortar is a realistic DIY project and allows for drainage adjustment later.
Cons of flagstone
- Irregular shapes require significant labor to cut and fit, which pushes installed costs up even when stone itself is cheap.
- Joint maintenance: wide sand-filled joints in dry-laid flagstone invite weeds and require periodic attention. Polymeric sand helps but isn't a one-time fix.
- Variable quality: buying unseen from a distant quarry can deliver slabs that are too thin, poorly matched, or overly porous for your climate.
- Freeze-thaw risk for softer species: porous sandstone or low-quality limestone can absorb water and crack in repeated freeze-thaw cycles (ASTM C97 water absorption can run 2–12% depending on source).
What flagstone actually costs
Material-only flagstone runs roughly $2.50–$5+ per square foot for the stone itself. Once you add a professional installer, base prep, cutting, jointing, and edging, you're typically looking at $7–$35+ per square foot total, with wet-set mortar installations at the high end. A 300-square-foot patio professionally installed with mid-range flagstone could easily land at $5,000–$10,000 all-in. If you're comfortable with a circular saw fitted with a diamond blade and can handle a compactor, a dry-laid flagstone patio is one of the more achievable DIY stone projects.
Granite, bluestone, limestone, and sandstone: individual strengths
Granite
Granite is the toughest common dimension stone for exterior paving. Compressive strength for intact granite commonly exceeds 120 MPa (over 17,000 psi), and water absorption is typically below 1%, which means freeze-thaw cycles cause minimal damage. Flamed or brushed finishes provide good slip resistance. The trade-off is cost: granite paving is among the most expensive options at $20–$50+ per square foot installed. It's the right call for high-use areas, cold climates, or anywhere you want a surface that essentially never needs replacing.
Bluestone
True Pennsylvania or New York bluestone is a dense sedimentary quartzite-like stone that performs exceptionally well in northeastern US climates. It tends to have relatively low water absorption, often landing in the 2–6% range or lower depending on the quarry, and it responds well to a thermal or sawn finish for outdoor use. The blue-gray color pairs well with both traditional and contemporary architecture. Sawn bluestone has clean edges and is easier to lay in patterns; irregular or natural cleft bluestone has more character but requires more fitting work. Expect to pay $18–$45/sq ft installed for sawn bluestone.
Limestone
Limestone is a warm-toned, elegant material that works beautifully in Mediterranean, Spanish Colonial, or transitional yard styles. The problem is that limestone is relatively porous compared to granite or dense bluestone, and many varieties absorb enough water to be risky in freeze-thaw climates unless properly sealed. Nominal slab thicknesses for pedestrian paving typically run 20–50 mm (3/4 inch to 2 inches). The Dimension Stone Design Manual, Natural Stone Institute lists nominal limestone slab thicknesses for pedestrian paving as typically 20–50 mm (3/4–2 in.) Dimension Stone Design Manual — Natural Stone Institute. A honed finish looks beautiful but can be slippery when wet, so outdoor limestone should have a sandblasted or brushed surface finish. In warm, dry climates like the Southwest or Southeast, limestone is a fantastic choice.
Sandstone
Sandstone is widely used in the South, Southwest, and coastal regions and has an earthy, warm palette that looks great in casual settings. The concern with sandstone in cold climates is its absorption rate, which can range broadly from about 2% up to 12% depending on the geologic source and how the stone was processed. An academic review of natural stones reports sandstone (including regional 'bluestone') commonly shows a broad absorption range (often 2–12% depending on geologic source) and notes many bluestones used for patios are relatively dense with absorption often under 2–6% and can perform well in freeze–thaw climates when properly installed or sealed blank" rel="noopener noreferrer">Academic review: physical properties of natural stones and absorption ranges. That high end is genuinely problematic in a freeze-thaw zone: water gets in, freezes, expands, and splits the slab. If you're in a cold climate and love the sandstone look, choose a dense, tightly cemented variety and seal it annually. In warmer climates, sandstone is more forgiving and genuinely attractive at a lower price point than granite or bluestone.
Porcelain pavers and manufactured stone tiles
Outdoor porcelain pavers have gotten dramatically better over the last decade. Modern 2 cm (20 mm) thick porcelain pavers are manufactured to water absorption below 0.1%, which makes them genuinely frost-resistant in virtually any climate. That's a meaningful advantage over natural stone in freeze-thaw zones. They're also consistent in size and thickness, which makes installation faster and less skilled-labor-intensive than irregular flagstone. Retail prices for 24x24 stone-look porcelain pavers can run around $5–$6/sq ft for the tile itself at big-box stores, though installed costs including base, mortar, and labor typically land at $15–$40/sq ft.
Slip resistance is measured by the Dynamic Coefficient of Friction (DCOF) under ANSI A326.3. The TCNA (Tile Council of North America) recommends a DCOF of at least 0.42 for wet areas. Most reputable outdoor porcelain paver lines are rated at or above this threshold, but always verify the product's rated DCOF before buying, especially for pool surrounds or shaded areas that stay wet. Smooth, polished-finish porcelain tiles that work indoors are not appropriate outside.
The main drawbacks of porcelain are aesthetic and structural. Some homeowners find the perfectly uniform look too manufactured compared to natural stone. Chips and cracks are also harder to blend invisibly in a repair because dye lots change. And because porcelain is installed on a mortar bed over a concrete or rigid base, it's less forgiving of ground movement than a dry-laid flagstone system. If your subsoil is expansive clay or you're in a region with significant frost heave, you need a robust reinforced concrete base or you'll be re-grouting within a few years.
For a more detailed breakdown of how porcelain compares to natural stone across surface types and installation methods, the best natural stone for outdoor patio and best outdoor patio stone guides on this site go deeper on material-by-material selection factors.
Brick, gravel, large slabs, and composites
Brick pavers
Fired clay brick pavers are a proven material with centuries of track record in outdoor paving. They conform to ASTM C936 standards (the same specification used for solid concrete interlocking paving units), which requires compressive strength around 8,000 psi and limits water absorption to 5% average per unit. That puts quality brick pavers in a solid range for most climates. The visual appeal is warm and traditional, and they pair well with older home styles. Pattern options include running bond, herringbone, and basketweave. From an interlock standpoint, 45-degree or 90-degree herringbone provides the highest mechanical interlock and is recommended for any application with vehicle traffic. Running bond and stack bond work fine for pedestrian patios.
Gravel and crushed stone
Gravel is the most permeable surface option and the cheapest to install: typically $3–$10/sq ft for materials and spreading. It handles stormwater naturally, which is a real advantage if your municipality has impermeable coverage limits. The EPA identifies permeable surfaces including gravel as an effective stormwater management tool, and many residential zones are starting to require them for large paved areas. The practical downsides are that gravel migrates, requires periodic raking and topping, and isn't great for furniture or barefoot walking. Compacted crushed granite or decomposed granite holds its surface better than rounded pea gravel.
Large stone slabs
Oversized stone slabs, think 24x48 inches or larger in bluestone, granite, or limestone, are having a moment in contemporary patio design. The minimal joint lines create a sleek, almost seamless look. They're also faster to lay than small-format stone because you're covering more area per piece. The engineering constraint is weight and base requirements: a 24x48x2-inch bluestone slab is extremely heavy, and the base beneath it needs to be very well compacted and level. Any settling will rock the slab. These are best suited to wet-set mortar installations on a concrete base for that reason. If you want to dig deeper into the best stone slabs for patio design, there's a full guide on that topic elsewhere on this site.
Composite pavers
Composite pavers blend aggregates, pigments, and binders (often polymer-modified concrete or rubber) into a consistent paving unit. They're dimensionally uniform, resistant to staining, and genuinely low maintenance. The trade-off is authenticity: they don't have the same visual depth or variation as natural stone, and some products fade noticeably over 5–10 years of UV exposure. For a practical, budget-conscious patio that you don't want to think about much, they're a reasonable choice, particularly in high-humidity climates where natural stone maintenance feels like a burden.
How to build the base right (this is where most patios fail)
I've seen more patio failures caused by inadequate base prep than by any material choice. The stone itself almost never fails first. The base does. Getting this right is the most important thing you can do regardless of what surface you choose.
- Excavate to depth: for a standard pedestrian patio, excavate enough to accommodate 4 inches (100 mm) of compacted aggregate base plus the thickness of your paving material plus 1 inch of bedding sand. That's typically 8–10 inches of total dig depth.
- Grade the subbase: establish your drainage slope now, before any base material goes in. You need a minimum 1–2% grade (about 1/8 to 1/4 inch per foot) sloping away from any structure.
- Compact the subgrade: compact native soil to at least 95% Standard Proctor density (ASTM D698) using a plate compactor. Don't skip this. Soft spots in the subgrade cause differential settling.
- Lay and compact the aggregate base: use compactible aggregate (ASTM or ICPI-approved crusher run or dense-graded aggregate). Add in lifts no deeper than 4 inches and compact each lift to 98% density. For soft soils or clay, consider a geotextile separation fabric under the base.
- Add bedding layer: 1 inch of coarse concrete sand (not mason's sand, which is too fine) screeded level provides the final setting bed for pavers. Do not compact the bedding layer before setting stone.
- Set the stone: work from one corner, keeping consistent joint spacing. Use a rubber mallet to seat each piece. Check level frequently.
- Edge restraints: install plastic, aluminum, or concrete edging before filling joints. This keeps the perimeter from spreading, which is the number one cause of paver migration.
- Joint filling: sweep polymeric jointing sand into joints, blow off the surface, then activate with a light water mist. Polymeric sand must go into dry joints and cure in dry conditions or it will wash out or cure improperly. Follow the manufacturer's cure window exactly.
Permeable patio systems: when and why to use them
If your yard has poor drainage, you're near a wetland buffer, or your municipality limits impermeable coverage, a permeable system is worth considering. Permeable interlocking concrete pavers (PICP) or open-set flagstone over a gravel reservoir can significantly reduce stormwater runoff and pollutant loads, which is why the EPA actively promotes permeable pavement as a green infrastructure tool. The base design is different: instead of dense-graded aggregate, you use an open-graded stone reservoir (typically No. 2 stone as the storage layer, No. 57 choker course, and No. 8 aggregate as the bedding and joint fill). In some soil types a geotextile separation layer is added per AASHTO M288 specifications. These systems require a site-specific infiltration and storage capacity calculation, especially in cold climates where freeze-thaw cycles affect the base.
Design patterns and visual ideas
Pattern choice affects both the look of your patio and its structural performance. For pedestrian patios, a running bond or random ashlar pattern works well and minimizes waste. For any application with vehicle access or heavy loads, ICPI guidance recommends 45-degree or 90-degree herringbone because it provides the highest degree of mechanical interlock and load distribution. Herringbone does generate more cut pieces at the borders, so factor in about 10–15% additional material waste. Here are some patterns and their best applications.
| Pattern | Best Material Match | Visual Feel | Interlock Level | Waste/Complexity |
|---|---|---|---|---|
| Irregular flagstone (random) | Natural flagstone, irregular slabs | Organic, rustic | Low | High labor, low material waste |
| Running bond | Brick, concrete pavers, sawn stone | Classic, clean | Moderate | Low waste, easy to lay |
| 45° Herringbone | Brick, concrete pavers | Dynamic, traditional | High (best for loads) | Higher waste (~10–15%) |
| 90° Herringbone | Brick, concrete pavers | Structured, geometric | High | Moderate waste |
| Random ashlar | Sawn bluestone, limestone, granite | Formal-casual hybrid | Moderate | Moderate waste |
| Large-format grid | Porcelain slabs, granite, bluestone | Contemporary, minimal | Low (mortar-set) | Low waste if sawn square |
| Basketweave | Brick, square pavers | Cottage, traditional | Moderate | Low waste |
Sealing, cleaning, and keeping it looking good
Sealing is genuinely necessary for some materials and largely optional for others. Dense granite and porcelain don't need sealing for freeze-thaw protection because their absorption is already near zero. Limestone, sandstone, and some softer flagstone species benefit significantly from a penetrating impregnator sealer that reduces water absorption without changing the surface appearance. Seal these materials 28–30 days after installation (to allow any efflorescence to migrate out) and re-apply every 2–4 years depending on traffic and weather exposure.
For cleaning, a stiff-bristle brush and a pH-neutral stone cleaner handle most routine dirt. Avoid bleach and acidic cleaners on limestone or any calcitic stone: the acid etches the surface permanently. For moss and algae (a real problem in shaded, humid climates), a diluted oxygen bleach solution works without damaging stone. Pressure washers are effective but should be used at moderate pressure (under 1,500 psi) and kept moving to avoid etching soft stone or blasting out jointing sand.
Repair: what to do when things go wrong
- Rocking or sunken paver: lift the stone, add or remove bedding sand to level, reset, and re-joint. This is a 20-minute fix on a dry-laid patio.
- Cracked stone in dry-laid patio: source a matching replacement slab, lift the cracked piece, set the new one. The harder part is matching color and texture after years of weathering.
- Cracked stone in mortar-set patio: chip out the old mortar carefully, source a match, and re-set in new mortar. More involved but very doable.
- Weeds in joints: pull manually, treat with a non-selective herbicide if needed, allow to dry completely, then re-apply polymeric sand. Addressing the root cause (thin or eroded joints) prevents recurrence.
- Efflorescence (white salt deposits): brush off dry, then treat with a diluted white vinegar solution on non-calcitic stone (not on limestone). A commercial efflorescence remover works on concrete pavers.
Full cost breakdown: what you're actually paying for
The number you see on a stone supplier's website is just the material. A complete installed patio includes excavation and disposal, base aggregate, bedding sand, edge restraints, jointing material, sealer, and labor. Here's how those layers stack up for a typical 300-square-foot residential patio.
| Cost Component | DIY Estimate | Professionally Installed |
|---|---|---|
| Excavation and disposal | $0 (rented equipment) – $200 | $300–$800 |
| Aggregate base (4 in) | $100–$200 | $150–$300 (included in labor quote) |
| Bedding sand | $50–$100 | Typically included |
| Edge restraints | $50–$150 | Typically included |
| Polymeric jointing sand | $50–$100 | Typically included |
| Sealer (1 application) | $80–$150 | $150–$400 |
| Stone/paver material (300 sq ft) | $750–$1,500 (concrete pavers) / $1,500–$6,000+ (natural stone) | Same material cost, often contractor-sourced |
| Labor | $0 (DIY) | $1,500–$6,000+ depending on complexity |
| TOTAL (ballpark) | $1,100–$2,200 DIY for concrete pavers | $3,000–$15,000+ for natural stone professionally installed |
National aggregator data from HomeAdvisor/Angi puts median installed paver patio costs around $8–$26 per square foot and typical project totals around $3,000–$5,000 for mid-sized patios. Natural stone at the premium end can push a 300-square-foot project well past $10,000. Always get at least three local quotes before committing, because regional labor and material costs vary enormously.
DIY vs. hiring a pro: an honest assessment
I'll be direct here: some of this work is genuinely DIY-friendly and some of it isn't. Dry-laid concrete paver patios on a flat lot with good soil are a reasonable weekend project for a methodical homeowner with access to a plate compactor (rent one for $80–$120/day). The base prep is tedious but not technically difficult. Irregular flagstone cutting requires a diamond blade saw and some practice to not crack expensive stone. Wet-set mortar installations over a concrete subbase, especially with porcelain or large natural stone slabs, are professional-grade work. Poorly mixed or applied mortar causes tiles to hollow out and crack, and that's an expensive redo. My rule of thumb: if the material costs more than $20/sq ft or requires a mortar bed, seriously consider hiring a professional tile or stone setter with verifiable exterior experience.
Sourcing tips: how to buy stone without getting burned
- Buy from a local stone yard where possible: you can inspect color, thickness, and finish variation before committing. Online and big-box purchases can deliver material that looks nothing like the website photo.
- Order 10–15% extra material to account for cuts and breakage. For irregular flagstone, go to 20% extra.
- Ask for the stone's water absorption (ASTM C97 test result) before buying for any freeze-thaw climate. If the supplier can't provide it, that's a red flag.
- For porcelain pavers, verify the DCOF rating is at least 0.42 for outdoor wet-area use and confirm the product is rated for exterior frost exposure.
- Verify the stone thickness matches your application: Natural Stone Institute recommends at minimum 30 mm (1.25 in) for pedestrian exterior stone. Anything thinner is a breakage risk.
- Match the lot number when buying in phases: natural stone color varies between quarry pulls and dye lots. Buy your entire project quantity from the same production run.
- Ask about return policy: most stone yards don't accept returns on cut stone. Buy right the first time.
Troubleshooting common patio problems
Even well-built patios develop issues over time. Here's what usually causes them and how to fix it without starting over.
| Problem | Likely Cause | Fix |
|---|---|---|
| Stone rocking or settling | Inadequate base compaction or bedding depth | Lift stone, re-compact base, adjust bedding sand, reset |
| Cracked stone in winter | High-porosity stone absorbing water and freeze-thaw cycling | Replace with denser stone; seal remaining stones preventively |
| Weeds growing through joints | Thin or eroded sand joints; no polymeric sand used | Remove weeds, dry joints thoroughly, apply polymeric sand |
| Efflorescence on pavers | Soluble salts migrating from concrete base or mortar | Brush off, treat with efflorescence cleaner; allow full cure time before sealing |
| Staining on limestone/sandstone | Low sealer coverage or elapsed sealer protection | Clean with pH-neutral cleaner, dry, apply fresh penetrating sealer |
| Pooling water on patio surface | Insufficient drainage slope or blocked edge drains | Re-pitch surface if possible; add channel drain at low point |
| Polymeric sand washing out | Applied in wet conditions or during rain window | Remove wet sand, allow full drying, reapply in dry weather following cure instructions |
Bringing it all together: which stone patio is right for you
There's no single best stone patio material. Granite and porcelain pavers are the most technically durable and freeze-thaw resistant. Flagstone and bluestone offer the most natural beauty and a wide range of price points. Brick and concrete pavers give you the best cost-to-performance ratio for a traditional look. Gravel handles drainage and budget better than anything else. The right answer is the material that aligns with your climate, your maintenance tolerance, your budget, and honestly, what your house actually looks like. Spend time with physical samples, not just website photos, before deciding. And if you're still unsure which stone fits your specific yard and region, the which patio stone is best guide on this site walks through a more detailed region-by-region and use-case comparison to help you narrow it down. For another relevant comparison, see which patio stone is best. For more help, see our guide to the best outdoor patio stone. See the best stone patios guide on this site for region-specific recommendations and detailed comparisons.
FAQ
Which stone patio material is best for my climate and why?
Choose by freeze‑thaw exposure, rainfall, and sun: dense, low‑absorption stones (granite, quartzite, some bluestone) and porcelain pavers perform best in freeze‑thaw zones because they absorb little water. Sandstone and some limestones can work if low‑porosity varieties are used, sealed as needed, and installed with proper drainage. In hot, sunny climates, lighter colors and porcelain resist heat and fading; in wet climates consider permeable options (permeable pavers or gravel) to reduce runoff (see EPA guidance on permeable pavement). Always check supplier datasheets for water absorption and frost resistance (ASTM/NSI data).
What are the pros and cons of common stone patio materials (flagstone, natural stone types, porcelain, brick, gravel, stone slabs, composites)?
Summary by material: - Flagstone: natural look, irregular shapes; versatile. Pros: attractive, slip‑resistant. Cons: irregular installation is labor‑intensive, variable durability and porosity. - Granites/Quartzites: very durable, low absorption, freeze‑thaw resistant. Cons: higher cost, heavy. - Sandstone/Bluestone: classic patio look, good texture. Cons: absorption varies by source; some require sealing. - Limestone: smooth finish options; mid cost. Cons: softer than granite; can weather. - Porcelain tile/pavers: extremely low absorption, consistent sizes, frost‑resistant options. Cons: can be slippery when wet unless textured; needs correct substrate or pedestal system. - Brick: warm traditional look, good durability. Cons: can stain, may spall in severe freeze cycles if poor quality. - Gravel: cheapest, excellent drainage, easy install. Cons: less formal, mobility/weed control, edging required. - Stone slabs (large format): dramatic, fewer joints. Cons: heavy, higher subbase requirements. - Composites (stone/resin): lightweight, uniform, lower maintenance. Cons: less authentic stone look; limited longevity data for some products. Use material datasheets and local climate experience to decide.
How much will a stone patio cost (materials and installed)?
Typical U.S. ranges (2025–2026 market data): - DIY materials only: flagstone $2.50–$5+/sq ft; porcelain tile product pricing can be ~$5+/sq ft. - Installed ranges: concrete/brick pavers $8–$25/sq ft; natural stone patios $15–$50+/sq ft depending on stone type, site prep, pattern complexity, and region. Expect extras for grading, drainage, retaining walls, steps, and lighting. Get at least three local quotes and verify what’s included (base, edging, jointing, sealing).
What base depth and compaction do I need for a durable pedestrian stone patio?
Industry guidance (ICPI/CMHA): compacted aggregate base for pedestrian patios is typically a minimum 4 in (100 mm) of well‑graded aggregate over a compacted subgrade (subgrade compacted to ≥95% Standard Proctor is recommended; base compacted to ≥98% in lifts ≤4 in). For heavy loads or vehicular access increase base depth to 6–12 in per ICPI/CMHA specs. Always bench or key edges into soil and follow local frost‑depth recommendations.
What are the essential installation steps for a stone patio (high‑level practical how‑to)?
Practical steps: 1) Plan layout, slope (min 1–2% away from house), and size; check utilities. 2) Mark and excavate to required depth (allow for base + bedding + paver thickness). 3) Compact subgrade to specified level. 4) Install geotextile if needed (poor soils). 5) Place and compact aggregate base in lifts (typ. No. 57/2 stone per specs). 6) Add bedding layer (bedding sand for pavers or mortar bed for wet‑set stone; porcelain may require pedestals or mortar/adhesive per TCNA). 7) Set stone/pavers in chosen pattern; cut as needed. 8) Install edge restraint. 9) Jointing: dry sand, polymeric sand, or mortar depending on system. 10) Compact pavers (plate compactor with protective pad if required), sweep joints, and finish sealing if specified. For permeable systems follow PICP design with reservoir course and open‑graded bedding. See our deeper installation guide [link to installation guide].
How should I handle drainage and slope on a patio?
Provide a finished slope of 1–2% (≈1/8–1/4 in per ft) away from structures to shed water. For low‑slope areas use drainage channels or a slight grade change to avoid puddling. Permeable patios require an open‑graded reservoir base sized per rainfall/infiltration capacity (follow ICPI/EPA PICP manuals). Ensure edge restraints and adjacent grades direct water away from foundations. Confirm local codes for roof runoff and stormwater.