For most homeowners, flagstone and bluestone hit the sweet spot of durability, looks, and value, but the single best stone for your patio depends on your climate, how you plan to use the space, and what you're willing to spend on installation and upkeep. If you're in a freeze-thaw zone, dense stones like granite and bluestone hold up where softer sandstone and some limestones crack. If slip safety around a pool or in rainy climates is your top concern, a honed or brushed finish on a stone with natural texture beats a polished surface every time. Get those two decisions right, stone type and finish, and almost everything else falls into place.
Best Stone Patios: Choose the Right Material for Your Yard

Nolan Ellison
1 May 2026
Natural vs. Engineered Stone: Which Way Should You Go?
This is usually the first fork in the road, and it's worth being honest about the trade-offs. Natural stone, flagstone, bluestone, granite, sandstone, limestone, slate, is quarried directly from the earth. Each piece is genuinely unique, it ages beautifully, and when installed well it can last 50 years or more. Engineered options like porcelain pavers and composite tiles are manufactured to mimic natural stone, with tighter dimensional tolerances and more predictable performance specs.
Porcelain pavers have real strengths: they're non-porous, frost-resistant when rated for outdoor use, and extremely consistent in thickness, which simplifies installation. Many porcelain tiles also meet or exceed the ANSI A326.3 minimum wet DCOF of 0.42, the benchmark used to evaluate slip resistance on wet surfaces, which can be easier to verify with manufactured products than with natural stone where surface texture varies piece to piece. The downside is that porcelain can look and feel artificial, especially up close, and if a piece chips or cracks years later, matching it exactly can be difficult.
My honest take: if you want a patio that looks like it's always been there, go natural stone. If you need absolute uniformity, a very specific color that doesn't exist in nature, or you're installing over a structure where weight matters, engineered options deserve a serious look. For the rest of this guide, natural stone is the focus, but know that porcelain is a legitimate alternative worth comparing when you're pricing things out.
Key decision factors before you pick a stone
- Climate: does your area see regular freeze-thaw cycles? If yes, prioritize dense, low-absorption stones.
- Drainage: will the patio drain freely, or will water pool? Standing water accelerates freeze-thaw damage and promotes algae on softer stones.
- Slip safety: wet DCOF of 0.42 or higher is the minimum target for outdoor wet areas; natural texture and honed finishes help.
- Foot traffic and use: heavy furniture, grills, kids, dogs, and outdoor kitchens all add load and abrasion demands.
- Style: formal vs. casual, contemporary vs. cottage — the stone format (cut slabs vs. irregular flagstone) drives the look as much as the stone type does.
- Budget: material cost is only part of the equation; installation labor often runs 2 to 3 times the material cost.
The Best Stone Options for Patios (and When Each One Wins)
Here's a straightforward look at the six natural stones that come up most often for patios, what each one does well, and where each one falls short.
Flagstone
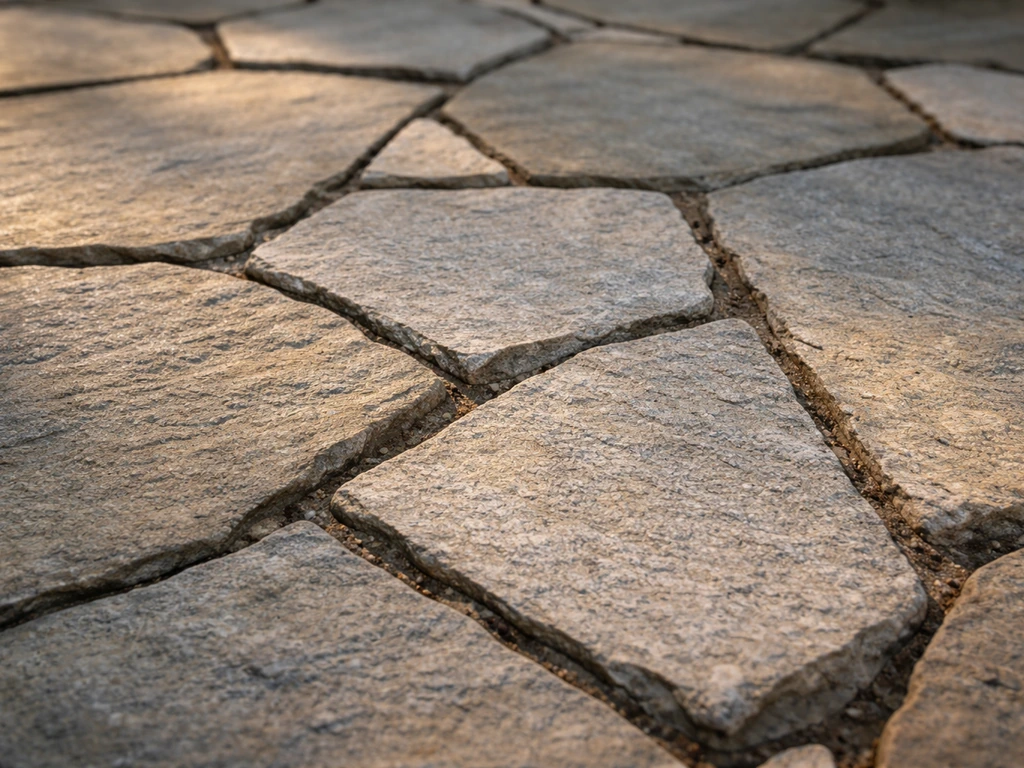
"Flagstone" is actually a format descriptor more than a single rock type, it refers to flat, irregularly shaped slabs split from various stone types including sandstone, quartzite, and bluestone. It's the most popular patio stone in North America for good reason: it's widely available, works in almost any style, and the irregular shapes give patios a natural, handcrafted feel. If you're deciding among the best stone slabs for patio projects, flagstone is often the go-to choice because it blends well with many styles and comes in multiple stone types. Thickness typically runs 1 to 2 inches. The quality and durability depend heavily on the underlying stone species, so always ask what type of rock the flagstone is cut from before buying.
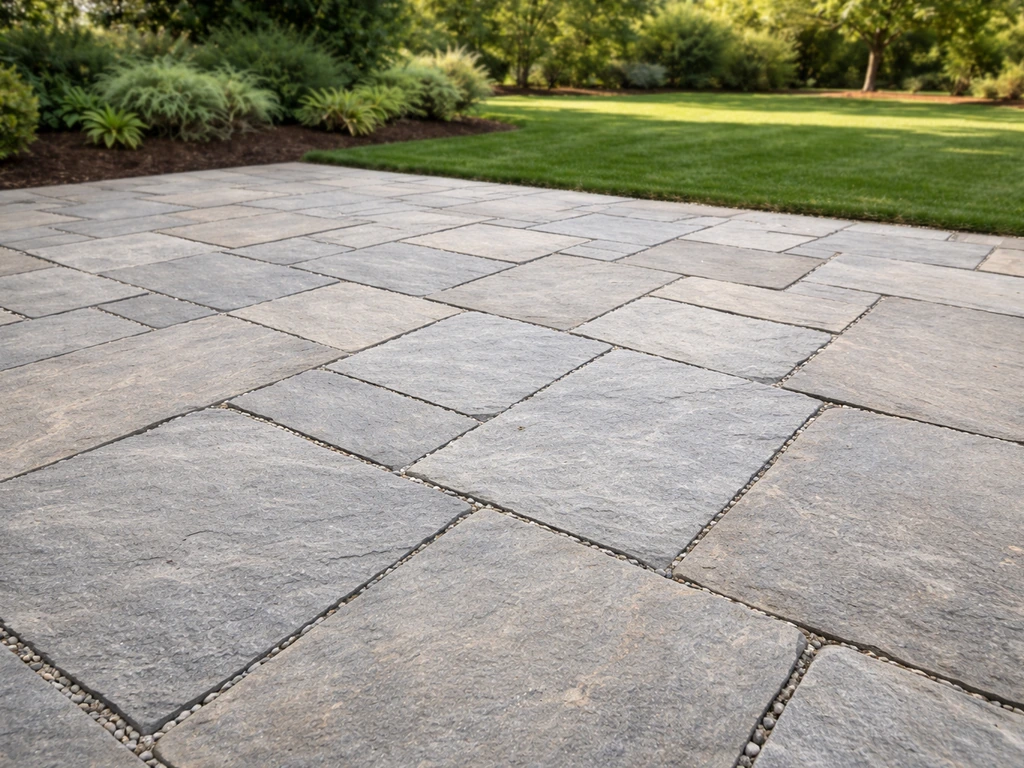
Bluestone
Bluestone is a dense sandstone (technically a blue-gray feldspathic sandstone) quarried primarily in the northeastern United States. It's one of the best all-around patio stones available: hard enough to handle freeze-thaw cycles when properly installed, naturally slip-resistant in its cleft (split-face) finish, attractive in both formal and casual settings, and available in both irregular and cut rectangular shapes. If you're in the northeast and want one stone that does everything well, bluestone is usually the answer. If you want the quickest answer, the best patio stone for most people is a dense, low-absorption option like bluestone or granite, especially in freeze-thaw climates. Expect to pay $3 to $8 per square foot for material, more for full-color select pieces.
Sandstone

Sandstone is softer and more porous than bluestone or granite, which means it's more vulnerable in freeze-thaw climates and stains more easily. That said, it's beautiful, warm tans, buffs, and rusts, and in mild climates it makes a wonderful patio. If you're in the Southwest, Southeast, or coastal areas without hard winters, sandstone is worth considering for its color palette and relatively lower cost. Seal it every two years without fail, and keep it away from pool chemicals that can etch the surface.
Limestone
Limestone is a classic choice for formal patios, particularly in warmer climates. It cuts cleanly into precise slabs, comes in elegant creams and grays, and pairs beautifully with traditional architecture. The problem in cold climates is its porosity: water penetrates the surface, freezes, expands, and spalls the face off the stone over time. Some denser limestones perform better than others, so if you're in a freeze-thaw zone and love the look of limestone, ask specifically for low-absorption grades and seal aggressively. In Florida, Texas, or Southern California, limestone patios are long-lived and gorgeous.
Granite
Granite is the most durable natural stone you can put on a patio, period. It's extremely dense, nearly non-porous, handles freeze-thaw cycles exceptionally well, and resists staining and scratching. The trade-off is cost and installation difficulty: granite slabs are heavy, hard to cut, and priced accordingly. It also comes almost entirely in polished or flamed finishes; polished granite is dangerously slippery when wet, so always specify flamed, bush-hammered, or sandblasted surface treatment for outdoor use. If your patio sees heavy use, outdoor kitchen, lots of foot traffic, entertaining, and budget allows, granite is the long-term investment that pays off.
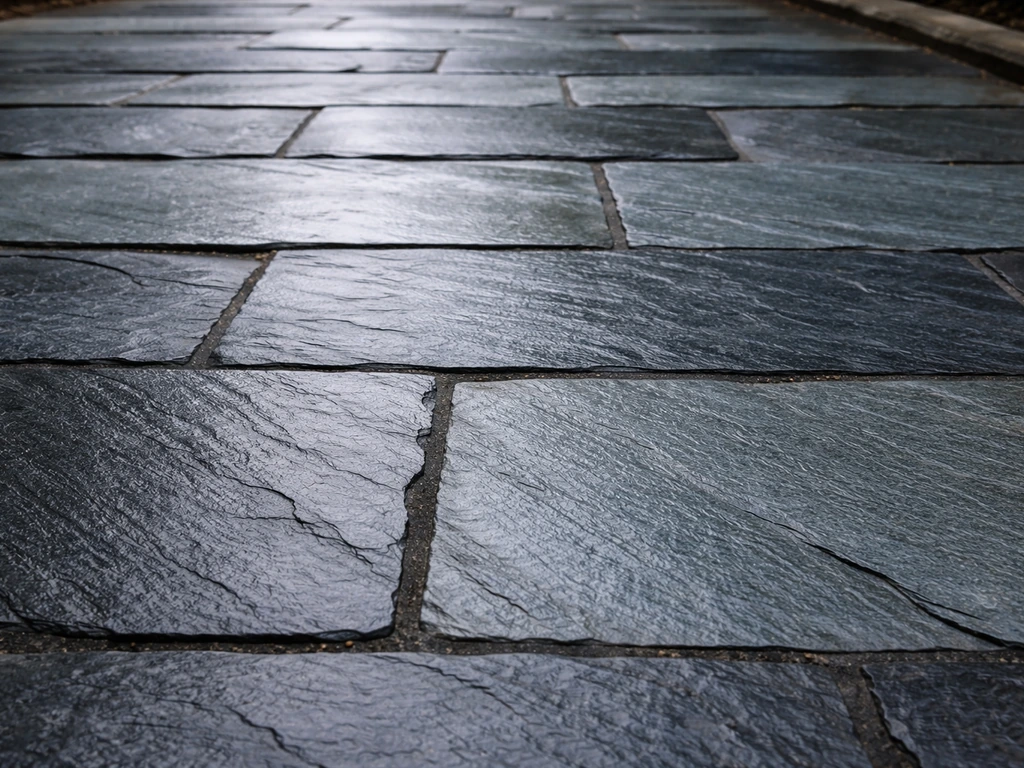
Slate
Slate is a fine-grained metamorphic rock that splits into thin, flat pieces with a naturally textured surface. Its layered structure gives it great slip resistance, and it comes in deep charcoals, greens, and purples that look stunning on the right patio. The concern with slate is delamination: low-quality slate from certain regions tends to flake and peel over time, especially in wet and freeze-thaw conditions. The better grades, Brazilian slate, Welsh slate, are dense and durable. Avoid bargain-priced slate without asking where it was quarried and what its absorption rate is.
| Stone | Durability (Freeze-Thaw) | Slip Resistance (Cleft/Natural) | Maintenance | Relative Cost (Material) | Best Climate |
|---|---|---|---|---|---|
| Bluestone | Excellent | Excellent | Low | $$ | All climates |
| Granite | Excellent | Good (flamed finish) | Very Low | $$$ | All climates |
| Flagstone (quartzite base) | Good–Excellent | Good | Low | $–$$ | All climates |
| Slate (high grade) | Good | Excellent | Medium | $$ | Mild to moderate |
| Limestone | Poor–Fair | Good | High | $$ | Warm/dry climates |
| Sandstone | Fair | Good | High | $–$$ | Mild/warm climates |
Stone Patio Designs and Layouts: Format Matters as Much as Stone Type
The format you choose, how the stone is cut and arranged, affects not just how the patio looks but how it performs, how easy it is to install, and what it costs. There are three main approaches.
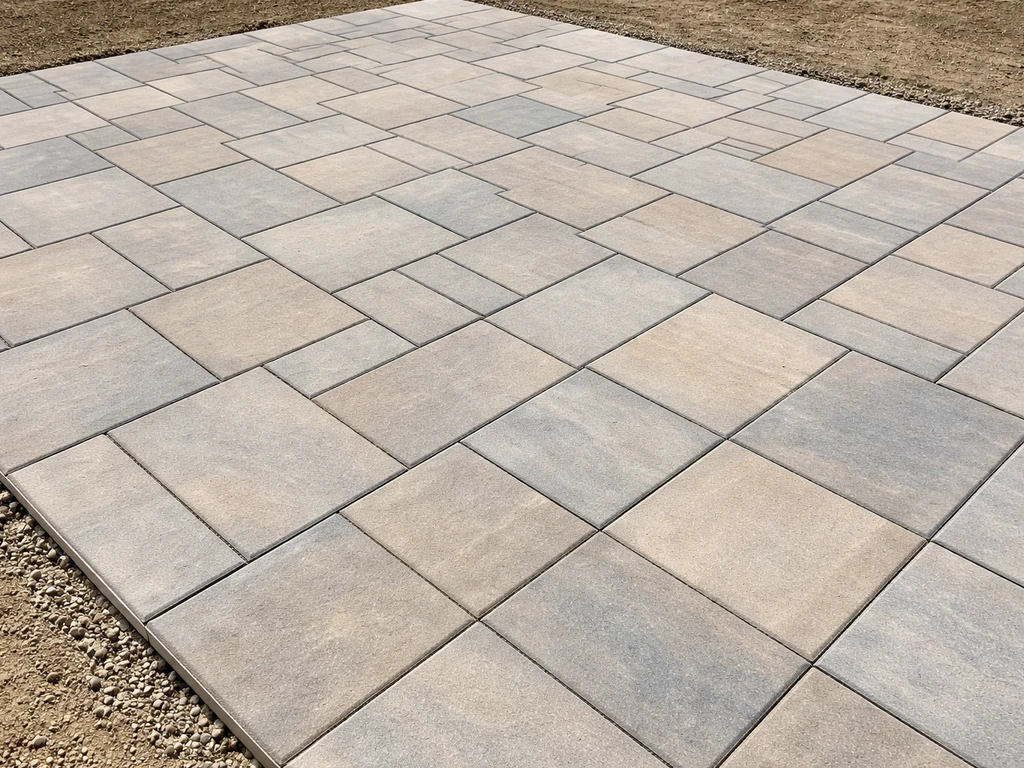
Cut slabs (formal layout)
Cut slabs are sawn into rectangles or squares with consistent dimensions and uniform thickness, usually 1.25 to 2 inches. They produce a clean, geometric look, think bluestone terrace or limestone courtyard, and lay flat reliably because thickness doesn't vary much. They're easier to set level, simpler to grout or joint, and look sharp with contemporary or traditional architecture. The downside is cost: precision cutting adds to the price, and waste from cuts at the patio edges adds up.
Irregular flagstone (random/organic layout)
Irregular flagstone is split rather than sawn, producing pieces with no consistent shape or size. The installer fits them together like a puzzle, and the result is a relaxed, cottage-garden feel. Because thickness varies from piece to piece (sometimes from 1 inch to 2.5 inches in the same batch), the installer has to spend more time adjusting the base to keep everything level. It's not harder in concept, but it takes longer, which means more labor cost. On the plus side, material waste is very low because odd shapes fill gaps naturally.
Random-coursed / rubble-style
This is a step between the two above, pieces are roughly shaped but set in loose horizontal courses, creating a semi-organized pattern. It works well for rustic or farmhouse aesthetics and is often used with fieldstone or Pennsylvania bluestone. It requires a skilled eye to make it look intentional rather than random.
Thickness: don't go too thin
Thickness is one of the most underestimated factors in patio stone selection. For a dry-laid patio (set on a gravel/sand base without mortar), you generally want a minimum of 1.5 inches of stone thickness, 2 inches is safer for irregular flagstone. Thinner pieces are fine in a mortared application over a concrete slab. I've seen homeowners order 1-inch flagstone to save money and then wonder why pieces crack under normal foot traffic or a heavy planter. If you're going dry-laid, don't go below 1.5 inches. For a mortared installation, 1.25 inches is usually adequate.
Edge detailing
The patio edge is where a lot of DIY projects fall apart visually. Options include: leaving a natural broken edge (works beautifully with irregular flagstone), sawn edges on cut slabs for a clean line, or installing a separate border course of a contrasting or complementary material. Edging also serves a structural purpose, it holds everything in place and prevents lateral movement, especially in dry-laid applications. Aluminum or steel landscape edging works, but a cut stone border generally looks more finished and holds up better long-term.
Cost and Value: What You're Actually Paying For
Stone patio costs vary enormously depending on stone type, where you live, the complexity of the installation, and whether you hire it out or DIY. Here's a realistic breakdown.
| Stone Type | Material Cost (per sq ft) | Professional Install (per sq ft, all-in) | Expected Lifespan | Sealing Required? |
|---|---|---|---|---|
| Bluestone (irregular) | $3–$8 | $18–$30 | 30–50+ years | Optional but recommended |
| Bluestone (cut) | $5–$12 | $22–$35 | 30–50+ years | Optional but recommended |
| Granite (flamed) | $8–$15 | $25–$45 | 50+ years | Rarely needed |
| Limestone (cut) | $4–$10 | $20–$35 | 20–40 years (climate dependent) | Yes, every 1–2 years |
| Sandstone (irregular) | $3–$7 | $15–$25 | 15–30 years (climate dependent) | Yes, every 2 years |
| Slate (high grade) | $4–$9 | $18–$30 | 20–40 years | Recommended every 2–3 years |
| Porcelain pavers | $4–$12 | $18–$35 | 25–40+ years | Not needed |
A few things worth pointing out: installation labor typically runs two to three times the material cost for complex flagstone work. A 400-square-foot patio that costs $1,600 in bluestone material might cost $5,000 to $8,000 fully installed by a professional mason. SlabCalc’s cost breakdown also offers blank" rel="noopener noreferrer">example ranges for installed paver patio costs, including illustrative labor components per square foot. HomeGuide’s paver patio cost breakdown also frames installed pricing using material costs and installation labor rates per square foot blank" rel="noopener noreferrer">fully installed by a professional mason. Base preparation, excavation, gravel, compaction, is not optional and represents a significant chunk of that labor cost. If you're DIYing, renting a plate compactor and spending the time to do the base right will save you from leveling problems five years down the road.
Long-term value is where natural stone separates itself from concrete pavers and cheaper alternatives. A well-built bluestone or granite patio genuinely adds resale value to a home, doesn't need replacement for decades, and gets better-looking with age rather than worse. Factor that into the cost calculation, because the cheapest patio today is rarely the cheapest patio over 20 years.
Installation Essentials: How to Get It Right the First Time
Most patio failures, rocking stones, cracking, frost heave, drainage problems, trace back to poor base preparation, not the stone itself. Here's what proper installation actually looks like.
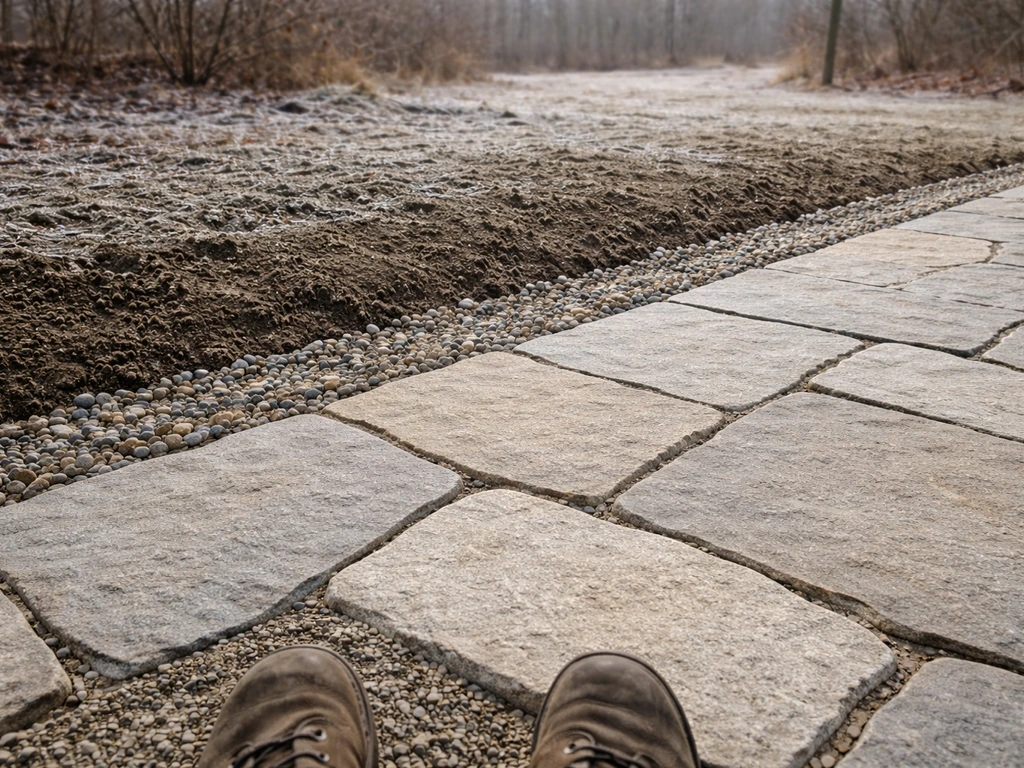
Step 1: Excavation and grading
Excavate to a depth that accommodates your base material plus your stone thickness, plus a little settling margin. For a dry-laid patio in a freeze-thaw climate, that typically means 8 to 12 inches of excavation total. Grade the subgrade away from the house at a minimum slope of 1 inch per 8 feet (about 1.5%) to ensure drainage. This is the step most homeowners underestimate. Getting the grade right here saves you from water pooling against your foundation and from freeze-thaw damage to the stone.
Step 2: Base material and compaction
A compacted gravel base is the foundation of every good stone patio. Use crushed stone (typically 3/4-inch compactable gravel, sometimes called 21-A or crusher run depending on your region), not smooth river gravel, which doesn't compact firmly. Lay it in 3- to 4-inch lifts and compact each lift with a plate compactor before adding the next. A minimum of 4 inches of compacted gravel is standard in non-freeze climates; 6 to 8 inches is better in freeze-thaw zones because deeper bases below the frost line resist heaving. Skipping full compaction is the number-one DIY mistake I've seen.
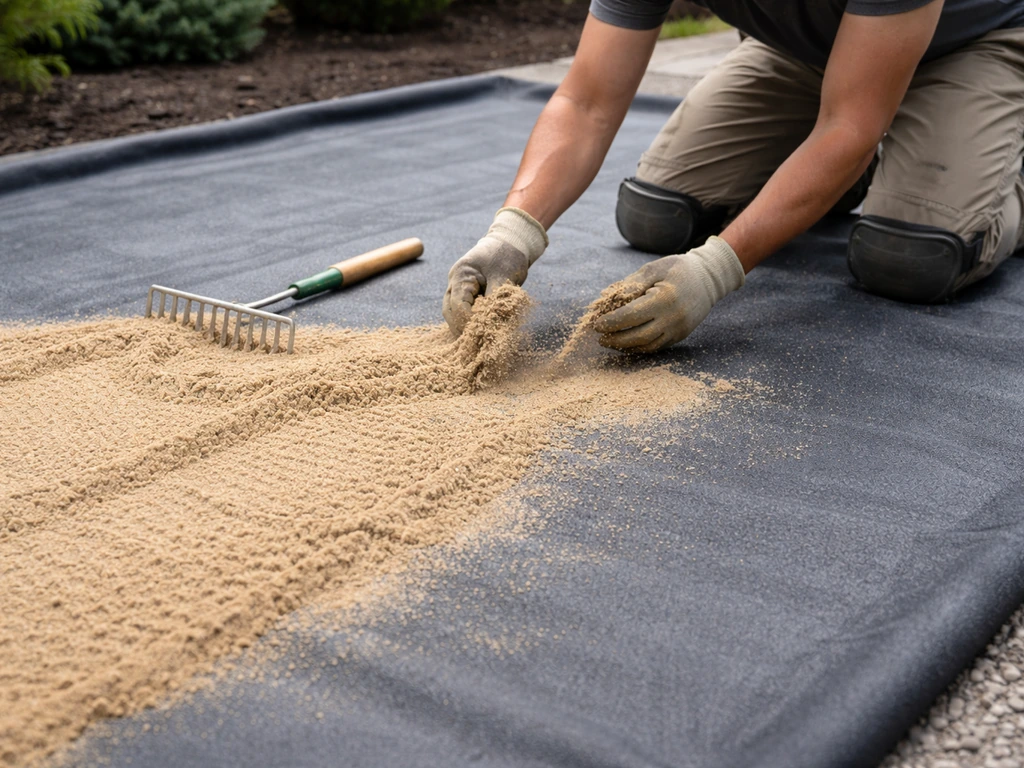
Step 3: Underlayment (landscape fabric and sand setting bed)
Lay geotextile landscape fabric over the compacted gravel before adding your setting bed. This keeps the setting sand from migrating into the gravel over time while still allowing drainage. On top of the fabric, add a 1-inch layer of coarse concrete sand (not fine play sand) as a setting bed. Screed it level with the proper pitch, then set your stone directly on this layer. For a mortared application over an existing concrete slab, skip the gravel/sand base and bond directly to the slab with a polymer-modified thin-set mortar.
Dry-lay vs. mortared: which method is right for you?
Dry-laid (also called dry-set or sand-set) means the stone is laid on compacted gravel and sand with no mortar, with joints filled by polymeric sand. It's DIY-friendly, allows water to drain through the joints, and makes repairs easy because individual stones can be lifted and reset. The downside is that weed growth through joints is harder to control long-term, and in freeze-thaw climates, stones can shift slightly over time. Mortared installation uses a concrete slab as the base with stones bonded on top using mortar or thin-set. It's more rigid, cleaner-jointed, and more formal-looking, but if the slab cracks, the stone cracks with it. In freeze-thaw zones, mortared patios must be built on properly designed concrete slabs with control joints to have any chance of long-term success.
Jointing and leveling
For dry-laid joints, polymeric sand swept into the joints and activated with water locks the installation and resists weeds far better than regular sand. Re-apply every 3 to 5 years as it breaks down. For mortared joints, use a sanded grout or mortar that matches your stone color. Keep joint widths consistent, irregular flagstone typically has 1/2-inch to 1.5-inch joints; cut slabs look best with 1/4-inch to 1/2-inch joints. Check level constantly as you set each piece with a 4-foot level and mallet; it's much easier to adjust before the sand sets than after.
Maintenance and Longevity: Keeping It Looking Good for Decades
Cleaning
Annual cleaning is really all most stone patios need. A stiff brush, mild dish soap, and a garden hose handle routine dirt and organic buildup. For algae or mildew, common in shaded or damp areas, a diluted white vinegar solution or a stone-safe algae cleaner works well. Avoid bleach on limestone and sandstone as it can cause pitting and discoloration. Pressure washing is fine for granite and dense bluestone, but go easy on softer or more porous stones, keep pressure below 1,500 PSI and hold the nozzle at least 12 inches from the surface.
Sealing
Sealing is mandatory for porous stones like sandstone and limestone, and strongly recommended for bluestone and slate. A penetrating impregnator sealer (not a topcoat sealer) soaks into the stone, fills the pores, and repels water and stains without changing the surface appearance. Apply it to clean, dry stone. For most natural stones in outdoor use, re-seal every 2 to 3 years. Granite rarely needs sealing at all. When in doubt, do a water drop test: if water soaks in rather than beading, it's time to seal.
Weed control
Weeds growing through patio joints are an annoyance, not a structural problem, but they can displace jointing material over time. Polymeric sand is your first line of defense. For breakthrough growth, a targeted application of a non-selective herbicide in the joints works, just protect adjacent plants. Some homeowners also apply a pre-emergent herbicide in spring, before weed seeds germinate. It's not a one-time fix, but 20 minutes once a year handles it.
Freeze-thaw considerations
Freeze-thaw damage happens when water trapped in stone pores or under stone expands as it freezes. The industry has used standards like ASTM C666 and ASTM C67 as proxies for evaluating natural stone's freeze-thaw resistance, though formal natural stone-specific freeze-thaw testing standards continue to evolve. Practically speaking: choose dense, low-absorption stones (bluestone, granite, high-grade quartzite) in cold climates; seal porous stones before winter; ensure drainage is excellent so water doesn't pool under or around the stone; and never use rock salt (sodium chloride) on stone patios, it accelerates freeze-thaw damage. Sand or calcium magnesium acetate are safer deicers if you need them.
Repairs
One of the biggest advantages of stone over poured concrete is repairability. A cracked flagstone piece can be lifted and replaced without disturbing the rest of the patio. A settled section can be lifted, the base releveled, and the stone re-laid. Keep a few spare pieces from your original order (most suppliers recommend a 10% overage for exactly this reason), because matching stone years later from a new quarry batch can be tricky.
Sourcing and Shopping: What to Ask Before You Buy
Where and how you buy your stone matters almost as much as what you buy. Here's how to avoid the most common sourcing mistakes.
Find a stone yard, not just a big-box store
Big-box stores carry a limited selection of pre-palletized stone, often in thinner gauges and without much information about origin or absorption rates. A local stone yard or masonry supplier will let you walk the yard, see full slabs and pallets, ask about specific grades, and often connect you with installers who know the material. You'll also get better pricing per ton when buying quantity. If you don't have a local stone yard, regional landscape supply companies often carry a solid range.
Questions to ask your supplier
- Where was this stone quarried, and what is the specific rock type?
- What is the average water absorption rate for this material?
- Is this stone rated for exterior/freeze-thaw use?
- What thickness options are available, and what is the thickness tolerance (variation) within a pallet?
- What is the coverage per ton, and how should I calculate overage?
- Do you have samples I can take home to see in my actual lighting conditions?
- What are the delivery minimums, and how is it shipped (palletized, strapped)?
- How much lead time is there if I need more of this exact material later?
Quality checks before accepting delivery
- Check the pallet for cracked or thin pieces — a reputable supplier will credit damaged material if you catch it on delivery.
- Look at thickness variation within the pallet; more than 1/2-inch variation in a single pallet of 'cut' stone is a problem.
- Check color consistency — quarried stone can shift between batches, so compare the delivered pallet to your sample.
- Count approximate coverage before signing off so you know if you're short before the truck leaves.
- Inspect a few random pieces for hairline fractures, especially in thin (under 1.5 inch) flagstone.
Sample planning and ordering smart
Always take physical samples home before ordering. Stone looks completely different in a stone yard under direct sun than it does in the shade of your house at 5 PM. Live with the sample for a day, see it wet and dry, and set it next to your house color and existing materials. Order 10% more than your calculated area for cuts and breakage, and keep leftover pieces for future repairs. If you're working with an installer, have them confirm the quantity calculation, it's easier to return a partial pallet than to wait for a second delivery that may not match.
Getting your stone patio right comes down to matching the stone's actual properties to your climate and use case, building the base properly, and buying from a supplier who can answer your questions without hesitation. Do those three things, and you'll have a patio that outlasts the rest of your landscaping, and probably your mortgage.
FAQ
What’s the easiest stone to maintain year-round if I want the “best stone patios” look without lots of upkeep?
Bluestone and granite are usually the lowest-maintenance picks because they’re denser and stain less than limestone and sandstone. Even then, you still need annual brushing, and you should plan on re-checking sealers on the porous stones (sandstone and limestone) before winter.
If I live in a freeze-thaw climate, can I use limestone or sandstone if I seal it?
You can, but it’s higher risk. Sealing helps, but freeze-thaw failures often start from water getting in faster than the sealer can protect (especially at edges and joints). If you choose limestone or sandstone, request low-absorption grades and build the base and drainage carefully so water can’t sit under the patio.
How do I choose between a dry-laid patio and a mortared patio?
Choose dry-laid if you want simpler repairs and better drainage through joints (you can lift and reset individual stones). Choose mortared if you want a more formal, tight-joint look and you’re confident the concrete slab will stay crack-resistant with proper control joints, because movement in the slab transfers to the stone.
What’s the minimum stone thickness I should insist on for a dry-laid installation?
For a dry-laid setup, don’t go below 1.5 inches in most cases. Irregular flagstone often needs closer to 2 inches to handle foot traffic and keep from cracking or shifting, particularly if your base settles slightly over time.
Are honed or brushed finishes always safer than polished stone outdoors?
For wet and pool-adjacent areas, yes. Polished surfaces can become slick when damp, even if the stone is otherwise high quality. If the supplier offers multiple surface treatments, specify a finish known for traction, like flamed, sandblasted, or a honed/brushed texture.
How can I verify slip resistance before I buy natural stone?
Ask the supplier for information about the stone’s surface texture and expected traction for outdoor wet use. For manufactured options, you can look for documented wet slip testing, but for natural stone you should focus on a finish that has real texture and avoid polished products where water will collect.
Do I need to edge my stone patio, and what’s the best option for stopping movement?
Yes, edges matter because they prevent lateral creep, especially on dry-laid patios. A properly set cut-stone border or a structured border course usually holds up longer than an unanchored “decorative” edge, and it keeps thickness and joint lines looking straight.
What’s the most common DIY mistake that causes rocking stones later?
Skipping full compaction and proper grading of the gravel base. If the base isn’t compacted in lifts and the patio isn’t pitched for drainage, sections settle unevenly, leading to rocking even when the stone itself is strong.
How often should I refill polymeric sand in the joints?
Plan on re-application every 3 to 5 years. It breaks down with weathering and washout, and once it weakens, weeds and movement are more likely, especially in freeze-thaw regions where expansion helps wash joint material away.
Is it okay to pressure wash natural stone patios?
It depends on the stone. Dense stones like granite and bluestone tolerate pressure washing better, but softer or more porous stones can suffer surface damage. If you do use a washer, keep distance and reduce pressure, and never aim at joints with a concentrated stream.
When should I seal my patio, and how do I know it’s time?
Most porous stones need sealing before winter and often every 2 to 3 years outdoors. Use the water drop test on a few spots, if water soaks in instead of beading, it’s time to seal, and always apply sealer to clean, fully dry stone.
What de-icer should I avoid on stone patios?
Avoid rock salt (sodium chloride). It accelerates freeze-thaw damage. If you need de-icing, use safer alternatives like sand or calcium magnesium acetate, and spread sparingly.
How much stone should I order to avoid running short during installation?
Order about 10% over your calculated square footage to cover cuts, breakage, and the chance you need matching pieces later. Also ask your installer to confirm the quantity calculation before the first delivery.
If a single stone cracks years later, can I repair a natural stone patio without replacing everything?
Often yes, especially with dry-laid patios. You can lift the damaged piece, re-level the base, and reinstall it, but matching color and tone can be difficult after a quarry batch changes, so keeping a few spare pieces from the original order is a smart move.