
A patio slab is a flat, horizontal layer of concrete (or a large precast concrete or stone unit) used as the walking surface of a patio. In most residential conversations, it means one of two things: a poured-in-place concrete slab cast directly on a prepared base, or large individual precast concrete paving slabs laid on a compacted aggregate base. Both fall under the "slab" umbrella, and both are legitimate patio surfaces.
What Is Patio Slab? Types, Costs, and Installation Tips

Nolan Ellison
29 May 2026
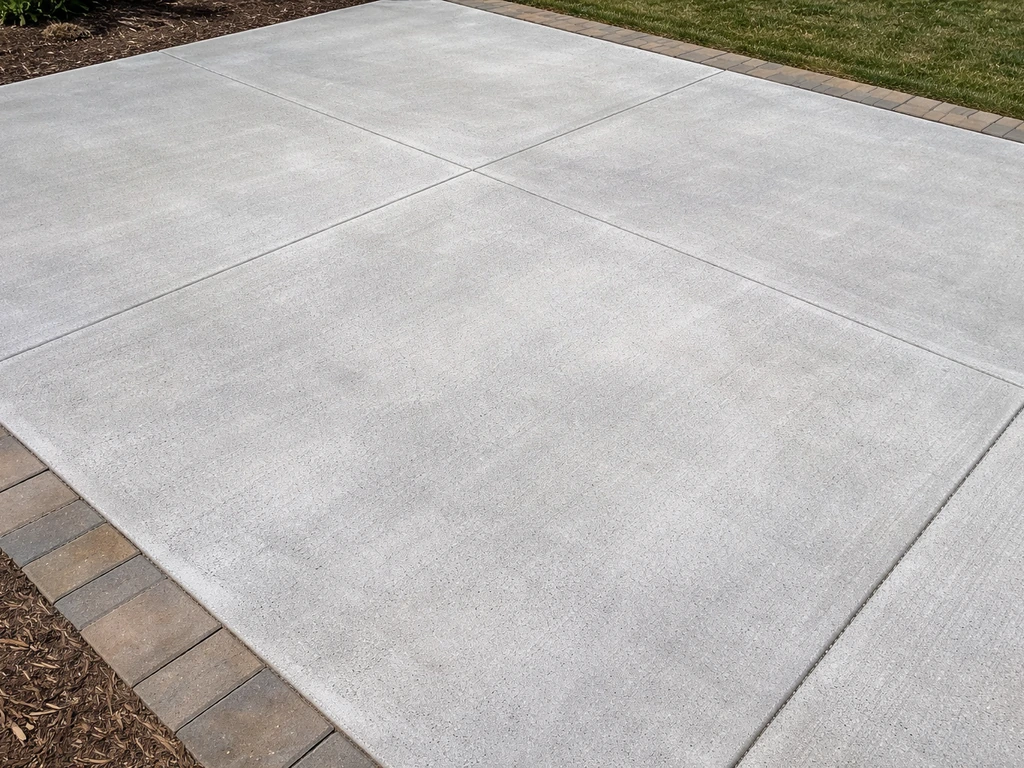
When a contractor quotes you a "concrete slab patio," they almost always mean the first type: a single monolithic pour that dries as one continuous surface. MasterClass describes a “concrete patio” as a poured concrete slab, which aligns with how many home-improvement guides use slab to mean cast-in-place concrete for patios.
What a patio slab actually is
The American Concrete Institute defines a slab as a molded, flat or nearly flat layer of plain or reinforced concrete with uniform thickness, supported on the ground (or on beams and walls). That engineering definition is worth knowing because it clarifies what separates a "slab" from a "paver" or a "tile." A slab is a plate-like element. When it's poured in place for a patio, the whole surface behaves as one connected piece. When it's precast, each slab unit is a thick, individual concrete plate, typically larger and heavier than a standard paver.
The word "slab" gets used loosely in hardscape marketing and contractor quotes, which causes real confusion for homeowners. A supplier might sell "paving slabs" that are precast concrete units you lay on sand, while a different contractor uses "slab" to mean a full cast-in-place pour. Before you sign anything or order materials, always clarify which one is being discussed. The installation process, cost, and long-term behavior are quite different.
Patio slabs vs. other patio surfaces
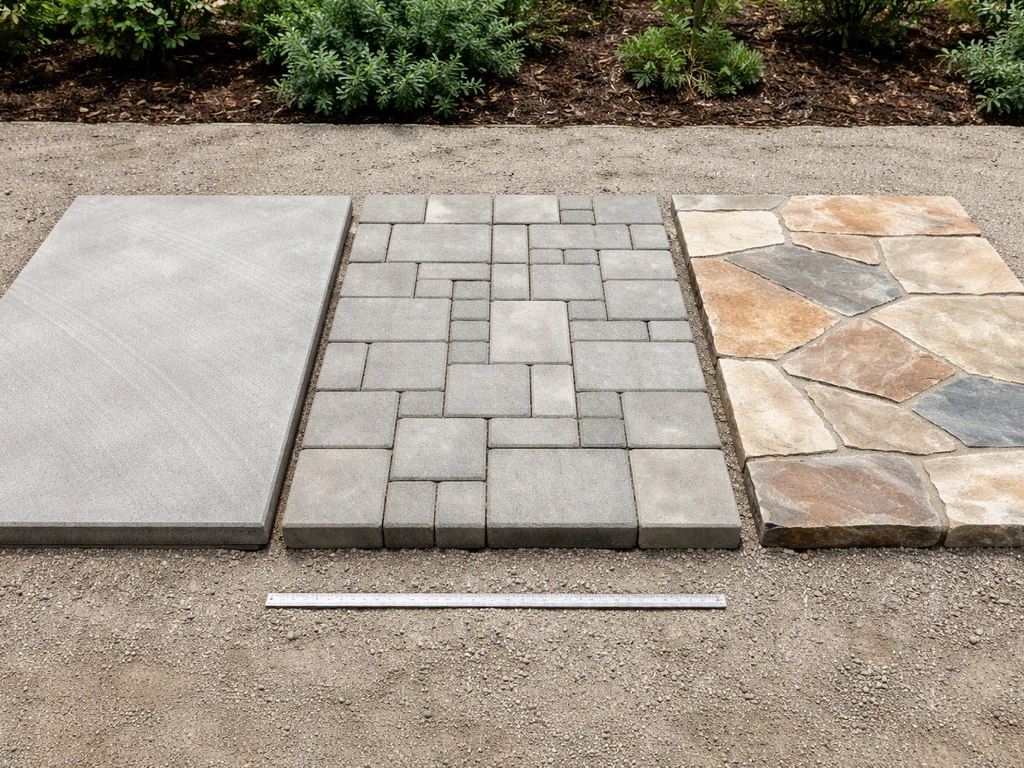
This is where a lot of homeowners get stuck, because there are genuinely good reasons to choose something other than a concrete slab, depending on your space and priorities. Here's a practical breakdown of how slabs compare to the common alternatives.
| Surface | Structure | Key Advantage | Key Drawback | Rough Cost (installed) |
|---|---|---|---|---|
| Poured concrete slab | Monolithic cast-in-place pour | Durable, low maintenance, versatile finishes | Cracks over time; hard to repair invisibly | $6–$12/sq ft |
| Precast paving slabs | Individual large concrete units on sand/base | Replaceable, no curing wait, DIY-friendly | Can shift or settle; joints need maintenance | $8–$15/sq ft |
| Brick pavers | Modular fired-clay units on sand/base | Classic look, individual units replaceable | Can shift, moss growth in joints | $10–$20/sq ft |
| Flagstone | Natural stone pieces on base or mortar | Natural appearance, unique look | Irregular, expensive, joints can crack | $15–$30/sq ft |
| Porcelain tile | Large format tiles on mortar/concrete | Clean look, very low porosity | Slippery when wet, can crack in freeze-thaw | $12–$25/sq ft |
| Gravel | Loose aggregate on compacted base | Cheapest option, good drainage | No firm surface, shifts under furniture | $1–$4/sq ft |
The main reason people choose a poured concrete slab over flagstone, brick, or pavers is value per square foot combined with low ongoing maintenance. You get a firm, level surface in one shot without the ongoing problem of individual units shifting or settling. The trade-off is that when a concrete slab cracks (and most eventually do, especially in climates with hard winters), repairs are visible. With modular surfaces like pavers or flagstone, you can swap out a single unit. That flexibility is genuinely worth paying for in colder climates.
Types of patio slabs and surface finishes
Poured concrete slabs
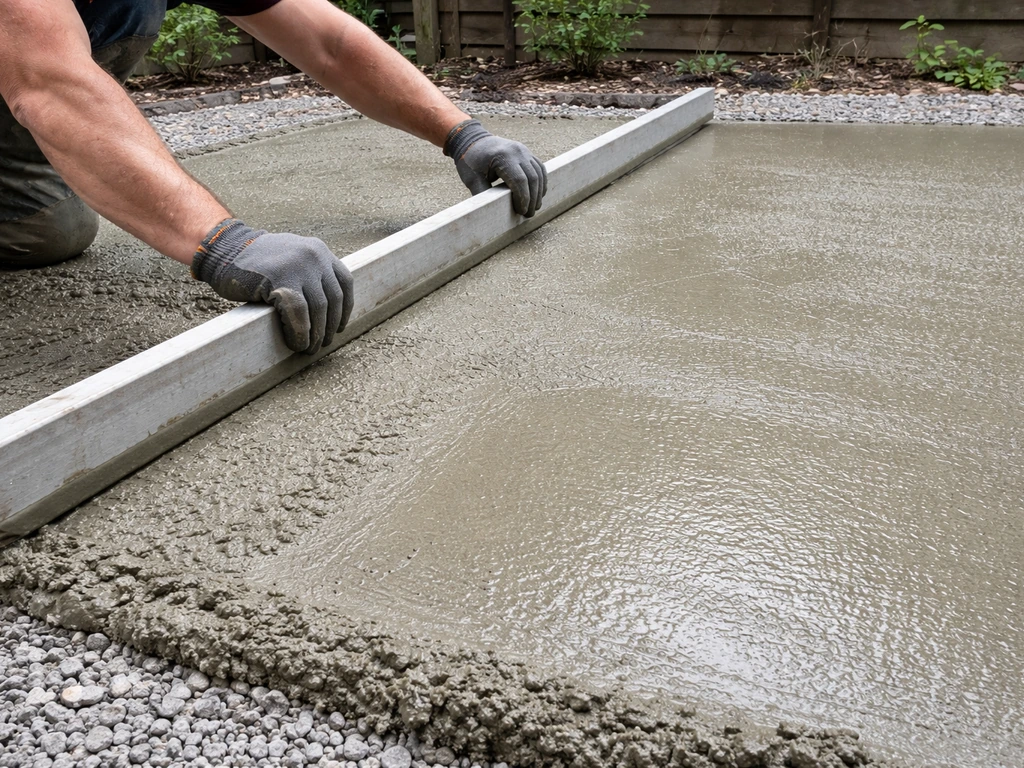
This is the most common residential patio slab. Concrete is mixed (or delivered by truck for larger pours), placed on a prepared base, screeded flat, then finished. The finish you choose dramatically changes how the surface looks, feels, and performs over time.
- Broom finish: A stiff brush is dragged across the wet surface to create a textured, slip-resistant surface. This is the standard, most affordable finish and holds up well outdoors.
- Smooth/troweled finish: The surface is hand- or machine-troweled to a near-flat sheen. It looks clean and modern but can be slippery when wet, so it's less ideal in rainy climates without a sealer.
- Exposed aggregate: The top layer of cement paste is washed off before it fully sets, revealing the stone aggregate underneath. This gives a pebbly, textured surface with good slip resistance and an attractive natural look.
- Stamped concrete: Rubber molds are pressed into freshly poured concrete to create patterns mimicking stone, brick, or wood. Coloring agents are added before or after the pour. Looks great initially, but the surface coating needs resealing every 2 to 3 years.
- Stained or colored concrete: Acid stains or integral pigments create color effects on a plain slab. These finishes are mostly cosmetic and don't affect durability.
Precast paving slabs
Precast paving slabs are factory-made concrete units, typically 18 inches square or larger, sometimes up to 24 x 24 inches or even 24 x 48 inches. They're laid on a compacted aggregate base with bedding sand (usually about 1 inch / 25 mm thick), similar to how concrete pavers are installed.
ICPI’s residential patio paving-slab detail similarly specifies a system that uses a compacted aggregate base with bedding sand (and a geotextile), along with edge containment elements to support proper drainage and performance laid on a compacted aggregate base with bedding sand.
The National Precast Concrete Association treats these as a distinct product category from standard pavers, and they are: paving slabs are thicker, heavier, and cover more area per piece. They give you a clean, tile-like look without the grout and without the mortar bed required for porcelain tile.
Natural stone slabs
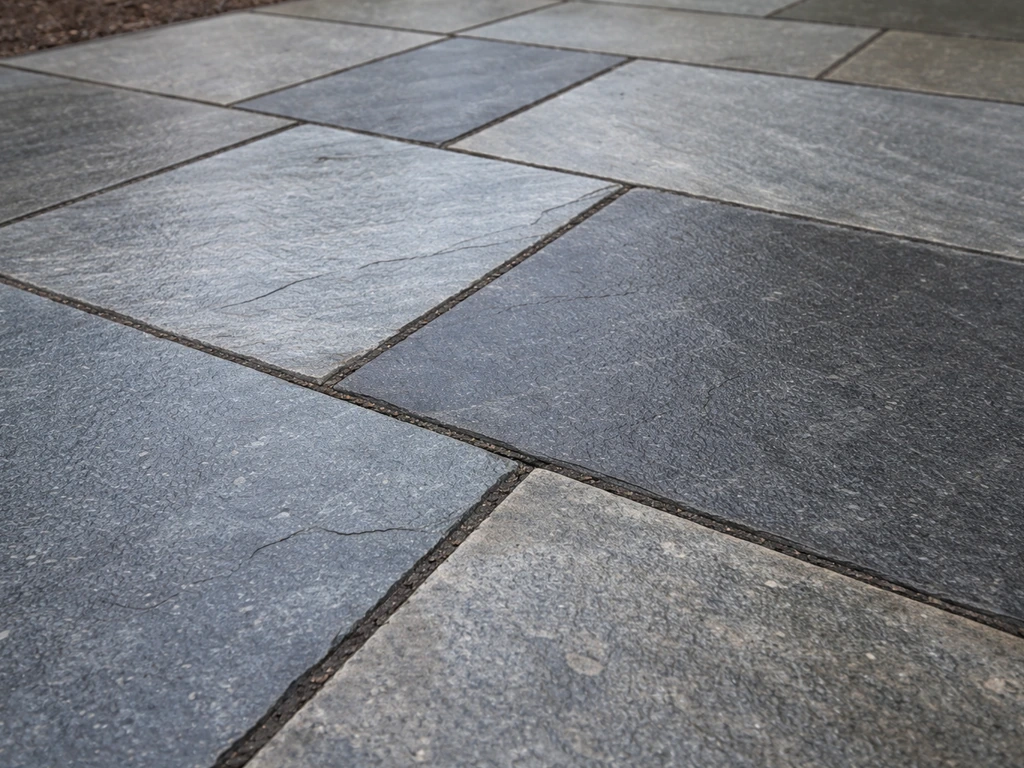
Slate, bluestone, limestone, and travertine are sometimes sold and installed as "slabs" when cut into large, uniform pieces. These sit between flagstone (irregular) and porcelain tile (manufactured) in terms of look and feel. They're laid on either a compacted base (dry-set) or a concrete/mortar bed (wet-set). Stone slabs cost more than concrete but offer a natural look that's hard to replicate.
If you're weighing slate specifically, it's worth researching how it performs in your climate before committing. Slate can be a good patio choice if its slip resistance and freeze-thaw performance work for your climate and intended use. To get the best results for a slate patio, use the best slate patio sealer recommended for your exposure and traffic level.
Materials, thickness, and what goes inside a slab
Concrete mix and thickness
For a residential patio slab, 4 inches thick is the standard starting point. That's the same baseline recommended for sidewalks and pedestrian areas. If you're parking a vehicle on it, go to 6 inches. Thinner slabs (3 inches or less) are asking for trouble outdoors, especially in climates with freeze-thaw cycles. The concrete mix for exterior flatwork should be air-entrained (tiny air bubbles mixed in that give the concrete room to expand and contract without cracking) and ideally 4,000 psi compressive strength.
Reinforcement
Residential patio slabs are often poured with wire mesh or rebar for tensile strength, since concrete is strong in compression but weak in tension. Rebar (typically #3 or #4 bar on a 18-inch grid) is better than wire mesh for most patios because it holds crack faces together more effectively if the slab does crack. Some contractors skip reinforcement on small patios, which is fine if control joints are properly placed, but reinforcement is cheap insurance on larger pours.
Control joints and expansion joints
This is the part that separates a well-built slab from a future headache. Concrete shrinks as it cures and expands and contracts with temperature. Control joints (also called contraction joints) are shallow cuts made with a saw or a hand groover that give the slab a planned place to crack, rather than cracking randomly. The cuts are typically one-quarter of the slab depth.
Timing matters: saw-cut control joints need to be cut after the concrete is firm enough not to ravel at the edges but before random shrinkage cracking begins, usually within the first 4 to 12 hours depending on temperature and humidity. Control joints are typically spaced no farther apart than 2 to 3 times the slab thickness in feet (so roughly 8 to 12 feet for a 4-inch slab).
Expansion joints, which are full-depth, flexible gaps (usually filled with a foam backer rod plus a flexible sealant), go where the slab meets structures like the house foundation, steps, or existing concrete.
How a patio slab gets installed
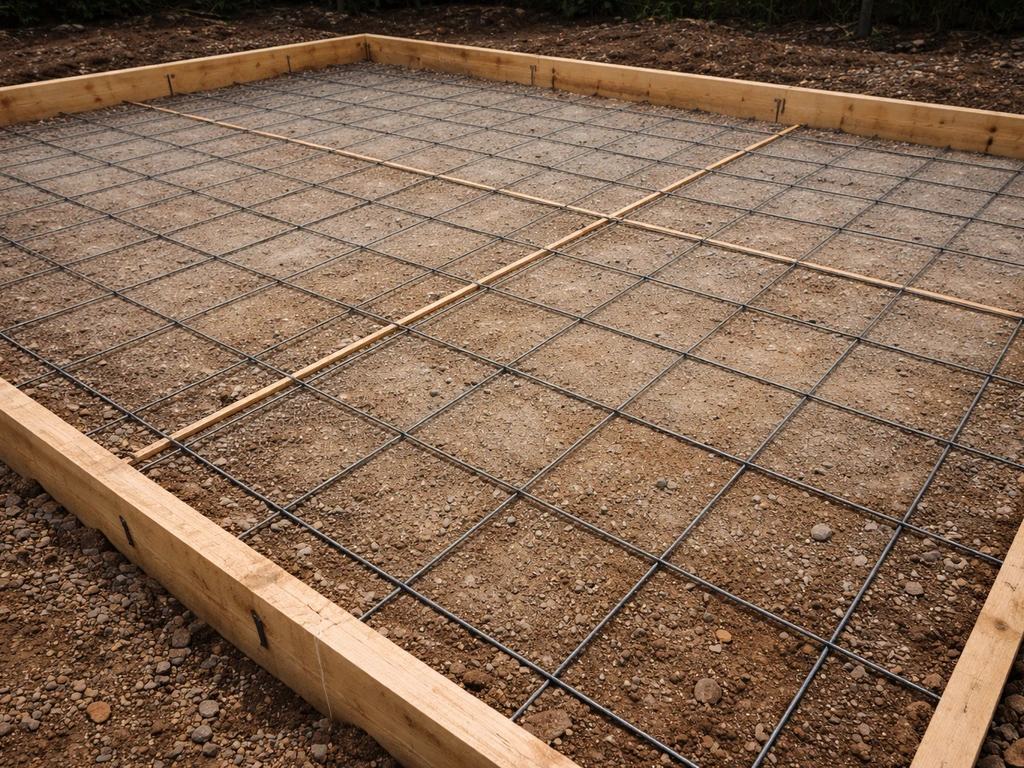
You don't need to install a slab yourself to understand what a good installation looks like. Knowing the steps helps you evaluate contractor bids and catch shortcuts before they become your problem.
- Excavate and grade the subgrade. Typically 6 to 8 inches of material is removed: 4 inches for the base, plus 4 inches for the slab itself. The subgrade (native soil) is compacted. In areas with saturated soil, expansive clay, or freeze-thaw risk, a geotextile fabric is laid on the subgrade before the aggregate base.
- Install the compacted aggregate base. A minimum of 4 inches of compacted gravel (crushed stone or road base) is spread and compacted. This base is critical for drainage and load distribution. Skimping here is the single most common cause of slab failure.
- Set forms and slope. Wooden or metal forms define the slab edge and set the grade. The slab must slope away from any structures at a minimum of 1/8 inch per foot, ideally 1/4 inch per foot, for drainage. Getting this right before the pour happens is non-negotiable.
- Place reinforcement. Rebar or wire mesh is set on chairs (small plastic supports) to hold it in the middle of the slab thickness, not resting on the base where it would be useless.
- Pour and finish the concrete. Concrete is placed, struck off with a screed, floated, and finished to the chosen texture. On hot or windy days, a curing compound or wet burlap is applied immediately after finishing to slow moisture loss.
- Cut control joints. Saw cuts are made within the first 4 to 12 hours, before random cracks form.
- Cure the slab. Concrete gains most of its strength in the first 7 to 28 days. ACI guidance calls for maintaining moisture and temperature for at least 7 days at temperatures above 50°F. Covering with plastic sheeting, wet burlap, or a curing compound are all valid methods. Walking on the slab is usually fine after 24 to 48 hours; placing heavy furniture should wait 7 days; full strength comes at 28 days.
- Seal the surface. Once cured, a penetrating or film-forming sealer protects against moisture intrusion, staining, and freeze-thaw damage.
For precast paving slabs, the process is similar through step 2, then: lay bedding sand (1 inch / 25 mm), set the slabs with consistent joint spacing, compact with a plate compactor, and fill joints with polymeric sand. There's no curing wait time because the slabs are already cured at the factory.
How patio slabs perform in different climates and budgets
Climate is probably the most important factor when deciding between a poured slab and a modular alternative. Here's the honest breakdown.
| Climate/Condition | Poured Concrete Slab | Precast Paving Slabs | Brick/Pavers | Natural Stone/Flagstone |
|---|---|---|---|---|
| Cold winters / hard freeze-thaw | Moderate risk; air-entrained concrete + control joints reduce cracking but damage still happens over time | Good; individual units can flex slightly and be replaced | Good; replaceable units, but sand joints erode faster | Slate and bluestone handle freeze-thaw well; limestone and travertine can spall |
| Hot, dry climates | Excellent; minimal freeze-thaw stress; expand/contract control joints handle heat | Excellent; stable performance | Good; heat retention can make surface hot underfoot | Good; avoid dark stone in intense sun |
| High rainfall / poor drainage | Risk of efflorescence and surface scaling if drainage is poor; sealing helps | Better drainage through joints; lower standing-water risk | Permeable joints allow drainage | Natural stone can be slippery when wet |
| Tight budget | Best value; lowest installed cost per sq ft for durable surface | Mid-range; more than poured concrete but less than stone | Mid-range; similar to precast slabs | Highest cost; flagstone especially |
| DIY installation | Requires skill and ideally truck-delivered concrete for large areas | Very DIY-friendly; no special equipment beyond plate compactor | DIY-friendly; well-documented process | Doable but physically demanding with heavy stone |
My honest take: if you're in a zone that sees hard winters (Zone 6 or colder in the US), a modular surface like precast paving slabs or brick pavers is easier to live with long-term, because individual units can be lifted and releveled without the visual headache of a patched concrete slab. If you're in a mild climate and want the lowest long-term maintenance and cost, a poured concrete slab with a broom finish and proper control joints is hard to beat. Stamped concrete sits in an awkward middle ground: it looks great initially but requires more maintenance than plain concrete and repairs are always noticeable.
Maintenance, repairs, and what to watch for over time
Sealing and resealing
Sealing a concrete patio slab is not optional if you want it to last. A penetrating (silane/siloxane) sealer soaks into the concrete and repels water without changing the appearance. A film-forming sealer (acrylic, epoxy, polyurethane) sits on top and adds sheen but needs reapplication every 2 to 3 years for solvent-based acrylics, or more frequently in harsh climates. Stamped or colored concrete almost always uses a film-forming sealer for appearance, which means more maintenance commitment. Efflorescence (white mineral deposits on the surface) is a sign that moisture is moving through the slab. It's mostly cosmetic but indicates a drainage or sealer issue worth addressing.
Crack repair
Hairline cracks (under 1/4 inch wide) in a concrete slab can be filled with a polyurethane or epoxy caulk applied directly into the crack. Larger gaps need a foam backer rod placed first to give the sealant something to bond against and to prevent three-sided adhesion, which causes sealant failure. No concrete crack repair on a colored or stamped slab will be invisible, which is the core aesthetic trade-off versus modular surfaces. For precast slabs or pavers, a sunken or cracked unit can simply be removed, the base re-leveled, and the unit replaced or swapped for a new one.
Joint maintenance
Control joints and expansion joints in a poured slab should be inspected every 2 to 3 years. When the sealant in a control joint degrades, water infiltrates and accelerates damage, especially in freeze-thaw zones. Cleaning out the old sealant and reapplying is straightforward but is the maintenance task most homeowners ignore until it's too late.
How to plan your next steps
Before you contact a contractor or order materials, get clear on three things: your climate zone, your budget per square foot, and whether you want a permanent monolithic surface or something modular that can be adjusted later. Once you know which slab type you’re after, use a simple checklist to figure out how to choose patio slabs for your climate, budget, and desired look. Those three answers will narrow your options quickly.
When getting quotes, ask contractors specifically: Is this a poured-in-place concrete slab or a modular slab/paver system? What thickness are you quoting? Does the price include base prep, compaction, and control joints? What finish is included, and what does resealing cost? A quote that skips base prep details is a red flag. The base is where corners get cut most often, and it's the part you'll never see once the slab is down.
For a poured concrete slab, budget $6 to $12 per square foot installed for a plain broom-finish slab, or $12 to $25 per square foot for stamped concrete with color. Schedule-wise, allow 1 to 2 days for the pour itself, then a full week before placing furniture, and 28 days before any heavy loading. For precast paving slabs or pavers, installation can usually be used immediately after completion since there's no curing phase.
If you're still deciding between slab types, it's worth spending time comparing specific slab materials for your space, since the best choice often comes down to the visual style you want alongside the climate and maintenance factors covered here. Looking at slate, flagstone, and porcelain options alongside concrete will help you build a fair comparison before committing to a quote.
- Confirm your frost depth and climate zone before choosing between poured concrete and modular slabs.
- Get at least two contractor quotes and make both specify base thickness, compaction method, and joint treatment.
- If budget is tight, a plain broom-finish poured slab with proper base prep and control joints is the most cost-effective durable option.
- If you want flexibility for future changes or live in a hard-freeze climate, precast paving slabs or pavers give you more options over time.
- Always ask whether sealing is included in the quote, and plan for resealing every 2 to 3 years regardless of which surface you choose.
FAQ
Is a patio slab the same as patio pavers or a patio deck surface?
Not usually. A patio slab typically means either a single poured-in-place concrete surface or large precast concrete/stone pieces set as a slab system. Pavers are modular blocks designed to be lifted and reset individually, and deck boards are wood or composite, not concrete. When comparing options, ask whether the contractor is quoting a monolithic pour or a modular unit system.
How do I tell if a “concrete slab patio” quote is for a true monolithic slab?
Request the scope in writing and confirm it includes base prep, compaction, joint layout, and the slab thickness. If they only mention laying slabs or “paving slabs” on sand, it may be a modular product rather than a cast-in-place pour. Also ask whether control joints are saw-cut or hand-scored, and whether they will be placed before random cracking starts.
What thickness should I require for a patio slab if I expect occasional vehicle use?
Use 6 inches as the baseline if a vehicle will park on it. If the quote is for a 4-inch slab but you plan on cars, that mismatch can lead to premature cracking and surface degradation. For anything heavier than a typical passenger vehicle, ask the contractor to calculate design suitability rather than relying on the standard patio rule.
Do I need reinforcement in every patio slab?
For small residential patios, reinforcement can sometimes be skipped if control joints are done correctly, but it is still low-cost insurance on larger pours. Rebar that holds crack faces together is often more effective than just wire mesh for preventing cracks from opening. If you want long-term durability, ask how they will place reinforcement (depth and coverage), not just whether it exists.
How far apart should control joints be, and what happens if they are spaced too widely?
Control joints are typically cut at spacing up to about 2 to 3 times the slab thickness in feet (for example, roughly 8 to 12 feet for a 4-inch slab). If they are spaced too far, random cracking is more likely because the slab has fewer planned weak points to relieve shrinkage.
When is the best time to seal or reseal a concrete patio slab?
Wait until the concrete has fully cured before sealing, and don’t assume a product can be applied immediately after the pour. For maintenance planning, remember that penetrating sealers generally last longer with less visual change, while film-forming sealers often require reapplication every few years and can be more maintenance-heavy in harsh climates.
Why does my concrete show white deposits, and should I seal over it?
White mineral deposits (efflorescence) usually mean moisture is moving through the slab. It is often cosmetic, but it also signals a drainage or sealer-related problem. In many cases you should address the moisture pathway and clean the surface appropriately before resealing, rather than sealing over the symptom.
What’s the difference between repairing a crack in a poured slab versus replacing a cracked precast slab unit?
In a poured slab, cracks may be filled with caulk and sealing methods that depend on crack width, and repairs are rarely invisible, especially on colored or stamped surfaces. With precast slab or paver systems, a sunken or cracked unit is usually remove-and-replace, which tends to keep the overall surface looking uniform again.
Can I install a patio slab over existing concrete?
Sometimes, but it depends on the condition and whether you need a proper base and leveling system. If existing concrete is cracked or uneven, installing over it can transfer movement and lead to premature failure. Ask for a plan that addresses base prep and joint continuity, and confirm whether they intend to remove, stabilize, or build over it.
What should I include in a contractor bid to avoid shortcuts?
Require specifics: slab type (poured monolithic versus modular slab system), slab thickness, base preparation and compaction method, control joint details (location, timing, and depth), finish type, and whether the price includes sealing and any resealing recommendations. A bid that glosses over base prep or joint planning is a common warning sign.