The best patio slab for your project depends on four things you need to nail down before you even look at samples: how hard the patio will be used, what your climate does to outdoor surfaces in winter, whether you want a low-maintenance material or are happy to seal and clean regularly, and what your budget actually covers installed (not just per tile at the showroom). Get those four answers clear and the choice narrows fast. Porcelain pavers handle freeze-thaw cycles best and need virtually no sealing. Natural stone looks incredible but requires more upkeep and careful species selection in cold climates. Concrete is affordable and versatile but spalls badly without air-entrainment and proper drainage. Brick and flagstone split the difference. The rest of this guide walks you through each decision in order, so you can land on the right material, size, and installation method without second-guessing yourself.
How to Choose Patio Slabs: Materials, Size, Slip, and Setup

Start with how you actually use your patio
Before you pick a material, be honest about what the patio is going to do. A mostly decorative garden space with a couple of chairs sees almost no abuse. A rear patio that doubles as an outdoor kitchen, hosts weekend parties, and has a grill parked on it year-round is a different job entirely. Heavy foot traffic and furniture dragging will wear down soft stones and rough concrete finishes faster than you expect. Poolside slabs get wet constantly, so slip resistance and drainage take priority. Areas near a grill or fire pit get heat-cycled repeatedly, which creates micro-stress in the surface, especially in thinner slabs.
Think through these use questions before you visit a supplier: How many people walk on it daily? Do you drag furniture or use furniture pads? Is any portion shaded and slow to dry (raising slip and moss risk)? Is there a pool, hot tub, or hose-down zone? Will a grill or firepit sit in a fixed spot? Your answers directly shape which material properties matter most, whether that is hardness, water absorption, texture, or thickness.
- High foot traffic: prioritize hardness and abrasion resistance (porcelain, dense granite, concrete pavers)
- Poolside or wet zones: prioritize slip rating (DCOF ≥ 0.42 as a baseline, higher for sloped or constantly wet surfaces)
- Shaded, damp spots: avoid smooth polished finishes; go with a honed, brushed, or textured surface
- Grill/heat zones: thicker slabs (40mm or more) handle thermal cycling better than thin tiles
- Decorative, low-traffic: opens the door to softer stones like limestone or sandstone if you accept the sealing work
Slab types and finishes explained
There are four main categories of patio slab, and each behaves very differently under your feet and over time.
Porcelain pavers
Porcelain is the toughest, lowest-maintenance option on the market right now. It is fired at high temperatures to achieve water absorption of 0.5% or less (measured by ASTM C373), which is why it is classified as impervious. That near-zero absorption is what makes it so resistant to freeze-thaw damage, staining, and moss growth. It needs no sealing, cleans easily, and holds its color for decades. The trade-off is cost and cutting: porcelain is harder than most natural stone, so you need a wet-saw with a diamond blade to cut it cleanly, and large-format rectified porcelain pavers are unforgiving if your sub-base is not perfectly flat. Rectified means the edges have been factory-machined to tight dimensional tolerances, which reduces lippage but demands precise installation. Finishes range from smooth (higher slip risk when wet) to textured and R-rated surfaces specifically tested for outdoor wet use.
Natural stone
Natural stone covers a wide range of materials with very different performance profiles. Granite is hard, dense, and durable in cold climates. Slate splits naturally into textured surfaces that grip well, though it can delaminate if you buy low-quality material. Travertine is beautiful but porous, and those natural voids fill with debris and ice in freeze-thaw zones unless you fill and seal them. Limestone is the most porous common patio stone and the most vulnerable to staining and freeze damage. Flagstone (often sandstone or irregular quartzite) works well dry-set for informal patios but needs careful sealing in wetter climates. Most natural stone patios need re-sealing roughly every two to three years, and more often in high-traffic or pool-adjacent areas. If you want natural stone in a cold climate, granite or dense slate are the safest bets.
Concrete (poured and precast)
Poured concrete is affordable and can be stamped, stained, or brushed to mimic more expensive materials. The problem is that plain concrete in freeze-thaw climates spalls badly when trapped moisture freezes and expands just below the surface. Air-entrained concrete mixes address this by creating tiny voids that give water room to expand, but not every contractor automatically specs it for exterior slabs. If you live somewhere with hard winters, ask specifically whether the mix is air-entrained. Precast concrete pavers are a more controlled product: they are denser, better compacted, and easier to replace if one cracks. Both formats are cheaper than porcelain or natural stone, with installed costs for concrete typically running $6 to $18 per square foot compared to $12 to $30 for concrete pavers.
Brick, pavers, and flagstone
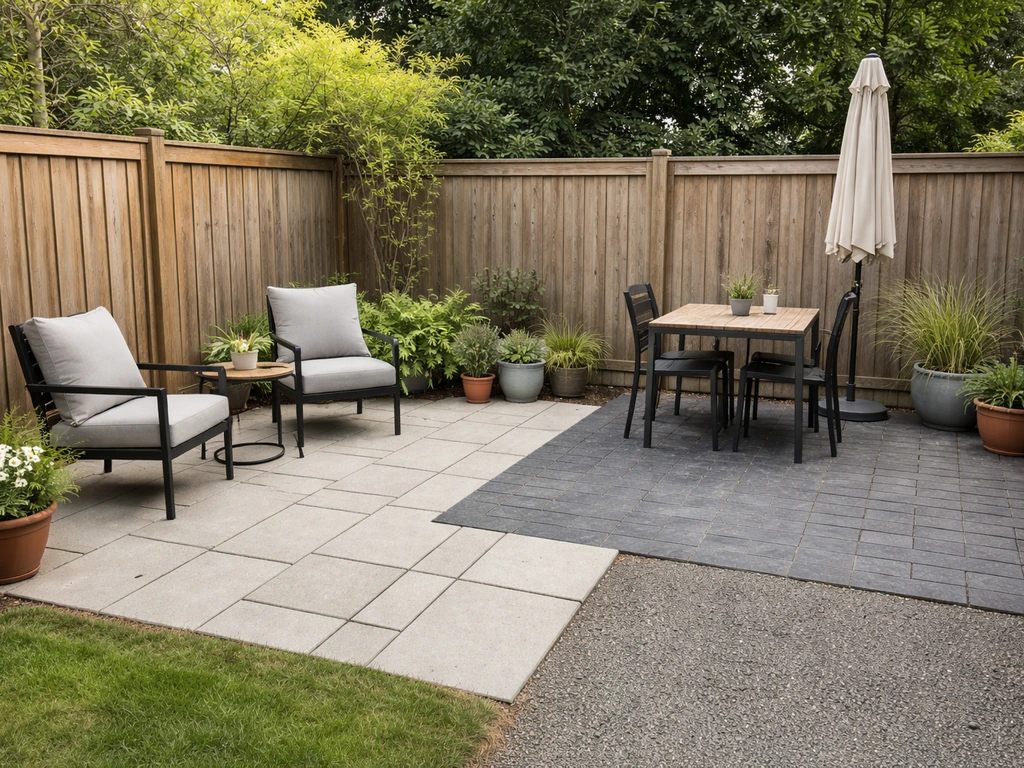
Clay brick and concrete interlocking pavers are classic choices for patios. They are modular, easy to repair (individual units can be lifted and replaced), and dry-set systems drain naturally through the joints rather than relying on surface slope alone. Flagstone laid dry in gravel or decomposed granite gives a relaxed, informal look that suits cottage gardens and low-traffic patios. The downside of all these options is weed and moss intrusion through joints, and they can shift over time if the base is not properly compacted. Polymeric sand in the joints helps significantly with weeds and stability.
How climate and freeze-thaw risk should drive your choice
If you live somewhere that drops below freezing regularly in winter, water absorption is the single most important spec to check. When water soaks into a porous slab and then freezes, it expands by about 9% and creates enormous internal pressure. Repeat that cycle dozens of times per winter and you get spalling, surface scaling, and eventually planar cracking through the slab. This is not a hypothetical risk: it is the number one reason outdoor slabs fail early in northern climates.
For freeze-thaw zones, porcelain at 0.5% or below absorption is the safest material choice. Dense granite and quality slate also perform well. Travertine, limestone, and sandstone are risky without aggressive sealing, and even with sealing they need more monitoring. Poured concrete is fine if the mix is correct and properly sloped to drain, but a poorly finished slab with standing water is a freeze-thaw failure waiting to happen. Deicing salts make this worse: salt pulls more moisture into concrete and accelerates surface scaling, so avoid salt on any concrete or stone patio surface.
In freeze-thaw areas, you should also build a deeper base than you would in a mild climate. Adding extra base depth and maintaining proper drainage slope reduces how much water sits under the slab in the first place, which directly reduces freeze-thaw stress on the material above. In mild climates with no frost risk, softer stones and thinner slabs become practical options, and your choice can shift toward aesthetics and budget.
| Material | Water Absorption | Freeze-Thaw Suitability | Sealing Required | Relative Installed Cost |
|---|---|---|---|---|
| Porcelain pavers | ≤0.5% (ASTM C373) | Excellent | No | $3–$35/sq ft |
| Granite | Low (1–2%) | Very good | Recommended | $20–$40/sq ft |
| Slate | Low–medium (varies by source) | Good (quality slate) | Recommended | $20–$40/sq ft |
| Travertine | Medium–high | Poor without sealing | Yes, critical | $20–$40/sq ft |
| Limestone | High (most porous common stone) | Poor | Yes, critical | $20–$40/sq ft |
| Concrete pavers | Medium | Good with proper base | Optional | $12–$30/sq ft |
| Poured concrete | Medium (depends on mix) | Fair (air entrainment needed) | Recommended | $6–$18/sq ft |
| Brick | Medium | Good (quality clay brick) | Optional | $12–$30/sq ft |
| Flagstone/sandstone | Medium–high | Marginal in hard freeze zones | Yes | $20–$40/sq ft |
Size, thickness, and sub-base: get these wrong and nothing else matters
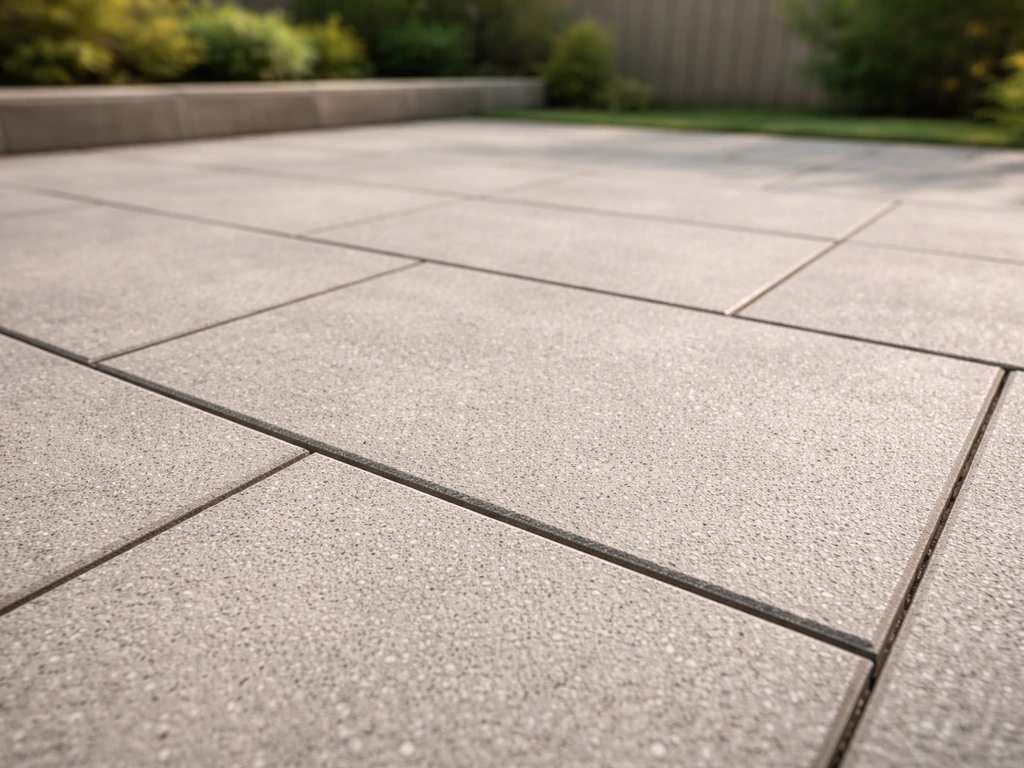
Slab size and thickness affect both how the patio looks and whether it survives long-term. Large-format slabs (24x24 inches and bigger) look contemporary and have fewer joints to collect debris, but they require a flatter, more precisely prepared sub-base. If the base has any humps or soft spots, large slabs rock and crack. Smaller pavers are more forgiving and easier to cut around curves and obstacles.
Thickness matters most for strength and freeze-thaw performance. For a pedestrian patio, 20mm (about 3/4 inch) porcelain or natural stone tiles on a mortar bed are common. For heavier use, 30mm or 40mm slabs are safer and more crack-resistant. If you are dry-setting (on a sand bed), go with at least 40mm slabs to handle point loads from furniture legs without cracking. Thinner tiles on a sand bed are a recipe for breakage.
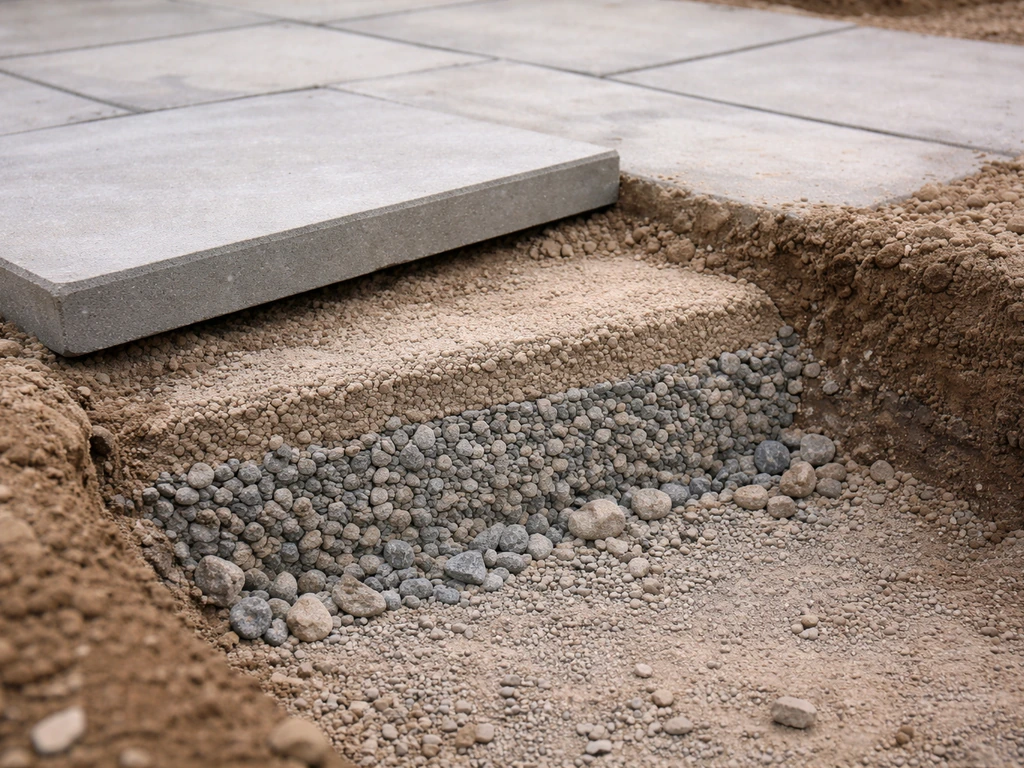
The sub-base is where most DIY patios fail. A well-compacted crushed stone base of 4 to 6 inches is standard for most residential patios in mild climates. In freeze-thaw zones, you may need 6 to 8 inches or more of compacted angular crushed stone to get below the frost line's influence and ensure drainage. The bedding layer on top of the base should be 1 to 1.5 inches of coarse, screeded sand for dry-set pavers, or a full mortar bed for mortar-set tiles. Soil subgrade compaction is critical: the base performs only as well as the ground it sits on, and skipping a plate compactor is a very common mistake.
Drainage slope is non-negotiable. Aim for at least 1/4 inch per foot (roughly 2% grade) away from the house or any structure. This keeps water moving off the surface instead of pooling. Standing water is the root cause of freeze-thaw damage, efflorescence (salt staining on the surface), and long-term joint deterioration. I have seen patios fail within three winters simply because the installer leveled them perfectly flat. Flat looks nice on day one; sloped keeps it looking nice in year ten.
Slip resistance, color, and finishes that hold up in real life
Slip resistance is measured by the Dynamic Coefficient of Friction (DCOF). The ANSI A137.1 standard sets a minimum wet DCOF of 0.42 for level surfaces expected to be walked on when wet. That is a floor, not a target: for outdoor use, poolside areas, and anything that stays damp under shade, you want products that exceed this threshold comfortably. Most outdoor-rated porcelain pavers carry a DCOF rating and some also carry an R-rating from European slip testing. Always check the product's spec sheet for the actual wet DCOF value rather than relying on vague terms like "slip resistant."
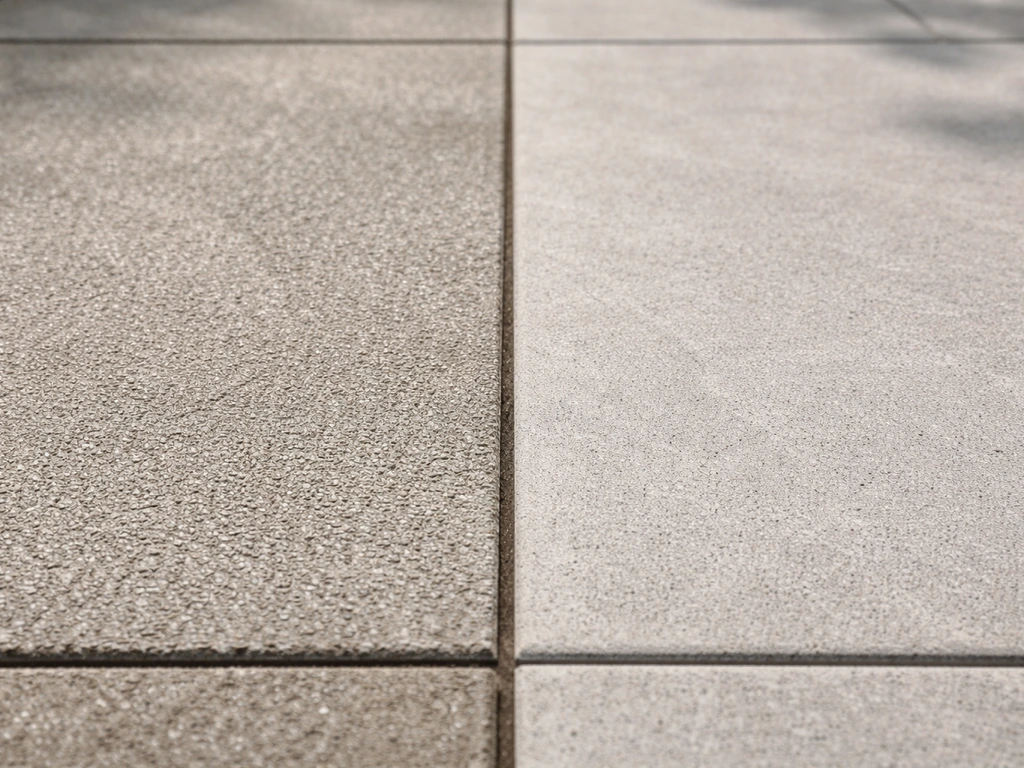
Finish affects both slip resistance and maintenance. A polished or high-gloss finish is the most slippery when wet and shows every water spot, footprint, and scratch. A honed or matte finish is safer outdoors and easier to maintain. A textured, sandblasted, or brushed surface gives the best grip and hides dirt between cleanings, but the texture itself can trap organic debris in shaded spots, leading to algae growth if not cleaned periodically. Flamed granite is a classic outdoor choice because flaming creates a rough, slip-resistant texture while still being a hard, durable surface.
On color: lighter slabs reflect heat, which is welcome in sunny climates but shows staining more readily. Dark slabs absorb heat (uncomfortable barefoot in full sun) but hide grime better day to day. Mid-tone, variegated materials (many natural stones and some porcelain ranges designed to mimic stone) tend to be the most forgiving in practice. Whatever color you choose, match it to your grout or joint treatment deliberately. A tight, matching grout joint makes large-format slabs look seamless and modern. Wider joints with contrasting color create a more traditional, handmade feel but collect debris faster.
Sealing interacts directly with aesthetics and maintenance. Porcelain does not need sealing, which is a genuine time and money saver. Natural stone patios need sealing every two to three years on average, and more often in high-traffic or pool-adjacent situations. Skipping seals on limestone or travertine means staining becomes almost permanent and freeze-thaw damage accelerates. Slate patios benefit from sealing even though slate is denser than travertine, and there is good detail on choosing the right product in our guide on slate patio sealers. For homeowners shopping for the best slate patio sealer, the goal is to choose a product that penetrates well and protects against staining and freeze-thaw stress slate patios benefit from sealing. Concrete can be sealed to improve stain resistance and slow freeze-thaw scaling, but the seal needs renewing regularly.
Mortar-set vs dry-set: choosing your installation approach
There are two fundamentally different ways to install patio slabs, and each suits different materials and situations.
Mortar-set (wet-set) installations
Mortar-set means the slabs are bonded to a concrete base using a thinset mortar system. This is the right approach for porcelain tiles, most natural stone tiles, and any slab thinner than 40mm. It gives you a rigid, stable deck that will not shift. The key requirements are: a properly cured concrete substrate with the right drainage slope, full mortar coverage (aiming for 95% back coverage to prevent voids that can crack the tile), and movement joints every 8 to 12 feet in each direction as well as at all perimeters and changes of plane. For large and heavy porcelain pavers, TEC’s system guidance (including exterior floor system recommendations such as TCNA F102) emphasizes pairing the mortar and grout components with movement-joint planning to manage exterior performance and substrate movement movement joints every 8 to 12 feet in each direction as well as at all perimeters and changes of plane.. Those movement joints are critical. Without them, thermal expansion and substrate movement have nowhere to go except into the tile and grout, and you will see cracks within a few seasons. Movement joints should be filled with a flexible sealant, not grout, and kept clear of mortar and debris.
Typical grout joint widths for outdoor mortar-set tile are 3/16 to 1/4 inch. The slightly wider joint (versus indoor tile work) provides a small amount of drainage and accommodates the natural dimensional variation in the tile. If you are using rectified porcelain, you can run tighter joints, but outdoor installers generally stick with at least 3/16 inch to be safe.
Dry-set (sand-set) installations
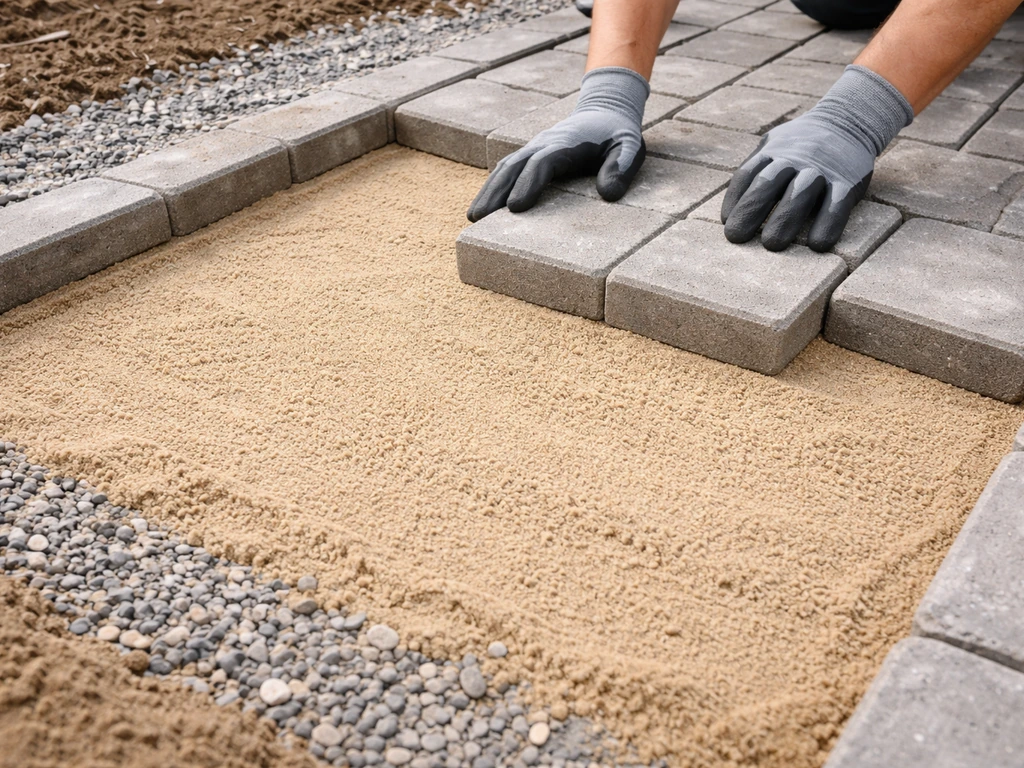
Dry-set means the slabs sit on a compacted base with a screeded sand bedding layer of about 3/4 to 1.5 inches. This is the standard approach for concrete interlocking pavers, brick, and thick flagstone. It drains naturally through the joints, is easier for DIYers to install and repair, and can be adjusted if something settles. The trade-off is that it requires thicker, heavier slab units (40mm or more), and the surface can shift slightly over time, especially in clay soils or freeze-thaw areas. Polymeric jointing sand significantly improves stability and weed resistance versus plain sand.
Dry-set is more DIY-accessible than mortar-set. The ICPI (Interlocking Concrete Pavement Institute) publishes detailed technical specs for base construction, compaction, and bedding sand placement that are worth reading before you start. Getting the compaction right matters more than almost anything else in a dry-set system.
Layout and pattern basics
Running bond (brick-style offset) is structurally stronger than stack bond (grid) for dry-set installations because the staggered joints spread load better. For mortar-set tiles, pattern choice is mostly aesthetic, but avoid very long uninterrupted grout lines that concentrate movement stress. A 45-degree diagonal pattern can visually enlarge a small space. Herringbone is traditional for brick and pavers and interestingly also one of the most stable patterns for dry-set work under lateral forces. Dry-lay your pattern before cutting to confirm the look and minimize waste.
Budgeting, sourcing, and what to inspect before you buy
Material and installation costs vary widely depending on where you are and what you choose. As a rough guide: poured concrete installs at around $6 to $18 per square foot, concrete pavers at $12 to $30, natural stone at $20 to $40, and porcelain pavers anywhere from $3 to $35 per square foot depending heavily on format size and source. Those are installed prices including materials and labor. DIY reduces the labor portion but adds complexity, especially for mortar-set systems where mistakes are harder to fix than in dry-set work.
When sourcing, buy from a supplier who can show you the actual batch you are getting. Tile and stone has natural variation within a production run, and large projects ordered in stages can have visible color or shade differences between batches. Order 10 to 15% extra material to account for cuts, breakage, and future repairs. Buying the same product years later is often impossible.
Before finalizing a purchase, inspect the following on actual samples or in the supplier's yard:
- Water absorption rating: for outdoor use in cold climates, verify the spec sheet shows ≤0.5% (porcelain) or ask for the specific absorption figure for natural stone
- DCOF wet slip rating: look for a stated wet DCOF value on the product spec sheet, not just 'suitable for outdoor use' language
- Thickness consistency: measure several pieces from the same batch; variation of more than about 1/16 inch causes lippage problems, especially in mortar-set systems
- Calibration and rectification: rectified tiles have machined edges for tighter joints; non-rectified tiles vary more and need wider joints to hide it
- Shade variation rating (for porcelain): V1 = uniform; V4 = heavy variation; outdoor applications often look best with V2 or V3 for a natural appearance
- Surface texture: run your hand across a wet sample; if it feels slippery, check the DCOF and reconsider for wet areas
- Freeze-thaw certification: many porcelain and quality stone suppliers state frost-resistance; ask for it in writing if you are in a cold climate
- R-rating (European slip classification): R9 is the minimum for pedestrian outdoor surfaces, R10 or R11 for poolside or slope applications
On the sourcing side, tile showrooms tend to stock product in small batches and may not have the volume you need for a large patio. Hardscape or paving suppliers often carry product in pallet quantities and are more familiar with outdoor installation requirements. If you are considering natural stone, regional suppliers sometimes carry locally quarried material at better prices than imported stone, and they can often advise on how that specific stone performs in your climate.
Quick comparison: which slab is right for your situation
| Situation | Best material choice | Key reason |
|---|---|---|
| Cold climate, minimal maintenance | Porcelain pavers (≥40mm, textured) | Near-zero absorption; no sealing; frost-safe |
| Cold climate, natural stone look | Granite or quality slate, sealed | Low absorption; durable; needs sealing |
| Warm climate, budget-conscious | Concrete pavers or poured concrete | Affordable; easy to repair; no freeze risk |
| Poolside or always-wet area | Textured porcelain or flamed granite (DCOF > 0.42) | High slip resistance; water-resistant |
| Informal garden, low traffic | Flagstone dry-set in gravel | Easy DIY; natural look; forgiving installation |
| Modern aesthetic, large format | Rectified porcelain pavers on mortar bed | Clean look; tight joints; durable |
| Traditional or cottage look | Brick or clay pavers (dry-set) | Classic appearance; easy repair; drainage |
| Tight budget, DIY install | Concrete interlocking pavers | Lower material cost; forgiving dry-set system |
If you are still deciding between a few material options, the single most useful exercise is to get samples of your top two or three choices and wet them down on a sunny day. Check how they look wet versus dry, feel how slippery they are under foot, and set them on your planned area to see how the color works with your house and landscaping. Most of what you are trying to predict in a supplier's showroom becomes obvious in 10 minutes in your own backyard.
Once you know your material, circle back to the installation method that suits it, confirm your sub-base plan handles drainage, and buy slightly more material than you think you need. Getting these foundational decisions right is far cheaper than re-doing a failed patio in three years. If you want to dig deeper into specific material options, our guides on what makes the best slabs for a patio and whether slate works well for patios cover those choices in more detail.
FAQ
How do I interpret a product’s slip resistance rating, and what if the listing doesn’t include wet DCOF or an R-rating?
Use wet DCOF (Dynamic Coefficient of Friction) when available, and confirm it is for outdoor or wet conditions, not just “meets ANSI.” If there is no wet DCOF, treat the product as a gamble for poolside, shade, or areas that stay damp. Ask the supplier for the spec sheet, test method, and whether the rating applies to that exact finish (honed, textured, matte), because finish changes slip performance a lot.
What’s the safest patio slab thickness choice if I’m not sure how the space will be used later?
When you want flexibility, lean toward thicker slabs, especially if you might add heavy planters, an outdoor kitchen, or more furniture. For dry-set sand beds, the article’s 40mm minimum matters because point loads from furniture legs can crack thinner units. If you might switch use patterns over time, err toward thicker material and a properly compacted base.
Can I lay large-format porcelain on a normal patio base, or does size change the base requirements?
Large-format slabs are unforgiving, the key issue is that the surface must be very flat and well supported. Even small humps, soft spots, or uneven compaction can cause rocking and cracking. If you want large-format, prioritize correct base compaction, correct bedding thickness, and follow the manufacturer’s flatness tolerances rather than relying on “looks level” on day one.
Do I need polymeric sand for joints if I’m doing a dry-set patio with pavers or brick?
For many dry-set projects, polymeric jointing sand is strongly recommended because it improves stability and reduces weed intrusion compared with plain sand. However, use it only where water drainage is planned and follow the product directions, since improper application (or over-wetting) can affect joint performance. If you have frequent freeze-thaw, polymeric sand can help, but it does not replace proper base compaction and slope.
Is mortar-set always better for preventing movement and cracking than dry-set?
Mortar-set can be more rigid, but it is only “better” when the substrate is correctly built and the system is detailed for movement. The article’s emphasis on movement joints (perimeters, changes of plane, and spacing every 8 to 12 feet) is critical. Without those joints and proper back coverage, mortar-set tile can crack through the grout and tile as the substrate expands and contracts.
What’s the best way to handle de-icing in a freeze-thaw area if my patio is concrete or natural stone?
Avoid de-icing salts on slab surfaces. Salt increases moisture uptake and accelerates scaling and surface deterioration, which can shorten patio life even when the material is otherwise appropriate. If you must melt ice, consider safer alternatives like mechanical removal first, and then use whatever ice-melt option the manufacturer explicitly allows for your exact slab type and finish.
How do I check whether my patio sub-base plan is “good enough” before installation?
Don’t rely on estimates, verify depth, compaction method, and drainage slope. The article notes plate compaction skipping is a common failure point, so plan to use a proper compactor and check the base is uniformly dense, not just “firm.” If possible, ask your contractor or supplier for base specs (angular crushed stone, bedding sand thickness, and tolerances) before any tile or paver goes down.
What color should I choose if I want the patio to hide stains but also stay comfortable barefoot?
Use a mid-tone, variegated look if you want a practical balance: lighter slabs can show staining sooner, and dark slabs absorb more heat. If barefoot comfort matters in sunny weather, prioritize lighter-to-mid tones rather than very dark finishes. Also consider how the finish affects visibility, polished surfaces show water spots more than honed or matte options.
How much extra material should I add for cuts and future repairs, and does it change for large-format slabs?
A common starting point is ordering 10 to 15% extra to cover cuts, breakage, and potential replacement. For large-format slabs, the waste and breakage risk is often higher due to handling and precise layout needs, so you may lean toward the upper end if your patio has many edges, stairs, or irregular geometry.
Should I wet test samples even for porcelain that’s labeled “low absorption”?
Yes, wet testing still helps because slip perception and surface texture show up when the slab is wet. Even if porcelain has very low absorption, finish and surface texture determine traction when wet. Wet testing on a sunny day also helps you judge how color, glare, and heat reflectivity change under real conditions.
What movement joints are truly non-negotiable for a mortar-set tile patio?
Non-negotiable items are movement joints at perimeters, at changes of plane, and within the field at regular intervals (the article references 8 to 12 feet in each direction). These joints should be filled with flexible sealant, not grout, and kept free of mortar debris. If you omit them or substitute rigid fill, cracking usually shows up within a few seasons due to thermal and substrate movement.