
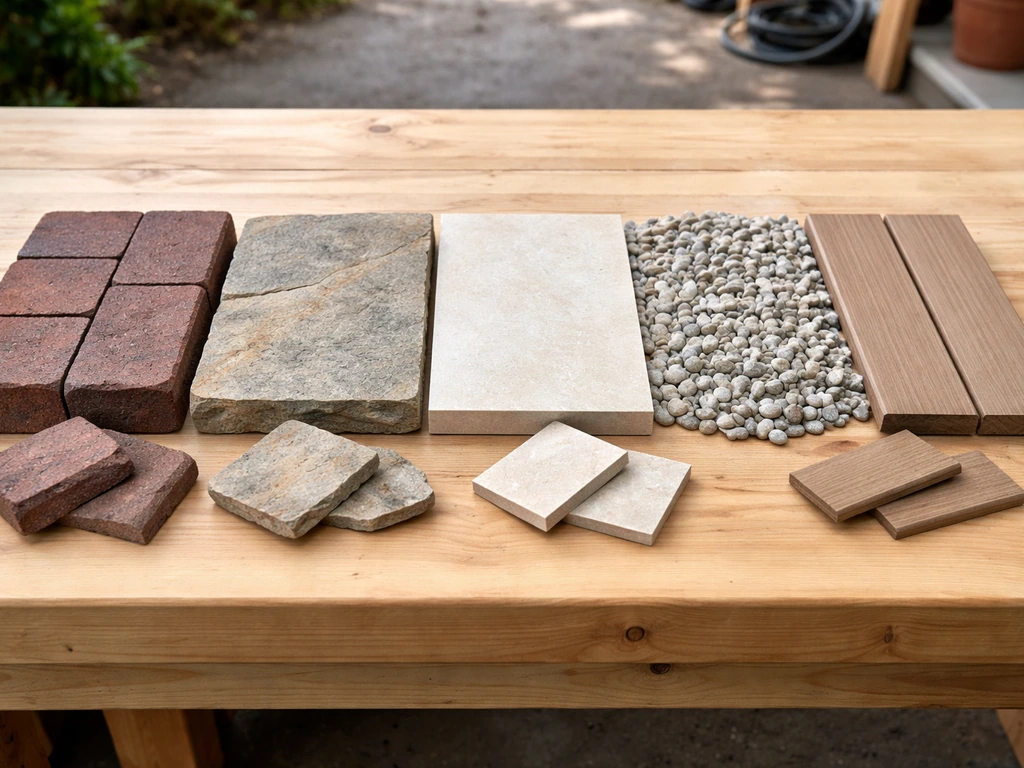
Concrete pavers and brick are the most forgiving all-around choice for most homeowners: they handle freeze-thaw cycles well, cost $8–20 per square foot installed, and individual pieces can be swapped out if something cracks or settles. Natural stone and flagstone look better but cost more and demand more base prep. Porcelain tile is beautiful and nearly maintenance-free but needs a perfectly level substrate and the right slip rating outdoors.
Patio Materials Pros and Cons: Choose the Right Surface

Nolan Ellison
23 May 2026
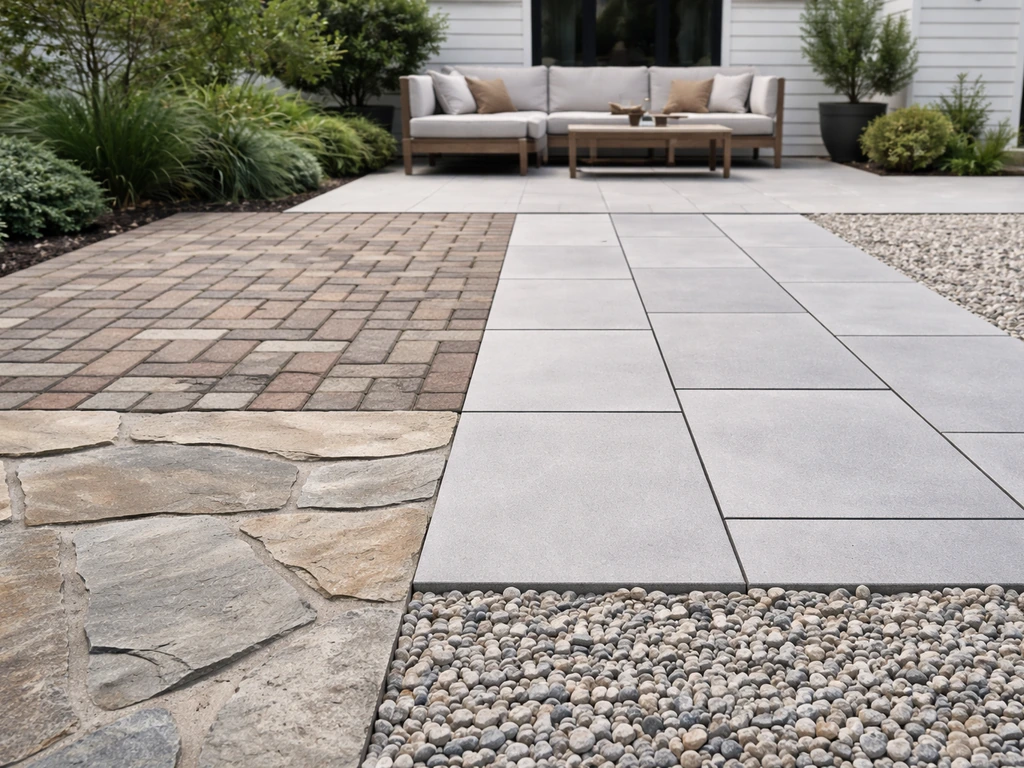
Gravel is cheap and drains like nothing else, but it shifts underfoot and requires ongoing top-ups. Composites and resin-bound surfaces sit in a growing middle ground: low maintenance, decent looks, but a higher upfront investment. The right pick depends on your climate, how much upkeep you'll actually do, and what your patio needs to handle day to day.
Start here: a quick decision framework
Before you dive into any specific material, run through four filters. They'll cut the list down fast.
- Budget: Are you working with under $10/sq ft installed, $10–25, or over $25? Gravel and basic concrete pavers live at the low end. Flagstone, porcelain, and composites climb quickly.
- Climate: Do you get hard freezes (below 20°F) regularly? Freeze-thaw cycles crack porous stone and non-rated tile. If you're in USDA zones 5 and colder, material porosity matters a lot.
- Maintenance tolerance: Be honest. Some materials look great for a decade with zero effort; others need annual sealing or joint refilling. Pick a material that matches what you'll actually do, not what you intend to do.
- Use case: Heavy foot traffic, pets, grilling, kids playing barefoot, or outdoor furniture dragging across the surface? Each of these factors pushes you toward different surface textures, slip ratings, and durability tiers.
Run through those four and you'll usually narrow it to two options at most. The sections below give you what you need to make the final call.
Pavers and brick
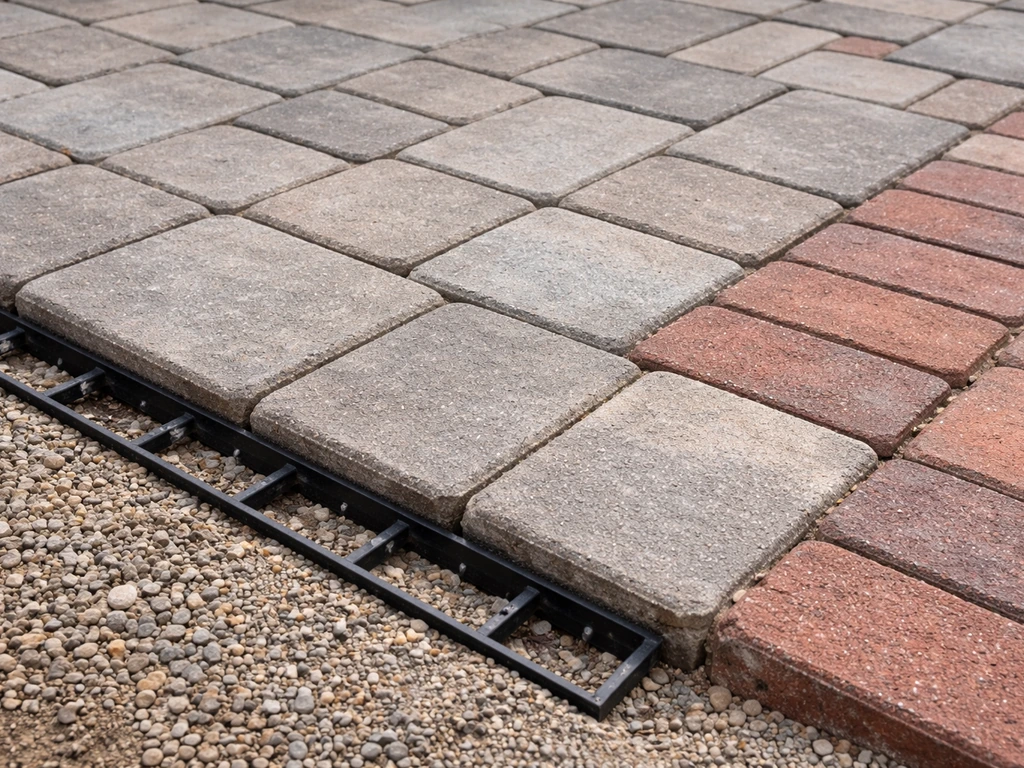
Concrete pavers and clay brick are the workhorses of the patio world, and for good reason. They're interlocking modular units set over a compacted gravel base and a 1-inch bedding sand layer (the ICPI standard method), which means they move slightly with freeze-thaw without cracking the way a rigid slab does. When one unit cracks or a section settles, you pull that piece, re-level the sand, and reset it. No grinding, no patching compounds, no visible repair lines. I've reset settled sections of a brick patio in under an hour with nothing more than a flathead screwdriver and a rubber mallet.
Pros
- Excellent freeze-thaw performance when properly installed with a well-drained base
- Individually replaceable: no full tearout if one unit fails
- Wide range of colors, textures, and patterns; clay brick develops a warm patina over time
- Polymeric jointing sand in the joints resists weed growth, erosion, and insects (Quikrete and others make it specifically for joints up to 2 inches in pavers, brick, and natural stone)
- Permeable options available (permeable interlocking concrete pavers, or PICP) for drainage-sensitive sites
- DIY-friendly: no mortar or special tools required for a basic installation
Cons
- Joint maintenance is ongoing: polymeric sand erodes over years and needs to be refilled; keeping joints full is the best defense against weeds and paver shifting
- Concrete pavers can fade unevenly in high-UV climates over 10–15 years
- Clay brick costs more than concrete pavers and sourcing consistent color for repairs can be tricky as products change
- Not ideal for heavily textured paver styles when using polymeric sand (some manufacturers advise against it due to hazing risk)
Best uses
Pavers and brick work in essentially every climate. They're especially smart in freeze-thaw zones where a rigid surface would crack, and in situations where you want DIY repairability. Clay brick is a strong pick for traditional or cottage aesthetics; concrete pavers are the go-to for modern, clean-line designs or larger formats.
Natural stone and flagstone
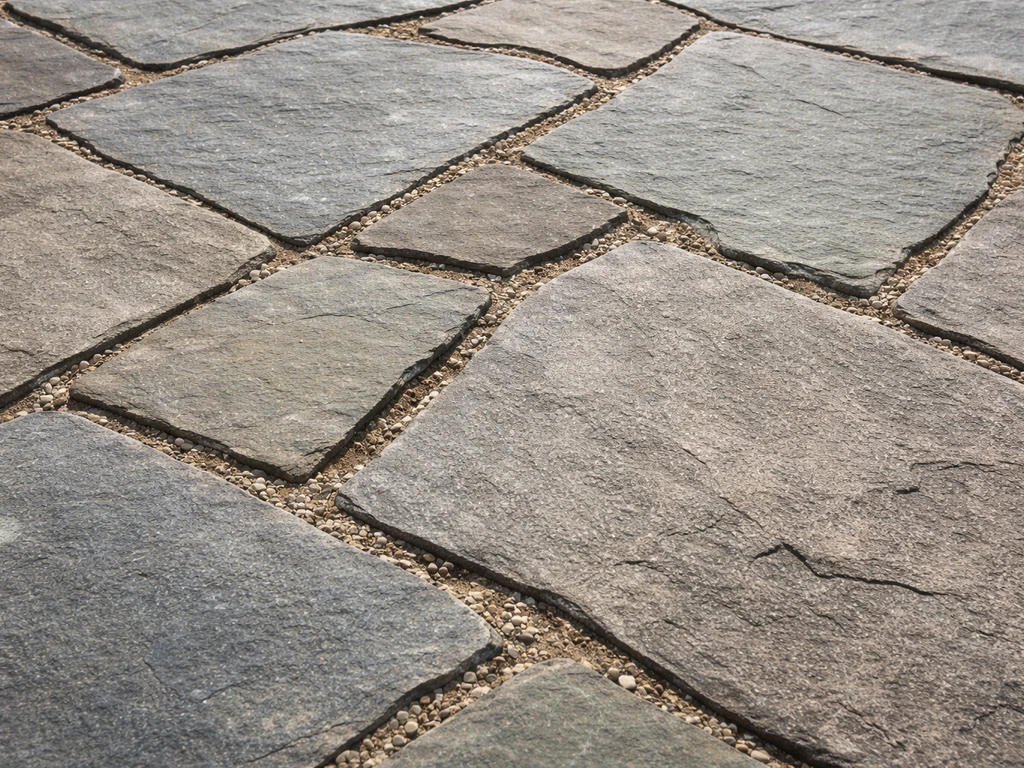
Nothing looks quite like real stone. Flagstone (bluestone, slate, travertine, limestone, sandstone) brings a natural character that manufactured materials struggle to replicate. But natural stone asks more of you during installation and over time, and not all stone performs equally in cold climates. The two big variables are water absorption and how the stone was installed.
Dry-laid flagstone over a gravel and sand base is forgiving in freeze-thaw climates because the stones can move slightly without cracking. Mortared flagstone on a concrete substrate is more rigid, which means frost heave in the subbase can crack both the mortar and the stone with nowhere for the stress to go. For cold-climate installs, dry-laid is almost always the smarter call. Thickness matters too: for dry-laid residential flagstone, pieces under 2 square feet should be at least 1.25 inches thick, and larger pieces benefit from 1.5 inches to reduce rocking and cracking risk.
Pros
- Unmatched natural aesthetics; every patio looks genuinely unique
- Extremely durable when the right stone is matched to the climate
- Dense stones like bluestone and slate have low water absorption and handle freeze-thaw well
- Dry-laid flagstone can be releveled and repaired without demolition
- Long service life: quality flagstone patios routinely last 30–50 years with proper care
Cons
- Higher water-absorption stones (sandstone especially) are risky in cold climates: absorbed water expands when frozen, causing scaling, spalling, and eventual fracture over repeated cycles
- Limestone is acid-sensitive and stains easily from organic matter, wine, or citrus
- Chemical deicers and road salt can cause spalling and surface discoloration on most natural stone types
- Uneven surfaces can be a trip hazard if pieces are not properly bedded and leveled
- Higher material and labor cost compared to concrete pavers: $15–35+ per square foot installed depending on stone type and region
- Irregular shapes mean more cutting and time on complex layouts
Best uses
Natural stone is ideal when aesthetics are a top priority and budget allows. Bluestone, slate, and granite are the safest choices for cold climates given their low absorption. If you're in a mild climate, limestone and travertine open up nicely. Always ask your supplier for freeze-thaw test data before buying sandstone or any softer stone for a northern install.
For a deeper look at individual stone types, flagstone patio pros and cons and slate patio pros and cons cover specific material trade-offs in detail. Flagstone patio pros and cons also cover how these stones behave with different bases and how much upkeep to expect over time.
If you're considering pea gravel epoxy, weighing the pros and cons of the epoxy finish versus loose gravel will help you choose the right long-term approach pea gravel epoxy patio pros and cons.
Porcelain tile and concrete tile
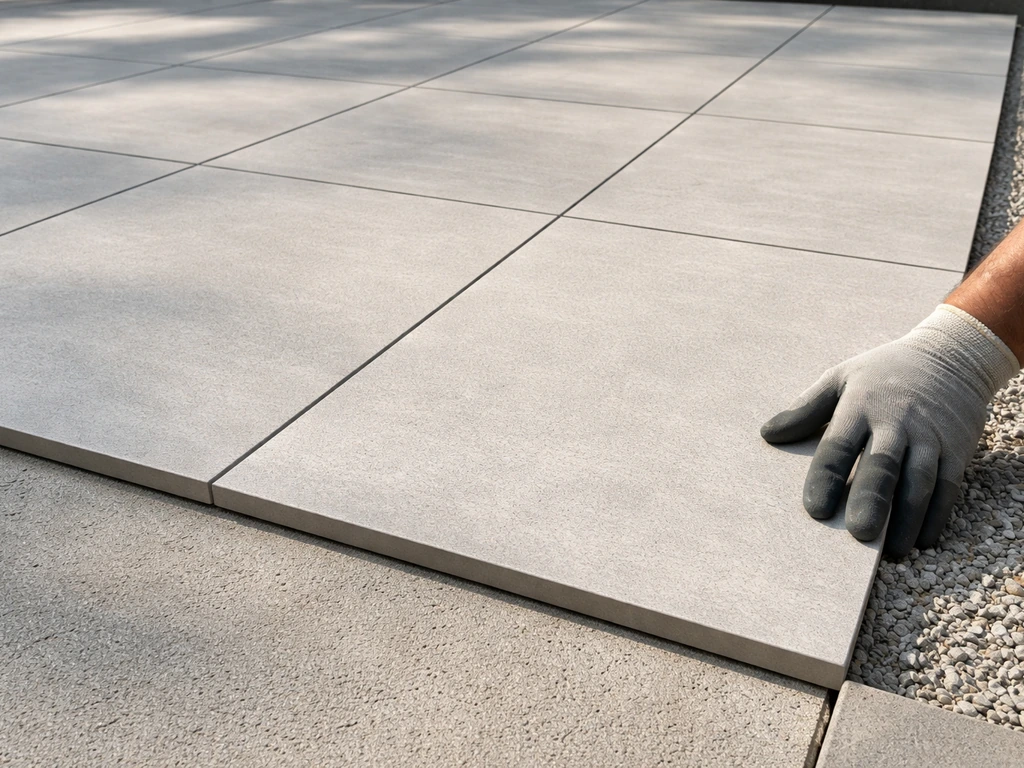
Porcelain pavers have become a serious option over the last decade, and the reason comes down to one number: water absorption below 0.5% (the ANSI A137. Porcelain tile water absorption should meet ANSI A137.1, with a typical threshold of 0.5% or less to indicate very low uptake and support freeze-thaw suitability ANSI A137.1 threshold. 1 threshold). That near-zero porosity is what makes quality porcelain suitable for outdoor use in freezing climates. Compare that to a natural stone with 5–10% absorption and the freeze-thaw advantage becomes obvious. Porcelain also doesn't need sealing, resists staining from cooking grease and tannins, and modern large-format options (24x24 inches and up) look clean and contemporary.
But porcelain has one serious demand: the substrate must be almost perfectly flat and stable. These tiles don't flex. Any movement in the base or concrete slab cracks them. For outdoor installations on grade, that usually means a concrete slab with a proper drainage slope (aim for at least 1/4 inch per foot, or roughly a 2% grade, away from the house). Outdoor porcelain also needs to be rated for slip resistance. Look for a DCOF rating of 0.42 or higher for wet residential outdoor use, or an R11/R12 surface classification for areas like pool surrounds or sloped surfaces where traction really matters.
Pros
- Water absorption below 0.5% makes quality porcelain freeze-thaw resistant when tested to ASTM C1026 standards
- No sealing required; resists staining from food, grease, and organic matter
- Very low maintenance: sweeping and periodic washing is usually all it needs
- Wide range of styles including realistic stone and wood looks in large formats
- Does not fade or discolor from UV exposure the way organic materials can
Cons
- Demands a rigid, flat, well-drained substrate; any base movement will crack tiles
- Individual tile replacement is harder than with pavers: matching discontinued tiles years later is a real problem
- Higher installed cost than basic pavers: $18–35+ per square foot depending on tile size and labor
- Polished or low-texture finishes can be dangerously slippery when wet; always verify the slip rating before buying
- Concrete tile (cement-bodied) is more porous than porcelain and generally requires sealing and more careful freeze-thaw vetting
Best uses
Porcelain is a strong pick for modern or minimalist patios where a clean, low-maintenance surface matters more than repairability. It works well on covered patios, pool surrounds (with the right slip rating), and rooftop terraces over waterproof membranes. Avoid it if your site has drainage issues or if you're not prepared to pour a proper concrete substrate.
Gravel and permeable surfaces
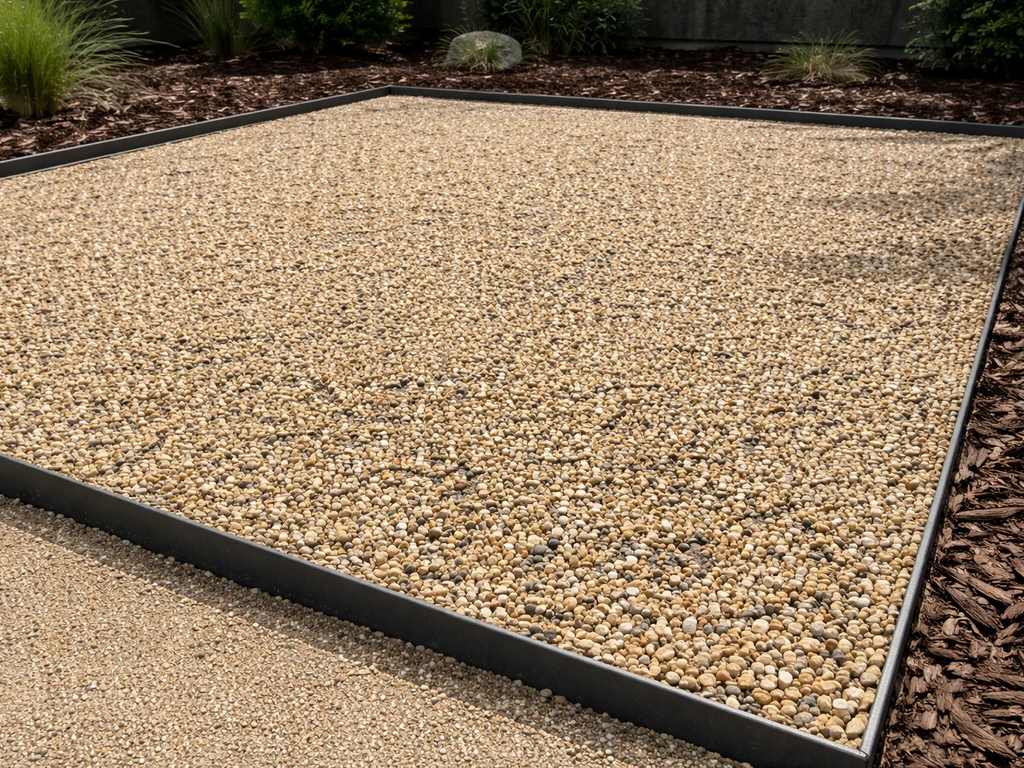
Gravel is the most affordable patio surface you can put in, period. Pea gravel and decomposed granite (DG) are the most common choices. Decomposed granite can also develop common patio problems like washouts, uneven settling, and erosion if the base and drainage are not done correctly decomposed granite (DG) patio problems. The drainage is excellent, installation is DIY-simple, and the cost for materials alone is often $1–4 per square foot. The catch is that loose gravel shifts, migrates into the lawn, gets tracked into the house, and can feel unstable under furniture legs and in heels. It also needs periodic raking and top-ups as material compacts or disperses over time.
Resin-bound gravel is a significant upgrade that addresses the main gravel complaints. Aggregate is mixed with a clear UV-stable resin and troweled onto a prepared base, creating a permeable but bound surface that doesn't shift. It's smoother underfoot, drains well, and requires only sweeping or low-pressure washing. The trade-off is cost ($40–80 per square foot installed in many markets) and UV-related color fading over time, especially in brighter color blends where resin UV stability and aggregate choice make a bigger difference. The pros and cons of pea gravel patios and the specific problems with decomposed granite are worth understanding before committing to a loose-gravel approach.
Pros
- Excellent drainage and permeability: one of the few true zero-runoff options for a patio surface
- Lowest upfront cost of any material for loose gravel installations
- Easy DIY installation with basic excavation, landscape fabric, and edging
- Natural, informal look that suits cottage, woodland, and Mediterranean garden styles
- Resin-bound systems offer most of the drainage benefit with far better stability and appearance
Cons
- Loose gravel shifts and spreads; requires edging restraints and periodic raking and top-up
- Uncomfortable underfoot for barefoot use and unstable for outdoor furniture on soft ground
- Weeds can push through landscape fabric over time, especially at edges
- Decomposed granite can compact into a hard surface that still erodes and muddies in heavy rain
- Resin-bound systems cost significantly more and UV fading of resin or brighter aggregates is a real long-term concern
Best uses
Loose gravel is best for informal, low-traffic zones: side yards, paths around garden beds, or a secondary seating area where budget matters most. Resin-bound gravel works well as a premium permeable alternative for front yards, sloped sites, or anywhere standing water is a problem. Neither is great for a primary outdoor dining area where you want furniture to sit flat and barefoot comfort to be a given.
Composites and low-maintenance alternative surfaces
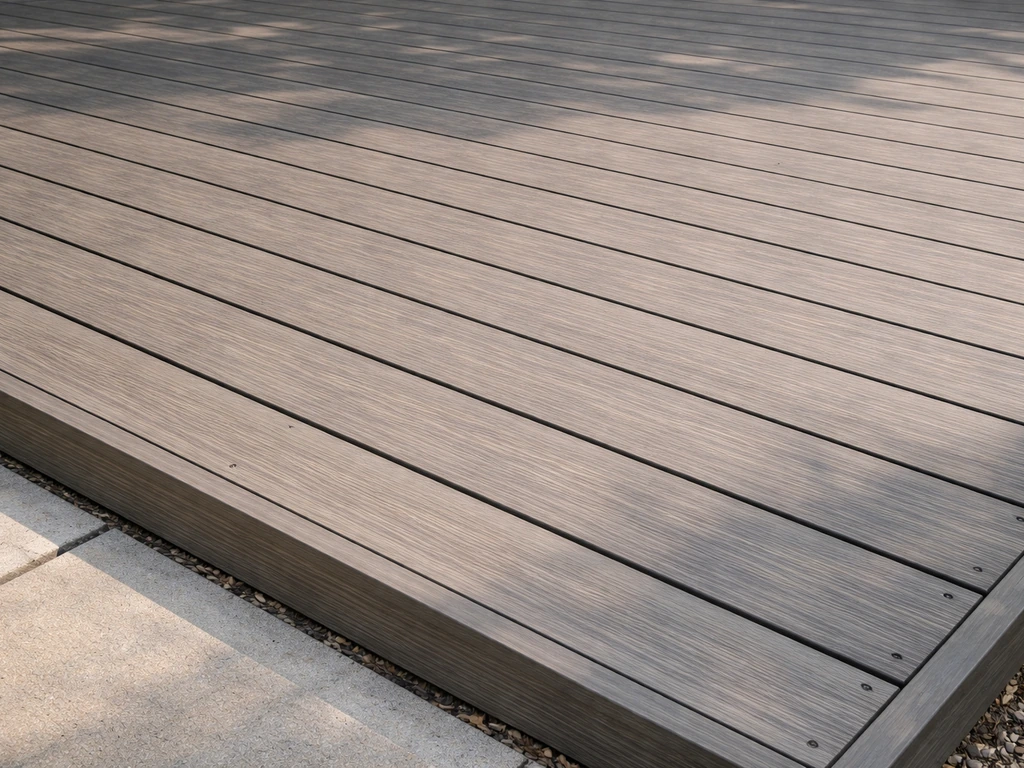
Composite decking products like Trex have pushed into the patio space, and at-grade composite installations are increasingly common, particularly for rooftop terraces and slightly elevated platforms where you want a deck aesthetic without wood maintenance. Trex and similar products carry multi-decade fade and stain resistance warranties (conditions vary by product line), and the decking itself genuinely holds up better than wood in wet climates. The key limitation is that composite is a decking product, not a true ground-contact patio material: it needs a structural frame underneath, it's not appropriate for at-grade earth contact, and it costs more than most paving options.
Other alternatives worth knowing about: rubber paver tiles (recycled tire material, very slip-resistant, shock-absorbing, and good for around pools or play areas), permeable concrete systems, and interlocking plastic grids filled with gravel or grass. Each has a niche. Rubber pavers are genuinely underrated for pool surrounds and areas where fall safety matters. Plastic grids with gravel fill give you a permeable, semi-stable surface faster and cheaper than resin-bound.
Pros
- Composite decking: no staining, sealing, or sanding; multi-decade warranties on fade and stain resistance for leading brands
- Rubber pavers: excellent slip resistance, shock absorption, very low maintenance, and freeze-thaw tolerant
- Plastic grid systems: highly permeable, fast to install, and reusable if you move
- All alternatives resist rot and insect damage that would affect wood
Cons
- Composite decking requires a structural subframe, adding cost and complexity versus a ground-level paver install
- Composites can get uncomfortably hot in direct summer sun, especially darker colors
- Rubber pavers have a limited aesthetic range and a distinct look that doesn't suit all design styles
- Plastic grids look utilitarian; mostly suitable as a functional rather than design-forward surface
- Higher upfront cost compared to gravel or basic concrete pavers across most alternative categories
Best uses
Composites are best for elevated or rooftop applications where you want deck aesthetics and zero wood maintenance. Rubber pavers are genuinely excellent around pools, hot tubs, and play structures where slip resistance and comfort trump looks. Plastic grid systems serve well in utility areas, overflow parking, or grass-reinforcement applications.
How the materials stack up: a side-by-side comparison
| Material | Installed Cost (approx.) | Freeze-Thaw Performance | Maintenance Level | DIY Friendly | Repairability |
|---|---|---|---|---|---|
| Concrete pavers / brick | $8–20/sq ft | Excellent | Low-moderate (joint refill) | Yes | Excellent (swap pieces) |
| Natural stone / flagstone | $15–35+/sq ft | Good to excellent (stone-dependent) | Moderate (sealing, edging) | Moderate | Good (dry-laid) |
| Porcelain tile | $18–35+/sq ft | Excellent (≤0.5% absorption) | Very low | No (needs slab prep) | Difficult (tile matching) |
| Loose gravel (pea/DG) | $2–6/sq ft | Good (drains freely) | Moderate (raking, top-up) | Yes | Easy |
| Resin-bound gravel | $40–80/sq ft | Good (permeable) | Low (sweep/wash) | No | Moderate (patching) |
| Composite decking | $25–45+/sq ft | Good (non-porous) | Very low | Moderate (framing req.) | Moderate (board swap) |
| Rubber pavers | $8–18/sq ft | Excellent | Very low | Yes | Excellent (swap tiles) |
Installation essentials, base prep, and finishes
The single most common reason a patio fails early is a bad base, not a bad material choice. Every surface category has different substrate needs, but the underlying principles are the same: get water away from the structure, compact the subgrade properly, and build to the tolerances the surface material actually requires.
Base prep by material type
- Pavers and brick: Excavate 8–12 inches (more in freeze-thaw climates). Compact native soil, lay 6–8 inches of compacted crushed gravel base, then a 1-inch bedding sand layer. Set pavers, compact with a plate compactor, sweep polymeric jointing sand into joints, mist to cure. Follow manufacturer instructions closely to avoid hazing on textured stone.
- Flagstone (dry-laid): Similar base to pavers: compacted gravel, then a sand or stone-dust bedding layer. Thicker flagstone pieces (1.25–1.5 inches for residential) reduce rocking on an imperfect bed. Use polymeric sand in joints to manage weeds.
- Flagstone (mortared): Requires a concrete slab substrate. Slab must be properly reinforced and cured. In freeze-thaw climates, this approach is riskier because the rigid mortar can't accommodate frost heave movement.
- Porcelain tile: Needs a flat, stable concrete slab. Slope the slab at least 1/4 inch per foot (2% grade) away from the house for drainage. Use tile-rated exterior adhesive or large-format setting mortar. Grout joints with frost-rated exterior grout.
- Gravel: Excavate 3–4 inches, compact subgrade, lay landscape fabric, add 2–3 inches of gravel. Install solid edging restraints (metal or polymer) to keep material contained.
- Resin-bound gravel: Typically installed over an existing concrete or tarmac base by a professional applicator. Base must be structurally sound and clean.
- Composite decking: Requires a pressure-treated or steel subframe set at the correct height and spacing for the product being used. Follow the manufacturer's joist spacing specs exactly.
Drainage slope and jointing
Regardless of material, slope everything away from the house at a minimum 2% grade (1/4 inch per foot). For tile and stone on a slab, this means the slab itself needs to be poured or built to slope. Don't rely on surface texture to drain water; gravity does the real work. For jointed surfaces like pavers and flagstone, keep joints full at all times. Unilock's guidance puts it plainly: full joints prevent paver shifting and block weed establishment. Polymeric sand is the best practical tool for this, though it's not suitable for all paver textures, so check the manufacturer guidance before committing.
Sealing
Not all materials need sealing. Porcelain does not. Concrete pavers benefit from sealing for color enhancement and stain resistance but it's optional. Natural stone sealing depends heavily on stone type: limestone and sandstone really should be sealed before use. Slate and dense bluestone are more forgiving but still benefit from a penetrating sealer in high-use areas. Always apply sealer to clean, dry surfaces and reapply on the manufacturer's recommended schedule, which is typically every 2–4 years depending on traffic and climate.
Long-term maintenance by material
Choosing a material you'll actually maintain is just as important as choosing one that performs well. Here's what the ongoing commitment looks like for each category.
| Material | Annual Tasks | Every 2–5 Years | Watch Out For |
|---|---|---|---|
| Concrete pavers / brick | Sweep, blow off debris, check joint levels | Refill polymeric jointing sand in eroded areas; reseal if desired | Joint erosion leading to weed growth and paver shifting |
| Natural stone / flagstone | Sweep, rinse, inspect for chips or lifted pieces | Reseal (especially limestone/sandstone); releveling dry-laid sections as needed | Acid damage from citrus/cleaners; salt/deicer spalling; frost heave on mortared installs |
| Porcelain tile | Sweep and occasional wash | Inspect grout joints; regrout if needed | Cracked tiles from base movement; slippery finish if wrong tile was specified |
| Loose gravel | Rake to redistribute; top up material annually | Replace landscape fabric if weed breakthrough becomes significant | Migration out of edging; instability for furniture |
| Resin-bound gravel | Sweep; low-pressure wash seasonally | Inspect for UV fading or surface delamination; patch as needed | Color fading in bright aggregates from UV exposure |
| Composite decking | Sweep, wash with mild soap | Inspect fasteners and subframe for corrosion; clean channels if debris-clogged | Heat buildup on dark colors; frame rot if drainage is poor |
| Rubber pavers | Rinse; blow off debris | Inspect for UV degradation on older products | Lifting at edges if not properly restrained |
The materials that consistently trip people up are the ones where maintenance is simple but easy to forget: paver joints that slowly erode over three or four years until weeds take hold, or natural stone that gets cleaned with the wrong acidic product and comes away etched. Set a calendar reminder once a year to walk the patio, check joints, look for lifted pieces, and clear any debris that's collected in corners. Most issues caught early cost nothing to fix. Caught late, they cost a full reinstall.
FAQ
What should I prioritize if my patio is on a slope or near a downspout?
Start with drainage design, then pick a surface that tolerates movement. For porous materials, make sure water has a clear path away from the house (aim for at least a 2% slope) and avoid bonded, rigid installs on subbases that can heave. For slopes, interlocking pavers and dry-laid flagstone are usually safer than porcelain unless you are prepared to build a tightly engineered slab and verify the slip rating for wet conditions.
How do I tell whether my current base is good enough for porcelain tiles?
Porcelain needs a stable, nearly perfectly flat substrate because the tile cannot flex. If you do not already have a correctly sloped, well-compacted concrete base, porcelain often turns into a costly rework. Before buying, check flatness using a long straightedge, confirm the base has the required drainage slope, and verify that the installer plan includes cracking and movement risk controls, not just thinset placement.
Do I need sealing for pavers or natural stone, and how often should I reapply it?
Sealing is not universal. Porcelain does not need sealing, concrete pavers only need sealing if you want color enhancement and easier stain cleanup, and natural stone depends on the stone type and how it will be used. Limestone and sandstone should be sealed, slate and dense bluestone are more forgiving but still benefit from a penetrating sealer in high-traffic areas. As a practical decision aid, choose based on your maintenance tolerance, and follow a reapplication schedule typically around every 2 to 4 years, adjusted for climate and foot traffic.
What’s the biggest mistake people make with paver joints and weed control?
Letting joints go empty over time. Even when the paver surface looks fine, eroded or washed-out joint material creates pathways for weeds and allows individual units to shift. Use polymeric sand only on compatible paver textures, keep joints fully filled, and re-top with the correct jointing material when you notice joint erosion.
Is loose gravel a bad choice if I plan to place a dining table and chairs outdoors?
It depends on how stable you need the seating to feel. Loose gravel can shift under legs, heels, and table traffic, which makes leveling chairs and keeping the set stable harder. If you want barefoot comfort and furniture that sits predictably, consider resin-bound gravel, pavers, or a grid system with a more stable fill. For dining areas, also consider whether the chosen material traps leaves, because cleaning routines matter for usability.
Can I use decomposed granite (DG) instead of pea gravel without worrying about washouts?
You can, but DG is more sensitive to base and drainage execution. Without a properly compacted base and adequate runoff control, DG can erode, settle unevenly, and create low spots. If your site has water concentration, frequent runoff, or soft subgrade areas, resin-bound gravel or interlocking pavers tend to reduce the risk of early unevenness.
Which materials are best in freeze-thaw climates if I want easy DIY repairs later?
Interlocking modular surfaces are typically the most DIY-friendly when damage happens, because you can lift and reset individual units. Concrete pavers and clay brick generally handle freeze-thaw well and allow targeted repairs. Dry-laid flagstone is also repairable, but mortar-laid flagstone on rigid substrates is riskier in cold climates due to stress trapping when frost heave occurs.
What slip-rating information should I actually look for when choosing an outdoor surface?
Use it as a decision filter for wet areas, especially pool surrounds, sloped entries, and covered patios that stay damp. For porcelain outdoors, a wet DCOF of 0.42 or higher is a common target for residential wet use. For specific high-traction locations, look for surface classifications such as R11 or R12, and confirm the rating applies to the exact product and finish you plan to install.
How do I compare upfront cost versus long-term upkeep across materials?
Choose a maintenance strategy, not just a price per square foot. Low-maintenance options like porcelain can have higher installation cost and stricter substrate requirements, while loose gravel is cheap up front but needs raking and top-ups. Pavers and brick often have a moderate lifecycle cost because you can repair localized issues. A simple next step is to estimate how many hours per season you are willing to spend on joint maintenance, clearing debris, and periodic resealing if you choose stone.
Is a patio more likely to fail because of the surface material or the base?
Most early failures come from the base and drainage, not the finish material. Incorrect subgrade compaction, poor water shedding, and wrong tolerances for the installed surface can cause cracking, shifting, or erosion regardless of what you cover it with. Before committing, confirm the plan includes compacted subgrade, correct slope away from the house (at least 2%), and the specific installation tolerances the chosen surface requires.
What maintenance routine is most worth doing, and when should I do it?
Once a year, do a quick walk-through with a repair mindset. Check joint integrity, look for lifted or rocking units, remove debris from edges and corners, and address small issues immediately before they expand. If your area has heavy freeze-thaw cycles or seasonal runoff, consider an extra inspection after major storms or during early spring when settling and washouts are more noticeable.