
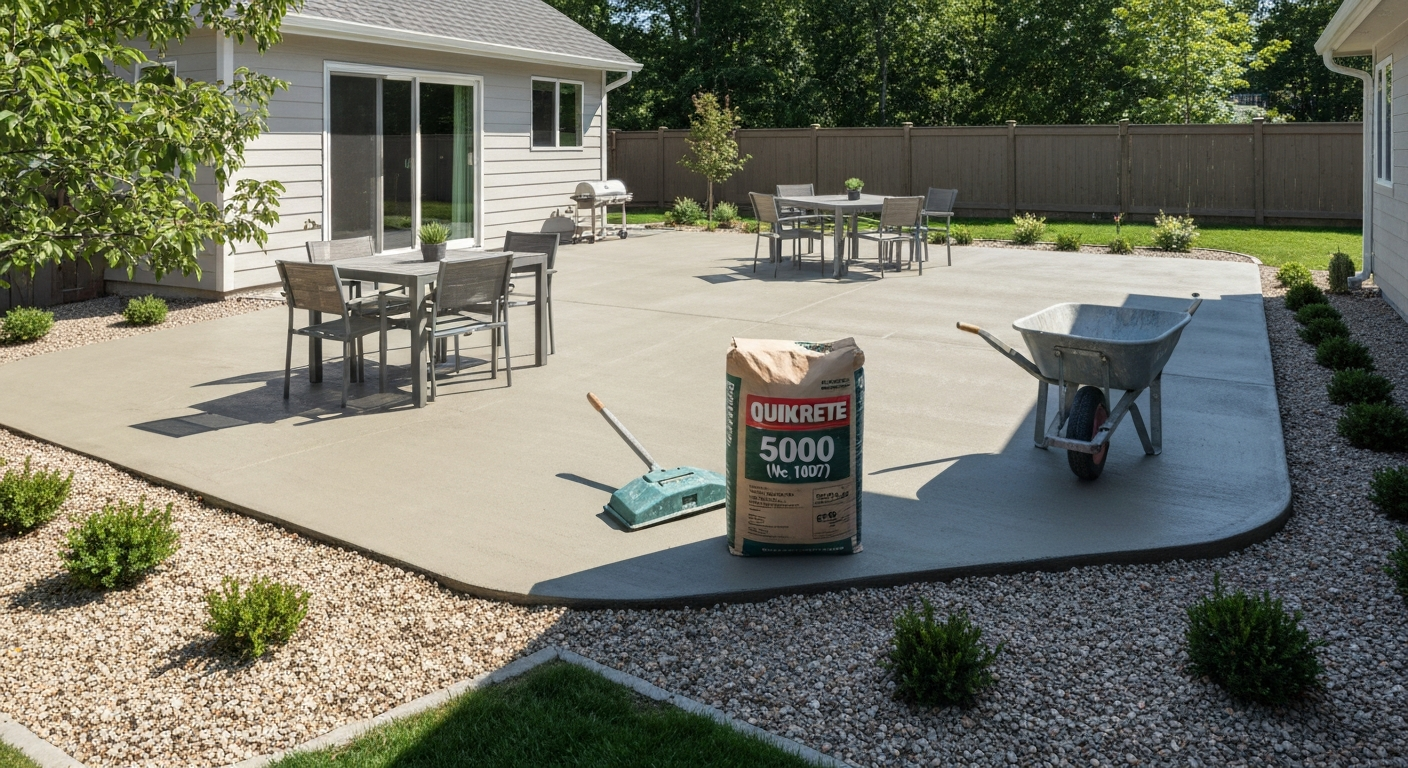
For a new poured concrete patio, QUIKRETE 5000 (No. 1007) is the best all-around choice: it hits 5000 psi at 28 days, sets fast enough to finish in one day, and handles freeze-thaw cycles better than standard mix. For bedding and setting pavers or flagstone, use QUIKRETE Patio Paver Sand as a screeded leveling layer, then lock joints with PowerLoc Jointing Sand on gaps up to half an inch. For brick or natural stone with traditional mortar joints, QUIKRETE Mason Mix is the right call. And if you are patching or resurfacing a worn slab, Re-Cap Concrete Resurfacer beats tearing out and replacing. Each scenario has a specific product for a reason, and using the wrong one is one of the most common (and fixable) mistakes I see homeowners make.
Best Quikrete for Patio: Mixes for Slabs, Pavers & Stone

Nolan Ellison
8 Aug 2026
What Quikrete products actually cover patio work
Quikrete makes a surprisingly wide range of products, and not all of them are meant for patios. The ones that matter for patio construction and repair fall into four categories: concrete mixes for poured slabs, setting sand and base materials for pavers and stone, polymeric jointing sands for filling paver gaps, and mortar mixes for brick and natural stone work. There is also Re-Cap Resurfacer for existing slabs that are worn but structurally sound. Knowing which category your project falls into narrows the choice from a wall of bags at the home center down to one or two real options.
Here is a plain-language map of the product lineup. Concrete Mix (No. 1101) is the entry-level general-purpose bag: good, but QUIKRETE 5000 (No. 1007) is worth the modest price bump for a patio because of its higher strength and better durability in cold climates. FastSet (No. 1004) is for situations where you genuinely cannot wait, like patching in cold weather or finishing late in the day. Re-Cap (No. 1131) is a polymer-modified overlay, not a structural pour. Mason Mix (No. 1136) is a bagged mortar, not concrete, and it is what you want for setting brick or natural stone. PowerLoc Jointing Sand (No. 1150) is the polymeric sand for paver joints. Each product has a lane, and they do not substitute for each other cleanly.
Quick decision guide: match the product to your patio type
If you are pressed for time, use this table to find your project type and jump straight to the right product. Detailed guidance for each scenario follows in the sections below.
| Patio scenario | Primary Quikrete product | Secondary / joint product | Notes |
|---|---|---|---|
| New poured concrete slab | QUIKRETE 5000 (No. 1007) | Acrylic Cure & Seal after pour | For slabs ≥2 in; best freeze-thaw durability |
| New poured slab, time-critical | FastSet Concrete Mix (No. 1004) | Seal once hardened | Sets in 25–45 min; batch small, work fast |
| Existing worn slab (resurfacing) | Re-Cap Resurfacer (No. 1131) | None required | Structural slab must be sound; thin overlay only |
| Concrete paver patio | Patio Paver Sand (bedding) | PowerLoc Jointing Sand (No. 1150) | ICPI-compliant base + edge restraint required |
| Flagstone / irregular natural stone | Patio Paver Sand or Mason Mix (mortar bed) | HardScapes Polymeric Jointing Sand (up to 2 in joints) | Dry-lay with sand bed OR mortar-set depending on stone weight and climate |
| Brick patio | Mason Mix (No. 1136) for mortar bed and joints | Mason Mix for repointing | ASTM C270 Type S mortar for exterior paving |
| Repointing existing joints (any type) | Mason Mix or Type S mortar | PowerLoc for paver joints ≤½ in | Match original mortar strength; see NPS guidance for historic stone |
Best Quikrete products for a new poured concrete patio
For most homeowners pouring a new patio slab, QUIKRETE 5000 (No. 1007) is the product I recommend first. It achieves 5000 psi compressive strength at 28 days versus roughly 4000 psi for standard Concrete Mix (No. 1101). That difference matters outdoors where the surface takes foot traffic, patio furniture, and in northern climates, repeated freeze-thaw cycles. Both mixes are formulated for pours of 2 inches or more, and both come in 60 lb and 80 lb bags. An 80 lb bag of standard Concrete Mix yields about 0.60 cubic feet, so plan your bag count accordingly. QUIKRETE 5000 is priced a little higher per bag but the gap is small enough that for a project you want to last 20 years, it is not a place to economize.
Standard Concrete Mix (No. 1101) is a reasonable choice if QUIKRETE 5000 is not stocked at your local store, or for interior-grade situations where freeze-thaw is not a concern. In most cases though, if both bags are on the shelf, reach for the 5000.
FastSet Concrete Mix (No. 1004) has its place for patios in specific circumstances: late-season pours where you are racing against cold temperatures, patching sections of an existing slab, or any situation where you truly cannot block off the area for a full day. Final set happens in 25 to 45 minutes and it reaches roughly 5000 psi at 24 hours and 7000 psi at 28 days. That strength is excellent. The trade-off is that you must mix only what you can place in about 20 minutes, so large patio pours with FastSet require very organized batching, ideally with a helper. I once tried to pour a 10x12 ft slab solo with FastSet and it is not an experience I would repeat.
For a badly worn but structurally intact slab, Re-Cap Concrete Resurfacer (No. 1131) is the smarter option than a full demolition and repour. It is a polymer-modified overlay that bonds to cleaned, profiled concrete and builds up the surface. At 28 days it reaches 5000 to 6000 psi in compression. It is not a structural fix: if the slab has heaved, cracked through its full depth, or lost support underneath, resurface after you fix the underlying problem. If the slab is just pitted, spalled, or cosmetically rough, Re-Cap will bring it back to a clean, hard surface at a fraction of the cost of replacement.
Concrete mix comparison at a glance
| Product | 28-day strength | Best for | Key limitation |
|---|---|---|---|
| Concrete Mix (No. 1101) | ~4000 psi | General DIY pours ≥2 in | Lower durability in hard freeze-thaw climates |
| QUIKRETE 5000 (No. 1007) | ~5000 psi | Patios, driveways, cold climates | Slightly higher cost per bag |
| FastSet (No. 1004) | ~7000 psi at 28 days | Time-critical pours, late-season work, patches | 20-min working window; needs careful batching |
| Re-Cap Resurfacer (No. 1131) | ~5000–6000 psi (overlay) | Worn but sound slabs | Not structural; slab must be solid underneath |
Best Quikrete products for installing a paver patio
A paver patio is built in layers, and Quikrete has products for the two layers that matter most at the surface: the bedding sand you screed before setting pavers, and the jointing sand you sweep into the gaps afterward. The base layer underneath, typically 4 to 6 inches of compacted crushed stone, is not a Quikrete product, it is a gravel you source from a landscape supplier. Do not skip it or substitute bedding sand for base material. ICPI (Interlocking Concrete Pavement Institute) guidelines are clear on this: a well-compacted granular base with proper drainage slope (at least 1/4 inch per foot away from structures) is what keeps a paver patio from settling unevenly over time.
Once your base is compacted and your edge restraints are set, spread Quikrete Patio Paver Sand as a 1 to 2 inch screeded bedding layer. This is a coarse sand that gives you a firm, level surface to set pavers onto. Screed it flat, do not compact it before setting pavers, and once your pavers are laid and tapped into place with a rubber mallet, compact the whole surface with a plate compactor to lock the bedding layer.
For the joints, Quikrete PowerLoc Jointing Sand (No. 1150) is the right product for gaps up to half an inch (12 mm), which covers most standard concrete paver patterns. It is a polymer-modified jointing sand that you sweep in dry, then lightly mist with water to activate the binder. Once cured, it resists washout and weed intrusion better than plain sand. The manufacturer specifies waiting at least 24 hours before foot traffic and about 72 hours before any vehicle drives over it. For larger or more irregular joints, such as those you get with tumbled pavers or flagstone, use Quikrete HardScapes Polymeric Jointing Sand, which is designed for joints up to 2 inches wide.
One critical point on polymeric sands: the paver surface must be dry when you apply them, and misting needs to be light and even. Too much water pushes the binder out of the joints and leaves a haze on the surface that is difficult to remove. I have seen this mistake on every other DIY paver job. Sweep the sand in when there is no rain forecast for at least 24 hours, and do your misting in the evening when the sun is off the surface.
Best Quikrete products for flagstone and irregular natural stone
Flagstone patios can be built two ways: dry-laid on a sand bed, or mortar-set on a concrete slab or mortar bed. Which method you use changes which Quikrete products you need. For dry-laid flagstone, the process is similar to pavers: compact your base, spread and screed a 1 to 2 inch layer of Patio Paver Sand, set the stones, and fill joints. The difference is that flagstone joints are often wider and more irregular than paver joints, so PowerLoc (which maxes out at half an inch) is usually not the right fit. Quikrete HardScapes Polymeric Jointing Sand handles joints up to 2 inches and works well for the organic, varied gaps you get with natural stone.
For mortar-set flagstone, you will use QUIKRETE Mason Mix (No. 1136) both as the setting bed mortar and as the pointing mortar to fill joints after the stone is placed. The setting bed should be mixed to a stiff, almost-dry consistency so the stone does not sink unevenly. Each stone goes down on fresh mortar, is tapped level, then mortar is packed into the joints and tooled. This method is more durable in high-traffic areas and better suited to frost-prone climates where a sand-set stone could shift. The downside is that it is harder to adjust or replace individual stones later.
For soft natural stones like some sandstones or reclaimed limestone, take the NPS Preservation Brief 2 guidance seriously: match mortar strength to the stone. A mortar that is stronger than the stone will cause the stone to crack at the face rather than the joint when there is movement. QUIKRETE Mason Mix is a Type S mortar by formulation, which is appropriate for most exterior natural stone, but if you have softer or historic stone, use a leaner mix or consult a mason who knows the material.
Best Quikrete products for brick patios and mortar joints
Brick patios are traditionally mortar-set, and QUIKRETE Mason Mix (No. 1136) is the right product for both the mortar bed and the joint mortar. It is a contractor-grade, preblended masonry mortar that meets ASTM C270 for mortar in unit masonry. For exterior paving, you want Type S mortar, which has higher compressive and bond strength than Type N and is specified for at-grade or below-grade masonry applications. Mason Mix falls in the Type S range when mixed to the manufacturer's proportions.
Lay the brick on a fresh mortar bed, butter the edges for the head joints, and keep joint widths consistent, typically 3/8 to 1/2 inch for standard brick. Tool the joints as the mortar reaches thumbprint hardness, which is when you press your thumb firmly and it leaves a clean impression without mortar sticking to you. Strike or rake the joints to a slight concave profile, which sheds water better than a flush or proud joint.
For repointing deteriorated brick joints, rake out the old mortar to a depth of at least 3/4 inch, ideally around 2.5 times the joint width as NPS guidelines recommend, clean the joint thoroughly, dampen the brick faces (not soaking), and pack fresh Mason Mix in layers no more than 1/4 inch deep, packing each layer before adding the next. Repointing is covered in more depth in the joint filling section below, and for full guidance on mortar joint repairs, the topic of the best mix for repointing patio joints covers material selection and depth in more detail. See best mix for repointing patio for detailed guidance on matching mortar strength, composition, and repair depth to your patio materials.
Joint filling and repointing: mortar vs polymeric sand vs resin-based pointing
Choosing how to fill or refill patio joints is one of the decisions that most affects long-term performance and maintenance. There are three main options for patio joints: traditional mortar mix, polymeric jointing sand, and resin-based pointing compound. Each has a clear use case, and picking the wrong one causes real problems. For a deeper comparison of pointing materials, see best patio pointing mix.
Traditional mortar mix (Mason Mix)
Use mortar for brick patios, mortar-set flagstone, and natural stone with wide joints where you need structural support and a clean, formal finish. Mortar is rigid, durable, and the material that masonry was designed to work with. It is the right choice when stones or bricks are mortar-set on a solid base. The downside is that mortar cracks if the base moves, and cracked joints need to be raked out and repointed periodically. In freeze-thaw climates, mortar joints in paving are under more stress than wall joints because water sits on them and saturates them. Use Type S mortar (what Mason Mix gives you) and seal the surface after curing to reduce water infiltration.
Polymeric jointing sand (PowerLoc and HardScapes)
Use polymeric sand for sand-set paver and flagstone patios where joints are up to 2 inches wide. It is faster than mortar, more flexible, and easier for a homeowner to apply correctly. PowerLoc is the Quikrete option for joints up to half an inch. For larger joints, HardScapes Polymeric Jointing Sand handles up to 2 inches. Polymeric sand resists weeds and ant intrusion better than plain sand but it is not a rigid joint, it allows small movement which is actually an advantage in dry-laid systems. It can be washed out in heavy rain if over-watered during activation or not given enough cure time, and it is sensitive to application temperature and humidity. Follow the dry-surface rule strictly.
Resin-based pointing
Resin-based pointing compounds are a newer category, and they offer a different trade-off: very high resistance to washout, weed growth, and freeze-thaw damage, but higher cost, less forgiving application, and the joints are essentially permanent once cured. They are typically two-part or moisture-activated polymer systems. Quikrete does not currently market a consumer-facing resin pointing product the way it does with concrete mixes, so if a resin system is what your project calls for (particularly for high-end natural stone or very exposed patios in harsh climates), look at specialist suppliers. The best patio pointing resin options from third-party manufacturers are worth comparing if your project justifies the cost and you want a maintenance-free joint for many years.
A quick way to decide between the three: if you have a mortar-set patio (brick, mortar-bed flagstone), use mortar for repointing. If you have a sand-set paver or flagstone patio, use polymeric sand. If you want a premium, very long-life joint on a sand-set or mortar-set patio and are willing to pay more and work carefully, look at resin pointing. For a deeper comparison of options, see our guide on the best patio joint filler for sand-set, mortar-set, and resin-pointing systems. The best patio joint filler and best patio jointing compound topics go deeper on non-Quikrete options for each of these scenarios. See the best patio jointing compound guide for non-Quikrete options and detailed comparisons (34cf5d67-6126-4588-8cee-a274c3b29da2).
Side-by-side comparison
| Joint type | Best for | Typical lifespan | DIY difficulty | Cost (relative) | Freeze-thaw performance |
|---|---|---|---|---|---|
| Mortar (Mason Mix) | Brick, mortar-set stone | 10–20 years before repointing | Moderate | Low | Good with Type S; can crack in severe climates |
| Polymeric jointing sand (PowerLoc / HardScapes) | Sand-set pavers, flagstone | 5–10 years before refresh | Low–Moderate | Low–Medium | Good; flexible joints tolerate movement |
| Resin-based pointing | All types, premium applications | 15–25+ years | High (less forgiving) | High | Excellent; very low water absorption |
How to mix each product type correctly
Mixing instructions are printed on every Quikrete bag, but the bag instructions assume you already know what 'proper consistency' looks and feels like. Here is what that actually means in practice, product by product.
Concrete mixes (QUIKRETE 5000, Concrete Mix No. 1101)
For an 80 lb bag of standard Concrete Mix, start with 6 pints (2.8 liters) of clean water in your mixer or wheelbarrow, add the dry material slowly, and mix thoroughly. Adjust water up to a maximum of 9 pints (4.3 liters) per bag to achieve a 2 to 3 inch slump. Test slump the old-fashioned way: pick up a small handful of mixed concrete and squeeze it. It should hold its shape, not flow or crumble. For patio pours, stay toward the stiffer end of the range, around 3 inches of slump. Wetter mixes are easier to place but weaker and more prone to surface scaling. Mix for at least 3 to 4 minutes after adding water. Batch only as much as you can pour and finish in about 30 minutes.
FastSet Concrete Mix (No. 1004)
Use approximately 3 quarts (2.8 liters) of water per 70 lb bag. Do not exceed 4 quarts per bag under any circumstances: excess water dramatically reduces strength and increases shrinkage. Mix for 3 to 4 minutes until uniform, then place immediately. You have about 20 minutes of workable time. In hot weather, use cold water to extend working time slightly. In very cold weather, use warm (not hot) water. Do not add more water to re-temper the mix if it starts to stiffen, that batch is done. Batching discipline is everything with FastSet: mix small amounts, place quickly, and keep a second person tamping or screeding while you mix the next batch.
Re-Cap Concrete Resurfacer (No. 1131)
For a squeegee or brush-apply consistency, use 2.5 to 3 quarts of water per bag and mix in a bucket with a drill and paddle mixer. The target consistency is similar to thick pancake batter: it should flow and spread when you pour it out but not run freely to the edges. For a trowel finish with more texture, use slightly less water to get a stiffer mix. Always pre-wet (but do not puddle) the existing slab before applying, and work in sections you can cover before the product skins over, typically 10 to 15 minutes in warm conditions.
Mason Mix mortar (No. 1136)
For a setting bed mortar, add water gradually to achieve a stiff consistency: the mix should hold a peak when you slice through it with a trowel and not slump or flow. For joint mortar or pointing, you want a slightly wetter mix that you can pack into a joint with a pointing tool without it crumbling. The general rule is to add water in small increments, mix thoroughly between additions, and stop when you reach the right consistency for the task. Overly wet mortar shrinks more, bonds less well, and is more likely to crack. Mix only what you can use within about 1 to 1.5 hours. Do not add water to re-temper mortar that has started to set.
PowerLoc Jointing Sand (No. 1150)
PowerLoc does not require mixing. You sweep it dry into paver joints using a stiff broom, making multiple passes until the joints are filled to within about 1/8 inch of the surface. Then compact the surface with a plate compactor (place a rubber pad under the plate to protect pavers) and sweep in more sand to top off joints. When joints are packed full, use a fine mist from a garden hose to wet the surface. The goal is to dampen, not soak: water should penetrate the joints without running off across the surface. Allow the surface to dry and check joints after 24 hours. If joints have settled slightly, add a small additional sweep of sand and re-mist. Full cure before foot traffic is 24 hours and before vehicle traffic is 72 hours.
Resin-based pointing (general preparation notes)
Resin pointing products vary by brand, but the preparation steps are consistent across systems: joints must be clean, dry, and free of old sand or mortar to a depth of at least 25 to 40 mm (roughly 1 to 1.5 inches). Remove debris with an air blower or vacuum, not water. Most resin systems are troweled or squeegeed in, and the excess is removed from the surface before it cures. Surface temperature limits are strict, usually between 5°C and 25°C (40°F to 77°F), and rain within 24 hours of application can ruin the job. Read the specific product TDS carefully because pot life and cure times vary significantly between two-part epoxy systems and single-component moisture-cure systems.
Curing and finishing: what actually needs to happen after you pour
Curing is the step most DIYers either skip or do half-heartedly, and it is the single biggest factor in whether your slab scales and cracks in its first winter or lasts decades. For standard Concrete Mix and QUIKRETE 5000, the manufacturer is specific: keep the concrete moist for 5 days at 70°F or warmer, and for 7 days at temperatures between 50 and 70°F. QUIKRETE® Data Sheet, Concrete Mix (Curing section) specifies keeping concrete moist for 5 days at about 70°F or 7 days at 50–70°F and protecting fresh concrete from freezing during the first 48 hours (use plastic sheeting or insulating blankets) blank" rel="noopener noreferrer">QUIKRETE® Data Sheet — Concrete Mix (Curing section). That means covering it with wet burlap or plastic sheeting and re-wetting once or twice a day, or applying a curing compound. Do not let it dry out and crust over. Protect the fresh concrete from freezing for the first 48 hours using insulating blankets if temperatures will drop near 32°F.
For FastSet, conventional wet curing is impractical because the surface sets so quickly. The manufacturer recommends applying QUIKRETE Acrylic Cure and Seal as soon as the surface will bear foot traffic without marking. This seals in moisture and protects the surface. Under hot, dry, or windy conditions, fogging the surface or covering with sheeting immediately after placement helps prevent plastic shrinkage cracking before the seal coat can be applied.
For a finished surface texture, broom-finish the slab before it fully sets to provide slip resistance. A medium-bristle push broom dragged across the surface in one direction gives a clean, functional finish. Avoid over-troweling (making the surface too smooth), which brings water to the surface, weakens the top layer, and creates a slab that scales when it freezes.
Freeze-thaw and climate considerations
If you live in a climate that sees freeze-thaw cycles, this section matters more than any other. Water that enters concrete or mortar joints, freezes, expands, and thaws will physically break down the material over time, a process measured by ASTM C666 testing in laboratory conditions. Manufacturers commonly cite ASTM standards such as ASTM C39, Standard Test Method for Compressive Strength of Cylindrical Concrete Specimens (ASTM listing) on product technical data and testing sections ASTM C39 — Standard Test Method for Compressive Strength of Cylindrical Concrete Specimens (ASTM listing). In the real world it shows up as scaling on slab surfaces, spalling at paver edges, and crumbling mortar joints.
For poured slabs, use QUIKRETE 5000 (not the standard Concrete Mix), achieve the lowest water-to-cement ratio practical by not over-watering the mix, broom-finish rather than steel-trowel finish, cure properly, and seal the surface with a penetrating concrete sealer or Acrylic Cure and Seal before the first winter. Air-entrained concrete mixes are the gold standard for freeze-thaw resistance in concrete, and if your project is large enough to justify a ready-mix delivery, specify an air-entrained mix with 5 to 7 percent entrained air. Bagged Quikrete products are not air-entrained to the same degree as purpose-mixed concrete, which is a genuine limitation of all bagged mixes in severe freeze-thaw climates.
For mortar joints in freeze-thaw conditions, use Type S mortar (Mason Mix), keep joint profiles slightly concave so water sheds rather than pools, and reseal or repoint before joints deteriorate to the point of crumbling. A joint that has shrunk even 1/4 inch below the surface starts collecting water. Repointing every 10 to 15 years is normal maintenance for mortar-jointed brick or stone patios in cold climates.
For polymeric sand joints in freeze-thaw areas, the flexibility of the joint actually works in your favor: pavers can move slightly without cracking the joint material. Refresh the sand every 5 to 8 years as it gradually breaks down and washes out. Avoid using de-icing salts on paver or concrete patios, they accelerate surface deterioration significantly. Sand is the safe alternative for winter traction.
Maintenance and small repairs
Routine maintenance keeps all types of patio surfaces going longer than any single product choice. For poured slabs, clean annually, inspect for cracks each spring, and fill hairline cracks with a concrete crack sealant before they widen. Reapply sealer every 2 to 3 years. For larger surface damage, Re-Cap Resurfacer is the cost-effective repair option if the slab is structurally sound.
For paver patios, check joint sand levels each spring after winter, top up with fresh polymeric sand where joints have settled, and compact lightly. If individual pavers have settled or heaved, pull them out, re-level the bedding sand, and reset them. This is one of the real advantages of a sand-set system over mortar: repairs are straightforward without breaking out hardened material.
For brick and natural stone patios with mortar joints, repointing is the primary maintenance task. When you see joints that are crumbling, recessed more than 1/4 inch, or missing material, it is time to repoint. Rake out the old mortar to at least 3/4 inch depth (deeper if the deterioration goes further), clean the joint with a stiff brush and air, dampen the joint faces slightly, and pack fresh Mason Mix in layers, tooling the final layer to a slightly concave profile. The best mix for repointing patio joints is one that matches the original mortar in strength and composition. For most modern brick patios, Mason Mix Type S is the right match. For older or softer stone, consider a weaker Type N mortar to avoid stressing the stone.
Safety: things to know before you open the bags
All Quikrete products containing Portland cement, including concrete mixes, mortar mixes, and polymeric jointing sands, contain crystalline silica and are classified as hazardous materials under long-term inhalation exposure. Wear an N95 or better dust mask when opening bags, mixing dry product, or cutting. Wear waterproof gloves because wet cement causes chemical burns on prolonged skin contact, and it is a slow burn that you may not notice until it is already serious. Eye protection is required when mixing or placing. Read the SDS for any product before use, the Quikrete SDS sheets are available on their website and on the back panel of bags.
Sourcing and cost: what to expect at the home center
All of the Quikrete products covered in this article are stocked at Home Depot and Lowe's across the US, and most are also available through independent masonry suppliers and hardware stores. As of 2026, typical retail pricing is roughly: standard 80 lb Concrete Mix in the $6 to $8 range per bag, QUIKRETE 5000 slightly more at $8 to $10 per bag, FastSet at $10 to $14 per bag, Re-Cap Resurfacer around $20 to $30 per bag depending on bag size, Mason Mix around $10 to $14 per 80 lb bag, and PowerLoc Jointing Sand around $18 to $26 per bag. These are approximate and vary by region and retailer.
For large patio pours, bagged concrete becomes expensive and labor-intensive quickly. A 400 square foot slab at 4 inches thick requires roughly 50 cubic feet of concrete, which is about 84 bags of 80 lb QUIKRETE 5000. At that scale, a ready-mix truck delivery is typically more cost-effective and produces better quality results because ready-mix concrete can be air-entrained to a precise specification. Use bagged concrete for patches, small pads, and pours up to roughly 1 cubic yard (about 45 bags). Beyond that, get a ready-mix quote.
When Quikrete is not the answer: alternatives worth knowing
Quikrete is a reliable, widely available, and well-documented product line, but it is not the only option, and for some applications other products genuinely outperform it. For resin-based joint pointing, specialist brands including Rompox, Alliance Gator, and Techniseal offer purpose-built polyurethane and epoxy jointing systems that last significantly longer than polymeric sand in high-traffic or exposed situations. For mortar-set applications on soft historic stone, a bagged Type N or even a lime-based mortar from a masonry supplier may be more appropriate than Mason Mix Type S. For large slab pours, air-entrained ready-mix concrete from a local batch plant is the technically superior choice for freeze-thaw durability. For polymeric jointing sand, Sakrete, Techniseal HP+, and Alliance Gator Polymeric Sand are all credible alternatives to PowerLoc with similar installation methods, and competition between them on price is worth checking in your area.
FAQ
Which Quikrete product should I use for a poured concrete patio slab (new build)?
For a standard poured patio slab ≥2 in thick use QUIKRETE® Concrete Mix (No. 1101) for routine residential patios; choose QUIKRETE® 5000 Concrete Mix (No. 1007) when you want higher strength and faster early performance. For small fast jobs or when you need very rapid strength gain (e.g., early foot traffic or short shutdown), use QUIKRETE® FastSet™ Concrete Mix (No. 1004) following the limited working time instructions.
What mix and thickness are recommended for a poured patio?
Minimum slab thickness is typically 4 in for pedestrian patios. Use standard concrete mix for general patios; 80 lb bag yields ~0.60 ft³ — design mix quantity from slab volume. Target slump 2–3 in; follow TDS water ranges (do not overwater). Cure moist for 5 days at ~70°F (7 days at 50–70°F) and protect from freezing first 48 hours.
Which Quikrete products are best for building a paver patio (base, bedding, joints)?
Use a well‑compacted granular base per ICPI guidance, then a 1/2 in screeded layer of Quikrete patio/paver sand (recommended in Quikrete how‑to). For jointing choose QUIKRETE® PowerLoc™ Jointing Sand (polymeric/portland blend) for joints ≤½ in. For larger joints (natural irregular stone) use QUIKRETE® HardScapes Polymeric Jointing Sand or a suitable polymeric/aggregate jointing product rated for the joint width.
When should I use masonry mortar or Mason Mix for patios made of brick, flagstone, or natural stone?
Use QUIKRETE® Mason Mix (or a masonry cement mix meeting ASTM C270) when the patio elements are bedded or pointed with mortar (e.g., historic brick, set flagstone, or stone pieces needing bonded joints). Mortar is required when you need structural bedding, grout between irregular stone, or historically compatible repointing. For dry‑laid pavers use sand and polymeric joint sand instead of mortar.
How do I decide between polymeric joint sand, mortar, or resin-based pointing for joint filling or repointing?
Decide by joint function and material: - Use polymeric joint sand (PowerLoc) for interlocking concrete pavers or dry‑laid stone with joint widths up to product limit (commonly ≤½ in); it resists erosion and weeds when installed correctly. - Use mortar/Mason Mix for structural joints, bricked patios, or where a bonded, rigid joint is needed (repointing historic masonry requires matching mortar strength). - Use resin‑based pointing (two‑part epoxies or resin mortars) only for specialized repairs where high chemical resistance or very thin joints are required; these require careful surface prep and often professional application.
Step‑by‑step: how to mix Quikrete bagged concrete for a small patio pour?
1) Calculate volume and number of bags. 2) Use a mechanical mixer or wheelbarrow; add most of the required water first (follow TDS starting water per bag). 3) Add bagged mix and blend 3–5 minutes until uniform. 4) Adjust water only within manufacturer limits to achieve 2–3 in slump (avoid excess water). 5) Place, consolidate (screed/strike off), screed and float finish, then edge and control joint per layout. 6) Begin curing immediately — keep surface moist or use approved cure & seal after initial set as per TDS.