
For most homeowners, a standard sand-and-cement mortar (Type S or Type N to ASTM C270) is the best patio pointing mix for general-purpose use on brick, concrete pavers, and natural stone. Polymeric sand is the best choice for interlocking concrete paver joints over a draining sand-set base. Hydraulic lime mortar (NHL 3.5) is the right call for softer stone, older brick, or any surface where flexibility and moisture-tolerance matter more than brute strength. Resin and epoxy systems deliver the toughest, most weather-resistant joints but come with a higher skill and cost threshold. Preblended ready-mix products like Quikrete Mortar Mix simplify batch consistency for DIYers tackling small repairs. The right option depends on your patio surface, joint width, drainage setup, and climate. For a concise recommendation tailored to surface type, joint size, and climate, see our guide to the best mix for repointing patio.
Best Patio Pointing Mix: Choose & Use for Every Surface

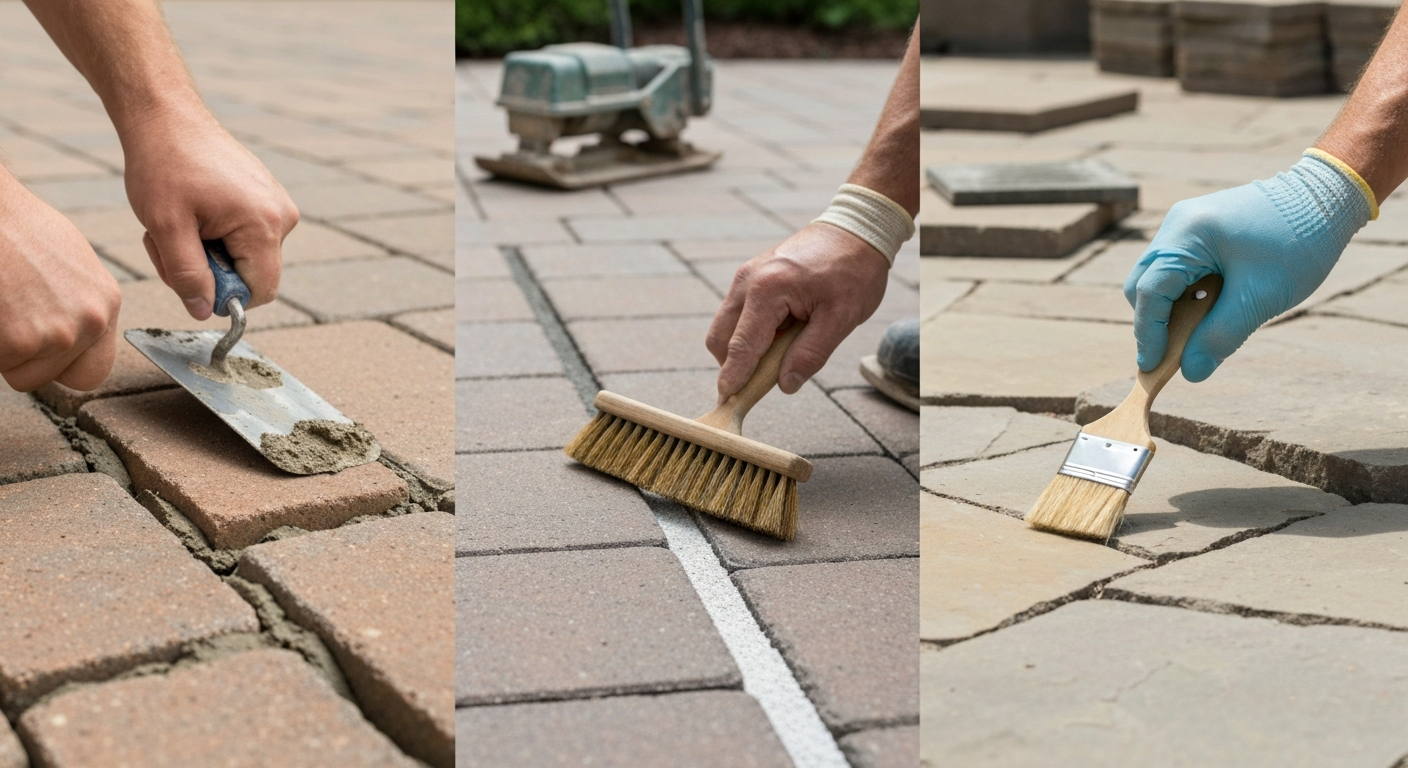
Why patio joints matter more than most people think
I've seen more patio failures start at the joints than anywhere else. People spend money on quality flagstone or good-looking pavers, then fill the gaps with whatever sand happened to be in the shed. Within a season, weeds are pushing through, joints are washing out in heavy rain, and the whole surface starts to shift. The joint compound is not a cosmetic detail. It is structural. It holds individual units in place, transfers load across the surface, channels water away from the base, and stops vegetation from colonising every gap.
Patio joints work by interlocking the edges of adjacent paving units so that horizontal forces (foot traffic, furniture, frost movement) are distributed rather than concentrated at one unit. When joints are properly filled to the right depth and with the right material, the whole surface behaves more like a rigid plane. When they fail, individual slabs rock, edges chip, and water infiltrates the base layer. Once water gets into a clay-heavy sub-base and freezes, you get heave. That cycle of freeze and thaw is the single biggest killer of patio surfaces in northern climates, and it almost always enters through failed joints.
Joint width and depth also dictate which products are physically possible to use. Narrow joints (under 6 mm / 1/4 inch) cannot accept a mortar mix that contains coarse aggregate. Joints shallower than around 40 mm (1.5 inches) are generally too shallow for polymeric sand to key properly. If you skip measuring your joints before buying a product, you may find it literally cannot be applied correctly. I'll cover those specifications product by product below.
Your options at a glance
There are five practical categories of patio pointing mix available to homeowners today. Each has a distinct set of strengths, failure modes, and ideal applications. Here is a quick orientation before the detailed sections. For a deeper comparison of specific products and to find the best patio jointing compound for your surface and climate, see our dedicated product guide.
| Mix Type | Best Patio Surface | Joint Width Range | DIY Friendliness | Relative Cost | Freeze-Thaw Suitability |
|---|---|---|---|---|---|
| Sand-and-cement mortar | Brick, concrete pavers, flagstone | 6–25 mm (1/4"–1") | Moderate | Low | Good with Type S; moderate with Type N |
| Hydraulic / lime mortar | Natural stone, soft brick, historic masonry | 6–25 mm (1/4"–1") | Moderate (slower pace) | Low–Medium | Excellent (flexible, breathable) |
| Polymeric sand | Interlocking concrete pavers, regular-joint flagstone | 1.6–25 mm (1/16"–1"), ideal 1.6–10 mm | High (if base is correct) | Medium | Good when installed over draining base |
| Resin / epoxy jointing | Porcelain, dense stone, commercial-grade pavers | 2–20 mm | Low–Moderate (strict prep) | High | Excellent (rigid, impermeable) |
| Preblended ready-mix (Quikrete-style) | Brick, block, general masonry repairs | 6–25 mm (1/4"–1") | High (consistent batches) | Low–Medium | Good (Type S equivalent mixes) |
Sand-and-cement mortar
What it is and how it performs
Sand-and-cement mortar is the traditional workhorse for patio pointing. You combine sharp sand (or a builder's sand for finer joints) with Portland cement in ratios typically between 3:1 and 5:1 (sand to cement by volume), add water to a stiff, thumb-print-hard consistency, and pack it into the joint. The result is a hard, durable joint that sets through a combination of hydration and carbonation over 28 days. Under ASTM C270, Type S mortar achieves a minimum 1,800 psi (12.4 MPa) compressive strength at 28 days and Type N reaches a minimum 750 psi (5.17 MPa). Type S is the correct choice for external paving subject to freeze-thaw cycles or ground contact. Type N is adequate for protected or sheltered surfaces.
For DIY repointing, the most important mixing tip is to keep the mix as dry as possible while still being workable. An overly wet mix will shrink on curing and crack. You want to add water incrementally, mixing thoroughly, until the mortar holds its shape when squeezed but leaves no water on your palm. In cold climates, avoid mixing or applying when temperatures are below 4°C (40°F), and protect fresh joints from frost for at least 48 hours.
Pros and cons
- Widely available, low cost, no specialist supplier needed
- Strong and durable on brick, concrete block, and hard stone
- Color can be adjusted with cement pigments
- Familiar to most DIYers and contractors
- Rigid and strong: Type S resists frost, heavy foot traffic, and vehicle loads when correctly applied
- Too strong and inflexible for soft stone or old brick (can cause spalling at edges)
- Prone to shrinkage cracking if mixed too wet or joints are too wide
- Requires raking out old mortar to at least 15–20 mm depth before repointing
- Cannot be used on constantly wet or submerged surfaces without admixtures
- Staining risk on porous stone if slurry is not cleaned off promptly
When to use it
Sand-and-cement mortar is the right choice for brick patios, concrete block paving, hard limestone flagstones, and granite sets where joint widths are 6 mm or wider. It handles freeze-thaw well at Type S ratios. Avoid it on soft sandstone, reclaimed brick with low crushing strength, or historic stonework, where its rigidity will cause the masonry unit itself to fail rather than the joint. For those situations, move to hydraulic lime.
Hydraulic and lime mortars
What they are and how they differ from cement
Hydraulic lime mortars are made from Natural Hydraulic Lime (NHL), classified as NHL 2, NHL 3.5, or NHL 5 depending on their hydraulic mineral content and resulting strength. NHL 3.5 (moderately hydraulic) is the most common choice for external patio pointing on softer stone. At a 1:2.5 binder-to-sand ratio, NHL 3.5 mortars typically reach around 200–300 psi (1.4–2.1 MPa) at 28 days and continue gaining strength for months through carbonation. That sounds low compared to cement, but that slower, lower-strength gain is precisely the point. The mortar is intended to be the sacrificial element: if frost or movement stress occurs, the joint cracks before the stone does, and joints are relatively easy to rake out and replace.
Lime-putty mortars (non-hydraulic) are softer still and are really only appropriate for conservation work on historic masonry, where Historic England and equivalent guidance bodies specifically recommend matching the original mix. For standard domestic patios, NHL 3.5 is the practical minimum for external use, since non-hydraulic lime needs dry conditions and extended curing time that most garden environments cannot provide.
Pros and cons
- Flexible and breathable: accommodates thermal movement and allows moisture to escape
- Compatible with soft stone, reclaimed brick, and sandstone without causing edge damage
- Excellent long-term frost resistance due to low modulus of elasticity
- More forgiving of minor base settlement than rigid cement mortars
- Slower to set than cement: requires protection from rain for 48–72 hours and from frost for longer
- Lower early strength means it cannot take foot traffic as quickly as cement
- Narrower working temperature window: do not apply below 5°C (41°F) or in direct strong sun above 25°C (77°F) without measures to slow drying
- More expensive per bag than basic cement and sand if bought pre-bagged
- Requires correct binder-to-sand ratios (typically 1: 2 to 1:3 by volume) and well-graded sand
When to use it
Use hydraulic lime mortar for any patio surface built from soft or porous stone (sandstone, limestone with visible bedding planes, soft buff York stone), reclaimed bricks of unknown crushing strength, or any period property where the existing mortar is lime-based. It is also the correct choice for patios in climates with significant freeze-thaw cycling where the stone itself is vulnerable. If you are repointing and the original mortar was noticeably soft and pale, that is almost certainly a lime-based product and the replacement should be too.
Polymeric sand
How it works
Polymeric sand is a dry blend of ASTM C144-graded sand and a polymer binder. You sweep it dry into paver joints, compact the surface with a plate compactor to settle the material, sweep off the excess, and then activate the polymer by applying water in controlled short bursts. The Techniseal SmartSand data sheet specifies joint widths from 1/16 inch (1.6 mm) minimum to a maximum of 1 inch (25 mm), with the ideal range being 1/16 to 3/8 inch (1.6 to 10 mm). Minimum joint depth is 1.5 inches (4 cm). Once activated, the polymer binds the sand particles together and resists washout. Pedestrian traffic is safe immediately after the drying period; vehicular traffic requires 48 to 72 hours.
Techniseal's data sheet notes that the product becomes rain-resistant after approximately 60 minutes, but recommends planning for 24 hours without rain for complete polymerization. In cold or humid climates, that drying window extends further. One more hard requirement: polymeric sand is only suitable on pavers installed over a properly draining sand-set base per ICPI specifications. If your patio is mortar-set or if the base retains water, the polymers will not cure correctly, the joints will remain soft, and you'll be sweeping it in again within months.
The most common failure and how to avoid it
I've had the polymer-haze problem firsthand. You sweep the sand into damp joints, add water before the surface has fully dried, and end up with a chalky residue bonded to the top of every paver. It will not come off easily. Manufacturers are consistent about this: joints and paver surfaces must be completely dry before you start. Do not apply polymeric sand if rain is forecast within 24 hours, if there is morning dew present, or if the pavers feel even slightly cool and damp to the touch. Test a small area, wait 24 hours, and check for haze before doing the whole surface.
Pros and cons
- Simple application for DIYers: no mixing, no mortar boards, no timing pressure
- Excellent weed and ant resistance once properly cured
- Works well in narrow joints where mortar cannot be packed effectively
- Available in a wide range of colors to match paver tones
- Fast return to pedestrian use
- Strictly requires draining sand-set base: not suitable for mortar-bed installations
- Surface and joints must be completely dry before application: weather-dependent
- Avoid pressure washing for 30 days after installation (per manufacturer guidance)
- Not suitable for natural stone with very rough or uneven joint edges that prevent plate compaction
- Narrower joints can re-open after heavy frost heave if base settles unevenly
When to use it
Polymeric sand is purpose-built for interlocking concrete pavers (ICPs) on a sand-set base with narrow, regular joints. It also works well on regular-joint flagstone set over a draining aggregate bed. It is not appropriate for irregular crazy-paving joints wider than 25 mm, for mortar-bed porcelain tiles, or for any surface that sits on a retained-water base. For projects where you want a tougher, more impermeable joint than polymeric sand can provide, consider a resin jointing system instead.
Resin and epoxy jointing systems
What they are
Resin jointing systems fall into two broad types. The first is a solvent-borne pre-polymer urethane stabilizer applied over kiln-dried sand already packed into joints. The Resiblock '22' SPPU product works this way: you pack dry sand into the joints, sweep off the excess, and then apply two coats of the liquid stabilizer, which penetrates the sand and binds it in place once cured. The second type is a self-binding jointing compound (like Resifix) where the polymer binder is already incorporated into the aggregate blend before application. Resifix is specified for joint widths of approximately 2 to 20 mm. Both approaches deliver joints that are impermeable to water, resistant to jet washing, and durable enough for commercial use. Epoxy-based two-component systems take this further for heavy-duty commercial or industrial applications, but at a significantly higher cost and skill requirement.
Pros and cons
- Highest durability and weather resistance of all jointing options
- Impermeable once cured: excellent for porcelain, dense stone, and high-use areas
- Resists jet washing and high-velocity water after curing
- Very effective weed and ant control
- Suitable for driveway-grade traffic with correct product selection
- Strict application conditions: temperature ranges, PPE requirements, solvent exposure
- Expensive compared with sand-and-cement or polymeric sand
- Errors during application (damp surfaces, missed coverage) are difficult to correct after curing
- Two-component epoxy systems have limited pot life and require precise mixing
- Not reversible: removal from joints requires mechanical grinding
When to use it
Resin jointing is the right choice for porcelain patio tiles (where a rigid, impermeable joint is needed and mortar slurry staining is a real risk on the polished surface), for dense granite or hard limestone paving in high-use areas, or anywhere that long-term resistance to jet washing and weed growth is a priority. It is also worth considering for driveways where vehicles will cross regularly. Factor in the preparation requirements and PPE before deciding DIY is appropriate; for large areas or first-time users, a professional application is worth the premium. This is where the decision between resin jointing and a conventional best patio joint filler product becomes most relevant to your project scope and budget.
Preblended ready-mix products
What they are
Preblended masonry mixes like Quikrete Mortar Mix (product data sheet No. 1102) are factory-proportioned blends of masonry sand and Type N masonry cement. They comply with ASTM C270 for Type N and deliver a minimum 28-day compressive strength of around 750 psi (5.17 MPa). You add water on site, following the manufacturer's instructions for consistency, and apply to prepared joints. The key advantage over site-mixed mortar is batch consistency: the sand gradation and cement content are fixed, so you are not guessing ratios. For small repairs, a single bag gives you a consistent result without the waste of buying separate bags of cement and sand.
Mixing guidance on the Quikrete data sheet calls for adding water incrementally and testing to a 'thumbprint hard' consistency: the mix holds a clear thumbprint impression without slumping or sticking aggressively to the thumb. This is worth practicing on a small test batch before committing to a full repair session. The data sheet also covers joint preparation (raking out to minimum depth, wetting the existing masonry to reduce suction) and curing notes (keep damp for 24 hours, protect from frost and direct sun during the first 48 hours).
Pros and cons
- Consistent batch quality: no on-site proportioning errors
- Widely available at hardware stores and home centers
- Simple, single-bag purchase for small repairs
- Manufacturer instructions cover mixing, application, and curing in accessible language
- Lower compressive strength than Type S: adequate for sheltered or low-load patio joints but not ideal for freeze-thaw exposed driveways or heavy-use areas
- Type N strength ceiling (750 psi) may be insufficient for external ground-level paving in harsh northern climates
- Some preblended products come only in standard grey: color matching on older patios can be challenging
- Larger bags mean waste on very small repair jobs
When to use it
Preblended mixes are the best option for small to medium repointing jobs where convenience and batch consistency matter more than achieving the maximum possible strength. They are a good fit for patios in mild-to-moderate climates, sheltered courtyards, and raised terraces where freeze-thaw risk is low. For patios in colder climates or high-traffic situations, check whether a Type S preblend is available in your market, or consider site-mixing a higher-strength mortar instead. If you are comparing specific product performance claims, reading the product label for the relevant ASTM type designation and 28-day strength figure is the most reliable guide.
Choosing the right mix for your situation
Before buying anything, measure your joint widths and depths, identify your patio surface material, check your base construction (sand-set vs. mortar bed), and consider your climate. The table below summarises the most common patio scenarios and the recommended pointing mix for each.
| Scenario | Recommended Mix | Notes |
|---|---|---|
| Interlocking concrete pavers, sand-set base, joints under 10 mm | Polymeric sand | Requires dry conditions and ICPI-compliant draining base |
| Brick patio, exposed to frost, joints 10–20 mm | Type S sand-and-cement or Type S preblend | Type N insufficient for freeze-thaw exposure |
| Sandstone or soft limestone flagstones, any climate | NHL 3.5 hydraulic lime mortar | Cement mortar risks spalling the stone face |
| Porcelain patio tiles, mortar-bed installation | Resin jointing system | Impermeable joint needed; mortar risks slurry staining |
| Granite or hard limestone sets, joints 6–15 mm | Type S mortar or resin system | Resin for driveway use; Type S adequate for foot traffic |
| Small brick repair, sheltered patio, mild climate | Preblended Type N ready-mix | Convenient for bags-up repairs; not ideal in hard frost zones |
| Historic or reclaimed brick/stone, original lime mortar | Lime-putty or NHL 2 mortar | Match original; seek specialist advice for significant areas |
| Wide irregular joints in crazy paving, 15–40 mm | Sand-and-cement (Type S) or hydraulic lime | Polymeric sand unsuitable above 25 mm width |
How to repoint a patio: the practical steps
Tools you will need
- Angle grinder with mortar-raking disc or hand-held plugging chisel and hammer (for removing old mortar)
- Wire brush and stiff-bristled brush for cleaning
- Pointing trowel and margin trowel
- Rubber mallet and wooden float (for polymeric sand compaction)
- Plate compactor (for polymeric sand over large areas)
- Mixing bucket or spot board (for mortar mixes)
- Drill with mixing paddle or handheld mortar mixer (for batches over half a bag)
- Sponge, clean water, and soft brush for cleaning excess from surface
- Safety glasses, dust mask rated P2 or FFP2 minimum, chemical-resistant gloves
- Kneeling pad or knee pads
Step-by-step repointing process
- Remove old mortar to a minimum depth of 15–20 mm using a raking disc or plugging chisel. Do not use a hammer and bolster on soft stone: use hand tools only to avoid edge damage.
- Brush out all loose debris, dust, and vegetation from joints with a stiff wire brush.
- Dampen existing masonry with clean water 30–60 minutes before applying mortar. This reduces suction and prevents the paving from drawing water out of the mortar too quickly, which causes premature drying and weak bonds. Do not saturate, just dampen.
- Mix your mortar or prepare your product. For mortar, add water in small increments to achieve a stiff, thumbprint-hard consistency. For polymeric sand, ensure surface and joints are bone dry.
- Pack mortar firmly into joints in layers if the joint is deep, tamping each layer before adding the next. Do not fill more than 10–15 mm in one pass with cement mortars. For lime mortars, work in thinner layers with longer intervals between.
- Strike (finish) joints to match the surrounding style: flush, slightly recessed, or weather-struck. Avoid a rounded bucket-handle joint on horizontal paving, as it can trap water.
- Remove excess mortar from the paving surface with a damp sponge before it sets. Clean promptly: staining on natural stone or porcelain from cement slurry can be very difficult to remove once hardened.
- Cure the finished joints. For cement mortars, keep lightly damp for at least 24 hours and protect from direct sun and frost for 48 hours. For hydraulic lime, mist lightly for 3–5 days and protect from frost for at least 7 days.
- For polymeric sand: sweep dry, compact with plate compactor or rubber mallet and board, sweep off all excess, then activate with water in short controlled bursts. Verify penetration to joint depth. Allow to dry completely (minimum 24 hours in warm, dry conditions).
Climate-specific guidance
Freeze-thaw cycling is the hardest test for any pointing mix. When water in a joint freezes, it expands by roughly 9 percent, applying pressure to the joint and the edges of adjacent slabs. The key protective factors are: using a mix with a low water-to-cement ratio (dense, low-absorption joints), ensuring the base drains well so water is not trapped in the joint zone, and choosing a mix with enough flexibility to accommodate small movements. Type S mortar (1,800 psi minimum) out-performs Type N in freeze-thaw conditions. Hydraulic lime's lower modulus of elasticity means it absorbs movement better than rigid cement without cracking. Research on polymer-modified cementitious mortars confirms that polymer modification improves freeze-thaw resistance compared with plain cement, but only when drainage and base construction are correct. Independent materials research, Analyzing bond‑deterioration during freeze‑thaw exposure in cement‑based repairs using non‑destructive methods (ScienceDirect), found polymer‑modification can improve impermeability, adhesion and freeze–thaw resistance, but long‑term field behaviour depends on pore structure, drainage, and mechanical restraint. Polymer modification alone does not rescue a poorly draining installation.
In hot, dry climates, the main risks are UV degradation of polymer-based products and thermal expansion of the paving units themselves. Wider thermal-expansion joints are advisable, and pointing mixes that allow slight movement (hydraulic lime or polymer-modified mortars) cope better than rigid plain cement. In very wet climates, water shedding from the joint profile and impermeability of the hardened joint become the priorities, pointing toward resin systems or well-struck cement mortars rather than open-textured lime finishes.
Maintenance, sealing, and troubleshooting
Routine maintenance
Check joints visually each spring after the first frost season. Look for cracking, shrinkage gaps, friable (crumbly) surface layers, and any weeds establishing in joints. Minor surface cracks in cement mortar (hairline width) are usually cosmetic and do not need immediate action. Cracks wider than 2 mm, or joints where the mortar has become soft and can be scratched out with a fingernail, need attention before the next winter.
For polymeric sand, check whether joints have lost material height after the first year. Re-sanding is straightforward: sweep new dry polymeric sand into the affected joints on a dry day, compact gently, remove excess, and re-activate with water. Avoid pressure washing above 1,200 psi for the first 30 days after any new application. Longer term, manufacturers typically recommend re-application every 5 to 8 years depending on use and climate.
Sealing
Sealing is optional for most cement-mortared patios but genuinely useful for natural stone surfaces where staining is a concern. A penetrating silane or siloxane sealer applied after the pointing has fully cured (at least 28 days for cement, longer for lime) reduces water ingress and can improve freeze-thaw resistance. For porcelain tiles with resin joints, sealing the paving surface adds little since porcelain is already impermeable, but protecting the grout/joint line with a penetrating impregnator can reduce biological growth.
Weed and moss control
Even well-filled joints can develop moss and algae in shaded, damp areas. The most effective long-term approach is physical: keep joints fully filled to depth to prevent seed germination. For established growth, apply a dilute solution of proprietary path and patio cleaner before scrubbing and rinsing. On lime-mortared surfaces, avoid acid-based cleaners entirely since they attack the carbonated binder. For polymeric sand, moss can be removed mechanically or with non-acid biological cleaners without damaging the binder.
Common problems and fixes
| Problem | Likely Cause | Fix |
|---|---|---|
| Mortar cracking within months of application | Mix too wet; joint not deep enough; frost during cure | Rake out and repoint with stiffer mix; ensure min 15 mm depth |
| Polymeric sand washing out after rain | Applied to damp joints; rain within 24 hours of application; base not draining | Re-apply on confirmed dry day; check base drainage |
| Polymer haze on paver surface | Sand applied or watered onto damp pavers | Allow to fully cure then attempt removal with manufacturer-specified cleaner; prevention is easier than cure |
| Joints crumbling but paving units intact | Original mortar too strong for soft stone (causing decay at joint edge rather than in joint) | Switch to hydraulic lime for repointing |
| Persistent weed growth despite repointing | Joints not filled to sufficient depth; biological residue in joint | Rake deeper, treat with biological cleaner, repoint fully |
| Resin joint hazy or not hardening | Applied below minimum temperature; damp surface | Follow manufacturer temperature limits strictly; remove and reapply |
Reading product labels: what to look for before you buy
Product labels carry the information you actually need, but they require a little translation. For mortar mixes, look for the ASTM C270 type designation (M, S, N, or O in North American products) or the EN 998-2 strength class (M1 through M10, or CS I through CS IV) on European products. These tell you the minimum 28-day compressive strength and give you a reliable basis for comparison. A product marked 'masonry mortar' without a type classification is a red flag: you cannot assess its performance claims objectively.
For polymeric sands and resin products, the data sheet (not just the bag) is the critical document. Check the specified joint width range, minimum joint depth, application temperature range, and rain-safe window. If a product claims performance without publishing a technical data sheet, be cautious. Colour matching is another label issue: most cement and preblended mortars come in natural grey, and matching aged or stained existing joints requires either tinted products or the use of cement pigment additives. Test any tinted mix on a hidden section first, since dry colour and wet colour differ, and cured colour differs from both.
DIY or hire a professional?
For small repointing jobs on a standard brick or concrete paver patio, DIY is entirely reasonable. The tools are affordable, the techniques are learnable in a single session, and the main requirement is patience and dry weather. Where I'd suggest calling a professional: large areas of natural stone requiring consistent hydraulic lime work (inconsistent mixes across a big surface show up badly), resin and epoxy jointing systems on porcelain (the surface prep and application tolerances are tight enough that mistakes are expensive to correct), any historic or listed masonry where incorrect mortar choice can cause irreversible damage, and situations where the base itself needs reconstruction before pointing can be successful. Historic England's 2017 guidance 'Repointing Brick and Stone Walls – Guidelines for Best Practice (Historic England)' recommends diagnosing masonry and matching new mortar to existing in strength, composition and joint profile (using lime mortars for softer historic masonry where appropriate), cautions against wholesale repointing, and advises seeking specialist advice for significant or historic work.
If you are unsure about the condition of your base, hire a paving contractor for an assessment before starting. Repointing over a failing base is money wasted. A good indicator: if multiple slabs are rocking or if water is pooling on the surface for more than an hour after rain, there is likely a base drainage issue that no pointing mix will fix on its own.
Sourcing tips and value considerations
For cement-based mortars, builders' merchants generally offer better sand quality and more type choices than general hardware stores. Specify sharp sand (not soft or building sand) for pointing: it gives a coarser texture that resists shrinkage cracking better. For hydraulic lime, specialist lime suppliers or conservation materials merchants are the most reliable source: NHL 3.5 from St-Astier or equivalent quality-controlled products come with published technical data sheets so you can verify the mix proportions you need. For polymeric sand, buy from a paving or hardscaping supplier rather than a general retailer if possible: they are more likely to stock the correct joint-width-specific formulation and can advise on base compatibility. For resin systems, buy directly from the manufacturer or an approved distributor and request the full technical data sheet before purchase.
On quantity: measure your joint area (total linear metres of joint multiplied by average joint width and depth) before buying. Overage of around 10 to 15 percent is sensible for mortar to account for waste and test mixing. For polymeric sand, most manufacturers provide a coverage calculator on their website. Running short mid-job can cause visible colour variation in the finished surface if the replacement bag comes from a different production batch.
FAQ
What are the main types of patio pointing/jointing mixes and what should I expect from each?
Main types: - Sand-and-cement (site-mixed or preblended mortar): Cementitious, relatively high early strength, good for structural joints and some paving; can be rigid and may crack under differential movement; suitable for many modern hard pavers and brick if joints are narrow and drainage is good. - Hydraulic lime / lime-based mortars (NHL or lime putty blends): More flexible, more compatible with softer natural stone or historic work; lower early strength and slower curing but better at accommodating movement and reducing damage to soft units. - Polymeric sand (sand blended with polymer binder): Fast to install for narrow joints on permeable, well-draining paver systems; requires dry joints and a correctly built base; resists erosion and weeds when properly cured. - Resin/urethane or epoxy jointing systems (two-part liquids or sand stabilizers): Create very hard, often impermeable joints suitable for heavy loads, commercial areas or where washout resistance is critical; require precise application, temperature and substrate conditions. - Preblended/ready-mix masonry mortars (brand products like Quikrete): Factory-controlled cement + sand mixes meeting standards (e.g., ASTM C270 for Type N/S); convenient and consistent for many repointing jobs. Expectations: strength, flexibility, permeability, cure time, and application complexity vary. Choose based on material compatibility, joint width, expected loads, and drainage/climate.
Which jointing option is best for different patio surfaces (flagstone, natural stone, brick, concrete pavers, porcelain)?
General guidance: - Flagstone / natural stone: Prefer lime-based mortars (NHL) for soft or historic stone to avoid damage; for very hard stone on a stable base, cementitious mortars or polymeric sand can be OK if compatibility checked. - Brick patios: Sand-and-cement (Type N or S depending on loads) or preblended mortars are common; use lime mixes where brick is soft or in conservation settings. - Concrete pavers: Polymeric sand for narrow joints on properly drained ICPI-compliant bases; resin/urethane for driveways or commercial use where superior washout resistance needed. - Porcelain pavers: Often installed on pedestals or bonded systems—use manufacturer-recommended grout or epoxy/resin jointing; avoid polymeric sand if porcelain is installed over a non-draining substrate. - Mixed materials: Match jointing to the weakest/most sensitive unit (e.g., if natural stone is included, favor lime compatibility). Always follow substrate and manufacturer guidance.
How does climate (freeze–thaw, heavy rain) affect the choice of pointing mix?
Freeze–thaw: Use mortars or products with proven freeze–thaw resistance and proper joint profile. Polymeric sands and cured polymer-modified or resin joints resist washout but performance depends on drainage. Lime mortars are flexible and breathable—good for movement in cold climates but need to achieve frost resistance (select appropriate NHL class and ratios). Heavy rain / frequent wetting: Avoid cementitious pointing that is rigid and prone to freeze–thaw damage if drainage is poor. Resin/urethane or epoxy joints provide high water resistance; polymeric sand can resist washout when applied to dry joints on draining bases but will fail if joints are constantly wet or submerged. Practical rule: If patio is on a draining base and joints are narrow, polymeric sand or resin is appropriate; if substrate holds water or joints are wide and expected to remain wet, use hydraulic lime (for breathability) or a cementitious/resin system specified for wet exposure—seek manufacturer guidance.
How do joint width and depth affect product choice?
- Very narrow joints (<3 mm / ~1/8" and up to ~6 mm): Polymeric sand or fine cementitious mortars commonly used; ensure sand particles match joint size. - Medium joints (6–20 mm / ~1/4"–3/4"): Polymeric sands (upper limit varies by product), resin-bound sands, or conventional mortar depending on substrate and load. - Wide joints (>20 mm / >3/4"): Cementitious mortars, hydraulic lime mortars or epoxy/resin grout are usually better; polymeric sand is not designed for very wide joints and may compact poorly. Depth: Typical minimum joint depth recommendations exist (many polymeric products require ≥25–40 mm compacted depth; manufacturer data varies). For mortar joints, maintain a depth that allows full bedding and proper bond—usually at least the full thickness of the joint and bedding layer recommendations for the paving type.
Step-by-step: how should a homeowner repoint patio joints (prep through curing)?
Basic repointing steps: 1. Assess: Identify material types, joint widths, substrate drainage and any movement or settlement. 2. Remove failed material: Rake out old mortar/sand to an appropriate depth (usually 20–30 mm or deeper for polymeric/bed depth requirements); use hand tools for delicate stone. 3. Clean: Brush and vacuum joints; remove dust, organic matter, roots; for polymeric sand ensure joints are completely dry before application. 4. Repair base/settlement first: Fix underlying base or bedding if pavers have moved or are sinking (critical for polymeric/resin systems). 5. Mix: Follow product TDS—measure water and powder ratios carefully; for preblends follow bag instructions; for polymeric sand use dry product. 6. Fill joints: Compact sand/mortar into joints in layers where required; for mortar use pointing tools and strike to profile; for polymeric sand sweep and mechanically vibrate to consolidate. 7. Activate/finish: For polymeric sand, remove surface residue and lightly mist/activate per instructions; for resin/epoxy follow two-part mix and application windows; for lime/cement mortars apply curing (keep moist as recommended). 8. Cure and protect: Keep work area dry (or moist for lime/cement as instructed) for manufacturer-recommended time; avoid traffic until cured. Follow cold/humid adjustments given by the product. 9. Clean haze/residue: Remove polymer haze per instructions after cure (often with a dry brush or specific cleaner). 10. Seal if needed: Only after full cure and if recommended for the product and substrate.
What are safe mixing and typical mix categories homeowners should know?
Safe mixing basics: Wear PPE—gloves, eye protection, dust mask/respirator when mixing powders, and avoid skin contact with cementitious and resin products. Mix in a well-ventilated area, add water gradually for cement mixes, follow manufacturer water-to-product ratios, and never add extra cement or lime unless instructed. Typical categories: - Preblended masonry mortars (Type N/S/M): Factory-proportioned cement/sand or masonry cement mixes; predictable performance and standardized by ASTM/EN. - Site-mixed sand + Portland cement (1:3 to 1:5 typical ratios): Flexible by user but less consistent than preblends. - Hydraulic lime mortars (NHL3.5, NHL5): Use specified binder:sand ratios (often 1:1.5–1:3) depending on strength needs; slower strength gain. - Polymeric sand: Dry sand with polymer binder—no water during mixing; activation done after placement. - Resin/epoxy: Two-part liquids mixed per ratio; fast chemical cure with limited working time. Always follow TDS for pot life and temperature limits.