
For most patios, a 3:1 sharp sand-to-cement mix (by volume) gives you a reliable, workable pointing mortar that bonds well and resists weather. If your joints are wider than about 10 mm or you're working with softer natural stone or older brick, switch to a 1:1:6 cement-lime-sand (Type N) blend for the extra flexibility it provides. Polymeric sand is the right call for concrete pavers and segmental paving where you want weed resistance without mixing anything by hand. Pointing resin is the premium option for porcelain and tight modern joints. The wrong choice, especially a hard Portland cement mortar on soft sandstone or historic brick, can do more damage than leaving the joints alone.
Best Mix for Repointing Patio: Mortar, Sand, or Resin Guide

Nolan Ellison
10 Aug 2026
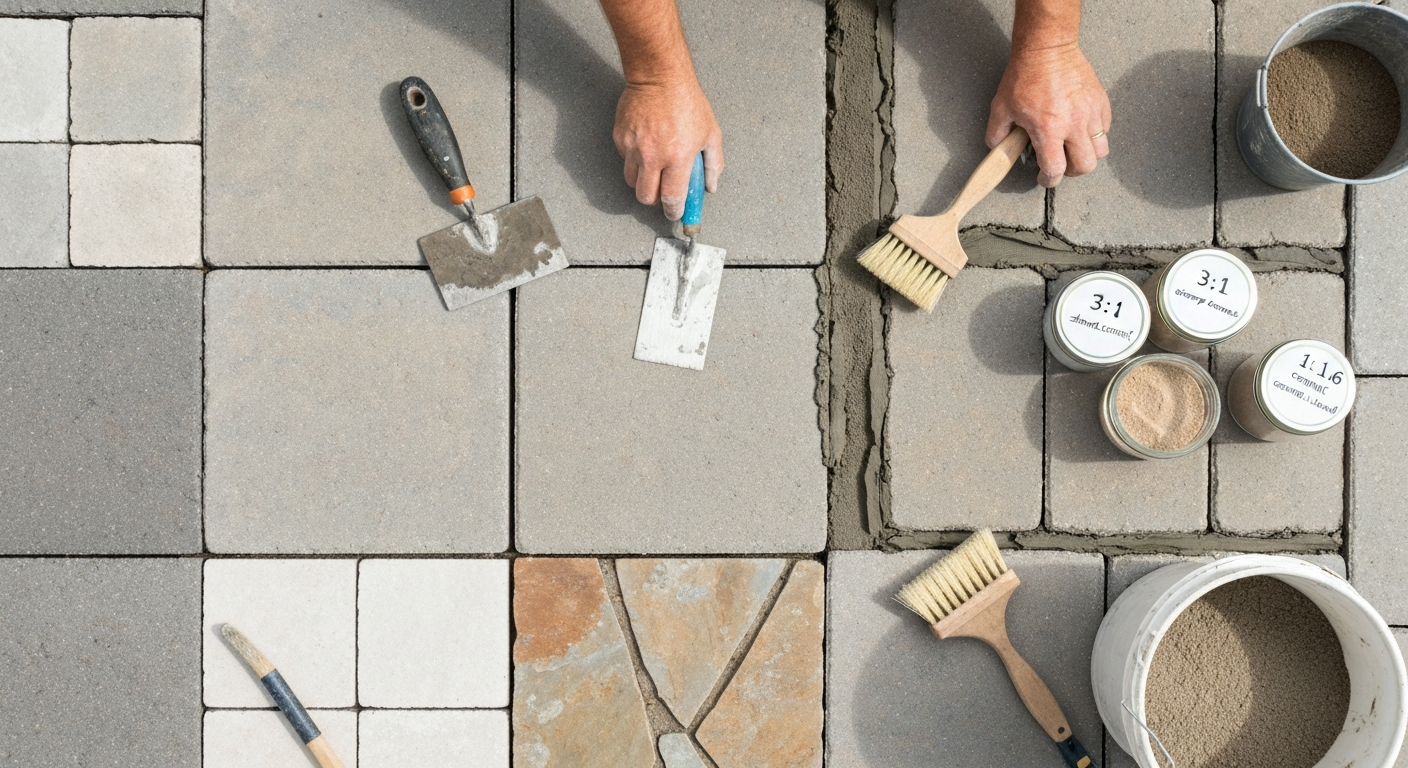
When to repoint: reading the signs
Joints fail gradually, so it helps to know what you're actually looking at before ordering materials. Get down close and inspect: crumbling or powdery mortar that you can scrape out with a key is ready to repoint. Hairline cracks running along the joint line, gaps where the mortar has shrunk away from the slab edges, and weeds forcing their way up through the joints are all clear signals. If water pools on the surface rather than dispersing, blocked or failed joints are often the reason.
That said, not every imperfect joint needs repointing right now. Shallow surface crazing that is still sound and bonded to both edges is fine to leave. Repointing over intact mortar wastes time and rarely bonds well because the new material has nothing to grip. And if the whole patio is moving, slabs rocking, edges dropping, significant unevenness, sorting the base is the priority. Repointing a slab that's going to shift again in a year just means doing the job twice.
- Mortar that crumbles or can be raked out by hand: repoint now
- Gaps or cracks wider than about 2 mm along the joint line: repoint now
- Weeds establishing in joints: clear and repoint
- Surface crazing that is still firmly bonded: monitor, no action needed yet
- Rocking or sinking slabs: fix the base first, then repoint
- Joints simply looking tired but still structurally sound: optional cosmetic repoint
Jointing options explained
There are five main options you'll encounter when repointing a patio, and they each suit different situations. Understanding what they actually are, not just their marketing names, makes it a lot easier to pick the right one.
Sand-and-cement mortar
This is the traditional DIY standby: sharp (gritty) sand mixed with Portland cement and water. It's inexpensive, widely available, and straightforward to use. The standard ratio for most patio pointing is 3 parts sharp sand to 1 part cement by volume, which gives a mortar firm enough to resist foot traffic but not so hard it risks cracking adjacent slabs. It suits concrete slabs, concrete pavers, and harder natural stones like granite or slate well. The downside is that pure cement mortars are rigid: in climates with significant freeze-thaw cycling, they can crack and pop out over time.
Cement-lime-sand mortar
Adding hydrated lime (builder's lime, not garden lime) to the mix makes the mortar more workable, slightly more permeable, and more flexible. This is the correct choice for softer stones like sandstone, limestone, or vintage brick, where a rigid Portland cement mortar can trap moisture and cause spalling. ASTM C270 Type N (approximately 1:1:6 Portland cement:lime:sand) is the most common patio pointing specification in the US. See ASTM C270, Standard Specification for Mortar for Unit Masonry for the official mortar types and proportion guidance ASTM C270 defines mortar types M, S, N, O and gives site‑mix guidance (e.g., Type N ≈ 1:1:6, Type S ≈ 1:0.5:4.5).. UK and European work often follows BS EN 998-2, which covers equivalent performance classes. Historic England explicitly warns against hard cement mortars on older masonry: they can lock in moisture and accelerate stone decay faster than a softer, vapour-permeable lime mix would.
Polymeric sand
Polymeric sand is kiln-dried sand blended with polymer binders that activate when you wet them. You sweep it into dry joints, compact it, remove the surface residue, then activate with light misting. Once cured, it sets firm enough to resist ants, weeds, and washout, while remaining slightly flexible. It is the go-to product for concrete paver patios and segmental paving. For a comparison of options to help you choose the best patio joint filler for your surface, see our guide. Important limitations: it reduces joint permeability significantly, which can be a problem if your patio design depends on infiltration for stormwater management. It also requires completely dry conditions during application and initial cure, and overwatering during activation can wash the polymer out of the joints entirely.
Pointing resin
Resin-based jointing compounds use a two-part epoxy or polyurethane system mixed on site, or single-component moisture-cure resins. They produce an extremely hard, durable, virtually impermeable joint that looks clean and precise, ideal for porcelain tile patios and contemporary sawn-stone designs where joints are tight (3-10 mm). For product comparisons and buying advice, see our guide to the best patio jointing compound. They're the most expensive option and the least forgiving during application: pot time is short, surface contamination is hard to clean up once cured, and removal later is very difficult. Not the right choice for wide joints, soft stone, or anywhere you need permeability. For detailed comparisons and buying tips on the best patio pointing resin, see our dedicated guide on selecting pointing resins.
Branded premix products (including Quikrete)
Bagged premix mortars like Quikrete Mortar Mix are proportioned at the factory, so you just add water. They save measuring time and are consistent batch to batch, which matters if you're new to mixing. The Quikrete Mortar Mix technical data sheet gives you exact water volumes, working times (roughly 1 hour pot time, consistent with ASTM C270 and ICC code requirements), and curing guidance. Always follow the specific TDS for any premix product rather than relying on generic ratios, because different products use different cement types and admixtures. These are perfectly good for repointing work on most residential patios.
Head-to-head comparison
| Option | Durability | Flexibility | Permeability | Appearance | DIY ease | Approx. cost |
|---|---|---|---|---|---|---|
| Sand-and-cement (3:1) | Good | Low | Low-moderate | Traditional | Easy | $ (lowest) |
| Cement-lime-sand (Type N 1:1:6) | Good | Moderate | Moderate | Traditional/natural | Moderate | $ |
| Polymeric sand | Good (pavers) | Moderate | Low | Clean, uniform | Easy (dry only) | $-$$ |
| Pointing resin | Excellent | Low-moderate | Very low | Very clean, modern | Difficult | $$$ |
| Branded premix (e.g., Quikrete) | Good | Low-moderate | Low-moderate | Traditional | Very easy | $-$$ |
For straightforward residential patio repointing, cement-lime-sand mortar offers the best balance of durability, compatibility, and forgiveness. For a concise guide to choosing the best patio pointing mix, see our detailed recommendations. Sand-and-cement alone is fine for harder surfaces in moderate climates where freeze-thaw is minimal. Polymeric sand wins on ease and weed resistance for concrete pavers specifically. Resin is worth the cost and complexity only for porcelain or very tight sawn-stone joints where you need a pristine, long-lasting finish.
What works with which surface
Surface compatibility is arguably the most important factor in picking a repointing mix. Getting this wrong is how you end up with spalling stone or joints that fail within a season.
Flagstone
Flagstone covers a wide range of rocks, so start by identifying what you actually have. Harder flagstone like bluestone or quartzite handles a 3:1 sand-cement mix well. Softer flags like sandstone or limestone need a lime-gauged mortar, 1:1:6 cement:lime:sand at minimum, or a natural hydraulic lime (NHL 3.5) mortar at roughly 1:2.5-3 lime:sand for conservation situations. The risk with hard cement mortar on soft flagstone is exactly what Historic England documents: moisture gets trapped at the joint-stone interface, freeze-thaw action drives it into the stone, and eventually the face of the flag spalls off.
Natural stone (sandstone, limestone, slate, granite)
Sandstone and limestone are porous and relatively soft. These need vapour-permeable mortars, NHL blends or cement-lime-sand Type N or O. Never use straight Portland cement on them. Slate and granite are hard and dense, and a 3:1 or 4:1 sand-cement mortar is fine. Granite in particular benefits from a slightly stiffer mix because the smooth face makes wiping off excess mortar easier while it's still green.
Brick
Modern engineering bricks and hard pavers take standard mortar well. Older, handmade or stock bricks are soft and need lime-gauged or pure lime mortars matched to the original. The rule of thumb from Historic England: the pointing mortar should be softer and more permeable than the masonry unit itself, so any movement and moisture migration happens in the joint (which is sacrificial and replaceable) rather than in the brick face (which is not).
Concrete pavers
Concrete pavers are the natural home of polymeric sand. The ICPI recommends joints of 2-5 mm for segmental paving, swept completely dry and compacted before activation. Sand-and-cement mortar works too and is common in block paving repairs, but polymeric sand is faster, cleaner, and far better at resisting weeds and ants. If drainage or stormwater infiltration matters on your site, note that polymeric sand will reduce permeability substantially.
Porcelain tiles
Porcelain is non-porous and dimensionally precise, with tight joints (typically 3-8 mm). Pointing resin is the best long-term choice here. Standard cement mortars don't adhere particularly well to the glazed faces, and any residue that dries on the surface is difficult to remove. If you choose a cement-based product for porcelain, use a flexible, fine-grained pointing product designed for external tiles and keep joints clean before the mortar goes off.
Climate and budget: what actually changes your decision
Freeze-thaw climates
In zones with hard winters, anywhere that sees repeated freeze-thaw cycles, joint flexibility and permeability become critical. ASTM C666 freeze-thaw testing shows rigid, low-permeability mortars crack as water expands on freezing in joint pores. Adding lime to the mix improves both flexibility and the ability of the joint to breathe moisture out before it freezes. In severe freeze-thaw climates, cement-lime-sand (Type S, 1:0.5:4.5) gives you stronger freeze resistance than Type N while retaining some flexibility. Polymeric sand performs reasonably well in freeze-thaw conditions once fully cured, but must not be applied when temperatures are forecast to drop below freezing during the cure window.
Wet and rainy climates
Consistent rain is hard on joints primarily because of erosion and biological growth. In wet climates, polymeric sand earns its price premium: the hardened binder resists washout that plain kiln-dried sand cannot. For mortar-pointed patios in wet climates, a slightly richer mix (moving from 4:1 to 3:1 sand-cement) improves erosion resistance. Sealing the finished surface, either the joints alone or the whole patio, helps substantially and is worth considering as a follow-up step after repointing.
Hot and dry climates
The main challenge in hot, dry conditions is curing, not weathering. Cement and lime mortars need moisture to hydrate properly, and if they dry out too fast in direct sun or wind, the joint is weak and chalky before it has finished setting. Dampen joints and slabs before applying mortar in hot weather, work in the shade or during cooler parts of the day, and cover fresh pointing with damp hessian or polythene for at least 24-48 hours. Polymeric sand in very hot climates can also soften slightly at extreme surface temperatures, so check manufacturer guidance if your patio bakes in full summer sun.
Budget reality
A 25 kg bag of sharp sand costs very little, and a 25 kg bag of Portland cement covers a lot of linear metres of pointing. For a typical 30-40 m² patio, a full bag mix repoint is genuinely one of the cheaper DIY jobs in terms of materials. Polymeric sand costs more per bag but is fast to apply and saves the labour of hand-mixing. Pointing resin is the highest unit cost by some margin, budget two to three times the cost of sand-cement materials for the same area. Where corners cannot safely be cut: using the wrong mix type for your stone (hard cement on soft stone) costs far more in stone replacement than the few pounds saved on lime.
Exact mix ratios and when to use them
| Mix type | Ratio (cement:lime:sand) | Standard reference | Best used for |
|---|---|---|---|
| Sand-cement (standard) | 0:0 / 1 cement:3 sand | Common practice | Hard stone, concrete slabs, modern brick in mild climates |
| Sand-cement (lean) | 1 cement:4 sand | Common practice | Wide joints, decorative pointing, mild climates |
| Type S mortar | 1:0.5:4.5 (cement:lime:sand) | ASTM C270 | Exposed patios, freeze-thaw climates, harder brick/stone |
| Type N mortar | 1:1:6 (cement:lime:sand) | ASTM C270 | Most patio pointing — soft/medium stone, older brick, general use |
| NHL 3.5 lime mortar | ~1:2.5–3 (NHL:sand) | Historic England / conservation spec | Soft sandstone, limestone, historic or period masonry |
| Polymeric sand | Pre-blended — no on-site ratio | Manufacturer TDS (e.g., Techniseal, Gator) | Concrete pavers, segmental paving — dry sweep and activate |
| Pointing resin | Per TDS (usually 2-part mix) | Manufacturer TDS | Porcelain, tight sawn stone, contemporary patios |
A few practical notes on these ratios: measure by volume, not weight, for site-mixed mortars. A bucket is perfectly adequate as your measuring unit. For Type N (1:1:6), that means one bucket of cement, one of lime, six of sharp sand. Mix the dry materials thoroughly before adding water gradually until you reach a consistency where the mortar holds a shape when squeezed but doesn't stick to a gloved hand. For polymeric sand, there is no on-site ratio adjustment, the blend is fixed and you must not add anything to it. For two-part pointing resins, follow the manufacturer's ratio precisely: getting it wrong by even 10% affects curing and final hardness significantly. With any cement-based mortar, mix only what you can use within about one hour. Beyond that, ASTM C270 and ICC guidance both restrict retempering because re-wetting a partially set mortar compromises strength.
Step-by-step: preparing joints and applying the mix
Joint preparation
- Rake out old mortar to a minimum depth of 15-20 mm using a plugging chisel, angle grinder with a pointing disc, or an oscillating multi-tool with a grout blade. For Historic England-recommended work on soft stone, do this by hand only — power tools risk damaging the stone arris.
- Brush out all loose material and dust with a stiff brush or compressed air.
- Check joint depth: if the joint is shallower than 15 mm after raking, the new mortar won't have enough depth to bond and will pull out. Keep raking.
- For cement or lime mortars: dampen the joints and slab edges with clean water about 20-30 minutes before applying mortar. This prevents the dry substrate from pulling moisture out of the mortar too fast and weakening it.
- For polymeric sand: the opposite applies — joints and slab surfaces must be completely dry. Even morning dew is enough to cause premature polymer activation. Wait for dry, above-freezing conditions.
Mixing and applying sand-and-cement or mortar
- Measure out your dry materials by volume (e.g., 1: 1:6 for Type N, or 3:1 sand-cement for standard). Combine in a bucket or on a clean board and mix dry until the colour is uniform.
- Add clean water gradually — a little at a time. For a standard patio mix, you're aiming for a consistency like peanut butter: firm enough to hold its shape but workable enough to push into joints. For Quikrete Mortar Mix and other premix products, follow the TDS water volume guidance exactly.
- Load mortar onto a pointing trowel or use a grout bag to fill joints. Work in manageable sections of about 1-2 m² so mortar doesn't go off before you can tool it.
- Press mortar firmly into the joint in layers if the joint is deep. Don't try to fill a 30 mm deep joint in one pass — fill to about 15 mm, let it firm slightly, then fill the remainder.
- Tool the joint surface with a jointing iron or the edge of a trowel to compact and finish it. A slightly recessed (bucket-handle) profile sheds water better than a flush or proud finish.
- Remove any mortar smears from slab faces promptly with a damp sponge before they set. Dried mortar on stone or porcelain is much harder to remove and can stain.
- Protect fresh pointing from direct sun, wind, and frost for at least 24 hours. Damp hessian, polythene sheeting, or damp sand over joints all work. In cold weather, protect for 48-72 hours and don't allow freezing until the mortar has fully cured.
- Allow mortar to cure fully before heavy use: typically 24-48 hours for light foot traffic, 7 days before furniture or heavy loads.
Applying polymeric sand
- Confirm joints are clean, dry, and at least 38 mm deep (the Gator Supersand Bond minimum is about 1.5 inches / 38 mm) and a minimum 3 mm wide.
- Pour polymeric sand over the surface and sweep it into joints with a stiff broom until joints are filled to within about 3-6 mm of the surface.
- Compact with a plate compactor (fitted with a rubber pad to protect pavers) or hand tamp for smaller areas, then top up and re-sweep as needed.
- Blow or sweep all residual sand from slab surfaces before activating — any sand left on faces will bond there permanently.
- Activate by misting with water in short passes of 20-30 seconds per section (Techniseal HP NextGel guidance). Avoid soaking: overwatering washes the polymer binders out of the joint.
- Allow to cure undisturbed. Most products are rain-safe after 60 minutes for light moisture, but full cure requires 24-48 hours of dry, above-freezing conditions. Check your specific product TDS.
Safety, tools, and curing: what not to skip
Mixing dry cement and sweeping polymeric sand both generate respirable crystalline silica dust. OSHA's construction silica standard (29 CFR 1926.1153) and NIOSH guidance are clear: this is a serious long-term lung hazard. Wear an FFP2/N95 respirator (not just a dust mask) when mixing dry mortars, grinding out joints, or sweeping polymeric sand. Work upwind, dampen materials where possible to suppress dust, and don't blow dust around with a leaf blower without respiratory protection.
- Respirator (FFP2/N95 minimum) for mixing, grinding, and sweeping polymeric sand
- Safety glasses or goggles when chiselling or grinding
- Chemical-resistant gloves: cement is alkaline and causes skin burns with prolonged contact
- Knee pads for working close to the ground
- Pointing trowel, grout bag, jointing iron
- Stiff brush and rubber mallet or plate compactor for polymeric sand
- Damp cloths or sponge for surface cleanup before mortar sets
Common failures and how to fix them
Washout, joints emptying after rain, almost always comes down to one of three causes: the mix was too wet and never developed proper strength, the joint wasn't deep enough to provide mechanical grip, or the mortar was hit by rain before it cured. The fix is to rake out, re-prep to the correct depth, and re-point in suitable weather. If washout is recurring, move to a slightly richer mix (3:1 instead of 4:1) or switch to polymeric sand for concrete pavers.
Cracking along the joint line is usually a freeze-thaw issue or a sign that the mortar is harder and less flexible than the substrate. On soft stone, this can be accompanied by surface spalling on the stone itself, a clear sign the mix was too rigid. Switch to a Type N or lime-gauged mix and rake out all the hard mortar before repointing. Trying to point over cracked joints without removing the original material just creates a second failure layer on top of the first.
Staining and efflorescence, white powdery deposits on joint or slab surfaces, come from soluble salts being carried to the surface as the mortar dries. It's mostly cosmetic and usually diminishes after a few rain events. For stubborn deposits, a dilute masonry cleaner (follow the stone manufacturer's guidance) and a stiff brush will shift it. Sealing the joint surface after repointing helps slow the return of efflorescence.
Polymeric sand failure almost always comes down to application conditions. Manufacturers' technical data sheets (for example, Alliance Gator, Supersand Bond TDS) list common failure causes such as applying over damp joints or wet surfaces, overwatering during activation, insufficient joint depth or compaction, poor base/drainage allowing washout from below, and applying in freezing or rainy conditions Alliance Gator — Supersand Bond TDS (installation notes and failure modes). If it was applied over damp joints or activated with too much water, the polymer doesn't set properly and the joint stays soft and erodes. There's no easy fix: the only reliable remedy is to rake it out and start again in dry conditions, following the manufacturer's TDS carefully.
Maintenance and sealing after repointing
New pointing benefits from being left alone for at least a week before any cleaning or sealing. Once cured, a penetrating patio sealer applied over joints and slabs together helps resist staining, slows biological growth, and reduces water ingress, all of which extend the life of the pointing. On natural stone, always check the sealer is compatible with the specific stone type before applying it broadly. For polymeric-sand joints, check with the sand manufacturer before sealing: some products are designed to breathe and a film-forming sealer can trap moisture below.
Annual maintenance is simple: brush joints clear of leaf debris and organic matter in autumn (packed organic material retains moisture and encourages joint decay), check for any early cracking or washout, and spot-repair minor failures before they spread. Patios that get this kind of light attention annually rarely need a full repoint more often than every 10-15 years.
Quick decision checklist
- Identify your surface: porcelain, concrete paver, hard natural stone, or soft natural stone / old brick — this alone narrows the field significantly.
- Check your climate zone: significant freeze-thaw cycles push you toward lime-gauged or Type S mortar; wet climates favour polymeric sand or a richer sand-cement ratio.
- Measure joint width and depth: joints under 5 mm suit resin or polymeric sand; wider joints over 10 mm are best suited to cement-lime mortars.
- Assess your DIY comfort level: premix bags (Quikrete or equivalent) are the lowest-barrier entry; resin is the most demanding and least forgiving.
- Check the weather forecast: no application in frost or rain; polymeric sand needs at least 24 dry, above-freezing hours post-application.
- Buy a little more material than you think you need — running short mid-job and mixing a second smaller batch risks colour and consistency variation.
- Gear up properly before you start: respirator, gloves, and eye protection are not optional steps.
FAQ
What are the common jointing options for repointing a patio?
Common options: cement–lime mortar (site‑mix or bagged mortar), hydraulic lime (NHL) mortar, sand‑and‑cement mixes, polymeric (polymer‑modified) jointing sand, pointing resin/epoxy for very narrow joints, and branded bag mixes (e.g., QUIKRETE Mortar Mix). Each has different strength, permeability and application needs.
When should I use a cement–lime mortar vs. hydraulic lime or pure cement?
Use cement–lime (Portland cement + hydrated lime + sand) for most modern brick, concrete pavers and hard natural stone where moderate strength and lower permeability are acceptable. Use hydraulic lime (NHL 2–3.5) for softer historic stone/brick or where compatibility and vapor permeability are required to avoid trapping moisture. Avoid hard pure cement mortars on fragile, soft or salt‑rich masonry.
Are polymeric sands suitable for patios?
Yes for interlocking concrete pavers, many natural stone patios with consistent joint widths and good base drainage. Polymeric sand hardens with water activation and resists weed growth and insects. Not suitable when permeability is required for stormwater percolation, for joints with frequent standing water, or where joints are too deep/shallow or pavers are wet during installation.
How do I choose a jointing material based on patio surface (flagstone, natural stone, brick, concrete pavers, porcelain)?
Flagstone/natural soft stone: prefer hydraulic lime (NHL) or softer lime‑based mortars. Dense natural stone/brick: cement–lime mortar or sand‑and‑cement. Concrete pavers/segmental systems: polymeric sand or compacted jointing sand (per ICPI). Porcelain: use non‑staining epoxy/pointing resin or specially formulated grout; many polymeric sands can stain porcelain so test first. Always match permeability and strength to substrate.
What mix ratios should I use for common repointing mortars?
Typical guidance: Type N cement–lime mortar ≈ 1 Portland cement : 1 hydrated lime : 6 sand (by volume). Type S ≈ 1 : 0.5 : 4.5 (cement:lime:sand) for higher strength. Historic/NHL mortars often use ~1 NHL : 2.5–3 sand (by volume) depending on NHL grade (NHL 2 to 3.5). Follow ASTM C270/BS EN 998‑2 or product TDS for precise proportions and local practice.
How do I prepare and mix mortar on site?
Use clean, well‑graded sand and clean water. Dry‑mix cement/lime and sand until uniform, then add water gradually to workable consistency. Mix only what you can use in the pot life (often ~1 hour). Do not retempered mortar beyond manufacturer/ASTM limits. For bagged mixes (e.g., QUIKRETE Mortar Mix) follow the product TDS for water amounts and mixing instructions.