
Gravel, permeable interlocking pavers, and flagstone set on a permeable base are the best patio materials for drainage. They either let water pass through the surface itself or shed it quickly without pooling. If you're dealing with a flat yard, clay soil, or a patio right next to your house, your choice of material matters far less than getting the subbase and slope right, but some materials make that job dramatically easier than others. This guide walks through each major patio surface in plain terms, compares drainage performance side by side, and tells you what installation details actually move the needle.
Best Patio Material for Drainage: Top Picks & Installation

Nolan Ellison
16 Jul 2026
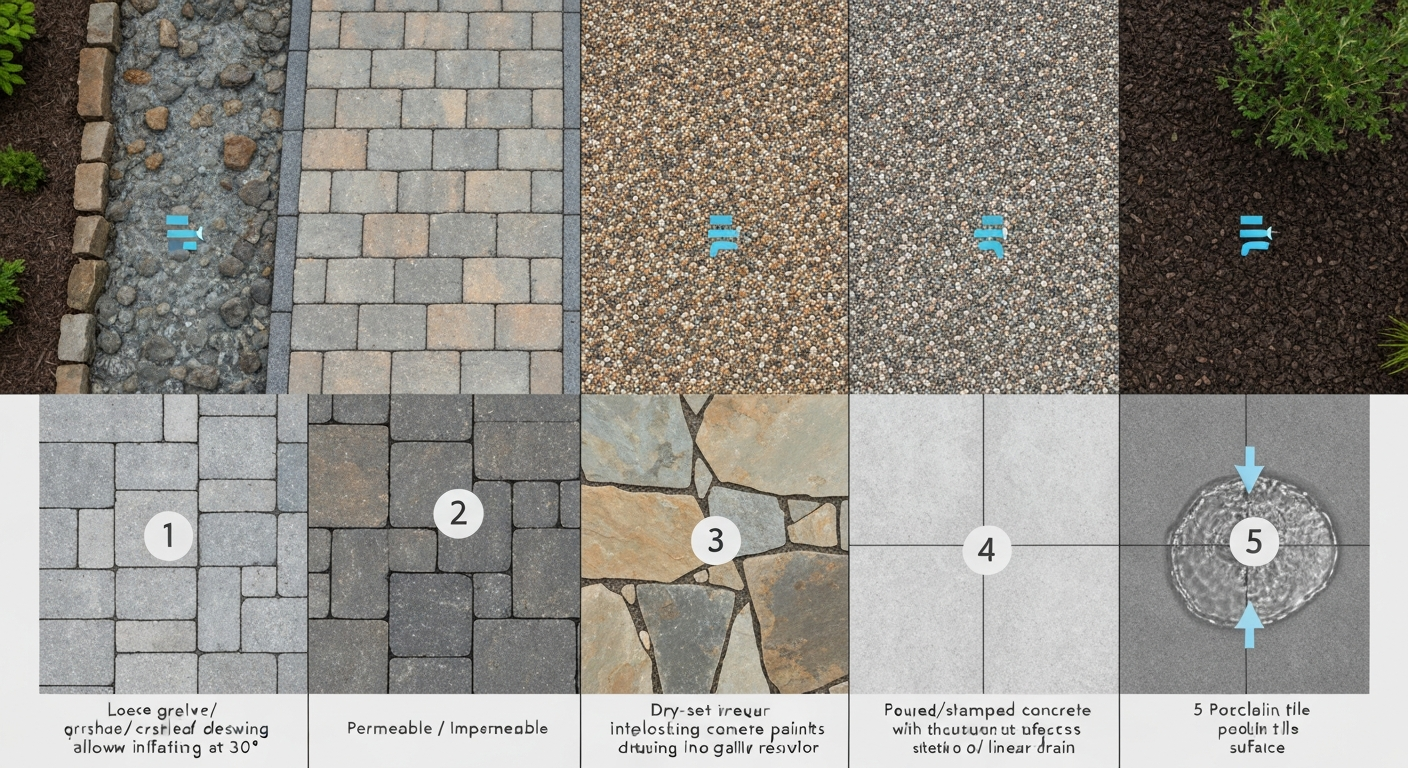
How patio drainage actually works
Every patio handles water in one of two ways: it either sheds water by directing it off the surface (impermeable), or it absorbs water down through the surface and subbase into the ground (permeable). Most drainage failures happen not because someone chose the wrong material, but because the slope was wrong, the subbase was compacted too tight to drain, or nobody thought about where the water was supposed to go once it left the patio.
The minimum slope you need on any impermeable patio is 2%, which works out to about 1/4 inch per foot. Building America guidance from PNNL specifically requires that slope away from the foundation for any slab within 10 feet of a house. For patios farther out, a 1% to 2% cross slope is usually enough, but check your local code. Even a tenth of a percent below that and you'll see puddles after every rainstorm.
Permeable systems work differently. Instead of redirecting water, they accept it. Water moves through open joints, porous surface material, or gaps between units and into a layered stone reservoir underneath, typically crushed stone graded to ASTM No. 2, 3, or 4 for the reservoir layer, with finer No. 57 for the structural base and No. 8 for the bedding layer, per ICPI's Permeable Interlocking Concrete Pavement Manual. From there, water either infiltrates into native soil or exits through perforated underdrains. Whether the system fully exfiltrates or partially drains depends on your soil's saturated hydraulic conductivity (Ksat). Sandy soils can handle 3.5 to 7+ inches per hour of throughput; clay soils drop to fractions of an inch per hour and almost always require underdrains.
Terms worth knowing before you shop
- Permeable / pervious surface: water passes through or between units (gravel, permeable pavers, flagstone on stone dust)
- Impermeable / impervious surface: water runs off the surface toward a drain or edge (poured concrete, porcelain tile, solid pavers set tight)
- Subbase / reservoir layer: the crushed stone bed below the surface that stores and filters water in permeable systems
- Geotextile fabric: a filter layer placed between the subbase and native soil to prevent fine particles from migrating up and clogging the system
- French drain: a perforated pipe buried in gravel that intercepts and redirects subsurface or surface water
- Channel drain / linear drain: a surface-mounted slot drain set flush with the patio to catch sheet flow off an impermeable surface
- Catch basin: a below-grade inlet box that captures concentrated runoff and connects to a pipe
- Ksat: saturated hydraulic conductivity — how fast your native soil absorbs water; critical for sizing any permeable system
- Infiltration rate: measured in the field using ASTM C1781 for permeable pavers or ASTM C1701 for pervious concrete; newly installed systems often test at hundreds of inches per hour, but long-term rates depend on clogging and subgrade
One thing I've seen trip up a lot of DIYers: they install a beautifully permeable surface and then compact the subbase so firmly that water has nowhere to go. The surface infiltration rate means nothing if the stone reservoir underneath is choked. Always use clean, angular crushed stone with minimal fines for the reservoir, and never compact it beyond what's needed to stabilize the surface course.
Quick comparison: all major patio materials at a glance
| Material | Drainage Type | Drainage Performance | Durability | Appearance | Installed Cost (per sq ft) | Best Use Case |
|---|---|---|---|---|---|---|
| Gravel / crushed stone | Permeable | Excellent — near 100% infiltration | Good with edging | Casual, natural | $2–$6 | Budget builds, rural settings, gardens |
| Permeable interlocking pavers (PICP) | Permeable | Excellent — near-zero runoff for most storms | Very high (>50 yrs) | Clean, architectural | $15–$30 | High-rainfall areas, stormwater credit needs |
| Flagstone (dry-set) | Permeable (gaps) | Very good — depends on joint width and base | High with maintenance | Natural, rustic | $15–$30 | Informal gardens, uneven ground |
| Brick / solid pavers (dry-set) | Semi-permeable | Good — joints allow infiltration if filled with sand | Very high (40+ yrs) | Classic, traditional | $10–$20 | Traditional homes, moderate rainfall |
| Natural stone — slate, granite, limestone (dry-set) | Semi-permeable | Good when set on stone dust with open joints | Very high | Premium, varied | $20–$40+ | Upscale installs, any climate |
| Concrete (poured / stamped) | Impermeable | Poor on its own — needs slope + drains | High (20–30 yrs) | Versatile, customizable | $8–$20 | Smooth, low-maintenance surfaces |
| Porcelain tile (exterior-rated) | Impermeable | Poor — requires engineered slope and drainage | Excellent (>30 yrs) | High-end, modern | $15–$35 | Covered patios, warm dry climates |
Flagstone
Flagstone is one of the most forgiving materials for drainage when it's installed the right way, meaning dry-set on a 4-inch compacted gravel base with open, sand-filled or gravel-filled joints rather than mortared tight. The gaps between irregular stones let water filter down, and the base provides a reservoir. Mortared flagstone on a concrete slab, on the other hand, behaves like a solid impermeable deck and needs the same slope-and-drain approach as poured concrete.
Drainage performance
Dry-set flagstone with 1/2-inch to 2-inch open joints and a properly graded compacted gravel subbase delivers very good drainage. The exact infiltration rate depends on joint width and coverage, wider, more irregular pieces leave more open area. On clay soil, you still need to direct water away or install underdrains because the subbase can saturate quickly. On sandy loam or sandy soil, a well-set flagstone patio can handle virtually all rainfall without runoff.
Pros, cons, durability, appearance and cost
| Factor | Details |
|---|---|
| Drainage (dry-set) | Very good — open joints allow infiltration; permeable base handles moderate storms |
| Drainage (mortared) | Poor — acts as impermeable slab; must slope to drain |
| Durability | High — individual stones last decades; joints need re-sanding every 3–5 years; frost heave risk in cold climates without proper base depth |
| Appearance | Natural, irregular, highly variable — fits cottage, garden, and woodland aesthetics well |
| DIY difficulty | Moderate — irregular shapes require cutting and fitting; base prep is critical |
| Cost installed | $15–$30 per sq ft depending on stone type (bluestone, limestone, sandstone) and labor market |
| Best for drainage | Dry-set with gravel base on sandy to loamy soil; pair with French drain on clay |
I've installed dry-set bluestone on a yard with moderate clay content and the key was running a perforated pipe along the low edge of the patio tied into a daylight outlet. The flagstone itself drained fine; the native soil just couldn't accept water fast enough. That's a soil problem, not a flagstone problem, and worth diagnosing before you start any patio project. Soil type also matters a lot if you're considering a patio garden space alongside your patio. For guidance on choosing and preparing soil that pairs with patio drainage, see our guide to the best soil for patio garden.
Natural stone, slate, granite, and limestone
Natural stone slabs cover a wide range of materials, but from a drainage standpoint they all behave similarly: the stone itself is dense and essentially impermeable, so all drainage work happens at the joints and subbase. Set them with open sand joints on a permeable gravel base and you get good drainage; mortar them solid and you're building an impermeable deck that needs engineered slope.
Drainage performance by stone type
Slate has a naturally textured cleft face that sheds water well even on modest slopes, but it's brittle in freeze-thaw cycles and needs a deeper, well-draining base in cold climates. Granite is the most durable of the group, extremely dense, frost-resistant, and almost maintenance-free once set. Limestone is attractive but relatively porous as a rock (though still impermeable as a patio surface), and it can be stained by organic matter if drainage is slow. All three benefit from a 4-to-6-inch crushed stone base with a 1% to 2% surface slope toward a designated drainage edge.
Pros, cons, durability, appearance and cost
| Factor | Details |
|---|---|
| Drainage (dry-set) | Good — open joints allow infiltration; granite and slate perform well; limestone needs clean joints to avoid staining |
| Drainage (mortared) | Poor — requires precise slope and supplemental drainage |
| Durability | Granite: excellent (50+ yrs); Slate: good but frost-sensitive; Limestone: moderate — scratches and etches |
| Appearance | Premium natural look; wide color and texture range; fits formal and informal settings |
| DIY difficulty | Moderate to hard — heavy slabs, precision cutting required; best with wet saw and helper |
| Cost installed | $20–$40+ per sq ft; granite and premium imported slate at higher end |
| Best for drainage | Dry-set granite or slate on 6-inch crushed stone base; add channel drain at low edge for clay soils |
If you're building in a cold climate, slate and limestone both need a base depth at or below the frost line to prevent heaving, something worth cross-referencing when you're comparing cold-climate patio materials more broadly. Granite is generally the safest bet across climate zones because it doesn't absorb water and won't spall under freeze-thaw cycling. For a detailed comparison of materials and frost-protection strategies, see our guide to the best patio material for cold climate (f169a508-1cad-4820-8d0a-753ca0c4ca76).
Porcelain tiles
Porcelain tile is the worst-performing material for drainage if you don't plan for it deliberately, and one of the best-looking options when you do. Exterior-rated porcelain tiles have a water absorption rate below 0.5% by mass per ANSI A137.1 standards. That number sounds impressive for durability, but it means every drop of rain that lands on the tile stays on the tile until it runs off. There is no infiltration through the surface at all.
Drainage performance
With porcelain tile, drainage is entirely a design and slope problem. You need a minimum 2% slope to a channel drain, perimeter drain, or open edge, no exceptions. Large-format tiles (24x24 inches or bigger) are increasingly common and look stunning, but they make achieving a consistent slope harder to execute during installation. The mortar bed or pedestal system has to be set precisely. I've seen beautiful porcelain patios that pool in a 12-inch circle because one tile was set even slightly low. The tile industry specifies DCOF (dynamic coefficient of friction) for exterior horizontal tile; look for a wet DCOF of at least 0.42 per ANSI A137.1, though many specifiers use 0.6 as a practical threshold for accessible outdoor surfaces to ensure safety when the tile is wet.
Pros, cons, durability, appearance and cost
| Factor | Details |
|---|---|
| Drainage | Poor inherently — 100% impermeable surface; requires engineered slope and supplemental drains |
| Slope requirement | Minimum 2% (1/4 in/ft) toward drain or open edge; consistent across all tiles |
| Durability | Excellent — dense, frost-resistant when exterior-rated; does not stain, scratch, or absorb water |
| Slip resistance | Critical to verify DCOF for exterior wet use; textured or matte finishes outperform polished |
| Appearance | Modern, clean, wide range of colors and textures including stone and wood looks |
| DIY difficulty | Hard — requires precise mortar bed, tile saw, consistent slope execution; best left to experienced installers |
| Cost installed | $15–$35 per sq ft; large-format and premium Italian tiles at higher end |
| Best for drainage | Covered or semi-covered patios; warm dry climates; always paired with linear drain or channel drain |
For hot, dry climates where standing water is rarely a prolonged issue, porcelain tile is a strong contender because its impermeability is actually an asset, it doesn't absorb heat the way darker stone does and stays cleaner longer. For a deeper discussion on choosing the best patio material for hot climate, see our guide on the topic. But in high-rainfall regions or anywhere with heavy clay soil, I'd point you toward a permeable material first unless you're ready to engineer the drainage system carefully.
Poured, stamped, and colored concrete
Standard poured concrete is fully impermeable. It's the most widely used patio surface in North America, and the vast majority of drainage complaints I hear involve concrete patios that were either sloped wrong, sloped toward the house, or had no provision for where the water actually goes once it reaches the edge. Concrete itself isn't the problem, the installation details are.
Drainage performance
A properly sloped concrete patio at 2% toward a lawn edge, swale, or drain handles rainfall reliably for decades. The problem is that stamped concrete with deep texture patterns can actually trap water in the low points of the pattern, so sealing is important both for aesthetics and to prevent water from sitting in crevices and staining or degrading the surface. Pervious (porous) concrete is a different product entirely, it uses a gap-graded mix with minimal fine aggregate to create interconnected voids, and can achieve field infiltration rates of 3 to 40+ inches per hour when first installed per published studies. FHWA publishes porous/permeable pavement guidance and tech briefs summarizing design, construction, performance, and maintenance of porous asphalt, porous concrete, and permeable interlocking pavements and referencing ICPI guidance and relevant ASTM test methods FHWA porous/permeable pavement guidance and tech briefs. However, pervious concrete requires skilled installation, specific mix design, and regular vacuum sweeping to prevent clogging, so it's rarely the best DIY choice. ASTM C1701 is the standard test method used to verify pervious concrete infiltration rates in the field.
Pros, cons, durability, appearance and cost
| Factor | Details |
|---|---|
| Drainage (standard) | Poor — fully impermeable; slope and supplemental drains are mandatory |
| Drainage (pervious) | Excellent when new (100s of in/hr); degrades with clogging; requires maintenance |
| Slope requirement | 2% minimum away from structures per Building America / IRC guidance |
| Durability | High — 20 to 30+ years with control joints and proper curing; stamped may crack at texture lines |
| Appearance | Very versatile — can mimic stone, brick, wood; any color via integral pigment or stain |
| DIY difficulty | Standard: moderate for experienced DIYers; stamped: hard — requires professional tools and timing |
| Cost installed | $8–$20 per sq ft standard poured; $12–$25 stamped; pervious at higher end due to mix/placement complexity |
| Best for drainage | Standard: flat or gently sloping sites with proper grading and channel drains; pervious: commercial or high-performance residential with professional install |
One concrete-specific mistake I see constantly: the contractor leaves the expansion joint gap open at the house foundation, and water channels directly along the joint and into the foundation. Either fill that joint with a backer rod and flexible sealant, or slope slightly away from it. This is an installation detail that costs almost nothing to do right and a lot to fix later.
Brick and interlocking pavers
Brick and concrete interlocking pavers are the most versatile drainage option in the paver category because they come in both standard (solid, impermeable) and permeable (PICP) versions, and the installation method, not just the product, determines drainage behavior. A standard paver set tight with polymeric sand in the joints behaves like a mostly impermeable surface. A permeable interlocking concrete paver (PICP) system with open-graded joints and a reservoir subbase can achieve near-zero stormwater runoff coefficients for most design storms. blank" rel="noopener noreferrer">ICPI Tech Spec 16 (Permeable Pavers and LEED) notes that PICP systems designed for full exfiltration may be credited with very low runoff coefficients, while actual runoff depends on soil infiltration capacity and whether underdrains provide partial exfiltration.
How permeable paver systems work
In a PICP system, the pavers themselves are either solid units with wide open joints (8mm or more) or units with built-in void cells. Per ICPI guidance, water passes through the joints filled with ASTM No. 8 stone (8mm clean crushed aggregate), into a No. 57 structural base layer, and then into a No. 2, 3, or 4 open-graded reservoir course. From there it either infiltrates native soil or exits through perforated underdrains. New PICP installations commonly test at hundreds of inches per hour surface infiltration per ASTM C1781. Long-term rates depend on maintenance and subgrade; ICPI recommends periodic re-testing and vacuum sweeping when rates fall below project-specified minimums. Standard concrete interlocking paving units typically show absorption below 5% and compressive strength above 8,000 psi per manufacturer data, making them extremely durable as structural units regardless of drainage system type.
Drainage performance for standard vs. permeable pavers
Standard clay brick set in sand with tight joints provides moderate drainage, better than monolithic concrete because the joint pattern allows some infiltration, but not enough to count on for high-rainfall sites. Brick on a mortar bed is essentially impermeable. Permeable pavers on a properly engineered reservoir base are the gold standard for residential drainage performance. They're the right call when you're dealing with clay soil that needs a managed drainage system, when you want stormwater credit from your municipality, or when you simply want the lowest-maintenance, best-performing drainage option available in a hard patio material. The system does cost more upfront, typically $15 to $30 per square foot installed, but it outlasts most poured concrete by decades and never needs grinding or resurfacing if one section settles.
Pros, cons, durability, appearance and cost
| Factor | Details |
|---|---|
| Drainage (standard paver, sand-set) | Moderate — joints allow some infiltration; needs 1–2% slope for reliable drainage |
| Drainage (PICP system) | Excellent — near-zero runoff coefficient; handles intense storms with proper subbase design |
| ASTM reference | ASTM C1781 for field infiltration testing; ASTM C936 for paver unit spec |
| Durability | Very high — individual units rated 40–50+ years; system is repairable unit by unit |
| Repairability | Major advantage — lift, relay, and re-compact individual pavers without patching |
| Appearance | Traditional (clay brick) to modern (concrete pavers in dozens of shapes and colors) |
| DIY difficulty | Moderate for standard sand-set; PICP requires correct subbase gradation and compaction — complex for DIY |
| Cost installed | $10–$20 standard pavers; $15–$30 PICP system including engineered subbase |
| Best for drainage | PICP on clay soil or high-rainfall regions; standard pavers with channel drain on simpler sites |
If you're on clay soil specifically, permeable pavers with underdrains are the combination I'd recommend above anything else. The clay will never accept enough water on its own, but the reservoir stores it and the underdrains manage the outflow in a controlled way. You're not fighting the soil, you're working around it. Clay soil patios present a related set of challenges around base stability that are worth understanding alongside the drainage question.
Installation details that actually determine drainage success
Whichever material you choose, these are the installation decisions that have the biggest impact on whether your patio drains well long-term. Material choice comes second to getting these right.
- Set the slope first, before laying a single unit: establish 2% away from the house using a laser level or a 6-foot level with a shim; mark your finished grade before any base work starts
- Use clean angular crushed stone for the base (not screened topsoil, not pea gravel): angular edges interlock and drain; rounded or silty material compacts to a near-impermeable layer
- Install a geotextile fabric between native soil and the stone base on any clay or silt-heavy site to prevent fines from migrating up and clogging the base over time
- For permeable systems: use the correct stone gradations — ASTM No. 8 bedding, No. 57 base, No. 2/3/4 reservoir — and do not compact the reservoir layer beyond seating the base course
- Size your drainage outlet before you start: a French drain or channel drain that's too small for your catchment area will back up; calculate your roof drainage area if water from gutters or downspouts discharges near the patio
- On clay soil, always provide an exit for water — either daylight the French drain on a slope or connect to a drywell sized for your soil's Ksat (test with ASTM D3385 double-ring infiltrometer before designing)
- Seal expansion joints against the house with a flexible backer rod and sealant — never leave them open to channel water toward the foundation
- For PICP systems, perform an ASTM C1781 surface infiltration test after construction to establish a baseline, then re-test annually and schedule vacuum maintenance when rates drop to your project minimum
Which material to choose for your situation
No single material is best for every yard. The right choice depends on your soil, rainfall, budget, and what you want the patio to look like. Here's how I'd map it out for the most common homeowner situations. For a side-by-side patio material comparison that covers drainage, cost, and maintenance, see our detailed patio material comparison guide. If you have pets, see a dedicated guide to the best patio material for dogs for recommendations on durable, non-slip, and easy-to-clean surfaces.
| Scenario | Best Material | Key Installation Detail |
|---|---|---|
| Tight budget, rural setting, heavy rain | Compacted gravel or crushed stone | Edge restraints + geotextile; regrade annually |
| Clay soil, any climate | Permeable interlocking pavers (PICP) with underdrains | Full reservoir subbase; perforated pipe to daylight outlet |
| High rainfall, want a finished look | Permeable pavers or dry-set flagstone | Open-graded base; ASTM C1781 test after install |
| Cold climate, freeze-thaw cycles | Granite (dry-set) or concrete pavers | Base depth below frost line; open-graded base for drainage |
| Hot dry climate, modern aesthetic | Porcelain tile or concrete (stamped) | 2% slope + channel drain; verify DCOF for wet safety |
| Pet-friendly patio | Pea gravel or brick pavers (sand-set) | Easy paw cleanup; gravel needs edging to contain |
| Patio adjacent to garden beds | Flagstone or permeable pavers | Open joints direct water to adjacent planting areas |
| Sloped yard, erosion risk | Interlocking pavers with step terracing | Level each terrace independently; swale at base to capture runoff |
| Near foundation, basement moisture concerns | Any material — but slope and sealed joint are non-negotiable | 2% slope away from house per Building America guidance; sealed expansion joint at foundation |
Maintenance to keep drainage working long-term
Even the best-designed drainage system degrades without maintenance. Permeable surfaces clog with fine sediment, leaf debris, and organic matter over time. Impermeable surfaces develop low spots as the subbase settles. Here's the maintenance routine that preserves drainage performance for each surface type.
- Permeable pavers and gravel: vacuum sweep or blow out joints annually; inspect for sediment buildup in the joint aggregate; re-test surface infiltration rate every 1–2 years using ASTM C1781 and schedule maintenance when rates fall below your baseline threshold
- Flagstone and natural stone (dry-set): re-sand joints every 3–5 years as sand migrates; check for settled stones that create low points; re-level individual units as needed
- Brick (sand-set): re-sand joints annually in high-traffic areas; lift and relay any settled units; check perimeter edging for movement that could open gaps
- Concrete (poured or stamped): reseal every 2–3 years to prevent surface absorption and staining; check slope with a level annually — repair any settled areas with grinding or mudjacking before they pond water
- Porcelain tile: clean joints of organic growth annually; inspect for cracked or lifted tiles that create low spots; ensure linear drain outlets are clear before each rainy season
- All systems: keep downspouts and gutters directed away from patio; clear leaf debris from drains each fall before freeze season; inspect geotextile fabric access points (if serviceable) every 5 years for fine particle buildup
Cost reality check
The cheapest patio to install is almost never the cheapest patio to own. A $4-per-square-foot gravel patio needs regular regrading and edging work. A $12-per-square-foot poured concrete slab that wasn't sloped correctly can cost more than the original pour to fix, grinding, mudjacking, or full removal and replacement. Permeable pavers at $20 to $30 per square foot feel expensive upfront, but they're repairable unit by unit, never need grinding, and typically outlast poured concrete by 20 or more years. Factor in the cost of any drainage infrastructure, French drains run $10 to $30 per linear foot installed; channel drains $25 to $50 per linear foot with pipe, when you're comparing bids. A material comparison that evaluates total cost of ownership over 10 to 20 years often reverses the ranking you'd get from looking at installed price alone.
FAQ
Which patio materials provide the best drainage overall?
Permeable systems perform best: permeable interlocking concrete pavers (PICP) and well‑installed gravel offer the highest surface drainage and infiltration when paired with a reservoir subbase and no underdrain. Pervious concrete is also excellent for infiltration if correctly specified/installed. Impervious options (porcelain, conventional concrete, composite decking, sealed natural stone, dense brick) shed water to drains and require slope and drainage collection rather than relying on infiltration.
How does each common patio material perform for drainage (flagstone, porcelain, gravel, brick/pavers, natural stone, concrete, composite decking)?
- Gravel: Highest permeability; drains to subgrade; needs edge restraint and weed barrier choices. - Flagstone (dry‑laid): Very good when set on compacted open base with joint sand/grit; moderate infiltration. - Permeable pavers (concrete unit pavers with open joints): Excellent when installed over reservoir base. - Pervious concrete: High infiltration if mix, placement and curing are correct. - Conventional concrete slab: Impervious; requires 2% slope and catchment drains. - Porcelain tile: Impervious; sheds water—needs slope, waterproofing near structures, and slip‑resistant finish. - Brick (mortar joint/solid bed): Mostly impervious; permeable clay pavers with open joints can be semi‑permeable. - Composite decking/tiles: Impervious surface; water flows off gaps or designed drainage channels—needs framing and slope.
What is the difference between permeable and impermeable patio systems and why does it matter?
Permeable systems allow rainfall to infiltrate into the ground or a reservoir layer beneath the patio (reducing runoff and stressing storm systems). Impermeable systems shed water to surface drains or away from the house. Choice matters for stormwater management, local code/stormwater credits, flood risk, soil conditions, and maintenance: permeable systems reduce runoff but require proper subbase, soil capacity, and maintenance to avoid clogging.
What installation details most affect patio drainage performance?
Key details: - Cross slope: minimum 1–2% for general patios; 2% (0.25 in/ft) recommended within 10 ft of buildings. - Subbase: open‑graded reservoir (No. 2/3/4 stone) for permeable systems vs. compacted aggregate for slabs. - Joints: open, properly sized joints with clean angular joint stone for pavers/flagstone. - Geotextile: under reservoir layer to prevent fines migration. - Edge restraint and underdrains (if soils are low‑permeability). - Compaction and grading to prevent settling and ponding.
When should I include a permeable base vs. a full underdrain or French drain?
Use a permeable reservoir base when soil can accept some exfiltration or when you want to store and slowly infiltrate runoff. Add an underdrain (perforated pipe in gravel trench) or French drain when native soils have low infiltration (clay), seasonal high water table, or you need reliable subsurface conveyance to a storm system. Underdrains are also used where full exfiltration isn’t feasible but you still want a permeable surface.
How do climate and soil type affect material choice and design?
- Sandy, well‑drained soils: favor permeable options (gravel, PICP, pervious concrete). - Clay/silty soils or high water‑table: prefer impermeable surfaces with positive surface drainage and underdrains, or permeable systems with engineered underdrain and large reservoir. - Cold climates with freeze‑thaw (New England): choose frost‑resistant materials (dense pavers, proper bedding) and design joints and subbases to avoid heave; consider underdrains to lower subsurface moisture. - Hot/dry climates: permeable systems still work and reduce runoff; UV‑stable materials and color selection matter.