
Bluestone patio steps done right will outlast almost anything else you can put in a yard, but done wrong they'll rock, crack, and heave within a couple of winters. The keys are stone thickness of at least 2 inches (preferably 2.5 inches or more for exposed edges), a compacted crushed-stone base that's at least 6 inches deep in freeze-thaw zones, a thermal or natural-cleft surface finish for traction, and proper drainage so water never sits under the slab. Get those four things right and you'll have steps that look great and stay safe for decades.
Bluestone Patio Steps: Design, Install, and Maintenance Guide

Nolan Ellison
27 May 2026
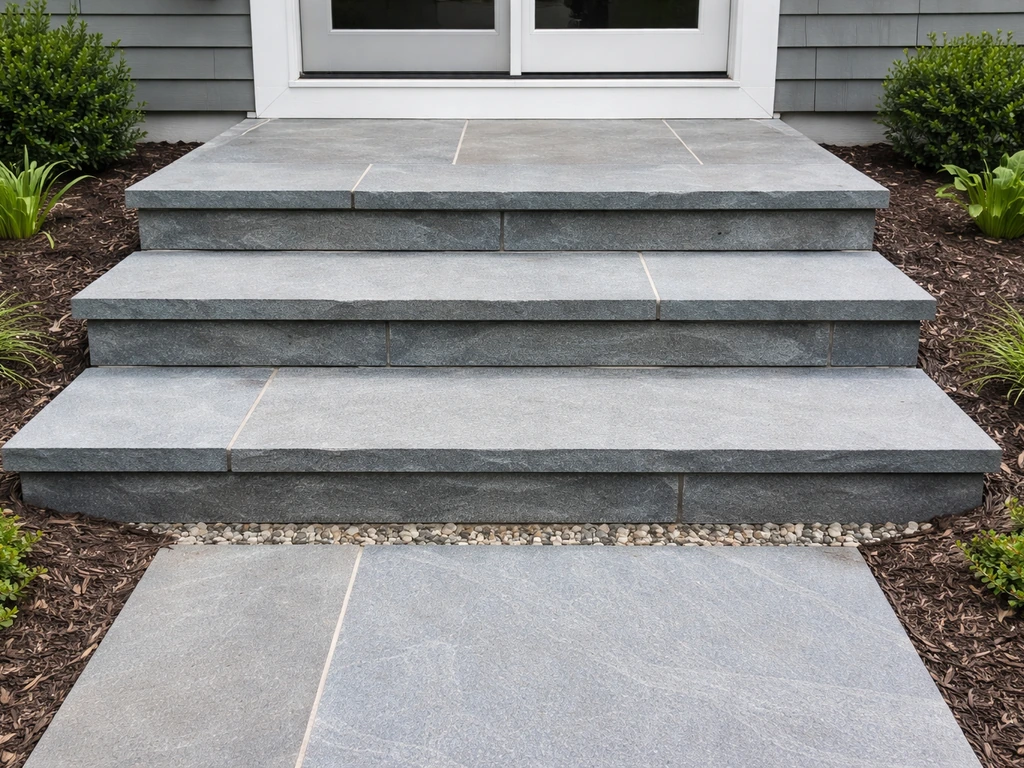
What bluestone patio steps are and where they fit best
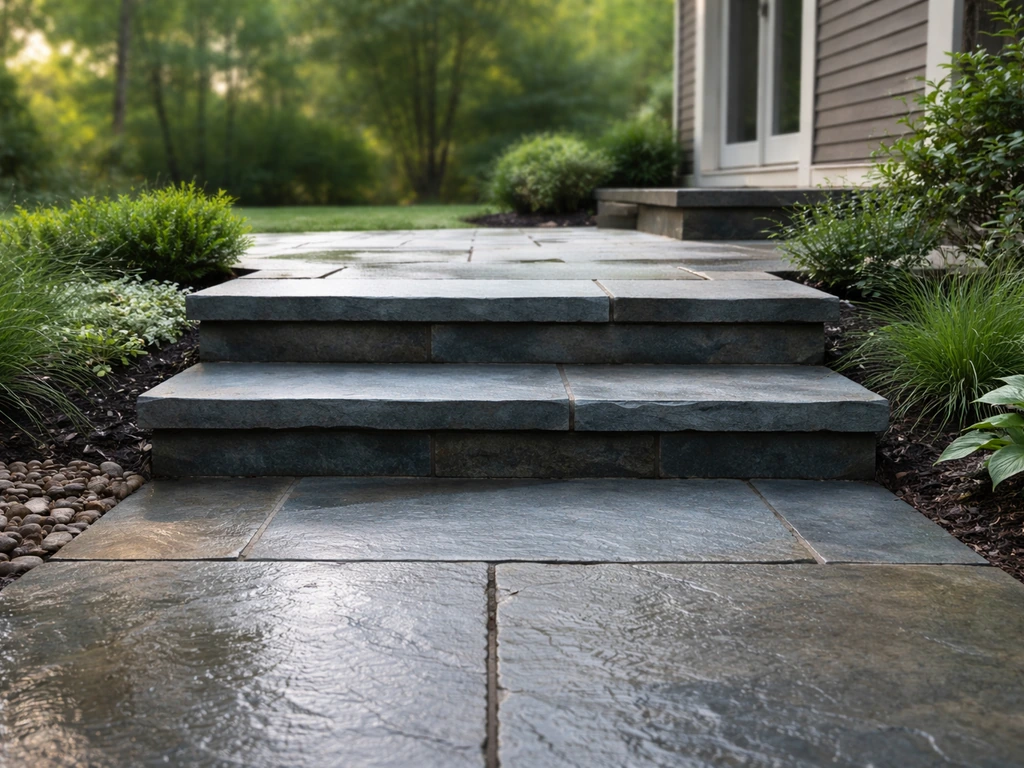
Bluestone is a dense sandstone quarried primarily in New York and Pennsylvania. That dense, tight grain structure is exactly what makes it so well suited to outdoor steps: it resists surface absorption, holds up under foot traffic, and machines cleanly into consistent treads and risers. You'll see it used on front stoops, garden terraces, pool surrounds, and any transition between a patio and a yard grade change.
It's worth knowing where bluestone fits compared with other step materials. Brick steps are softer and more porous, which makes them vulnerable to spalling in hard-freeze climates. Composite steps are low-maintenance but look and feel synthetic. Natural stone steps in general offer the same permanence as bluestone but vary widely in density and workability. If you are deciding on natural stone patio steps, focus on base depth, drainage, and a slip-resistant finish to help them last through freeze-thaw cycles natural stone steps. Among all of them, bluestone sits in a sweet spot: it's genuinely durable, widely available in the Northeast, cuts to clean dimensions, and looks at home in both formal and informal landscapes.
Where bluestone is less ideal: if you're in a climate where the ground freezes deep (below 36 inches) and you're not willing to invest in a proper base, you'll fight heaving every few years. And if your budget is tight, be aware that bluestone steps are mid-to-high cost compared with poured concrete or brick. But for homeowners who want natural stone that holds its appearance and structural integrity, it's hard to beat.
Bluestone step sizes, layout, and design choices
Comfort and safety both come down to getting rise and run right. The 2018 International Residential Code sets the minimum tread depth at 10 inches and maximum riser height at 7.5 inches. For outdoor patio steps I'd actually go a bit more generous: a 12-to-14-inch tread depth and a 6-to-7-inch rise feel natural and handle furniture or planters at the edge without tripping hazard. Critically, whatever riser height and tread depth you choose, keep them consistent across every step. Even a half-inch variation between steps is enough to cause a stumble.
Standard bluestone tread units come in sizes like 36x16 inches, 48x16 inches, 36x18 inches, and 48x18 inches. Those 16-to-18-inch depths give you a comfortable outdoor tread and leave room for a slight forward pitch (about 1/8 inch per foot) to shed water. For thickness, treads are typically available at 1.5 inches and 2 inches from most suppliers, with 2 and 2.5 inches being the better choice for steps where the front edge is cantilevered or exposed. Anything thinner than 1.5 inches is not appropriate for load-bearing tread use. If you're building monolithic steps (where the tread also forms the riser block), you'll want 6-inch-thick stock, which some suppliers carry specifically for that application.
One layout note that catches people off guard: when you're ordering natural cleft bluestone, the nominal size is not the actual cut dimension. Suppliers subtract a small amount (typically 3/8 to 1/2 inch) to account for grout joints. Make sure you confirm actual dimensions with your supplier before you design the layout, or you'll find your steps coming up short.
Designing the transition from patio to steps
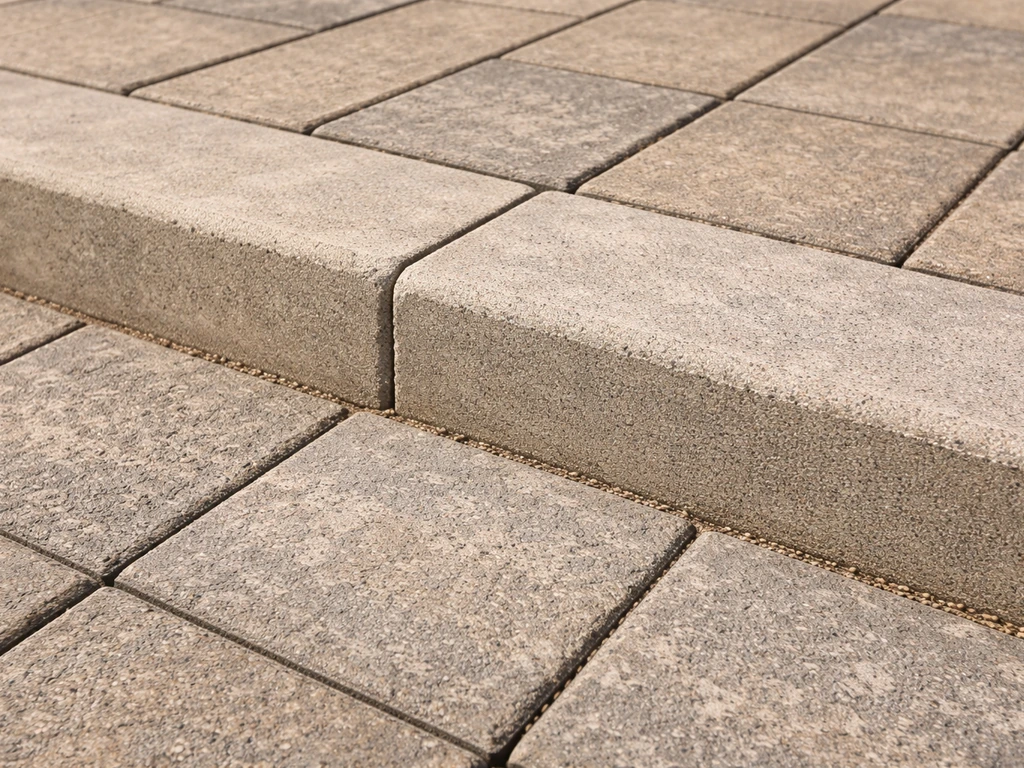
The transition point between your patio surface and the top riser is where most design mistakes happen. Ideally the top tread of your steps sits flush with or 1/4 inch below the patio surface so water drains away from the house. Avoid any configuration where the patio surface slopes toward the top step, because that's how you get ice pooling at the step edge in winter. If you're tying into an existing patio, check whether the patio has any low spots near the transition before you set the steps. You can use the same transition guidelines when planning stone steps from house to patio, so the top tread sheds water away from your home.
Surface finish options and slip-resistance
This is one of the most important decisions you'll make for steps, and a lot of people get it wrong by choosing the finish they like the look of rather than the one that's safest underfoot. Here's a direct comparison of the main options:
| Finish | Texture | Slip Resistance (Wet) | Best Use for Steps |
|---|---|---|---|
| Natural Cleft | Irregular, rough surface from natural splitting | Good to very good | Informal gardens, rustic settings; texture varies stone to stone |
| Thermal (Flamed) | Uniform rough texture from heat treatment | Very good to excellent | Best all-around for steps; consistent grip, works in wet/icy conditions |
| Honed | Smooth, matte surface | Low to moderate when wet | Interior or covered steps only; requires slip-resistant sealer outdoors |
| Sawn | Smooth with saw marks | Low to moderate when wet | Not recommended for exposed outdoor steps without anti-slip treatment |
For outdoor steps, especially any that will see rain or shade (and therefore stay wet longer), thermal finish is the safest specification. The heat treatment opens up the surface texture uniformly, creating consistent grip across the full tread without the stone-to-stone variability of natural cleft. If you prefer the look of natural cleft, it does perform reasonably well on steps, but inspect each piece: some cleft stones are almost flat in spots, and those flat areas will be slippery when wet.
If you've already installed honed bluestone steps, you're not necessarily stuck. A penetrating sealer formulated with a slip-resistant additive (or a topical anti-slip coating) can bring them up to a safer standard. But it's an ongoing maintenance commitment, not a one-time fix.
Installation methods: setting, leveling, and coping details
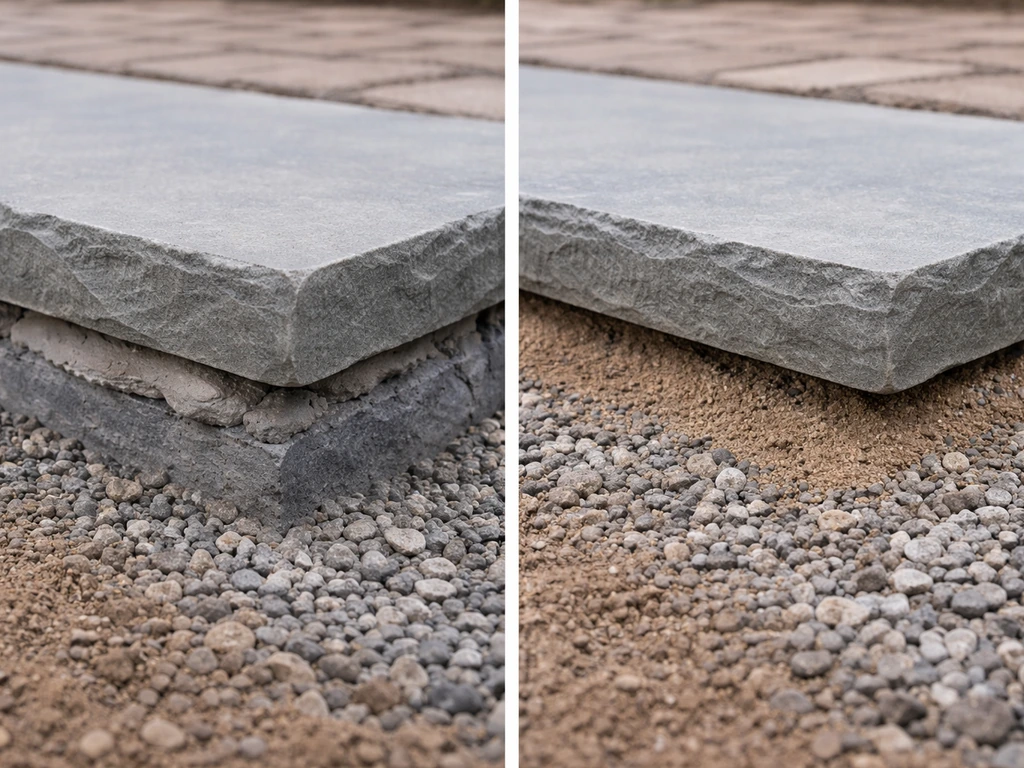
There are two main ways to set bluestone steps: on a mortar bed over a concrete or compacted aggregate base, or dry-set on compacted aggregate with a sand or stone-dust bedding layer. For steps specifically, I almost always recommend a mortar-set approach. Steps take concentrated point loads when people step near the edge, and a dry-set step can rock or shift over time in ways that a full-bed mortar set won't. That said, the mortar-set approach is only as good as the base beneath it.
Step-by-step setting process
- Excavate to your required base depth (see the drainage and freeze-thaw section below for depth guidance). Remove all organic material and soft soil.
- Compact the subgrade, then place and compact your crushed-stone base in lifts of no more than 4 inches. Use a plate compactor, not just tamping by hand.
- For mortar-set steps, pour or form a concrete footing or set a compacted aggregate base, then apply a 3/4-to-1-inch mortar setting bed (Type S mortar for outdoor use).
- Set each tread on the mortar bed and tap to level with a rubber mallet. Check for front-to-back pitch (1/8 inch per foot forward pitch to shed water) and side-to-side level simultaneously.
- Check that adjacent treads are flush with each other (no lippage). Shim with mortar as needed before it sets.
- For the front edge (nose/coping), make sure the tread overhangs the riser face by 1 to 1.5 inches. This overhang creates shadow line and prevents water from wicking directly into the riser joint.
- Point the joints with Type S or Type N mortar, keeping joints tight (3/8 inch or less) and tooled slightly concave to shed water.
- Cure the mortar for a minimum of 28 days before allowing heavy traffic or sealing.
One thing I always emphasize: do not use stone dust as a bedding layer for mortar-set steps. Stone dust retains moisture, doesn't compact cleanly, and will cause heaving when that trapped moisture freezes. Use properly graded crushed aggregate for your base.
Coping and edge details
The front edge of each tread takes the most wear and the most weather exposure. For steps, use bluestone that's at least 2 inches thick at the nose. If your tread is a sawn piece, have the front edge either pitched (eased) slightly or left as a square edge but check it carefully for any thin spots from the quarrying process. Thinner areas at the nose are where you'll see cracking first. Suppliers like Delaware Quarries and Connecticut Stone offer treads specifically sized and edge-finished for this application, and it's worth paying for purpose-made tread stock rather than cutting down patio field stone.
Underlayment, drainage, and freeze-thaw protection
Freeze-thaw failure is the number one reason bluestone steps fail in the Northeast and Midwest. Water gets into the base, freezes, expands, and pushes the stone up. When it thaws the stone drops back, but not always exactly where it started. After a few cycles you have rocking, lifted, or cracked steps. The fix is almost never about the stone itself: it's about the base and drainage.
Base depth by climate
- Mild climates (frost depth under 12 inches): 4 inches of compacted crushed stone base is typically adequate for pedestrian steps.
- Moderate freeze-thaw climates (frost depth 12 to 36 inches): 6 inches of compacted crushed stone base minimum.
- Deep-frost zones (frost depth over 36 inches): 8 inches of compacted crushed stone, and seriously consider a concrete footing below frost depth with mortar-set treads on top.
Use angular crushed stone (not rounded gravel or pea stone) for your base because it interlocks and compacts tightly. A 3/4-inch clean crushed stone or dense-graded aggregate works well. Avoid anything that retains water, which rules out stone dust and fine sand as base materials.
Drainage fabric (geotextile) at the bottom of your excavation helps prevent fine soil from migrating up into your base and reducing drainage over time. It's cheap insurance, especially if you have clay-heavy soil.
For additional freeze-thaw protection, make sure each step has that 1/8-inch-per-foot forward pitch so water runs off the tread surface rather than pooling. Any water that sits on the stone surface and then freezes can eventually work into micro-cracks and cause spalling. Keep the joints tight and well-pointed to minimize water infiltration paths.
Mortar, grout, joint fill, sealing, and maintenance
Mortar and joint fill choices
For outdoor bluestone steps, Type S mortar is the standard specification. It has higher strength and better freeze-thaw resistance than Type N, which matters when you're in a climate with real winters. Mix it slightly stiff (it should hold its shape when squeezed) to avoid excess water in the mix, which weakens the cured joint.
If you're setting treads with wider joints (3/4 inch or more), polymeric jointing sand is an option for the joint fill rather than traditional mortar pointing. Products like Evolution Polymeric Sand are formulated to remain semi-flexible in freeze-thaw cycles, which reduces the cracking you'd see with rigid mortar in wide joints. Apply it dry, sweep into joints, then activate with water. It's not as strong as mortar pointing for step edges, but it works well for field joints in the tread layout.
Sealing
Bluestone is dense enough that sealing is often optional rather than mandatory, but for steps it's worth doing. A penetrating (impregnating) sealer soaks into the stone and blocks water and stain absorption without creating a film on the surface that can peel or become slippery. STONETECH’s surface care guide also describes applying penetrating sealers by letting the sealer penetrate and then dwell or cure according to the specific product instructions blank" rel="noopener noreferrer">penetrating (impregnating) sealer soaks into the stone. Apply one coat to clean, dry stone, let it dwell according to the product instructions, and wipe off the excess before it hazes. Dense stone like bluestone typically takes only one coat; applying a second coat before the first has fully penetrated just leaves a surface film that causes problems.
For honed bluestone steps that need slip resistance, look for a sealer that includes a slip-resistant additive, or use a separate topical anti-slip treatment. Be aware this will need to be reapplied more frequently than a standard penetrating sealer, typically annually in high-traffic areas.
Ongoing maintenance
- Clean steps once or twice a year with a pH-neutral stone cleaner. Avoid acidic cleaners (vinegar, muriatic acid) which etch bluestone and degrade mortar joints.
- Inspect mortar joints every spring after freeze-thaw season. Tuck-point any joints that are crumbling or missing material before water gets into the base.
- Re-seal every 3 to 5 years for penetrating sealers, or annually if you're using a topical slip-resistant coating.
- Remove ice with plastic shovels and calcium chloride ice melt rather than rock salt (sodium chloride), which can accelerate surface spalling and mortar deterioration.
Common problems and how to fix them
Rocking or shifting steps
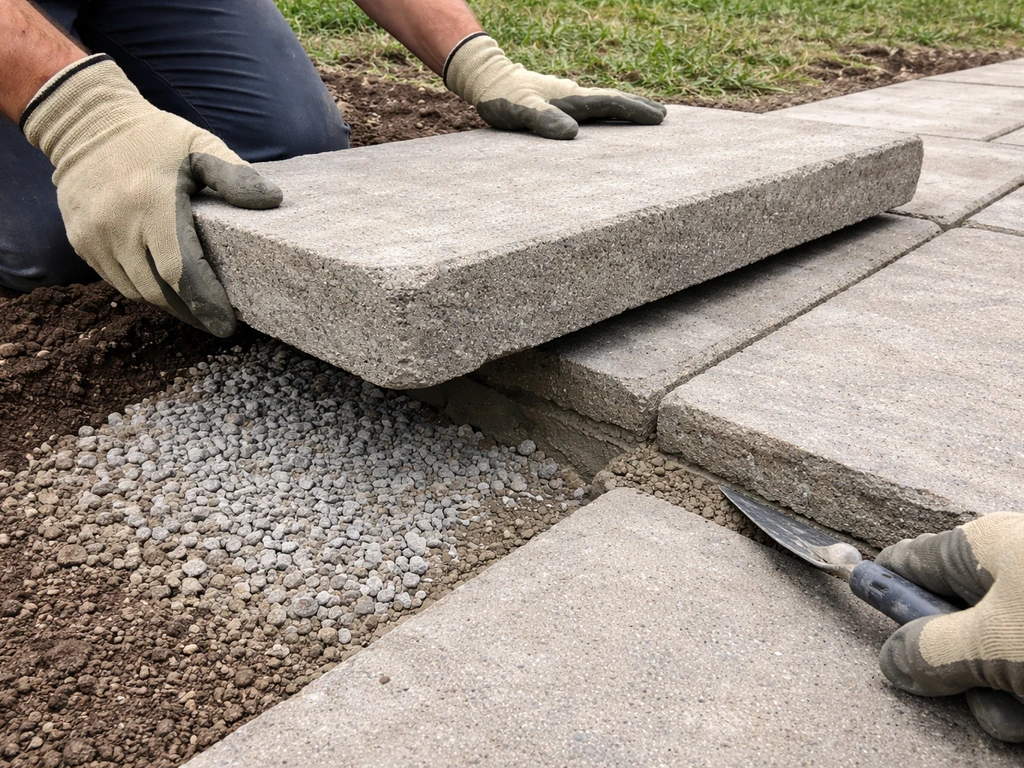
A step that rocks underfoot has failed below the surface. The most common cause is base failure, either from poor drainage, inadequate compaction, or freeze-thaw movement in the base material. The fix is to pull the affected tread, assess the base, and address the root cause before resetting. If you just re-mortar the tread without fixing the base, it will rock again within a season or two. Remove the stone, compact or rebuild the base layer, and re-set with fresh Type S mortar.
Lippage between adjacent treads
Lippage means one tread sits higher than its neighbor, creating a tripping edge. On new installation this is a setting error. On established steps it usually means one stone has heaved while the adjacent one hasn't. If the height difference is minor (under 1/4 inch) you can sometimes grind the high edge down. For anything larger, the high stone needs to come up, the base or mortar bed needs to be corrected, and the stone gets reset. Don't ignore lippage on steps: it's a tripping hazard and will get worse.
Cracking
Cracks in bluestone treads almost always start at the nose (front edge) or at thin spots in the stone. A crack running across the width of a tread usually means the stone was set without full support under the front edge, or the base settled unevenly. For small surface cracks, a color-matched epoxy filler can stabilize and seal the crack. For a tread that's cracked through the full thickness, replacement is the right call: a split tread is structurally compromised and will continue to deteriorate. When you replace it, inspect the stone you order and reject any pieces with visible thin spots near the nose.
Spalling and surface flaking
Surface spalling (flaking or delaminating of the surface layer) is almost always water-related. Water gets into micro-pores, freezes, and pops the surface off. It's most common on honed or sawn surfaces that weren't sealed, on stone that had surface water pooling, or on steps where de-icing salt was used. Minor spalling can be addressed by cleaning, drying thoroughly, and applying a penetrating sealer to stop further water infiltration. Severe spalling, where the surface has lost significant material, typically means the stone needs to be replaced. Inspect replacement pieces for uniform thickness and no existing surface delamination before setting.
Loose or deteriorating mortar joints
Mortar joints fail over time, especially in freeze-thaw climates. Once joints open up, water gets in, the stone can shift, and the steps become unsafe. Tuck-pointing is a straightforward repair: use a grinder or cold chisel to remove loose mortar to a depth of about 3/4 inch, blow out the dust, dampen the joint, and pack fresh Type S mortar in with a pointing tool. Feathering new mortar over old is not a durable repair: you need to remove the failed material first.
Cost, budgeting, and sourcing the right stone
What drives the cost
Bluestone steps cost more than most people expect until they understand what they're actually paying for. Material cost is driven by stone thickness, size, finish, and grade. Here's how those factors stack up:
- Thickness: 1.5-inch treads are the least expensive but not ideal for exposed-edge steps. 2-inch and 2.5-inch treads cost more but hold up better at the nose. Purpose-made 6-inch-thick monolithic step blocks are the most expensive material option.
- Finish: Natural cleft is the base price. Thermal (flamed) costs more because it requires processing, but it's worth the premium for steps where traction matters. Honed costs more and performs worse outdoors, so avoid it for exposed steps.
- Size: Standard sizes like 36x16 and 48x16 inches are stocked and priced off the shelf. Custom cuts cost significantly more and usually involve fabrication lead time.
- Grade and select: 'Select' grade bluestone has more consistent color and fewer inclusions. Standard or utility grade is less expensive but may have more surface variation and occasional thin spots.
- Labor vs DIY: Professional installation of bluestone steps typically adds significant cost over material-only. DIY is feasible for experienced homeowners doing a small number of steps, but base preparation and leveling accuracy are non-negotiable.
What to ask vendors before you buy
Most failures I've seen with bluestone steps trace back to someone buying the wrong material, not installing it incorrectly. Here's what to confirm before you commit to a supplier:
- What is the actual (not nominal) dimension of the treads? Confirm this in writing so your layout calculations are accurate.
- What is the actual thickness, and is it consistent across the piece? Ask for a minimum thickness guarantee, especially at the nose edge.
- Is this material rated for outdoor/freeze-thaw use? Some thinner or lower-grade pieces are suitable only for interior applications.
- What finish is this, and how was it produced? Thermal finish should be uniform across the whole tread surface, not just on portions of it.
- Is this Pennsylvania or New York bluestone? Both are excellent, but know what you're getting and confirm it's not a cheaper imported material labeled similarly.
- What is the lead time for your stock sizes, and what is the upcharge for custom cuts? Plan your order early if you need non-standard sizes.
- Can I see a sample piece before ordering? For steps especially, surface consistency and color should be checked in person before a large order.
For most residential projects with four to eight steps, budget for material plus professional labor if you're not experienced with masonry. If you're confident in your base prep and leveling skills, setting the treads yourself after a contractor prepares the base is a reasonable hybrid approach that saves money without compromising the most critical part of the job.
FAQ
How do I figure out how many bluestone patio step units I need before I order?
Measure the run of your steps in inches from the intended landing height, then convert to a tread-and-riser plan before ordering. Bluestone is sold in standard tread unit sizes, so you may need to adjust the number of steps or trim less than you think, especially when maintaining a consistent rise and run across every tread.
What should I verify at the transition between my patio and bluestone patio steps to prevent ice pooling?
If the steps will connect to an existing patio, check the patio slope and look for low spots within about 3 feet of the transition. If the patio sheds toward the house, water can collect at the top tread and refreeze, even if the steps themselves are built correctly.
Is natural cleft bluestone as slip-resistant as thermal bluestone for outdoor steps?
Thermal bluestone is usually safer than natural cleft for consistent traction because the surface texture is more uniform across pieces. If you choose natural cleft anyway, install a dry-fit test row and wet the cleft faces, then discard individual stones that feel smooth or “waxy” when wet.
Why do mortar-set bluestone patio steps sometimes still rock or heave after installation?
In mortar-set installations, the base layer must be angular crushed stone and properly compacted, not fine, moisture-holding material. If you use a bedding layer that can retain water (like stone dust), freeze-thaw cycles can lift the tread even when the mortar joint itself is intact.
If my bluestone step is already rocking, can I just re-mortar it and move on?
Yes, but only after you address the base. Pull the affected tread(s), rebuild or re-compact the base, then re-set with Type S mortar; otherwise the rocking pattern returns. For long-term stability, also confirm the original forward pitch and drainage path away from the steps.
When replacing a cracked bluestone tread, what stone defects should I look for besides visible cracking?
For any replacement stone, reject pieces with visible thin spots near the nose. Even if the overall thickness meets spec, a weak nose area is where cracks start, and it can telegraph problems to neighboring treads once loads concentrate.
Can lippage on bluestone patio steps be fixed without removing the stones?
If lippage is less than about a quarter inch, some cases can be corrected by grinding the high edge, but you must also ensure the stone is fully supported beneath that high area. If grinding exposes voids or creates a thin nose, resetting with base correction is the safer fix.
What mortar should I use for bluestone patio steps in freeze-thaw climates?
Use Type S mortar for outdoor steps, and mix a stiff consistency that holds shape when squeezed. A wetter mix can increase shrinkage and weaken freeze-thaw performance of the joint, which often shows up as joint opening and subsequent stone movement.
Will sealing honed bluestone steps make them slippery, and how should I choose a sealer?
Avoid flexible or film-forming sealers on steps if they reduce grip when wet. For honed or low-texture surfaces, choose a penetrating sealer designed with a slip-resistant additive or use a topical anti-slip product, then plan to reapply as the safety coating wears.
How many coats of sealer should I apply to bluestone patio steps, and how do I avoid a film on the surface?
When sealing, apply to thoroughly clean, dry stone, then wipe off excess if the surface hazes. Dense bluestone often needs only one coat, and adding more before the first fully penetrates can leave a surface film that deteriorates performance.
Can I use polymeric jointing sand for filling joints in bluestone patio step layouts?
For wide joints, polymeric sand can work for tread field joints, but it is not a substitute for proper edge support where loads concentrate. If step-edge joints are critical to your detailing, rely on mortar for those areas and reserve polymeric infill for non-edge joints.
What does a bluestone tread crack pattern across the width usually indicate, and what should I fix first?
If a crack runs across the tread width, it often indicates uneven support under the front edge or uneven base settlement. Before replacing or repairing the stone, confirm full support beneath the nose and correct the base so the same loading pattern cannot recreate the crack.