To build stone patio steps that stay put, look great, and won't ice over dangerously, you need three things working together: correct riser-and-tread geometry (7 to 7.75 inches rise, 12 to 16 inches tread depth), a compacted and well-drained aggregate base at least 4 to 6 inches deep, and stone thick enough and rough enough to give real traction in wet or freezing weather. Get those three right and the rest is mostly execution.
Stone Steps Patio: Layout, Sizing, Installation Guide

Nolan Ellison
1 May 2026
Where stone patio steps fit and what to plan first
Before you pick a single stone, figure out exactly where the steps need to go and what conditions they'll face. The most expensive mistake I see is dropping steps into a low spot where water naturally pools. In a freeze-thaw climate, that's a guaranteed failure within two or three winters. Walk your yard after a heavy rain and note where water sits. Your step location should be draining, not collecting.
Also think about the transition between the steps and the patio surface itself. Steps from a house down to a patio are a slightly different challenge than steps built into the patio perimeter where the grade changes. In both cases, the patio surface needs to slope away from any structure at roughly 1:60 to 1:80, which works out to about 12 to 17 mm of drop per meter (or about 1/8 to 1/4 inch per foot). That slope prevents water from pooling at the base of the steps and turning the whole surface into a skating rink.
While you're at it, count your steps before you start digging. Measure the total vertical rise from the patio surface to the upper landing, divide by your target riser height (start with 7 inches and adjust), and you'll know exactly how many steps you need and how far the staircase will extend horizontally. Doing this math before you excavate saves you from discovering a geometry mismatch halfway through the job.
Choosing the right stone for patio steps
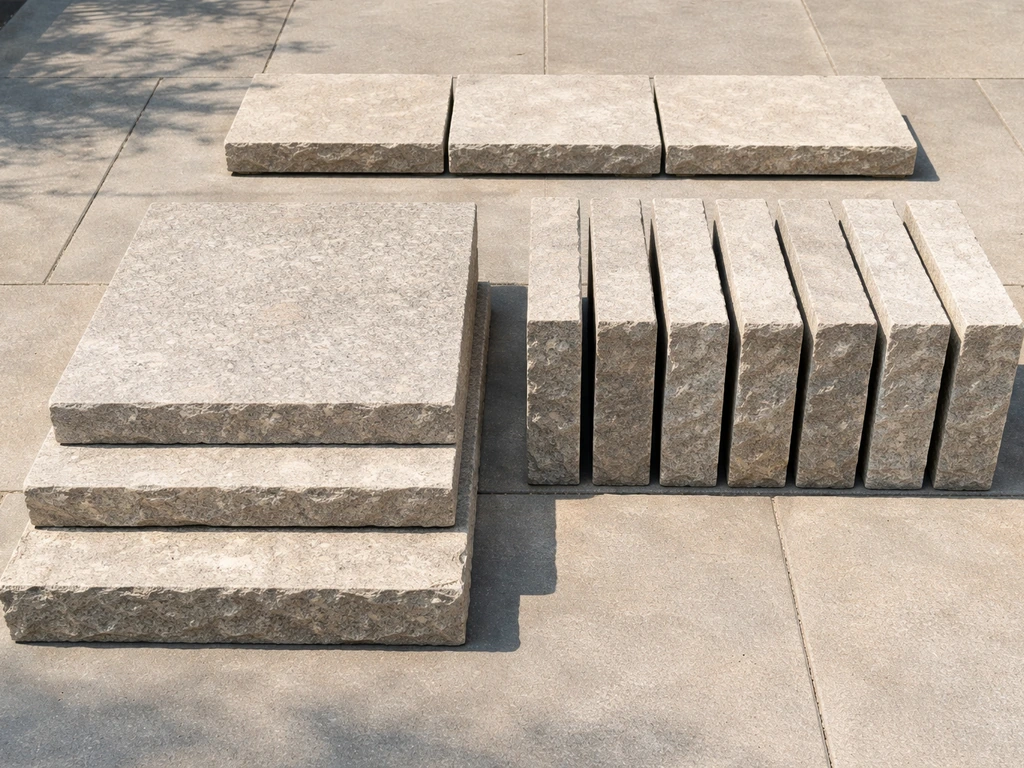
Not every stone that looks good on a patio surface is safe or practical for steps. Steps take concentrated foot traffic, repeated impact, and serious leverage stress when someone trips or catches a heel. Always buy stone specifically rated or sold for step treads, not standard paving slabs. Tread-grade stone is typically thicker (2 inches minimum, often 3 to 4 inches for natural stone treads) and cut to handle edge loading.
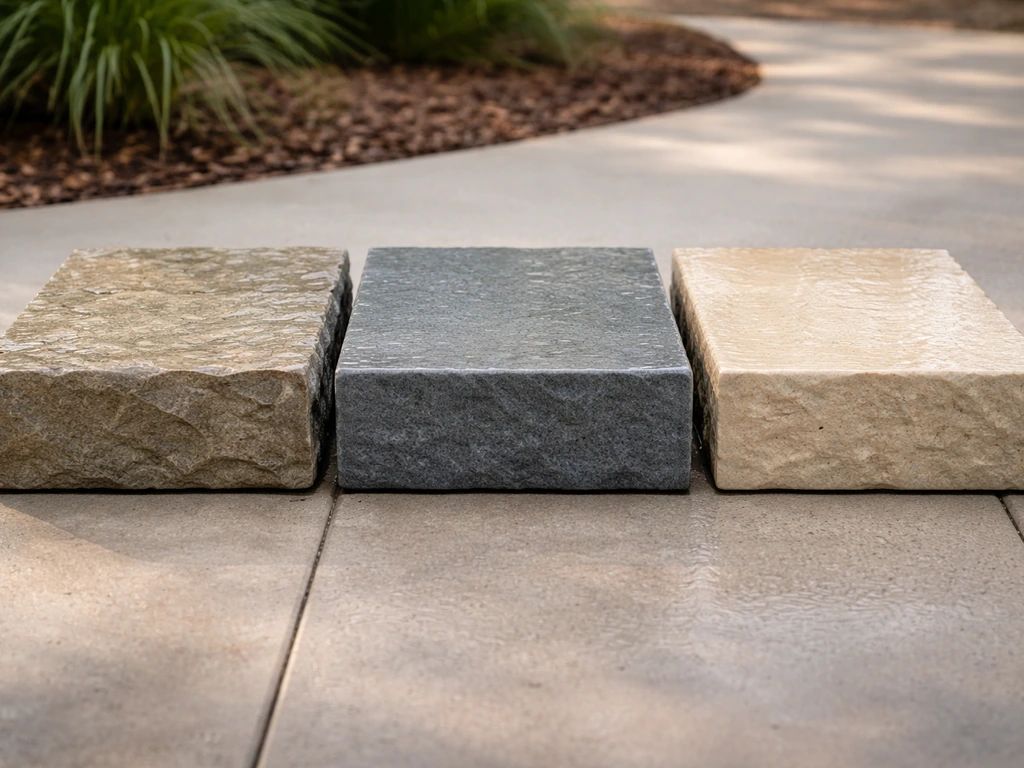
Natural stone options
Flagstone is a popular choice because the natural cleft surface gives built-in slip resistance without any extra treatment. Irregular flagstone has a rustic character that works beautifully in informal garden settings, but the uneven thickness makes it harder to achieve consistent riser heights across a flight of steps. If you go with flagstone, sort your pieces by thickness before laying anything and build up your bedding layer to compensate for variation.
Bluestone is probably the most commonly spec'd material for formal stone patio steps. It's dense, durable, and comes in consistent sawn dimensions that make geometry control much easier. The traction story with bluestone depends heavily on finish: thermal finish (also called flamed) creates a rougher, reliably grippy surface and is the right call for outdoor steps. Honed bluestone looks elegant but gets slippery when wet and should only be used outdoors if you apply a slip-resistant topical sealer, and even then it needs monitoring. Fieldstone and quarried limestone are also popular depending on region, and both perform well when they're thick enough and properly supported.
Manufactured and paver-based options
Concrete patio pavers and manufactured stone step units offer dimensional consistency that natural stone can't always match. They're easier to work with if you're doing a DIY installation and need precise riser heights. The trade-off is character: they rarely have the same visual weight as a thick natural stone tread. For a patio where the steps are integrated into a paver field, using matching paver step units often makes the most sense aesthetically and practically. Pavers require edge restraint and a proper layered base just like natural stone, but the installation system is more standardized.
| Material | Traction (untreated) | Freeze-thaw durability | Dimensional consistency | Relative cost | Best for |
|---|---|---|---|---|---|
| Flagstone (natural cleft) | Excellent | Good if dry-laid | Low (variable thickness) | Medium | Informal/rustic patios |
| Bluestone (thermal finish) | Very good | Excellent | High (sawn sizes) | Medium-high | Formal patios, high use |
| Bluestone (honed finish) | Poor when wet | Excellent | High | Medium-high | Indoor or treated only |
| Fieldstone/limestone | Good | Good to excellent | Low-medium | Low-medium | Naturalistic, rural settings |
| Concrete paver step units | Good (textured face) | Excellent | Very high | Low-medium | Paver patio integration |
| Manufactured stone veneered steps | Variable | Moderate | High | Medium | Cosmetic upgrades |
Layout, measurements, and slope rules for safe steps
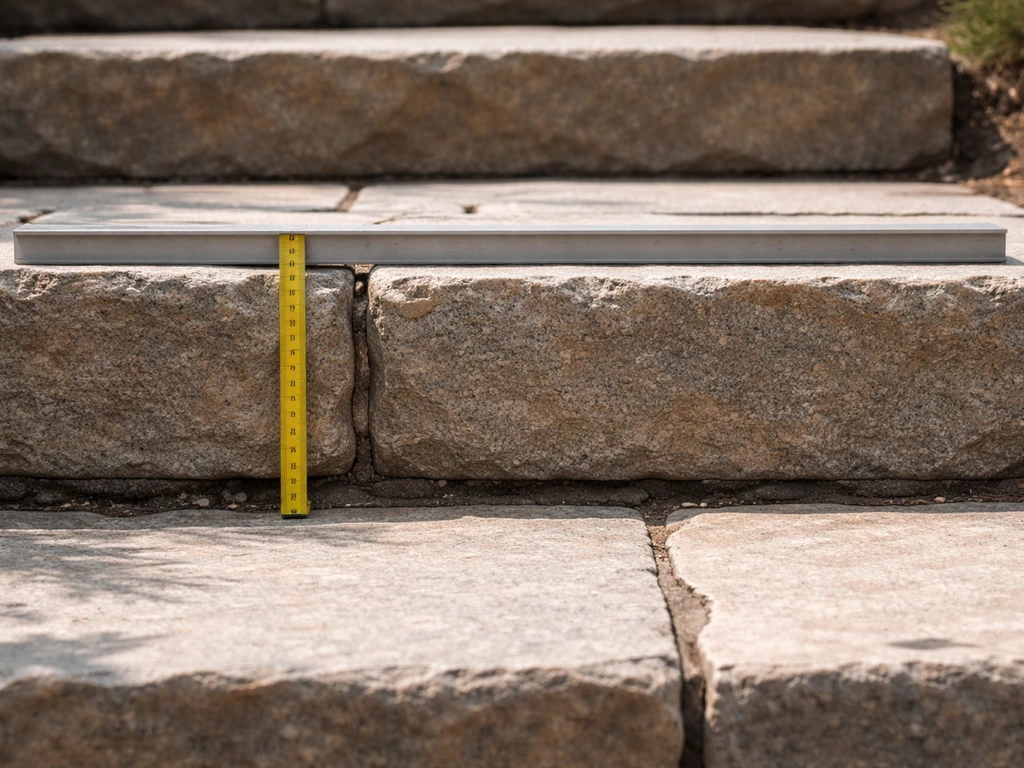
Getting the geometry right isn't optional. Inconsistent riser heights are the single biggest cause of trips on outdoor steps, and the IRC (International Residential Code) is clear on this: within a single flight, blank" rel="noopener noreferrer">the tallest riser can't differ from the shortest by more than 3/8 of an inch. That tolerance is tighter than most people expect, especially when you're working with natural stone that has thickness variation.
For outdoor landscape steps, target a riser height of 6 to 7.75 inches. Going below 6 inches makes shallow risers that people tend to stub toes on; going above 7.75 inches makes steps feel steep and tiring. For tread depth, 12 to 16 inches is the practical sweet spot for landscape construction. Deeper treads (14 to 16 inches) feel more comfortable and give more room to land your foot securely, which matters especially when carrying things or when steps are wet.
The nosing, the front edge of the tread that overhangs the riser face, is worth getting right. The IRC specifies nosing projection of not less than 3/4 inch and not more than 1-1/4 inches for residential stairs. For stone steps, a small natural overhang on the tread edge or a slightly bullnosed cut both work. The nosing is critical for safety because it's where your foot makes first contact with the step and where wet stone is most hazardous.
Work your layout from the bottom up. Set a story pole or use a level and tape measure to mark your riser heights on a stake at the side of the staircase run. Shaping your layout from the ground up ensures that any rounding adjustment happens at the top step, not the middle, where it would create a hidden inconsistency. If the numbers don't divide evenly, it's usually easier to adjust tread depth slightly than to change riser height.
Base, subgrade, and drainage: build it so it won't shift
The base is where most failing stone steps went wrong. A thin or poorly compacted base lets frost heave the stones unevenly, lets water pond underneath and accelerate freeze-thaw damage, and eventually causes the whole flight to settle in different directions. This is not an area to cut corners.
For most residential stone steps, excavate at least 6 to 8 inches below the bottom of your first stone, more if you're in a cold climate (USDA zone 6 or colder) or on clay-heavy soil. Fill with compacted crusher-run (Granular A or equivalent 3/4-inch minus aggregate) in layers, compacting each 3-to-4-inch lift before adding the next. In drainage-sensitive spots, use an open-graded clear stone base over permeable landscape fabric to actively move water through the base rather than letting it saturate. FusionTurf’s fusion-style drainage guidance recommends using an open-graded, angular stone base over separation fabric to improve subsurface drainage and help reduce freeze-thaw heave risk open-graded clear stone base over permeable landscape fabric to actively move water through the base.
Drainage sequencing matters too. Extend the compacted base several inches behind each stone so water that infiltrates through the joints has a path to move through aggregate rather than building up against the back of a riser. If water gets trapped between a riser stone and saturated soil, the first hard freeze will push that riser forward. I've seen beautifully built natural stone steps get destroyed in a single winter simply because no thought was given to where the water behind the risers was going.
In climates with significant freeze-thaw cycles, dry-laid construction (stones bedded in compacted stone dust or granular material without mortar) is often more durable long-term than fully mortared steps. Mortar bonds are rigid; dry-laid systems can flex and settle slightly without cracking. If a dry-laid stone does move, you can reset it without demolition.
Step construction options: treads, risers, and cap stones
There are a few different ways to build the actual step structure, and the right choice depends on your material and the total rise you're dealing with.
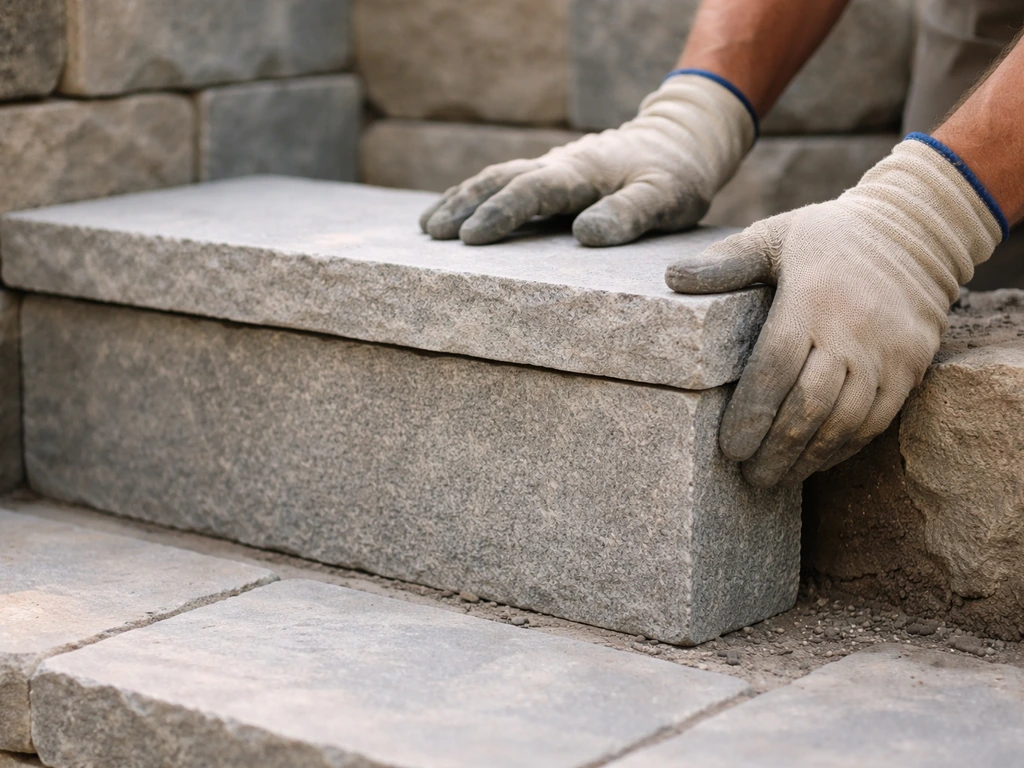
Stacked slab method
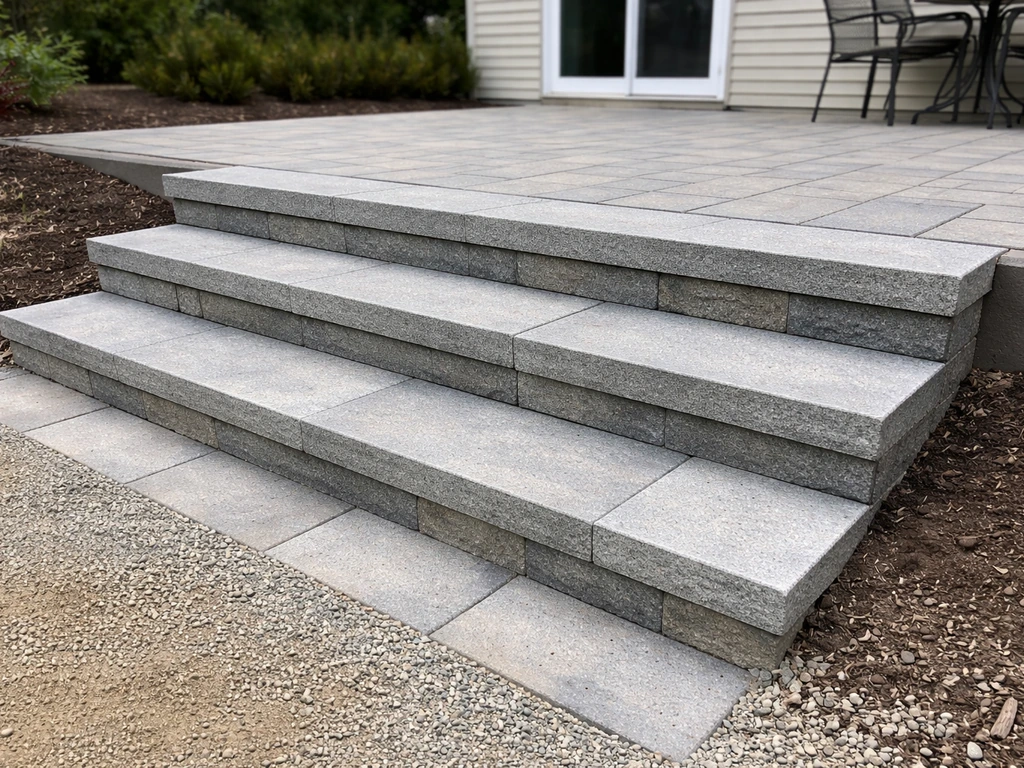
This is the most common approach for natural stone steps on patios. Each step is a thick stone slab (or a stack of thinner slabs) that creates both the tread surface and the visible riser face below it. The front of each upper slab overhangs the slab below it slightly, creating the tread nosing. This method works well for bluestone, limestone, and other dimensional stone. The key is making sure each slab is fully supported, especially at the back edge, so it doesn't tip under load.
Separate tread and riser method
More common in formal masonry construction, this approach uses a separate upright riser stone or block with a tread stone laid on top. It gives you more flexibility in riser height but requires more precise cutting and more masonry skill to execute cleanly. Mortared joints between tread and riser add rigidity but also add freeze-thaw vulnerability unless you have excellent drainage beneath.
Cap stone steps on a block core
For taller staircases or where you're integrating steps with a retaining wall, building a concrete block or dry-stacked stone core and then capping with your finish stone is a smart approach. The block core does the structural work; the cap stone provides the tread and aesthetic finish. This is often used when steps from a house down to a patio involve a significant grade change of 3 or more steps.
Paver step systems
Manufactured paver step units stack cleanly and pair well with paver patios. They need a compacted base, a flat bedding layer (sand no thicker than 1.5 inches), and edge restraint to prevent lateral spreading. The advantage is that everything is engineered to consistent dimensions, so riser consistency is easier to achieve. The limitation is that you're constrained to whatever heights and depths the manufacturer offers, which may not perfectly match your grade change.
Installation best practices for stone steps on patios
Once your base is compacted and your layout is marked, work from the bottom step up. Setting the bottom step first and working upward ensures each successive stone bears on the one below it, which is how the weight is meant to transfer. Setting top-to-bottom is a common beginner mistake that can leave the bottom stone under-supported.
- Excavate and compact subgrade, then build up compacted aggregate base in lifts. Check base level and slope before proceeding.
- Set the bottom step first. Bed it in compacted stone dust or a priming mortar slurry depending on your installation method (dry-laid or mortared). Check for level side-to-side and correct front-to-back pitch (a very slight forward pitch of about 1/8 inch helps water shed off the tread).
- Set each successive step, checking riser height with a consistent reference point (your story pole or a measured rod). Verify that each riser falls within 3/8 inch of the others.
- For paver or block-based steps, install edge restraint at the sides before backfilling. For natural stone, the weight of the stone provides lateral stability, but the base must extend fully under the stone.
- Fill joints with polymeric sand (for paver systems) or dry mortar mix (for natural stone with tight joints). For polymeric sand: make sure all surfaces are completely dry before sweeping in the sand, then mist in stages to activate the polymers through the full joint depth.
- Check that the top step aligns flush or slightly below the patio surface or landing so there's no raised lip to catch a toe.
- Allow jointing material to fully cure before heavy use. Polymeric sand typically needs 24 hours; mortar joints need 48 to 72 hours depending on temperature.
The alignment between the steps and the patio is a detail that's easy to under-think. If the patio surface is set at a specific elevation, the top step tread needs to land at the right height so the transition is smooth and there's no trip hazard at the patio edge. Mock this up dry before you set anything in mortar or compact any bedding material permanently.
Maintenance, sealing, repairs, and keeping steps safe in winter
Stone steps are low-maintenance compared to wood or composite, but they're not no-maintenance. A few consistent habits will keep them safe and looking good for decades.
Cleaning
Sweep or blow debris off stone steps regularly, especially in fall when wet leaves create both a slip hazard and a staining problem. Cracked or uneven patio steps brick can also collect debris and worsen slip and trip risks. For a deeper clean, use a stone-safe cleaner (not acidic cleaners on limestone or bluestone) with a stiff brush. Pressure washing works well at low to medium pressure but avoid directing a high-pressure stream at joints, which can erode jointing sand.
Sealing
Most natural stone steps benefit from sealing, especially in climates with significant moisture and freeze-thaw cycles. Seal annually in spring as a practical rule; some denser stones like bluestone or granite can go two years between applications. Use a penetrating (impregnating) sealer for most natural stone, which protects without leaving a surface film that can peel. For smoother stones used outdoors, choose a sealer with a slip-resistant additive or apply a dedicated anti-slip topcoat separately. Honed bluestone steps used outdoors absolutely need this treatment.
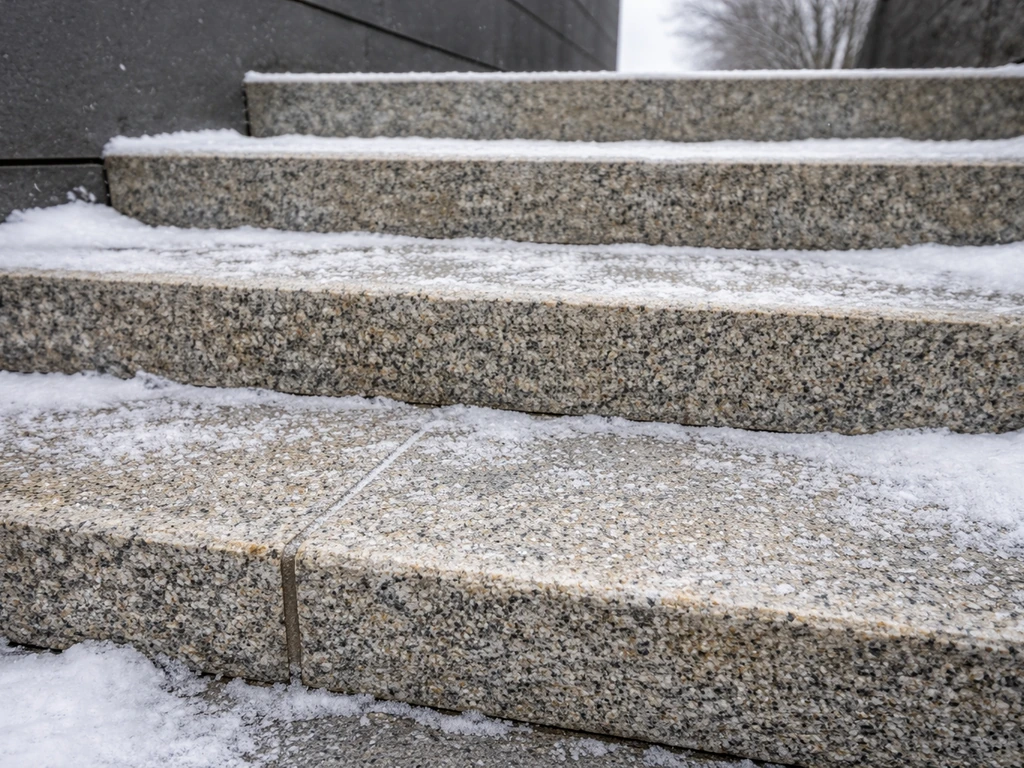
Winter traction and ice management
Stone steps in cold climates need a traction plan. Naturally textured stone (flagstone, thermal-finish bluestone, rough-cut limestone) performs reasonably well, but any stone can become dangerous under ice. Avoid rock salt (sodium chloride) on natural stone steps: it's corrosive and accelerates surface spalling over time. Use calcium magnesium acetate or sand-based traction products instead. A simple rubber-backed mat on the most-used step tread adds meaningful grip without damaging the stone.
Fixing settlement and cracks
If a stone tips or settles unevenly, address it quickly: a rocking stone is both a trip hazard and a sign that the base beneath it has failed. For dry-laid steps, this is usually a simple reset: lift the stone, add or regrade the bedding material underneath, and reset. For mortared steps, you'll need to chip out the old mortar, clean the surface, and re-bed with fresh mortar. Cracked treads should be replaced rather than patched; a cracked tread is a safety liability and structural patches on stone rarely last.
Keep joints topped up with jointing sand or appropriate material. As jointing sand erodes, the bedding layer beneath is exposed and vulnerable to water intrusion and eventual base deterioration. Topping off joints every year or two is a five-minute job that prevents a much bigger problem later.
Finally, if you're comparing stone steps to other materials like brick or composite step systems, the basic planning and base-building principles are the same. What changes is material durability, traction characteristics, and how forgiving the installation system is when your geometry isn't perfect. Stone, done right, is one of the most durable and practical choices you can make for a patio step system, and it ages in a way that manufactured materials rarely do.
FAQ
Can I use thinner patio pavers or slabs as stone steps to save money?
Usually not. Even if they look thick enough, step treads need edge support and repeated impact resistance. If the stone is not sold or rated for treads, plan on a higher failure risk from cracking, chipping at the nosing, and rocking as the base settles.
What should the patio base slope be right at the bottom step?
Aim for drainage to carry water away from the step area, then extend that logic across the landing. A common mistake is matching the patio slope but leaving the soil under the first riser flat or lower, which lets water infiltrate and freeze beneath the bottom stones.
How do I handle a staircase width that changes or a curved run?
Keep the tread geometry consistent per step (same riser height and tread depth) even if the outside edge curves. For a curved run, use smaller stones or cut segments and double-check that the landing edges still meet the required patio transition height to avoid a hidden lip where people step off.
Is dry-laid always better than mortared stone steps in freeze-thaw climates?
Dry-laid is often more forgiving, but it still requires a properly compacted, well-drained base and correctly sized stones. If you choose mortared construction, you must prioritize drainage and avoid trapping water behind risers, because rigid mortar can hold a problem in place longer.
How tight do riser heights need to be if I am using natural stone with varying thickness?
Treat your story-pole marks as the final riser targets, then sort or pre-select stones to minimize thickness swings. If you cannot get consistent thickness, adjust tread depth more often than riser height, but stay within the small allowable variation for a single flight.
What bedding material thickness should I use under step treads?
Use only as much bedding as needed to achieve a flat, solid support plane. Too much sand or dust bedding can compress over time, leading to rocking and uneven step faces. For systems that call for sand bedding, keep it limited (for paver step units, typical limits are around 1.5 inches).
Do I need an expansion joint between the stone steps and the patio surface?
Yes, in practice you should plan for movement at the interface. Even with careful base work, patios and steps can settle slightly differently, so a small separation or flexible jointing approach helps prevent cracking and keeps the nosing transition from becoming a trip edge.
Why is water sometimes pooling behind riser stones even when the yard slopes away?
The slope often drains the surface, but water can still infiltrate through joints and travel toward the path of least resistance. If there is not enough aggregate and a clear drainage path behind each riser, it can saturate soil at the riser back edge and freeze later, pushing stones forward.
Is sealing mandatory on all stone steps?
Not always, but it is strongly recommended for outdoor steps exposed to moisture and freeze-thaw. Penetrating sealers help reduce staining and slow water absorption, and some stones, like honed bluestone outdoors, require slip-resistant treatment to stay safe when wet.
What is the safest traction approach for icy locations?
Use stone-appropriate traction surfaces first, then add a reversible aid where people step most. Avoid rock salt on natural stone steps because it can accelerate surface breakdown, instead use calcium magnesium acetate products or sand-based traction, and consider a rubber-backed mat on the top-used tread.
If a single step rocks, do I repair it by resetting or re-mortaring?
For dry-laid steps, resetting is usually the right fix: lift the stone, regrade and recompact the bedding/base support, then reset. For mortared steps, you generally need to remove failed mortar and rebuild the bed, because simply adding more mortar often leaves the underlying void or drainage issue.
How often should I top up jointing sand?
Plan on checking annually, especially after winter freeze-thaw and heavy rain. If joints look open or uneven, add appropriate jointing material promptly to keep water from reaching the base through eroded joints.