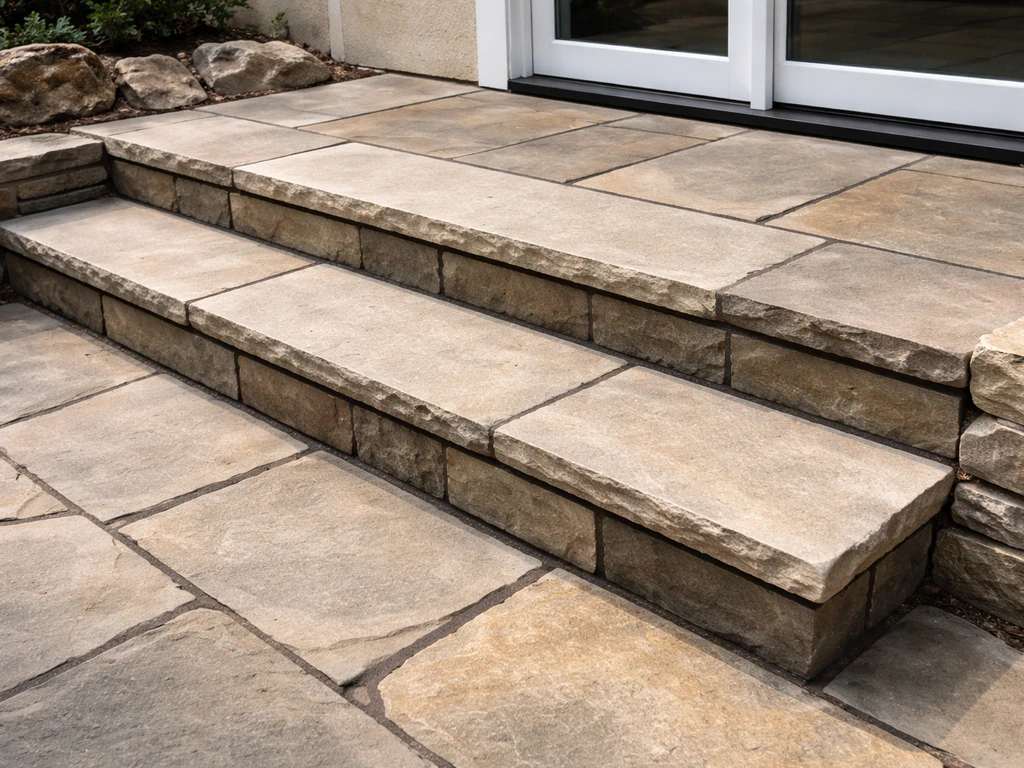
Natural stone patio steps that stay level, look great, and don't become a slip hazard come down to three things: picking the right stone for your climate, building a solid compacted base with proper drainage, and setting each stone so it can't rock or shift. Skip any one of those and you'll be releveling slabs or pulling moss off a slick surface within a few years. This guide walks you through the whole process, from choosing stone at the yard to sealing the finished steps, so you can either do it yourself with confidence or hand a contractor specs they actually need to quote accurately.
Natural Stone Patio Steps: Install, Design, and Maintain

Nolan Ellison
17 May 2026
Choosing the right natural stone for outdoor steps
Not every beautiful stone at the landscape yard belongs on a set of exterior steps. Steps take more abuse than a flat patio surface: foot traffic concentrates on the front edge, freeze-thaw cycles attack the exposed nosing, and rain hits at an angle that accelerates erosion on soft stones. The two things to focus on first are hardness and surface texture.
Granite is the workhorse choice. It's dense, absorbs almost no water (typically under 0.4%), resists freeze-thaw damage exceptionally well, and holds up to decades of foot traffic without worn edges. The trade-off is cost and weight: granite treads run heavier and more expensive than sandstone or limestone. If you're in a cold climate with hard winters, granite is the stone worth the premium.
Bluestone (a form of sandstone) is probably the most popular step stone in North America, and for good reason. It's hard enough for exterior use, naturally textured on its cleft face, cuts cleanly into uniform treads, and looks handsome with almost any house style. Thermal-finish and cleft bluestone both hold up well in cold climates. Pennsylvania and New York bluestone are reliable; just make sure you're not buying a softer sandstone sold loosely as 'bluestone' by a budget yard.
Limestone works well in moderate climates. It's more porous than granite or bluestone (absorption rates of 3-8% are common), which makes it vulnerable to freeze-thaw spalling in cold zones unless it's a particularly dense variety. In the Southwest or Southeast it's a great option and gives a clean, refined look. Avoid polished limestone outdoors entirely: it becomes dangerously slick when wet.
Flagstone (usually sandstone, quartzite, or slate pieces cut to irregular or sawn shapes) is often used for informal step construction. Quartzite is the toughest of the flagstone family and handles freeze-thaw well. Slate can delaminate on exposed nosing edges over time in wet climates. Sandstone is soft and wears quickly under heavy use, though it works fine for light-traffic garden steps.
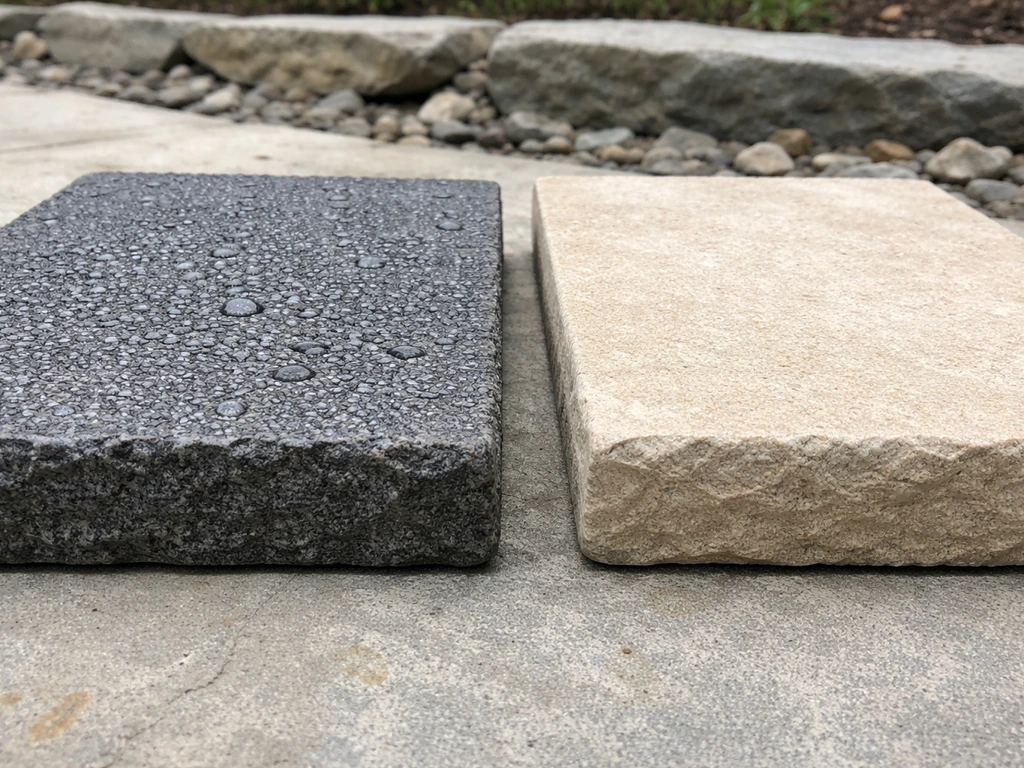
Surface finish matters as much as stone species. Flamed or thermal finishes create a rough, open texture that drains fast and grips well. Cleft (the natural split face of slate or bluestone) is also excellent for traction. Honed finishes are smoother and less grippy when wet. Polished finishes have no place on exterior steps. Tumbled finishes land somewhere in the middle: softer edges but still reasonably textured. If you're in a rainy or humid region, flamed or cleft is the right call every time.
| Stone Type | Hardness / Durability | Water Absorption | Best Climate | Surface Options | Relative Cost |
|---|---|---|---|---|---|
| Granite | Excellent | Very low (<0.4%) | All climates, ideal for cold zones | Flamed, honed, sawn | $$$$ |
| Bluestone (sandstone) | Very good | Low-moderate | All climates, great for cold zones | Cleft, thermal, sawn | $$$ |
| Limestone | Good | Moderate (3-8%) | Moderate/warm climates | Honed, sawn, tumbled | $$-$$$ |
| Quartzite | Very good | Low | All climates | Cleft, sawn | $$$ |
| Sandstone | Fair | Moderate-high | Dry/mild climates | Natural, sawn | $$ |
| Slate | Good (can delaminate) | Low-moderate | Mild/moderate climates | Cleft | $$-$$$ |
For step treads specifically, aim for slabs at least 1.5 inches thick, and ideally 2 inches or thicker for spans wider than 4 feet. Thinner pieces crack under concentrated edge loading or when the base settles slightly. Risers can be thinner (1 to 1.25 inches) since they're not bearing direct foot load.
Safety and sizing: treads, risers, and slip resistance
Getting the proportions right is not just an aesthetic decision. Steps that are the wrong height or depth are genuinely dangerous because they disrupt your natural walking rhythm. The classic rule for exterior steps is: two risers plus one tread should equal roughly 26 inches. So a 6-inch riser pairs with a 14-inch tread; a 7-inch riser pairs with a 12-inch tread. For exterior stone steps with no railing, most designers stay in the 5.5 to 7 inch riser range and 12 to 16 inch tread depth range. Shallower risers with deeper treads feel more comfortable and are preferred for wide garden steps.
Consistency matters more than the exact number. Every riser in a flight must be the same height (within 3/8 inch maximum variation by most building codes). A single step that's even half an inch taller or shorter than the others is a trip hazard. Measure carefully and adjust your base material, not the stone, to hit a consistent riser height.
Slip resistance is where stone selection and finish choice directly affect safety. The Marble Institute of America references ASTM C1028 testing and recommends a static coefficient of friction (COF) of 0. Stone World notes that the Marble Institute of America’s guidance for ADA-jurisdiction public facilities recommends considering natural stone with a textured surface or an ASTM C1028 result of 0. 5 or higher for high-traffic areas [static coefficient of friction (COF) of 0.
](https://www. stoneworld. com/articles/83570-what-is-coefficient-of-friction). 5 or higher for high-traffic areas, especially in wet conditions.
For reference, ANSI A137. 1 sets a minimum dynamic coefficient of friction (DCOF AcuTest) of 0.
42 for wet interior tile, and exterior steps in the rain need to perform at least as well. Polished or honed smooth stone typically scores below 0. 5 when wet. Flamed granite and cleft bluestone consistently score above 0.
6 in manufacturer testing. The ADA Standards for Accessible Design also require that accessible ground surfaces be stable, firm, and slip resistant, which is worth keeping in mind if anyone using the steps has mobility limitations.
A few practical traction tips: pitch every tread 1/8 inch per foot toward the front edge so water runs off rather than pooling. Keep joints between stones 3/8 to 1/2 inch wide to allow drainage. And if you're in a climate with algae or moss growth (humid Southeast, Pacific Northwest), plan to use a stone or finish that stays drier faster, and budget for periodic cleaning.
Planning layout and site prep
Before you touch a shovel, calculate your total rise and total run. Measure the vertical drop from the top landing to the bottom landing. Divide that by your planned riser height to get the number of steps. Then multiply the number of treads by your tread depth to find out how much horizontal space the steps will occupy. This determines where your bottom step lands and whether you have room for the approach you're imagining.
Grading around the steps matters a lot for long-term stability. Water should drain away from the steps on all sides. If you have clay soil or a site that holds water, you'll need to address drainage before building. A common mistake is building beautiful steps in a low spot that collects runoff, then wondering why they're heaving and shifting after two winters. If your goal is stone steps from house to patio, pay special attention to tie-in details and drainage so the run stays level year after year. If the area around your steps is flat or bowls inward, regrade it so water flows away, or install a French drain or channel drain at the base of the steps.
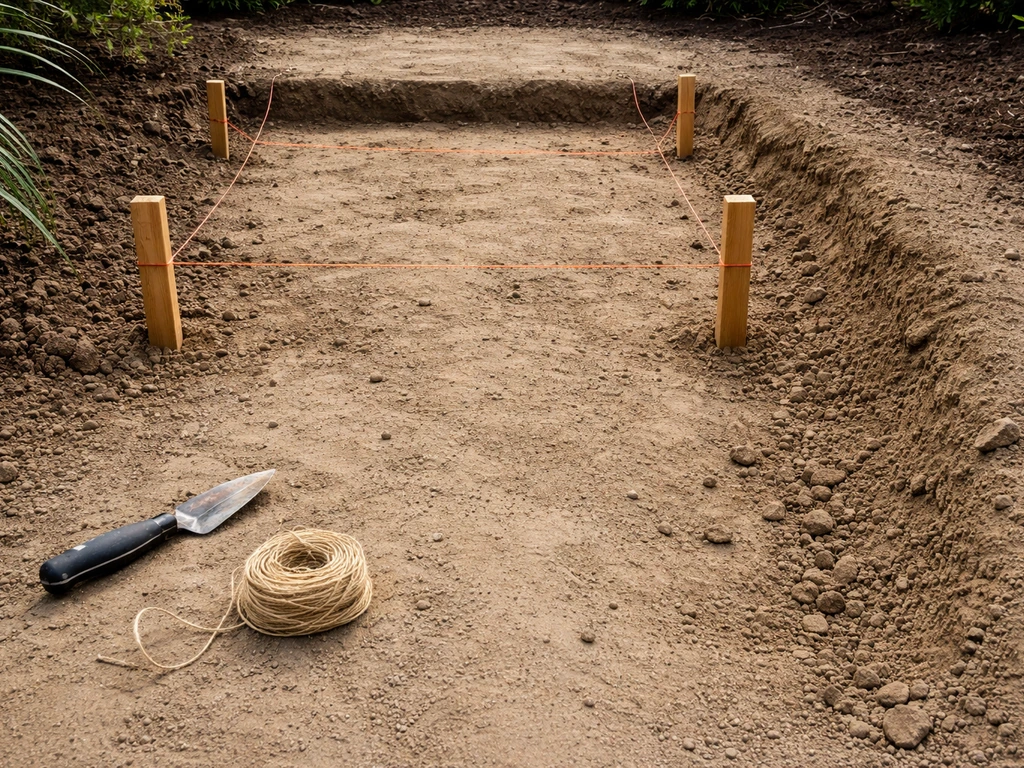
Mark out the full footprint of the step structure with stakes and string lines. Excavate down at least 6 to 8 inches below your finished grade for the base material, and add a few more inches in cold climates where frost depth is significant. In freeze-thaw zones, some contractors excavate down to frost depth (24 inches or more in the northern US) for the base of a mortared step structure. At minimum, get below the topsoil and into stable, undisturbed subgrade.
Building the step foundation and support system
The base is where most DIY step projects fail. A poorly compacted base shifts with moisture and temperature, and the stone above it goes with it. For any natural stone step installation that's meant to last, you need a compacted aggregate base: typically 4 to 6 inches of crushed stone (3/4 inch clean crushed granite or limestone, sometimes called crusher run or compactible gravel) compacted in 2-inch lifts with a plate compactor. Don't use pea gravel or rounded river rock as your structural base. It doesn't compact and it shifts.
For a mortared step installation (which is the right approach for steps attached to a house foundation or for formal, heavy-traffic applications), you'll typically pour a concrete footing or build a concrete block or CMU core structure, then face it with the natural stone. The concrete provides a rigid, frost-resistant backbone. The stone becomes the decorative and functional surface. This is the most durable approach but also the most involved: the concrete substructure needs to be tied to the house foundation if the steps connect to the house, and it needs its own footing below frost depth.
For freestanding garden steps or a separated patio step structure (steps that go from a lower patio level to an upper one, not attached to the house), you can often get away with a dry-set approach on a well-compacted crushed stone base. Follow the same base and drainage principles to keep stone steps patio surfaces safe and level over time. Larger, heavier stones (2 inches thick or more, 200 pounds or more per tread) stay put through their own mass if the base is solid. But in cold climates with significant frost, even heavy dry-set steps move over time, so plan to recheck and relevel every few years.
One approach that works well for both stability and DIY-friendliness: build each step riser out of stacked dry-set or mortared stone blocks (or a concrete block core), then set the tread stone on top on a bed of mortar. This gives you a solid structural core without the full complexity of a poured concrete footing, and the tread is mechanically bedded so it won't shift independently.
Setting the stone: mortar vs. dry-lay, joints, and edging
The choice between mortared and dry-laid stone affects both performance and repairability. Dry-laid steps (stone set on compacted gravel or sand with no mortar) are easier to adjust and repair if a stone shifts, but they're less stable in freeze-thaw climates and less appropriate for steps attached to a structure. Mortared steps are more rigid and formal looking, better for high-traffic and cold-climate use, but harder to repair if a stone cracks or needs adjustment.
For mortared treads, use a Type S mortar mix (rated for exterior and below-grade use) or a polymer-modified mortar for better adhesion and flexibility. Spread a full, even mortar bed 1 to 1.5 inches thick. Set the stone into the mortar with a slight front-to-back pitch (1/8 inch per foot toward the front edge for drainage). Tap the stone level with a rubber mallet and check with a level. Don't slide the stone around after setting it in mortar; lift and reset if you need to adjust.
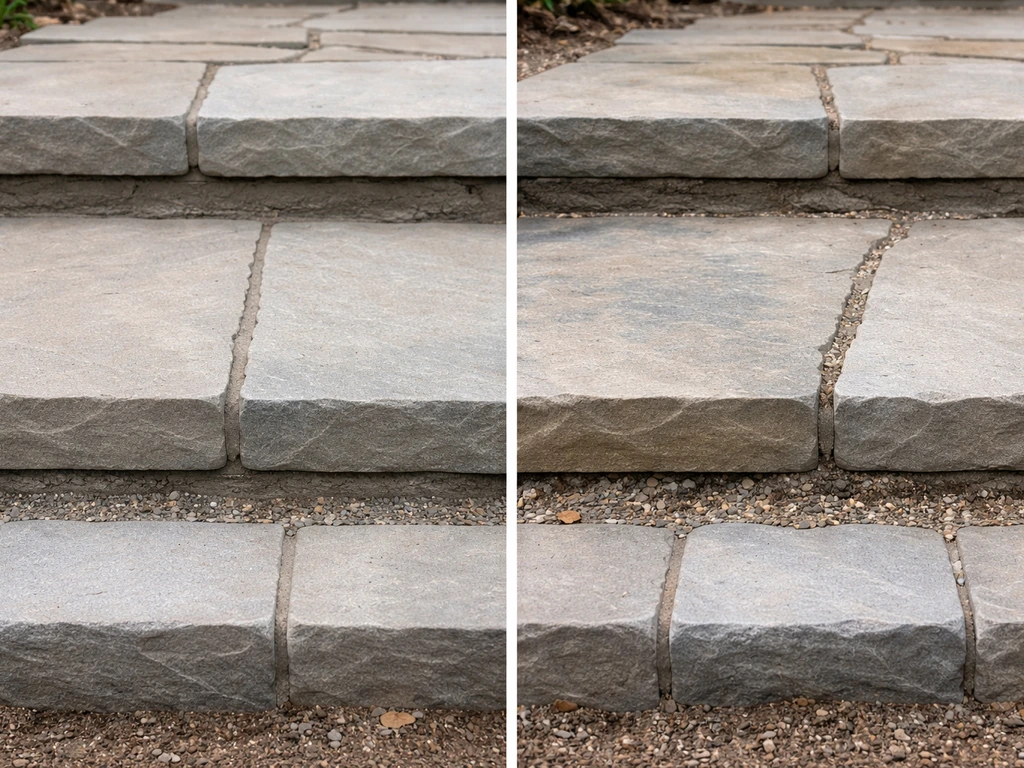
Joint width between treads or between tread and riser should be consistent: 3/8 to 1/2 inch is typical. Fill joints with mortar to match (point them with a grout bag and jointing tool), or for a more rustic look on dry-set steps, fill with polymeric sand, which resists weed growth and stays flexible through temperature changes. Standard sand joints are the least desirable option: they wash out and invite weeds almost immediately.
Edging and riser stones get mortared or pinned in place before the tread goes on top. The riser face is the vertical surface you see from the front. You can use the same stone species as the tread (cut thinner), a contrasting stone, or a natural rough-cut edge for a more rustic look. Whatever you choose, make sure the riser is plumb and fully supported before setting the tread on top of it.
One thing I'd stress from experience: test-fit every tread before you put mortar down. Lay it in place dry, check the riser height, check the pitch, check the overhang. It's very easy to adjust a dry stone. It's a mess to reposition one that's already set in mortar.
Finishing touches: nosing, leveling, and weatherproofing
The nosing is the front edge of the tread that overhangs the riser face. A 1 to 1.5 inch overhang is standard and gives the step a finished, substantial look. It also helps shed water away from the riser joint. Some stones (like bluestone) come with a naturally eased or bullnosed edge. Others have a sharp sawn edge that you can leave as-is or have the stone yard lightly grind and ease. Avoid sharp, raw sawn edges on exposed nosing: they chip easily and look unfinished.
Once all treads are set and the mortar has cured (give it at least 48 to 72 hours, longer in cool weather), go back and check each step with a 4-foot level. Every tread should be flat side to side and pitched slightly toward the front. Check riser heights one more time with a tape measure. If anything is off by more than 3/8 inch, now is the time to address it, before you point the joints and seal.
Weatherproofing (sealing) is optional on some stones and strongly recommended on others. Dense granite doesn't strictly need sealing, but a penetrating sealer adds stain resistance and makes cleaning easier. Limestone and sandstone definitely benefit from sealing because of their higher porosity. Use a penetrating impregnating sealer (silane-siloxane based) rather than a topical film sealer for exterior steps. Film sealers peel, trap moisture, and create a slip hazard. Apply sealer to clean, dry stone (wait at least 28 days after mortar work for the full cure). Follow the manufacturer's coverage rate; two thin coats are better than one heavy one.
Maintenance and repairs: cleaning, sealing, weeds, cracks, and re-leveling
Natural stone steps are low maintenance but not zero maintenance. What they actually need depends on the stone type, climate, and how well the installation was done.
Cleaning
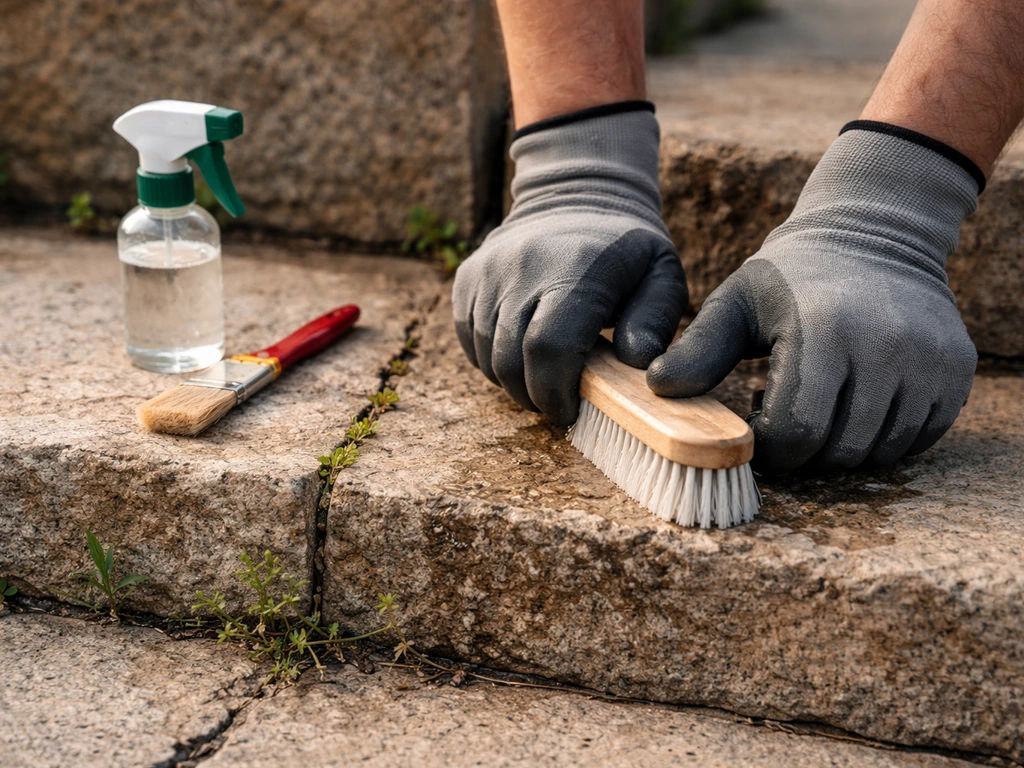
For routine cleaning, a stiff brush and water handles most dirt and grime. For tougher buildup, use a pH-neutral stone cleaner, not a generic deck cleaner or bleach dilution (both can etch softer stones and degrade mortar joints over time). Pressure washing is fine for granite and bluestone at moderate pressure (1200 to 1800 PSI with a fan tip), but go easy on limestone and sandstone, which can be damaged by high-pressure water.
Efflorescence (that white chalky deposit that appears on mortared joints, especially in the first year or two) is just mineral salts migrating through the mortar. It's harmless and usually fades on its own, or you can scrub it with a diluted white vinegar solution or a dedicated efflorescence cleaner.
Sealing schedule
Most penetrating sealers last 3 to 5 years on exterior steps depending on traffic and sun exposure. Test every couple of years by dropping water on the stone: if it beads up, the sealer is still working. If it soaks in within 30 seconds, it's time to reseal. Clean the steps thoroughly before reapplying. You don't need to strip old penetrating sealer before recoating.
Weeds in joints
Weeds in mortar joints usually signal a failing joint, not just a weed problem. If the mortar is intact, weeds can't root. So weeds are your indicator to inspect the joints and repoint any that are cracking or crumbling. Pull the weeds, dig out the loose mortar to at least 3/4 inch depth, and repoint with fresh Type S mortar. If the steps are dry-set with polymeric sand, sweep in fresh polymeric sand and compact it. Don't just pour herbicide on the joints and call it done: you'll be back in the same spot next season.
Cracks and settling
A single cracked tread on an otherwise solid installation is usually repairable: remove the broken pieces, clean the base, and reset a new stone of the same type. If multiple steps are cracking or you're seeing widespread shifting, that's a base failure and needs to be addressed at the foundation level, not patched at the surface. Full removal and a rebuilt base is the honest fix. Patching the top while the base continues to move just delays the inevitable.
For dry-set steps that have settled but are otherwise intact, you can often lift the tread with a pry bar, add or remove base material to correct the height, and reset the stone. Do this in fall or spring when temperatures are moderate, not in the middle of a freeze.
Cost, sourcing, and deciding between DIY and hiring a pro
Natural stone steps range widely in cost depending on the stone species, thickness, and whether you're doing it yourself or hiring out. Here's a realistic breakdown.
| Cost Factor | DIY Typical Range | Pro-Installed Typical Range | Notes |
|---|---|---|---|
| Bluestone treads (per linear ft, 2" thick) | $15–$30/ft | $15–$30/ft (material) | Price varies by region and slab width |
| Granite treads (per linear ft, 2" thick) | $25–$50/ft | $25–$50/ft (material) | Flamed finish costs more than sawn |
| Limestone treads (per linear ft, 2" thick) | $12–$25/ft | $12–$25/ft (material) | Softer stone, lower material cost |
| Crushed stone base (per step) | $10–$25 | $10–$25 | Depends on excavation depth |
| Labor (per step, mortared) | Your time | $150–$400/step | Complexity, site access affect price |
| Sealer (per project) | $30–$80 | Often included or $50–$100 | Penetrating impregnating sealer |
| Total: 5-step project, bluestone, mortared | $400–$900 materials | $1,500–$3,500 installed | Wide range by region and complexity |
Where to source stone: local stone yards and masonry suppliers are your best bet. You can see and handle the actual material, compare thicknesses, and talk to someone who knows what's durable in your specific region. Big-box home improvement stores carry some flagstone and step treads, but selection is limited and staff knowledge of stone quality is hit or miss. For sawn bluestone or granite treads specifically, call a stone yard that serves contractors, not just retail landscapers. They'll have better inventory and tighter tolerances on thickness and sizing.
Order 10 to 15 percent more material than your calculated square footage. Stone breaks, cuts waste material, and you want to be able to match later if a tread ever needs replacement. Trying to source one matching tread from a stone yard two years after the original installation is a genuine headache.
The DIY vs. pro decision comes down to the complexity of the installation. Dry-set garden steps on a stable, well-drained site with large individual stones: absolutely a capable DIY project if you're comfortable with physical work and have access to a plate compactor (rent it, don't skip it). Mortared steps attached to a house foundation, steps over 4 feet wide, steps requiring concrete footings, or any project on a difficult grade: hire a mason. The structural and drainage details on those jobs directly affect your house, and mistakes are expensive to fix.
If you go the pro route, get at least three quotes and ask each contractor to specify the base depth, base material, mortar type, and stone thickness in writing. Vague quotes that just say 'natural stone steps installed' leave too much room for shortcuts you won't discover until things start moving. Knowing exactly what you want (from reading a guide like this one) makes you a much better client and helps you spot low bids that are cutting the base prep corners.
If you're comparing natural stone steps to other materials, brick and composite step options offer easier DIY installation and lower material costs but don't match the longevity or visual weight of quality stone. Brick patio steps are a solid mid-range choice, and composite steps are worth a look for areas where freeze-thaw damage is a major concern. But for sheer durability and the classic look that actually gets better with age, natural stone is hard to beat if you build the base right.
FAQ
Can I install natural stone patio steps directly over existing concrete or pavers?
Yes, but only if the stone is meant for exterior use and you build it on a properly compacted crushed-stone base with drainage. In a mortared build, keep mortar off any ornamental pool surfaces that could trap water against the joint, and ensure every tread is pinned or supported so it cannot rock after the mortar cures.
What mortar or joint material should I use if my steps are in a freeze-thaw climate?
For exterior steps, avoid mortars or joint sand that are not rated for freeze-thaw exposure. If you are pointing joints with polymeric sand, use the specific exterior polymeric product and recompact after it is installed, then keep it clear of standing water during the initial cure period.
How do I avoid getting the wrong “bluestone” for natural stone patio steps?
Budget products often sold as bluestone can be a softer sandstone mix, which wears faster on the tread edge and can worsen slip risk when textured faces smooth out. Buy only with documented stone type, and request thickness tolerances before ordering so your risers and tread heights stay consistent.
How can I check slip resistance at home before committing to a stone finish?
Test by running water over the tread finish after installation. Even without lab testing, you can often tell if a surface is too slick, because polished or overly honed stones will leave a strong wet sheen while flamed or cleft textures will look matte and stay grippy.
When should natural stone patio steps be mortared versus dry-set?
Make the decision based on attachment and traffic. Dry-set can work for freestanding steps on a stable, well-drained base, but for steps tied into a house, or where the ground can move unevenly, mortared cores and mortared risers reduce the chance of differential movement.
What should I do if one riser ends up slightly higher than the others after installation?
Yes, but do not rely on small shims hidden under the stone as a permanent fix. If you find a tread height mismatch, pull and reset with correct base adjustment and consistent thickness so the riser height stays within your targeted variation.
How do I correct tread pitch if water starts pooling on the steps?
Recheck pitch before the mortar fully hardens. If you already set in mortar and the tread is too flat, remove the stone and redo the bed, because trying to correct pitch with thinner or thicker bedding spots can create weak points and future cracking at the nosing.
My natural stone steps get slippery with algae. What maintenance actually helps?
Do not assume algae will respond to sealing alone. Use a stone-safe, pH-neutral cleaner for routine maintenance, and schedule periodic scrubbing in high-humidity areas (spring and late summer). Also confirm your joints have proper drainage width so water does not linger at the riser line.
Do freestanding natural stone patio steps need the same base depth as steps attached to a house?
Yes, but you still need a drainage plan and a stable base. In wet or clay-heavy sites, even a freestanding dry-set approach can heave if runoff is trapped, so regrade and consider a French drain or channel drain along the downhill side.
If a tread cracks, is it usually a simple stone replacement or a sign of deeper base failure?
Sometimes. A single cracked tread can be replaced if the surrounding steps are stable and the base does not show shifting, but if you see repeated cracking across multiple treads, the base likely moved. That is a rebuild-at-the-base situation, not a surface patch.
Can I seal my natural stone patio steps right after pointing the joints?
Allow a full cure time for mortar before sealing, and do not seal contaminated or damp stone. A quick water test helps, if water soaks in quickly you need resealing, but if the joints still look actively chalky or wet, wait longer so the sealer does not trap moisture.
How should I finish the nosing edge to reduce chipping and improve water runoff?
Yes, and it is often better to plan for it early. Add a subtle bevel or maintain a slightly textured finish on the nosing, then keep the overhang consistent so water sheds away from the riser joint rather than dripping directly into it.