
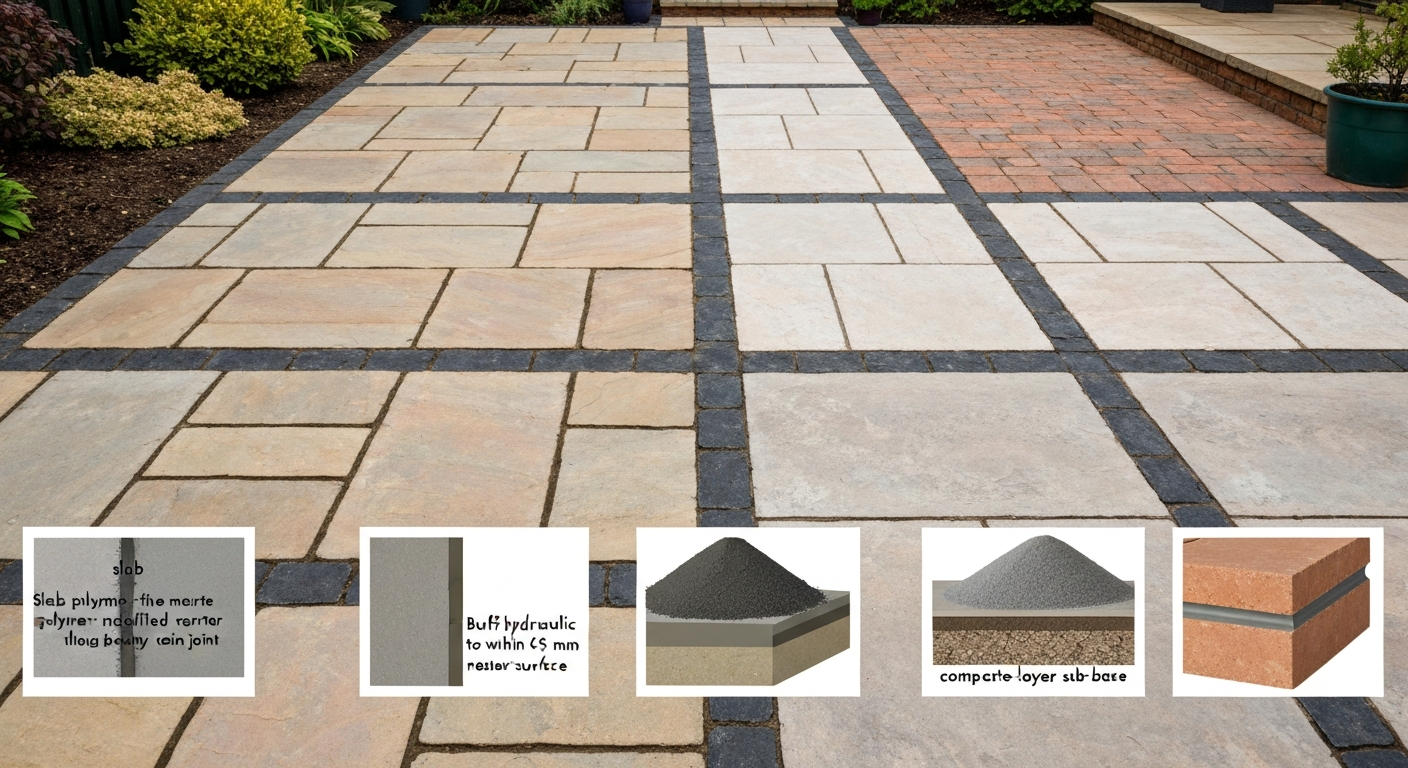
For most standard concrete or natural stone patio slabs, a polymer-modified cement mortar (roughly 3:1 sharp sand to cement, with a polymer additive) gives you the best balance of strength, flexibility, and weather resistance. For deeper recommendations and product picks, see the guide to the best mortar for patio pointing. If you're working with softer natural stone or a historic surface, switch to a hydraulic lime mortar at around 2.5:1 sand to NHL 3.5. For a fast, DIY-friendly job on modern interlocking slabs or porcelain, a ready-mixed resin-based jointing compound or a quality polymeric jointing sand is perfectly adequate. The wrong choice, cementing rigid joints into soft stone, or using plain sand on a high-traffic area, causes cracking, staining, and early failure, so matching the product to your specific slab type and climate matters far more than brand loyalty.
Best Pointing for Patio Slabs: Guide to Mortar & Jointing

Quick recommendations: best pointing by patio type
If you want a straight answer before diving into the detail, here's where I land after working with most of these materials and reading through installation data from manufacturers, ASTM C270, BS 7533, and ICPI technical specs. Think of this as your starting point, not a final answer, scroll down to find the full breakdown for your specific situation.
| Patio / slab type | Best pointing material | Avoid | Rough cost (per 20 kg/bag) |
|---|---|---|---|
| Concrete flags (standard) | Polymer-modified mortar (3:1 sharp sand:cement + admix) | Dry-mix only, plain sand | £8–£15 / $15–$25 |
| Natural stone (sandstone, limestone) | NHL 3.5 hydraulic lime mortar (2.5:1 sharp sand:NHL) | Strong Portland cement | £12–£20 / $18–$30 |
| Porcelain tiles | Flexible polymer or epoxy jointing compound (e.g., Sika FastFix) | Lime mortar, plain sand | £14–£25 / $20–$35 |
| Flagstone (irregular) | NHL lime mortar or polymeric sand depending on joint width | Rigid cement in wide joints | £10–£22 / $15–$32 |
| Brick paving | Type S cement-lime mortar (1:0.5:4.5 Portland:lime:sand) | Type M (too rigid for most) | £8–£14 / $14–$22 |
| Composite / porcelain pavers | Polymeric jointing sand or resin compound | Cement-based pointing | £12–£20 / $18–$28 |
| Permeable / SuDS paving | Washed grit / permeable jointing product only | Any cementitious grout | £6–£12 / $10–$18 |
These ranges reflect typical UK and US retail prices as of mid-2026. Coverage varies significantly by joint width and depth, so always check the bag for spread rates before buying.
How pointing actually works, and why getting it wrong is expensive
Pointing is the material that fills the joint between paving slabs. It sounds simple, but it's doing three separate jobs simultaneously. First, it locks slabs against lateral movement. An unfilled or under-filled joint lets slabs rock and creep, especially under vehicle loading or on poorly compacted sub-bases. Second, it manages water. A well-filled joint directs surface water toward drainage falls rather than letting it channel downward between slabs and saturate the bedding layer. Third, it finishes the surface visually, joint color, width, and profile define how a patio looks as much as the slab itself.
The depth and width of the joint matter more than most homeowners realize. BS 7533 (the UK code of practice for laying natural stone slabs and concrete paving) gives specific joint-width guidance by unit type and exposure category. In practice, most natural stone and concrete flags end up with joints between 5 mm and 20 mm wide, and the pointing material needs to fill to within about 5 mm of the surface, not flush, and definitely not recessed by 10 mm or more. Deep recessed joints trap debris and water, which leads to frost damage in cold climates and weed colonization in milder ones. Historic England specifically warns against recessed pointing on natural stone for exactly this reason.
Drainage is where people get caught out on permeable systems. If you've built a SuDS-compliant permeable patio with a free-draining sub-base, filling the joints with a cementitious grout or polymer compound defeats the entire water-management design. Interpave and the CIRIA SuDS Manual are explicit on this: permeable systems need permeable jointing, whether that's washed angular grit or a specifically formulated permeable jointing product.
The main pointing materials explained
There are four broad categories of pointing material for patio slabs, and each behaves differently once it's in the ground. I'll go through each one plainly, because the marketing language on bags can make them sound more similar than they are.
Cement mortars (standard Portland-based)
This is the traditional pointing method: a mix of Portland cement, sharp sand, and water, sometimes with a plasticizer added. Under ASTM C270 (the US standard for masonry mortars), mortar types are designated M, S, N, and O, with Type S being the most commonly specified for exterior horizontal paving applications. U.S. Marine Corps / Army technical guidance, mortar proportion examples (references to ASTM C270 / US Army/Navy practice) note typical field mixes by volume as Type S ≈ 1 part Portland cement : 0.5 part hydrated lime : 4.5 parts sand and Type N ≈ 1:1:6 (Portland : lime : sand) U.S. Marine Corps / Army technical guidance — mortar proportion examples (references to ASTM C270 / US Army/Navy practice). Type S targets a minimum 28-day compressive strength of around 1,800 psi (12.4 MPa), which is appropriate for loaded paving. Type N is softer at roughly 750 psi and better where some flexibility is needed. Type M at around 2,500 psi is often too rigid for natural stone work, it doesn't accommodate minor thermal and moisture movement, and you end up with the pointing cracking out rather than the slab.
The dry-brush method, brushing a dry cement-sand mix into joints and misting it to set, is widely used by DIYers because it's fast. I've done it. It works on smooth concrete flags with tight joints in sheltered conditions, but it fails in three situations: on textured or riven surfaces where water doesn't reach the bottom of the joint evenly, in cold or damp weather where the mix doesn't cure properly, and on any surface where residue isn't cleaned before it sets. When it goes wrong, you get grey smearing that's very hard to remove.
Polymer-modified cement mortars
A polymer-modified mortar adds a liquid acrylic or SBR (styrene-butadiene rubber) admixture to a standard cement-sand mix. The polymer improves adhesion, reduces water absorption, adds a degree of flexibility, and generally extends the working life of the mix. For most residential patio pointing, this is the modification I'd recommend as a baseline upgrade over plain cement. It costs a few pounds more per bag but performs noticeably better over five-plus years, particularly in freeze-thaw climates where plain cement joints tend to crack out after two or three winters.
Lime mortars (hydraulic lime / NHL)
Natural hydraulic lime (NHL) mortars are the correct choice for natural stone patios, particularly softer stones like sandstone or limestone, and for any historic or listed-building context. Historic England's guidance is clear: Portland cement mortars can damage softer stones by trapping moisture and causing differential decay, where the joint is harder than the stone and forces movement-related stress into the face of the slab rather than into the joint where it belongs. An NHL 3.5 mortar at a 2.5:1 sand-to-lime ratio typically achieves around 3 to 3.5 MPa at 28 days (based on St Astier published data), which is significantly lower than Type S cement mortar but appropriate for most natural stone paving. The key practical point: lime mortars keep gaining strength over months and need protection from frost and drying wind during the curing period, which is typically longer than cement.
Jointing compounds (resin-based and ready-mixed)
Products like Sika FastFix are resin or polymer-based compounds supplied ready to use from a tub or bag, squeezed or brushed into joints. Sika FastFix, for example, is listed as suitable for joints from around 5 mm wide and 20 mm deep, with an initial set of 6 to 12 hours at over 15°C and up to five days at 4 to 15°C. These products are popular with DIYers because they're clean to use, don't require mixing, and most are weather-tolerant once set. The trade-off is cost: they're considerably more expensive per linear metre of joint than a bagged mortar mix, and the range of compatible substrates varies by product.
Polymeric jointing sand
Polymeric sand is kiln-dried sand coated with a polymer binder that activates when dampened with water. You sweep it into joints, compact, then mist to activate and bind the sand particles together. Products like Techniseal HP NextGel come in 50 lb (22.7 kg) bags and are designed for joints typically 3 mm or wider. ICPI Tech Spec guidance (particularly Tech Spec 9 for joint sand) requires correct aggregate gradation to ASTM C144 and appropriate base and edge restraint before any polymeric sand installation. See the Drumheller Downtown Plaza specifications for polymeric joint sand quality metrics, which reference ASTM C144 gradation, compressive/pull-off performance near ~800 psi, and set-time requirements for acceptance Drumheller Downtown Plaza specifications — polymeric joint sand quality metrics (ASTM C144 gradation, compressive strength ~800 psi, set time references). The failure modes with polymeric sand are well documented by manufacturers: washout if rain hits before the polymer cures, premature activation from damp paver surfaces, and cracking under freeze-thaw in poorly installed systems. The bones of a good installation matter as much as the product.
Pros, cons, and budget comparison for each pointing material
| Material | Pros | Cons | Best climate | DIY difficulty | Typical cost (per bag) |
|---|---|---|---|---|---|
| Standard cement mortar | Strong, widely available, cheap | Rigid, can crack in movement zones, damages soft stone | Mild/dry | Easy–Medium | £5–£10 / $8–$15 |
| Polymer-modified cement mortar | Better adhesion, some flexibility, good frost resistance | Slightly more expensive, needs correct mix discipline | All climates | Medium | £10–£18 / $14–$25 |
| NHL hydraulic lime mortar | Flexible, breathable, compatible with natural stone | Slower set, needs frost protection while curing, less available | Moderate (not extreme freeze) | Medium–Hard | £12–£22 / $18–$32 |
| Resin/polymer jointing compound | Ready to use, clean, weather-tolerant | Expensive, limited joint-size range, repair patches can show | All climates | Easy | £15–£30 / $22–$42 |
| Polymeric jointing sand | Fast, weed-resistant, permeable options available | Washout risk, needs dry install conditions, fails on poor base | Mild–Moderate | Easy–Medium | £12–£22 / $18–$30 |
| Plain kiln-dried sand | Cheapest, allows movement, permeable | Washes out, weeds, no structural lock | Any (temporary only) | Easy | £3–£7 / $5–$10 |
Mixing ratios and the best patio mortar mixes
Getting mix ratios right is where a lot of DIY pointing goes wrong, usually by making the mix either too wet (weak and prone to shrinkage cracking) or too dry (won't bond properly). All proportions below are by volume using a consistent measure like a bucket or gauge box.
Standard cement–sand mixes
- General-purpose patio pointing (concrete flags, brick): 3–4 parts sharp sand : 1 part Portland cement. Add a small amount of plasticizer (not washing-up liquid, which weakens the mix) for workability.
- High-strength / heavy-duty (driveways, loaded areas): 3 parts sharp sand : 1 part Portland cement, no plasticizer, polymer admixture instead.
- ASTM Type S mortar (US, for exterior horizontal paving): 4.5 parts sand : 1 part Portland cement : 0.5 parts hydrated lime. Minimum 28-day compressive strength approx. 1,800 psi (12.4 MPa).
- ASTM Type N mortar (US, lighter-duty or softer substrates): 6 parts sand : 1 part Portland cement : 1 part hydrated lime. Lower strength (~750 psi) with more flexibility.
- Consistency check: a squeezed handful should hold its shape but not stick to your glove. Too wet = runs when released; too dry = crumbles.
Polymer-modified mortar adjustments
Start with a 3:1 sharp sand to cement base mix, then substitute part or all of the mixing water with an SBR or acrylic polymer admixture at the dilution rate specified on the product (typically 1 part SBR to 3–5 parts water for pointing applications). The polymer-to-water ratio matters: too concentrated and the mix sets too fast and may be difficult to work into joints; too dilute and you lose most of the benefit. Most SBR datasheets recommend a dilution of 1:3 for exterior pointing, giving roughly 10–15% polymer solids in the final mix.
Hydraulic lime mortar mix ratios
For natural stone pointing, use NHL 3.5 (not NHL 5, which is stronger than most soft stones can tolerate). The practical site ratio is 2.5 parts sharp/coarse sand to 1 part NHL 3.5 by volume, or up to 3:1 for softer, more flexible applications like historic sandstone. Don't mix lime mortars in a pan mixer with dry aggregate for too long before adding water, pre-mix the dry lime and sand, then add water gradually to a stiff but workable consistency. Allow the gauged mix to stand (slake) for 10–15 minutes before final adjustment. NHL 3.5 at a 2.5:1 ratio achieves approximately 3 to 3.5 MPa at 28 days, but continues to gain strength for several months, as published data from St Astier confirms.
Common product types and brands, what to look for
The market is full of bagged jointing products under names like 'patio jointing mortar', 'all-weather paving grout', and 'joint stabilizer'. Some are genuinely good; others are marked up versions of basic cement-sand mixes. Here's how I evaluate a product before recommending or using it.
What to read on the bag
- Declared compressive strength at 28 days: look for at least 10–15 MPa for standard paving applications; lower for lime-based products.
- Compatible joint sizes: many ready-mixed products have minimum (often 5 mm) and maximum (sometimes 20 mm) joint width limits.
- Rain-safe window: how long after application before rain is permissible. Under 4 hours is risky in unpredictable weather.
- Temperature range: most cement-based products shouldn't be applied below 5°C or above 30°C ambient.
- Coverage rate: typically stated in linear metres per kg at a given joint width and depth, which lets you calculate quantities accurately.
No Nonsense and similar jointing mortars
Budget-end jointing mortars like No Nonsense Patio Grout (sold through Screwfix and similar trade/DIY outlets) are essentially pre-blended cement-sand mixes, sometimes with a small polymer fraction. They're convenient and reasonably priced, and for standard concrete flag patios in sheltered conditions they do an adequate job. The limitations are honest ones: coverage rates are sometimes overstated on the packaging, the set can be unreliable in cold or damp conditions, and staining from residue left on textured slab surfaces is a common complaint. If you're using this category of product, apply to a test panel first, and clean off residue before it firms up, don't wait until the joint is set. For a fuller breakdown of how these products compare in real-world conditions, the dedicated review of No Nonsense patio jointing mortar on this site covers the reported performance in more detail. For user feedback and performance notes, see no nonsense patio jointing mortar reviews on this site.
Polymeric sand brands (Techniseal, Polybind, Alliance, etc.)
Techniseal HP NextGel is one of the better-documented polymeric sands, distributed in 50 lb bags with full technical data sheets covering particle gradation, recommended joint sizes (3 mm minimum), and safety data (the SDS flags eye irritation and skin sensitization risks from dust, so use appropriate PPE during the dry-sweep phase). Polybind and similar overlay formulations extend the maximum joint width to around 50 mm and specify a minimum joint depth of 38 mm for proper performance. When comparing brands, the activation method, rain-safe window, and freeze-thaw test data are the three factors worth verifying from the manufacturer's TDS, not just the retailer listing. Municipal and commercial specifications commonly require polymeric joint sands to meet ASTM C144 gradation and demonstrate compressive pull-off performance in the range of 800 to 1,000 psi, which is a reasonable benchmark when evaluating residential products too.
Choosing the right pointing for your specific patio material
Material compatibility is the single most important factor in pointing choice, and it's where I see the most expensive mistakes. The compressive strength of the pointing should never significantly exceed the compressive strength of the slab or stone itself, if the joint is harder than the slab, differential thermal and moisture movement will crack the slab face rather than the joint.
Concrete paving slabs and precast concrete flags
Standard concrete flags are robust enough for a polymer-modified 3:1 cement-sand mortar. You can also use a ready-mixed jointing compound for ease. The main watch-out is color matching: concrete flags come in a wide range of tones, and grey cement pointing on a buff or charcoal slab looks wrong. Buy a sample bag of a tinted jointing compound and test it on a small area before doing the whole patio.
Natural stone (sandstone, limestone, granite)
Sandstone and limestone are softer and more porous than concrete flags. Portland cement mortars risk trapping moisture and causing salt crystallization damage (spalling) at the joint edges. The correct product is an NHL 3.5 hydraulic lime mortar, typically at 2.5:1 to 3:1 sand to NHL. Granite is harder and more tolerant of cement-based mortars, but lime still gives a better long-term result on any natural stone. This ties directly to the sister topic on best mortar for stone patio, which goes deeper on aggregate selection and color matching for natural stone applications.
Porcelain paving tiles
Porcelain is non-porous and has very low moisture absorption, which means standard cement mortars don't bond well to it and will often crack out of the joint within a year. The correct choice is a flexible polymer or epoxy-based jointing compound, or a specialist porcelain paving grout. Joint widths on porcelain are typically narrower (3–10 mm), so make sure your chosen product covers that range. Never use lime mortar on porcelain, lime needs a porous surface for keying.
Clay brick paving
Clay engineering bricks used in paving are hard and dense, and a Type S cement-lime mortar (1 part Portland cement : 0.5 parts hydrated lime : 4.5 parts sand, per ASTM C270 proportions) is the standard US recommendation for exterior exposed applications. The small lime addition improves workability and gives a slight flexibility advantage over straight Portland mixes. In the UK, a 3.5:1 sharp sand to cement with a plasticizer is the common site practice.
Composite and concrete interlocking pavers
Composite and interlocking concrete pavers are the natural home for polymeric jointing sand. ICPI Tech Spec guidance for North America is the industry standard here: correct aggregate base, proper bedding, and adequate edge restraint are prerequisites, not optional extras. Without edge restraint, no jointing product will prevent long-term lateral creep on an interlocking system.
Flagstone: mortar or sand, a genuine debate
Flagstone is the one substrate where the choice between mortar and jointing sand is genuinely contested, and the right answer depends on your joint width, climate, and whether you're prioritizing function or aesthetics. This topic is covered in dedicated depth in the comparison of flagstone patio mortar vs sand on this site, but here's the practical summary.
When to use mortar on flagstone
If your flagstone has irregular joints (which natural flagstone usually does, anything from 10 mm to 60 mm between pieces), mortar is the more appropriate fill. It locks stones firmly, prevents rocking under foot traffic, and gives a cleaner finished appearance in wide joints where sand would look sparse and erode easily. Use NHL 3.5 mortar at 2.5:1 for softer stones, or a polymer-modified cement mortar for harder flagstone like slate or granite. Fill joints to within 5 mm of the surface, profile with a rounded jointing tool, and keep the surface clean. The main downside of mortar on flagstone is the risk of staining the face of the stone during application, and the fact that cracked mortar in wide joints is difficult to repair invisibly.
When to use jointing sand on flagstone
Jointing sand, whether plain washed angular grit or a polymeric product, makes more sense for large-format flagstone on a sand-set base where some differential movement is expected, or where a more naturalistic, informal appearance is the goal. A polymeric sand handles weed suppression better than plain grit and resists washout far better under heavy rain. The practical limits: standard polymeric sand works up to about 50 mm joint width in overlay formulations, and it needs a minimum joint depth of around 38 mm to perform properly. If your flagstone is set on a mortar bed, filling the joints with sand produces an inconsistent result, sand settles at the bottom while the top stays loose and dusty. Sand on mortared flagstone only works well if joints are uniformly deep and the base is stable.
Performance and aesthetics side by side
| Factor | Mortar (NHL or polymer-modified) | Polymeric jointing sand |
|---|---|---|
| Joint width range | 5 mm – unlimited (practical max ~80 mm) | 3 mm – 50 mm (product-dependent) |
| Weed resistance | High (sealed joint) | Medium–High (depends on binder quality) |
| Freeze-thaw performance | Good (lime) / Variable (cement) | Variable — needs dry install and good base |
| Repair ease | Difficult (colour match) | Easy (re-sweep and re-activate) |
| Permeability | Low (impermeable when set) | Medium–High (permeable products available) |
| Appearance on wide/irregular joints | Cleaner, more formal | Natural, informal — can look patchy in very wide joints |
| DIY skill required | Medium–High | Easy–Medium |
| Cost per m² | Lower materials, higher labour | Higher materials, lower labour |
Installation: preparation and application steps
The most common pointing failure I see isn't a product problem, it's a preparation problem. Slabs that aren't fully set on their bedding layer, joints that haven't been cleared of old debris, or mortar applied onto damp or frost-covered surfaces. Get these right and even a mid-range product will last.
- Clear joints thoroughly: remove existing sand, debris, and vegetation to the full joint depth using a pointing chisel, grout rake, or oscillating tool. Vacuum or blow out dust.
- Check slab stability: press each slab by hand and foot. Any rocking means the bedding layer needs re-doing before you point — otherwise the pointing will crack out with movement.
- Check joint width and depth: joints narrower than 5 mm won't hold most mortar products reliably; joints wider than 50 mm may need a different approach (back-filling with grit before final pointing). Aim for a minimum 25 mm depth for structural pointing.
- Check the weather forecast: do not apply cement-based mortars below 5°C or when frost is expected within 24 hours. Do not apply in direct summer sun above 30°C. For polymeric sand, the slab surface must be completely dry — not just surface-dry but bone dry.
- Dampen natural stone slightly before applying lime or cement mortar: this prevents the slab from drawing moisture out of the mortar too quickly (suction), which causes premature cracking. Porcelain should not be dampened.
- Mix accurately: use a gauge box or consistent bucket; never guess proportions. For polymer admixtures, follow the dilution rate on the datasheet exactly.
- Fill joints in sections and compact: press mortar firmly into the joint in layers if depth exceeds 30 mm, tamping each layer. For polymeric sand, sweep across the whole surface, then plate-compact with a rubber pad to settle the sand.
- Profile the joint surface: use a rounded jointing tool (bucket handle or pointing iron) to compress the top surface of mortar to a slightly concave or flush profile. Avoid recessed profiles deeper than 3–4 mm on natural stone (Historic England guidance).
- Clean residue promptly: wipe mortar smears from slab faces before they set. Test your cleaning method on a hidden corner first.
- Cure correctly: keep cement-based pointing damp and protected from wind and sun for at least 3 days, preferably 7. Protect lime mortars from frost for a minimum of 3–5 days and from rapid drying for up to 7 days.
Curing, freeze-thaw, and climate considerations
Cement-based pointing is vulnerable in its first 24 to 72 hours. Industry practice calls for moist curing with plastic sheeting or damp hessian for 3 to 7 days in normal conditions, and avoiding application if frost is forecast within 24 hours of laying. In practice, a light polythene sheet weighted at the edges and left overnight is enough to prevent rapid surface drying in dry or windy conditions, it's a small effort that prevents a frustrating amount of surface craze cracking.
In freeze-thaw climates (most of the northern US, Canada, and UK highland areas), saturated pointing that freezes will expand and fracture. The solution is threefold: use a polymer-modified mix to reduce water absorption, ensure the joint is filled correctly (no voids that trap water), and ensure the overall patio has adequate falls (typically 1:60 to 1:80 away from buildings) so water drains off the surface rather than sitting in joints. Hydraulic lime mortars perform reasonably well in moderate freeze-thaw conditions due to their flexibility, but they need to be well-cured and protected before the first frost of the season, lime mortars that haven't fully hardened when frost hits are vulnerable to damage.
Maintenance, repair, and expected lifespan
Realistically, even well-specified pointing on a residential patio needs some attention after 5 to 10 years. Weed intrusion, minor cracking, and surface erosion are normal, not signs of failure. Annual maintenance is simple: inspect joints in early spring after winter, clear any vegetation with a stiff brush and targeted weedkiller (not bleach near natural stone), and re-point any sections where the joint has cracked or hollowed out below 5 mm from the surface.
For cement mortar repairs, rake out the failed section to at least 20 mm depth, clean out dust, dampen the joint edges (for natural stone), and re-point with a matching mix. The biggest challenge in repair work is colour matching: old cement pointing weathers to a warmer, darker tone and fresh grey mortar will stand out for 6 to 12 months. Pre-blended, tinted pointing mortars reduce this problem, and doing a slightly larger section rather than spot repairs makes the result less obvious.
Polymeric sand repairs are easier: sweep new sand into failed joints, mist, and allow to cure. The key is using the same product as the original installation, mixing brands or formulations sometimes produces inconsistent results at the joint boundaries.
| Material | Expected lifespan (residential patio) | Maintenance interval | Repair difficulty |
|---|---|---|---|
| Standard cement mortar | 5–10 years | Check annually | Medium (colour match) |
| Polymer-modified cement mortar | 10–20 years | Check every 2–3 years | Medium |
| NHL hydraulic lime mortar | 15–25 years (gains strength over time) | Check annually in first 3 years | Medium–Hard |
| Resin/polymer jointing compound | 10–15 years | Check every 3–5 years | Easy–Medium |
| Polymeric jointing sand | 5–10 years | Check every 2 years | Easy |
| Plain kiln-dried sand | 1–3 years | Top up annually | Easy (but ongoing) |
Sourcing and buying tips
Buy from a builders' merchant or specialist paving supplier rather than a general DIY superstore where possible. The product range is wider, the staff can advise on regional aggregate types and compatibility, and you can often buy a sample bag before committing to a full pallet. For smaller residential jobs, most pointing projects use between 10 and 30 kg per 10 m² depending on joint width and depth, measure your joints before buying and use the coverage rate on the bag to calculate accurately.
- Check the batch code and 'best before' date on bagged mortars: cement-based products degrade in storage and bags older than 6 months from manufacture may have partially hydrated from ambient moisture.
- For NHL products, buy from a reputable lime supplier (St Astier, Singleton Birch, and similar) rather than unknown own-brand products — the NHL class (3.5, 5) and performance data should be clearly stated.
- Polymeric sands: check the product TDS for your specific joint size and climate. Not all polymeric sands are suitable for wide joints or freeze-thaw exposure.
- Tinted mortars: order a sample bag and test on a spare slab or hidden corner before buying full quantities — colors vary between batches and dry color is often lighter than wet.
- Buying in bulk (25 kg or 40 kg bags) is cheaper per kilogram but only worthwhile if you can use the product within 3–4 months of opening.
DIY vs professional installation: a practical checklist
Most pointing work is within DIY capability if the base and slabs are already in good condition. The decision point is usually time, confidence with mixing, and the slab type. Natural stone and heritage materials genuinely benefit from a tradesperson experienced with lime mortars, an inexperienced lime mix applied to listed-building stonework can still cause damage, and that's a costly mistake.
| Scenario | DIY appropriate? | Key consideration |
|---|---|---|
| Standard concrete flags, new patio, simple layout | Yes | Follow mix ratios; clean residue quickly |
| Concrete flags re-pointing after weed damage | Yes | Rake out joints fully; check slab stability first |
| Natural stone (sandstone/limestone), lime mortar | Yes (with research) | Correct NHL class, mix ratio, and frost protection |
| Porcelain tiles, flexible compound | Yes | Check product compatibility; clean faces immediately |
| Historic stone, listed building | Recommend professional | Conservation-grade lime, Historic England guidance |
| Large-area polymeric sand (>50 m²) | Yes, with plate compactor hire | Surface must be bone dry; have weather contingency |
| Permeable paving / SuDS system | Recommend specialist | Wrong jointing defeats the drainage design |
For most homeowners, the sweet spot is a polymer-modified mortar mix for concrete flags or a quality polymeric sand for interlocking pavers, both are widely available, forgiving enough for careful DIY work, and durable enough to last a decade with minimal maintenance. If you're deciding on the actual mortar formulation and want to go deeper on specific patio mortar mixes and proportions, the dedicated guide to the best patio mortar mix on this site covers those ratios and adjustment factors in more detail. And if you're sourcing products specifically for stone surfaces, the guide to the best mortar for stone patio is worth reading alongside this one.
FAQ
What is 'pointing' for patio slabs and why does the choice of material matter?
Pointing (jointing) is the material and method used to fill gaps between paving units. It affects structural stability, drainage/permeability, appearance, freeze–thaw durability, weed/pest resistance and long‑term maintenance. The correct material must match the paving type, joint geometry, load/exposure and local climate; the wrong choice can cause washout, cracking, trapped moisture, soft stone damage or premature failure.
Which jointing materials are commonly used for patios and what are their main pros and cons?
Cement‑based mortar (Portland cement ± lime): strong, durable and cheap; good for tight joints on concrete or brick but can be too rigid for soft stone and traps moisture. Polymer‑modified mortar/repair grouts: improved adhesion, reduced shrinkage, quicker strengths; more costly and requires correct mixing/application. Hydraul ic lime (NHL) mortar: flexible, vapour‑permeable and compatible with historic/natural stone; lower early strength, needs protection while curing. Polymeric jointing sand (poly sand): fast, clean, good for narrow joints (≥3 mm) on interlocking pavers/porcelain; vulnerable to washout if not cured correctly and unsuitable where permeability is required. Resin/epoxy joint compounds: chemically resistant and fast setting for wider or irregular joints; higher cost, specialist mixing and may be brittle in extreme movement. Washed jointing sand/grit: permeable and cheap for SuDS/permeable systems; does not bind, so requires excellent base and edge restraint.
Which pointing is best for concrete slabs and precast paving?
For concrete slabs and precast paving, cementitious mortars (Type S or a strong polymer‑modified mortar) or quality polymeric jointing sand are usually best. Use cement mortars for wide joints (>10 mm) and where high compressive strength is needed. For narrow joints on interlocking concrete or porcelain, poly sand gives a neat, low‑maintenance finish—provided joints are dry and installation guidelines are followed. Ensure a stable sub‑base and secure edge restraint to avoid movement.
What pointing should I use for natural stone, flagstone and softer masonry?
Prefer lime‑based mortars (hydraulic lime) for soft or historic stone because they are flexible and vapour‑permeable, reducing the risk of trapped moisture and stone damage. For harder natural stones with low porosity, a cement‑lime mortar or polymer‑modified mortar can be acceptable. When using cementitious materials on flagstone, keep joints compatible (not overly strong/rigid) and consider blended mixes or use a sacrificial sand/bitumen joint where conservation is required.
Flagstone: sand vs mortar — which should I choose?
Use sand (coarse, compacted or polymeric depending on joint width and permeability requirements) when you need permeability, easier future re‑levelling, or a softer, breathable joint. Use mortar when joints are wide/irregular, the surface sees heavier loads, or a rigid, washable finish is desired. For conservation or soft stone flagstones, hydraulic lime mortar is recommended over Portland cement. For SuDS/permeable designs, do not use cementitious or impermeable polymers—use permeable joint materials and a suitable sub‑base.
How do I select mortar type and strength (US ASTM types / practical advice)?
Match mortar strength to the substrate: Type S (higher strength) is suitable for exterior horizontal applications on durable substrates; Type N (moderate) for general above‑grade walls and less exposed paving; for historic or softer masonry choose lime/NHL mortars. Consider polymer‑modified mortars when faster strength, improved bond and reduced shrinkage are needed. Avoid overly strong cement mortars on weak stone to prevent differential stress and damage.