For most residential patios, a 3:1 sand-to-cement mix (by volume) with a water-to-cement ratio kept below 0.5 gives you the best balance of workability and durability. If you're in a freeze-thaw climate, bump that up to a 4-part sharp sand, 1-part cement ratio and add a plasticiser to improve flexibility. For pointing existing joints on a flagstone or porcelain tile patio, a pre-mixed polymer-modified mortar or a ready-to-use jointing compound is almost always the smarter call unless you're doing a large new-build project and mixing in bulk makes economic sense. For more on the best mortar for patio pointing, including consistency and tooling tips, see the companion guide.
Best Patio Mortar Mix: Choose, Mix, and Set Durable Joints

Nolan Ellison
24 Jun 2026
What 'best patio mortar mix' actually means for your joints
The phrase gets used loosely, so let's pin it down. Patio mortar mix refers to the material you pack into the joints between your paving units, whether those are concrete pavers, clay brick, natural flagstone, or porcelain tiles. It's not the same as the bed mortar you lay the slabs onto (though the two often share the same base recipe). A good joint mortar has to do several things at once: bond to the sides of the paving units, resist water ingress, flex slightly with thermal movement without cracking clean through, and survive foot traffic, furniture loads, and in many climates, repeated freeze-thaw cycles.
Getting it wrong is surprisingly common. I've seen patios where the homeowner used a standard builder's mortar that was way too strong for narrow joints in natural stone, and the slabs themselves cracked before the mortar did. I've also seen weak, high-sand mixes wash out in the first heavy rain. The 'best' mix is always relative to your specific setup, and that's exactly what this guide walks through. The 'best' mix is always relative to your specific setup, and if you want a stone-specific answer next, see the best mortar for stone patio options for joints and durability.
Match the mix to your patio material and climate
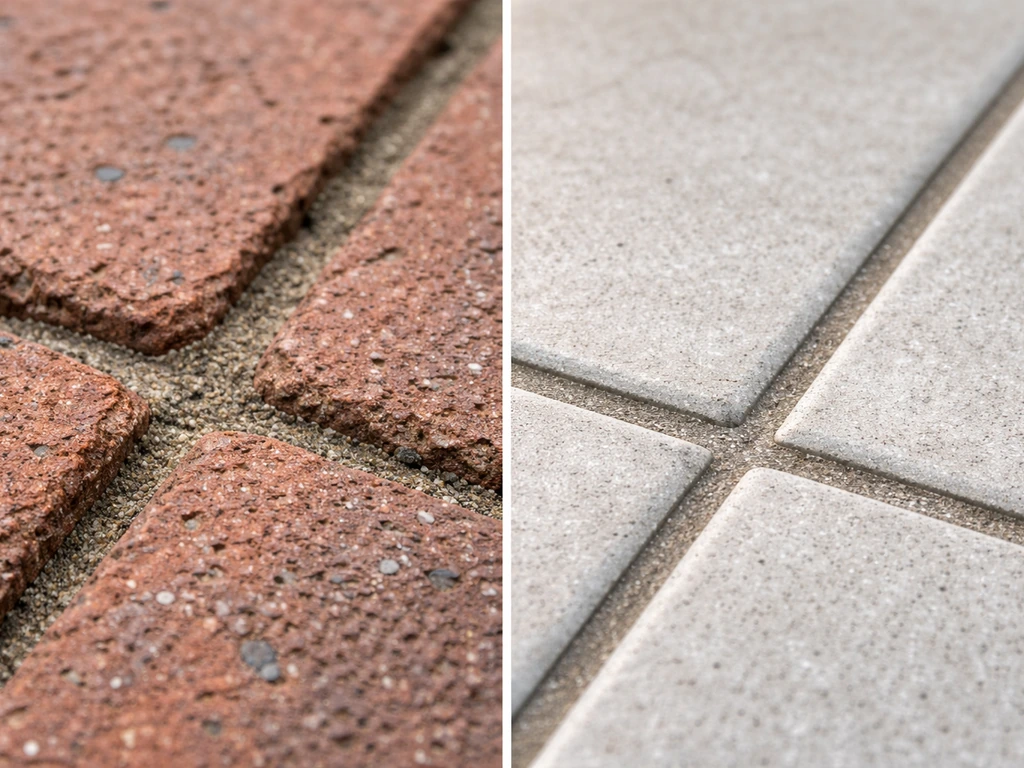
This is the step most people skip, and it's why joints fail. Porcelain tiles have almost zero absorption, so mortar bonds differently to them than to a porous clay brick. Natural sandstone or limestone is soft and can be stained by high-cement mixes if you're not careful. Concrete pavers are fairly forgiving. Your climate matters just as much: water saturating a joint and then freezing expands about 9% by volume, and that mechanical stress is what pops mortar out of joints over winter. Research into masonry freeze-thaw behaviour consistently shows that the mortar-to-unit interface is the weakest link under these conditions, not the mortar body itself, so bond quality matters as much as mix strength.
| Patio Material | Recommended Mix Type | Joint Width | Climate Notes |
|---|---|---|---|
| Concrete pavers | 3:1 sharp sand:cement + plasticiser | 10-15 mm | Add air-entraining agent in hard freeze-thaw zones |
| Clay brick | 4:1 sharp sand:cement (Type S equivalent) | 8-12 mm | Avoid overly strong mixes; brick needs to flex with mortar |
| Natural flagstone (sandstone/limestone) | 4:1 or 5:1 sand:cement, polymer-modified | 10-25 mm | Polymer additive protects soft stone edges; avoid acid cleaning |
| Granite or slate | 3:1 sharp sand:cement | 5-15 mm | High-density stone; standard mix fine, focus on bond prep |
| Porcelain tiles | Dedicated porcelain pointing mortar or grout | 3-10 mm | Standard cement mortar bonds poorly to non-porous surfaces |
| Reclaimed brick | 5:1 soft sand:cement (NHL 2 or NHL 3.5 optional) | 10-20 mm | Soft mortar essential to protect old, brittle brick edges |
If you're in a coastal area or a region where de-icing salts end up on the patio (driveways adjacent to patios, cars nearby, or salt-air exposure), use a sulphate-resistant cement (Type SR in the UK, Type V in the US) or a polymer-modified pre-mix. Salt damage comes from crystallisation pressure inside the pore structure of the mortar, not just from the chemical reaction, so reducing water absorption through polymer modification is one of the most effective countermeasures you have.
Mortar types and when to use each
Pre-mixed bagged mortars
Pre-mixed mortars are calibrated at the factory, which removes the biggest variable in DIY work: human error in proportioning. Brands like Larsen, Tarmac, and Mapei offer dedicated paving joint mortars that are polymer-modified, colour-matched, and tested to EN 998-2 performance standards (the European masonry mortar specification that includes freeze-thaw resistance methodology and water absorption limits). For most homeowners doing a single patio repair or a small new build under 20 square metres, a quality bagged product is the practical choice. Cost is higher per kilogram than DIY, but you save time, avoid waste, and get consistent results.
Dry-mix pointing compounds (brush-in and semi-dry)
Products like Rompox, Romex, and similar resin-bound jointing compounds sit in a category between traditional mortar and grouting. You brush a semi-dry mix into the joints and it sets via hydration from beneath or light water activation on top. These are excellent for irregular flagstone joints, large-format tiles, and situations where you want a very clean finish without smearing wet mortar across porous stone faces. They're not cheap, but for natural stone patios they're genuinely worth it.
For more detailed product comparisons in this category, the guide on no-nonsense patio jointing mortar covers specific UK-market options in depth. If you want to compare the best options for your conditions, the no nonsense patio jointing mortar reviews section helps you narrow down the most reliable choices no-nonsense patio jointing mortar.
Site-mixed mortar
Mixing your own is the right call for larger projects (say, 40+ square metres of pointing) or if you want full control over the recipe. Use sharp washed sand (not soft building sand, which is too fine and weakens the mix) for most applications. The exception is reclaimed or very soft brick, where soft sand gives a more forgiving, traditional mortar. Always use fresh Portland cement or, for softer stone, natural hydraulic lime (NHL 3.5 is the go-to grade for most paving applications). NHL sets more slowly, breathes better, and is far less likely to cause salt bloom or edge staining on porous stone.
Comparing your options at a glance
| Mortar Type | Best For | Skill Level | Approx. Cost (per 25 kg) | Freeze-Thaw Rating |
|---|---|---|---|---|
| Bagged OPC/polymer pre-mix | Most patio materials, repairs | Beginner-intermediate | £8-£15 / $10-$18 | Good to excellent (polymer-modified) |
| Dry brush-in resin compound | Flagstone, large-format tiles, natural stone | Beginner | £20-£40 / $25-$50 | Excellent |
| Site-mixed OPC + sharp sand | Large areas, concrete pavers, brick | Intermediate | £3-£5 / $4-$7 | Good with plasticiser/air entrainer |
| NHL lime mortar (site-mixed) | Soft stone, reclaimed brick, period properties | Intermediate-advanced | £8-£14 / $10-$18 | Good (softer, self-healing) |
| Epoxy/polyurethane mortar | Commercial, very high-traffic, wet areas | Advanced | £30-£60+ / $38-$75+ | Excellent but inflexible |
Choosing the right strength, additives, and joint size
Mortar strength is measured by compressive strength class (M2.5, M5, M10, M15 under EN 998-2) or by ASTM type (N, S, M) in the US. For most domestic patios, you want an M5 to M10 mortar, which corresponds roughly to ASTM Type N or Type S. ASTM C1072 is the standard test method used to measure masonry flexural bond strength between a mortar and masonry unit under specified conditions. Going stronger than M10 for a domestic patio is rarely beneficial and often counterproductive: a very stiff, high-cement mortar has less flexibility and can crack the softer paving units around it rather than accommodating movement in the joints themselves.
Additives worth knowing about: a plasticiser (also called a workability aid) replaces the need for excess water to get a workable mix, so you don't sacrifice strength to get it off the trowel. An SBR (styrene-butadiene rubber) bonding agent, mixed into the gauging water at roughly 1 part SBR to 3 parts water, significantly improves adhesion and water resistance for almost any OPC mortar. In hard freeze-thaw zones, a purpose-made air-entraining admixture helps, but note that research on freeze-thaw effects on masonry suggests water-saturated conditions are when bond strength degrades fastest, so your primary goal should be reducing water ingress rather than relying solely on air entrainment.
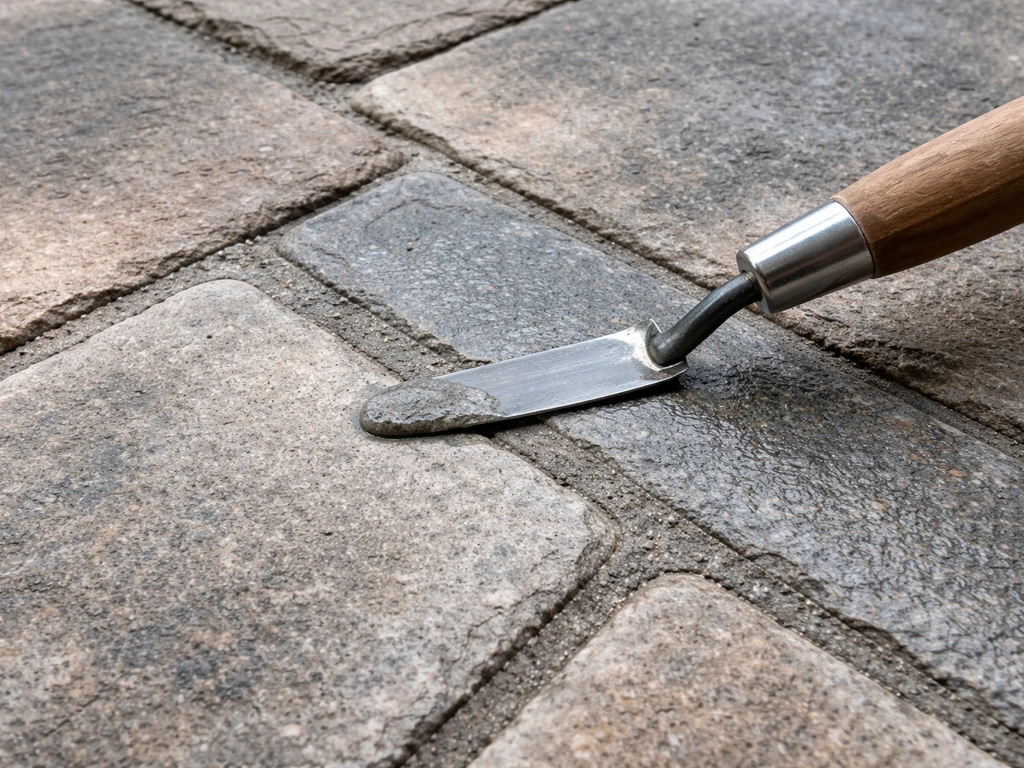
Joint width and depth govern how much mortar you need and which consistency to aim for. Narrow joints under 8 mm need a fairly wet, fluid mix to fill without voids. Joints between 8-20 mm accept a stiffer, buttered-in mix. Deep joints over 20 mm should be packed in two layers to prevent shrinkage cracking as the mortar dries. Depth should be at least 25 mm for structural pointing; shallow pointing under 15 mm tends to pop out under thermal movement. For more detail on pointing specifically, the companion guide on the best mortar for patio pointing goes deeper into consistency and tooling techniques.
Step-by-step: prep, mix, apply, and tool
Preparing the joints
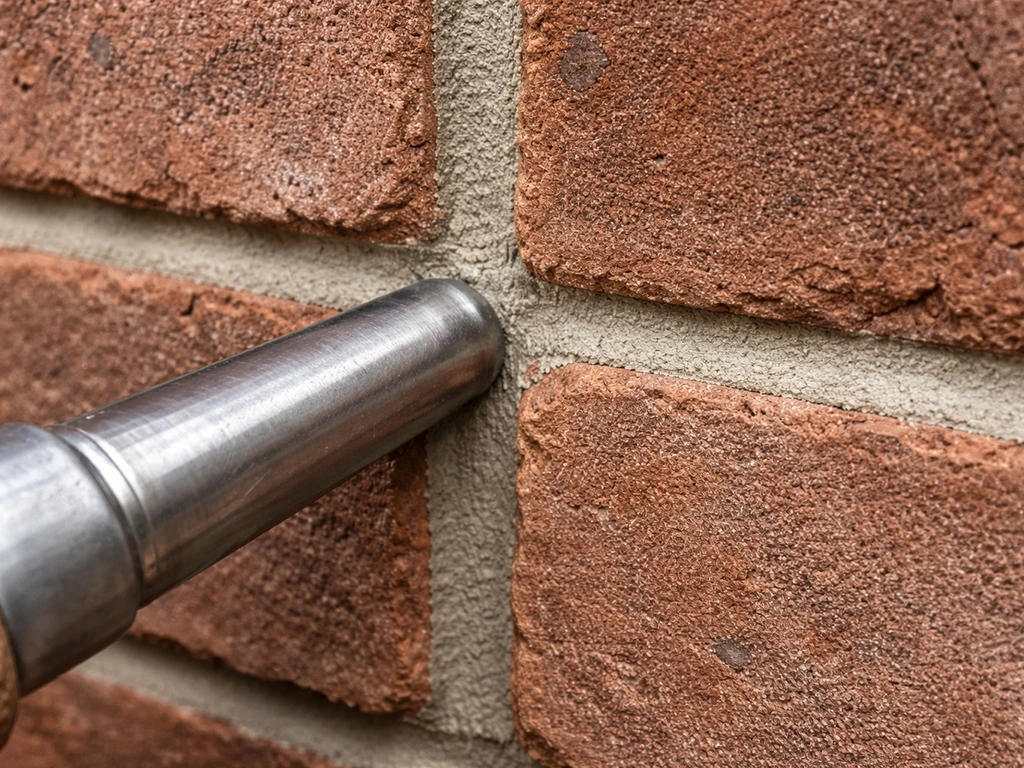
- Rake out old or loose mortar to a depth of at least 20-25 mm using a cold chisel, angle grinder with a pointing disc, or an oscillating multi-tool. Don't just point over failed mortar.
- Brush out all dust, grit, and debris with a stiff brush or compressed air. Any loose material left in the joint will create a weak plane.
- Dampen the joint faces with clean water and let the excess drain. You want the paving unit sides damp, not wet. Dry sides absorb water from the mortar too fast and cause premature curing failures. Saturated sides dilute the mix at the interface.
Mixing
- For site-mixed mortar, combine dry ingredients first (sand and cement) in the correct ratio using a clean bucket or forced-action mixer for larger volumes. Never mix in a drum mixer for small batches; it segregates the fine particles.
- Add water (with plasticiser if using) gradually. Target a 'dropped ice cream' consistency: the mortar holds its shape when squeezed in your fist but doesn't crumble. For narrow joints, go slightly wetter.
- Mix for at least 3-5 minutes until uniformly grey with no dry lumps. Batch only what you can use in 45-60 minutes; don't re-temper (add water to) a stiffening mix, as this destroys the cement hydration chemistry.
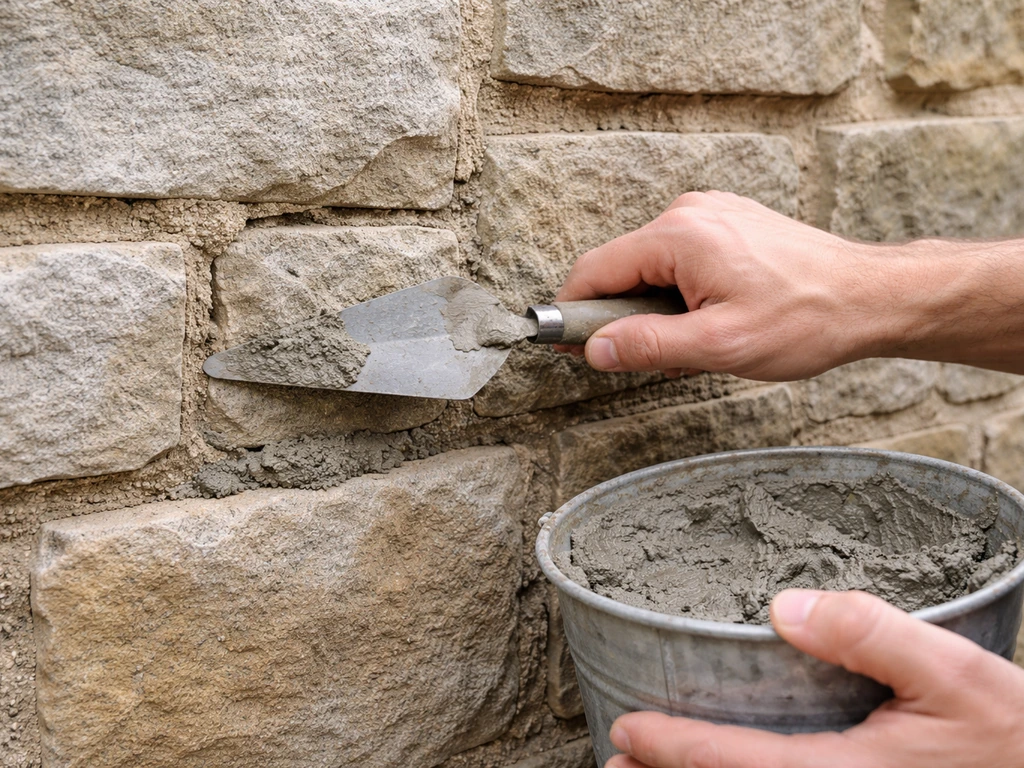
Applying the mortar
- Load the mortar onto a hawk or board and work it into joints using a pointing trowel or a bucket trowel for wider gaps. Push firmly to eliminate voids; mortar with internal air pockets will fail fast.
- For dry brush-in compounds, fill joints to just below the surface, sweep the dry mix across, and then lightly mist with water per the manufacturer's instructions. Avoid flooding.
- Protect the face of the paving as you go. Mask with low-tack tape on sensitive stone or porcelain. Clean smears immediately with a damp sponge while the mortar is still fresh. Cement haze on porcelain or polished stone is much harder to deal with once it has cured.
Tooling and finishing
- Tool the joints when the mortar has reached a 'thumbprint' firmness, typically 1-3 hours after application depending on temperature and humidity. Press a rounded jointing tool or the back of a spoon along the joint to compact and slightly recess the surface.
- A slightly recessed, concave joint sheds water away from the paving unit edges better than a flush or raised joint. This matters most in wet climates.
- Brush off any crumbs or mortar nibs with a soft brush once tooled. Don't wash down with water for at least 4-6 hours after tooling.
Curing, sealing, and handling that first bout of weather
OPC-based mortar reaches about 70% of its design strength within 7 days and full strength at 28 days. During the first 48 hours, keep it damp (mist lightly in dry/hot weather) and protect from frost. If temperatures drop below 4°C (39°F) within that first 48 hours, you need to either delay the job or use a frost-protection admixture and cover the patio with insulating sheeting overnight. Freeze damage to fresh mortar is almost impossible to see until the following spring when joints start crumbling.
NHL lime mortars cure more slowly and need to carbonate in air. Keep them damp for longer (up to 72 hours) and avoid covering completely, as they need some air exchange to harden properly. Don't use lime mortars in temperatures under 5°C (41°F) without specialist advice.
Sealing the joints is worth doing for natural porous stone (flagstone, sandstone, limestone) and for patios exposed to de-icing salts or heavy staining risk. Flagstone patio mortar vs sand is a common question because jointing materials change how well the joints resist water uptake and freeze-thaw stress. Use a breathable, penetrating impregnator rather than a surface film sealer. Film sealers trap moisture beneath the surface and can cause more spalling than they prevent.
Wait a minimum of 28 days after pointing before sealing so the mortar is fully cured. For porcelain and dense granite, sealing the joints adds little benefit and can be skipped. The topic of sealing specifically for stone patios connects closely with questions around the best mortar for stone patio installations, where porosity management is a recurring theme.
Fixing failed joints and keeping them going long-term
Common failures and what they tell you
| Problem | Likely Cause | Fix |
|---|---|---|
| Cracking (map or linear) | Too-strong mix, insufficient depth, or thermal movement | Rake out, use a more flexible (lower cement) mix, consider adding polymer SBR |
| Shrinkage gaps at edges | Too much water in original mix, or dry joint faces | Re-point after raking; keep W/C ratio under 0.5 next time |
| Washout in first rain | Too wet a mix, not enough cure time before rain, or very shallow joints | Re-point; protect fresh work from rain for 24 hours |
| Efflorescence (white bloom) | Soluble salts migrating to surface as mortar dries | Brush dry, use diluted white vinegar or proprietary efflorescence remover; prevent with polymer additive next time |
| Cement haze on stone/tile | Mortar smear left to cure on paving face | Use diluted phosphoric acid cleaner; avoid HCl on limestone or marble |
| Loose or hollow-sounding joints | Poor prep, no key in joint, or bond failure at interface | Full rake-out and re-point; dampen faces properly before next application |
Long-term maintenance routine
Well-installed mortar joints on a residential patio should last 10-20 years before needing major attention, assuming a decent base (minimum 100 mm compacted sub-base plus 50 mm concrete or sharp sand bed). Annual maintenance is simple: inspect joints in spring after the freeze-thaw season, looking for any cracks or voids. Tap the joint surface with a metal object and listen for a hollow sound, which indicates debonding. Catch it early and you can just rake out the affected section and re-point rather than dealing with a full joint failure.
Every couple of years, wash the patio down and re-apply a penetrating sealer if you're on porous stone. Avoid pressure washing mortar joints directly; the concentrated lance pressure erodes the mortar surface faster than any weather exposure would. A fan-pattern nozzle at a reasonable distance is fine for the paving faces, but keep it off the joint lines. If joints have dropped more than 5 mm below the paving surface and water is pooling in them, it's time to re-point the whole area rather than spot-patching, which tends to look patchy and match poorly once the old mortar weathers to a different colour.
If you're comparing full re-pointing against alternatives like polymeric sand or brush-in jointing compounds for a low-maintenance future, the guide on the best pointing for patio slabs covers that decision in detail, including when each approach makes practical and economic sense.
FAQ
Can I use regular sand and builder’s mortar for patio joints, or is that a bad idea?
It’s usually a bad idea for narrow or natural-stone joints. Builder’s mortar often uses finer sand and higher binder proportions, which can make the joint too stiff and either crack the paving or wash out early. For best results, match the mix to joint width and porosity of the units, then avoid excess water (too much water increases shrinkage and debonding).
What mortar mix strength should I aim for if I’m not sure what the paving material is?
For most residential patio joints, target an EN 998-2 class in the M5 to M10 range (roughly ASTM Type N or Type S). If you are working with softer stone, do not go higher than necessary, because stiffer joints can transfer movement into the paving edges rather than flexing with the patio.
How do I adjust the mix for very narrow joints (under 8 mm) to prevent voids?
Use a more fluid, well-worked consistency and avoid over-filling. Narrow joints trap air, so mix slightly wetter than you would for 8 to 20 mm joints, but rely on a plasticiser rather than adding lots of water. Tool and pack until you see full contact, then clean excess immediately.
What’s the difference between patio joint mortar and the bed mortar under the slabs?
Joint mortar is designed to bond to the sides, resist water ingress at the interface, and accommodate thermal movement in a relatively thin, exposed zone. Bed mortar is mainly for setting and leveling, it can be stronger or less flexible depending on the build-up. Even if the base ingredients are similar, do not automatically assume the same mix is ideal for exposed joints.
Do I need polymer-modified jointing mortar for porcelain or tiles?
Porcelain is dense and low-absorption, so bonding can be less reliable with plain, high-water mixes. Polymer-modified mortar or a dedicated jointing compound helps adhesion and reduces water uptake, which matters even if the tile face itself does not absorb much. Focus on getting full contact at the unit edges, not just nominal mix strength.
Is lime mortar (NHL) always better than OPC for patio joints?
No. NHL can be excellent on porous or softer stone because it breathes and cures more slowly, but it is not ideal in cold conditions (generally avoid below about 5°C unless you have specialist guidance). Also, lime needs longer damp curing and some air exchange, so it changes your scheduling and protection plan.
How long do I have to keep fresh joints damp and protected?
For OPC, you typically want to keep the joints damp for at least the first 48 hours and protect from frost in that window. For NHL lime mortars, damp curing is longer (often up to around 72 hours), and you should avoid fully sealing the surface too early because lime needs air to carbonate and harden.
Can I seal patio joints right after they cure, or do I need to wait?
Wait at least 28 days after pointing before applying a joint sealer, even if the surface feels hard sooner. Sealing too early can trap moisture and increase the risk of staining, spalling, or poor performance. If you are in a humid or cold period, extend the wait to be safe.
What’s the safest way to clean a patio without damaging the joints?
Avoid pressure washing mortar joint lines directly. If you need to wash, use a gentle approach with a fan-pattern nozzle on the paving faces and keep the tip off the joints. High lance pressure accelerates surface erosion along the interface and can loosen already weak bond areas.
When should I re-point entire sections instead of spot-patching?
Spot-patching is likely to look patchy and can fail sooner if the underlying joints have dropped or debonded beyond a local area. If joint profiles are off by more than about 5 mm relative to the paving surface, or if water is pooling in the lines, re-point the full affected zone rather than trying to isolate a few bricks or tiles.
My mortar failed after the first heavy rain. What common mistake causes that?
A frequent cause is using weak, high-sand mixes and adding extra water to make them “easier to work,” which reduces durability and increases washout. Another cause is poor bonding because the paving edge faces were dirty, dusty, or wet when you packed the joints. Remove debris, control moisture condition, and use the right sand type (sharp/washed, not soft building sand).
Do freeze-thaw climates require special air entrainment, or is it better to focus on water control?
Use air-entraining admixtures if specified for your system, but the biggest practical lever is reducing water ingress and improving bond at the unit interface. When joints stay water-saturated, bond degradation and mechanical stress are the main failure pathway, so prioritize correct joint packing, drainage, and protective curing over relying only on chemistry.
What should I do about salt exposure near a patio, like de-icing or coastal air?
Use sulphate-resistant cement or a polymer-modified jointing product, because salt crystallization pressure can damage mortar pores and worsen spalling. Also consider sealing only when appropriate for your surface type, since film sealers can trap moisture and potentially worsen freeze-related breakdown.