For most stone patios, a Type S mortar mix (1 part Portland cement, 0.5 part lime, 4.5 parts sand) is your go-to for setting and pointing, because it balances strength with enough flexibility to survive freeze-thaw cycles. For large flagstone or irregular natural stone over 1. In the DIY discussion on Reddit r/masonry about laying flagstone, contributors also talk about working with screeding or smoothing the bed and using cement or mortar in the joints screeding or smoothing beds and using cement/mortar in the joints. 5 inches thick, use a thick-bed mortar approach with a full mortar bed of 3/4 to 1.5 inches. For thinner cut stone, porcelain, or concrete patio slabs, a polymer-modified thinset is the right call. For brick, Type S mortar handles both setting and jointing. If you're re-pointing existing joints, a pre-mixed polymer jointing mortar or a bagged Type S mix matched to the original joint color will save you a lot of headache.
Best Mortar for Stone Patio: Types, Mixes, and Tips

Best mortar picks at a glance
| Patio material / situation | Best mortar type | Notes |
|---|---|---|
| Thick natural stone / flagstone (>1.5") | Type S mortar (full bed) | Mix 1:0.5:4.5 cement:lime:sand; bed depth 3/4"–1.5" |
| Cut stone / thin flagstone (<1") | Polymer-modified thinset | Use medium-bed thinset if stone is 3/8"–3/4" thick |
| Concrete patio slabs (large format) | Medium-bed polymer-modified mortar | Belgard and similar brands require thinset under mortar bed for overlays |
| Brick patio (setting + jointing) | Type S mortar | Softer than Type N; suits outdoor freeze-thaw exposure |
| Joint pointing (all stone types) | Polymer jointing mortar or Type S | Pre-mixed for small jobs; bagged for larger repairs |
| Dry climate / no freeze-thaw | Type N mortar or Type S | Type N is workable and forgiving in mild climates |
| Freeze-thaw / cold climate | Type S mortar (polymer-modified preferred) | Extra strength and flexibility prevent cracking |
What mortar actually needs to do outside
Outdoor mortar lives a brutal life compared to interior tile work. It has to bond to porous, irregular stone surfaces, handle direct water exposure from rain and irrigation, and in cold climates it has to expand and contract through dozens of freeze-thaw cycles every winter without crumbling. This is why the same basic thinset you'd use for a bathroom floor will often crack and pop loose within a season or two when used under flagstone in a northern climate.
There are four things I look at when choosing a mortar for any outdoor patio job: bonding strength to the specific stone or brick, water resistance once cured, freeze-thaw durability, and how well it fills or supports the joint width and bed depth needed. A mortar that's too rigid fails in cold climates. One that's too soft lets heavy stones shift. And one that's the wrong consistency won't bond to a dense, low-porosity stone like bluestone or porcelain at all without a polymer additive.
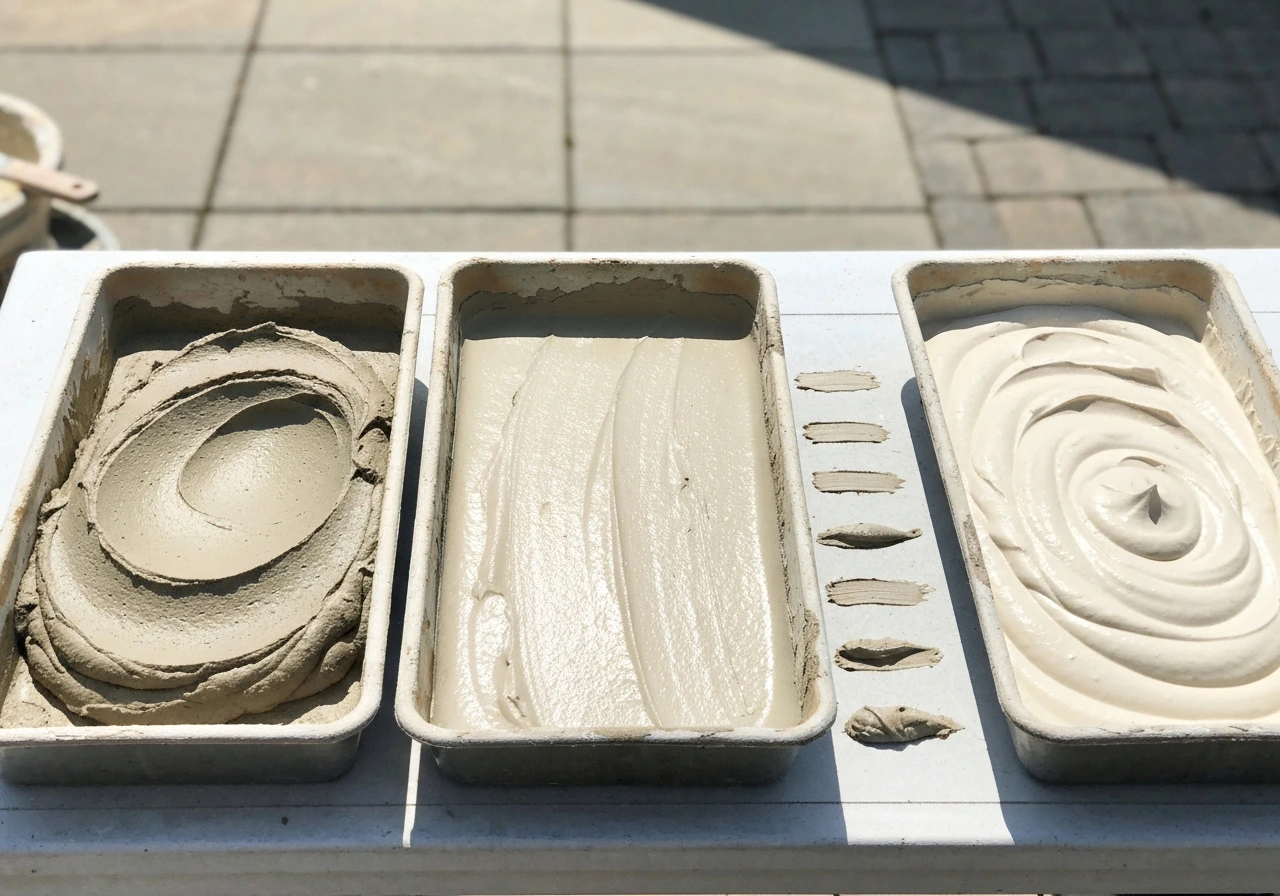
The main mortar types you'll encounter are Type N (general purpose, lower strength, workable), Type S (the outdoor standard, higher bond strength, freeze-thaw resistant), and Type M (very high compressive strength, used in retaining walls and below-grade work but too brittle for most patio joints). Thinset is a different animal entirely: it's a cement-based adhesive mortar designed for thin applications under 3/8 to 1/2 inch, while thick-bed or full-bed mortar is used to set heavy or irregular stone in a deep, compacted layer.
Setting and pointing mortar for natural stone and flagstone
Natural stone patios, especially flagstone, come in two very different situations: thick irregular fieldstone or sawn flagstone over an inch and a half thick, and thinner cut stone slabs under an inch. These need different approaches, and using the wrong one is one of the most common mistakes I see on DIY patio jobs.
Thick flagstone and irregular natural stone (full mortar bed)
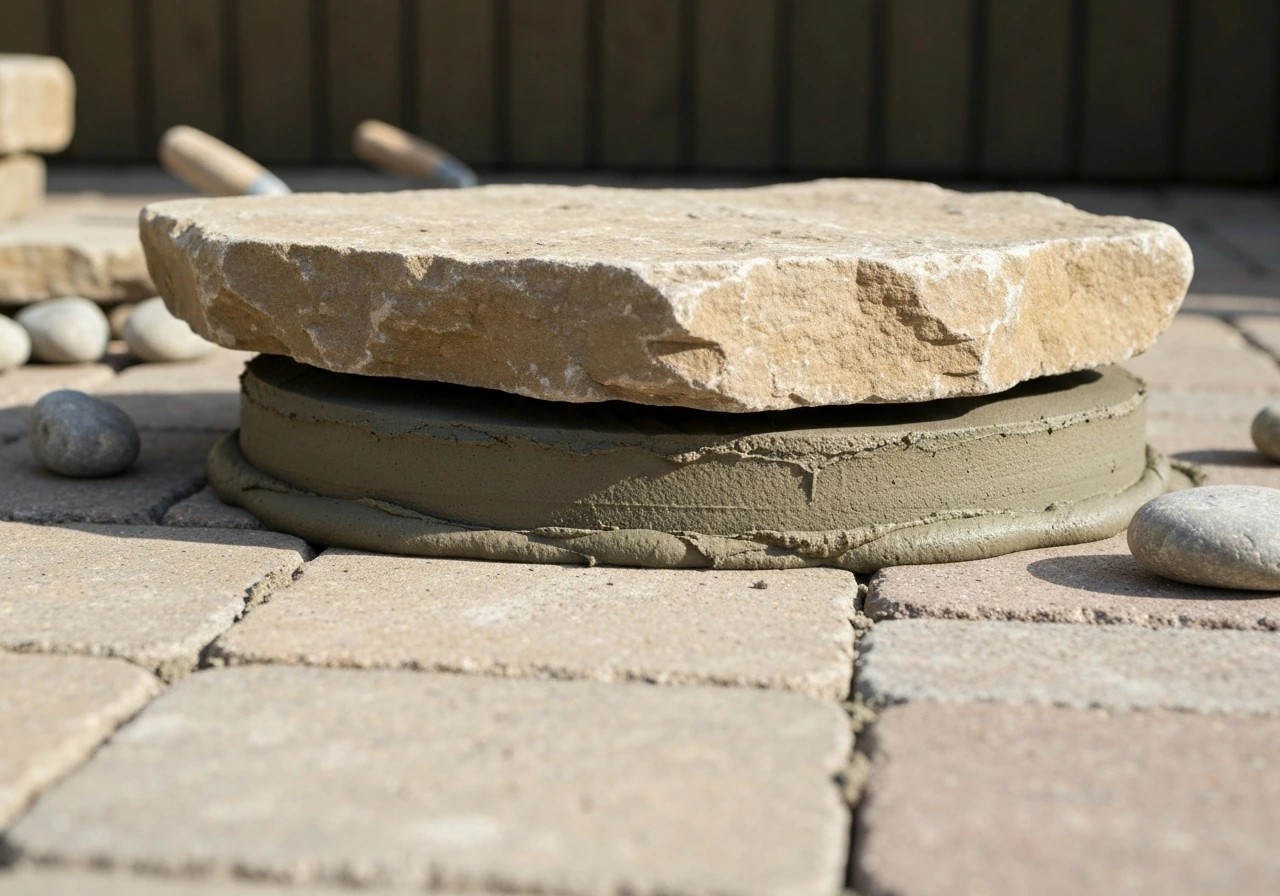
For stone thicker than 1.5 inches, lay it in a full mortar bed of Type S mortar, mixed to a stiff, damp-sand consistency. The bed should be 3/4 to 1.5 inches deep over a solid concrete base. Butter the back of the stone lightly with the same mix before setting it, then press and tap it level. Type S gives you the bond strength for heavy stone while the lime content keeps it slightly flexible, which matters when temperatures swing hard. For a standard batch, mix 1 part Portland cement, half a part hydrated lime, and 4.5 parts clean coarse sand. Add water slowly until the mix holds its shape when squeezed but isn't slumping.
Thin cut stone and sawn flagstone (thinset approach)
For stone under 1 inch, especially dense cut stone like bluestone, slate, or limestone pavers, use a polymer-modified thinset. JLC Online also distinguishes polymer-modified thin-set from dry-set or unmodified thin-set for typical installation scenarios blank" rel="noopener noreferrer">polymer-modified thinset. Schluter clarifies that ANSI A118.4 specifies modified dry-set cement mortar, which is polymer-modified mortar blank" rel="noopener noreferrer">polymer-modified thinset. The polymer additive is critical here because dense stone has low porosity and won't bond reliably to plain cement mortar. Apply the thinset with a 1/2-inch notched trowel to the concrete substrate, back-butter each stone, and set it within the open time on the bag (usually 20 to 30 minutes). Don't try to use thinset as a leveling bed for stone that's over 3/4 inch thick, because thick thinset layers don't cure properly and can be hollow underneath.
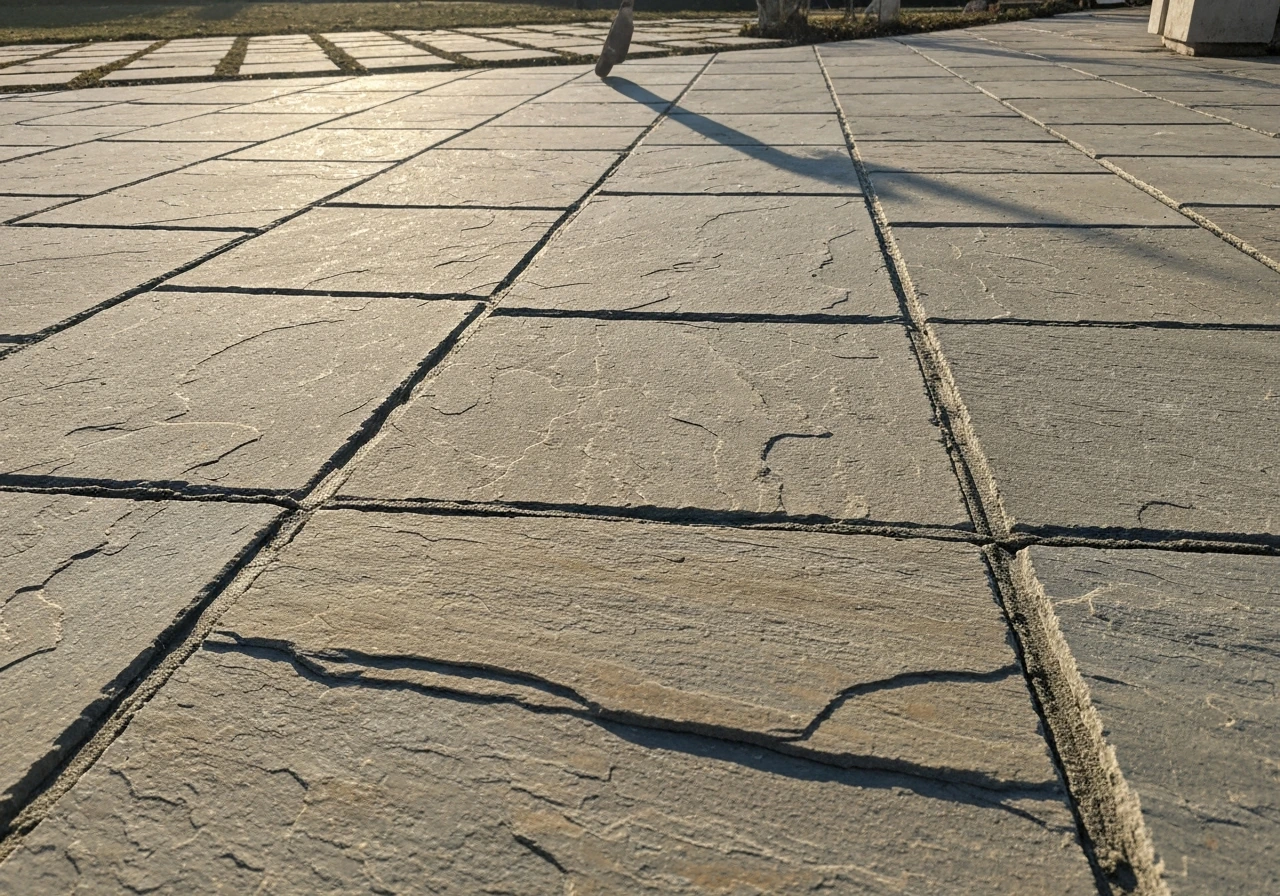
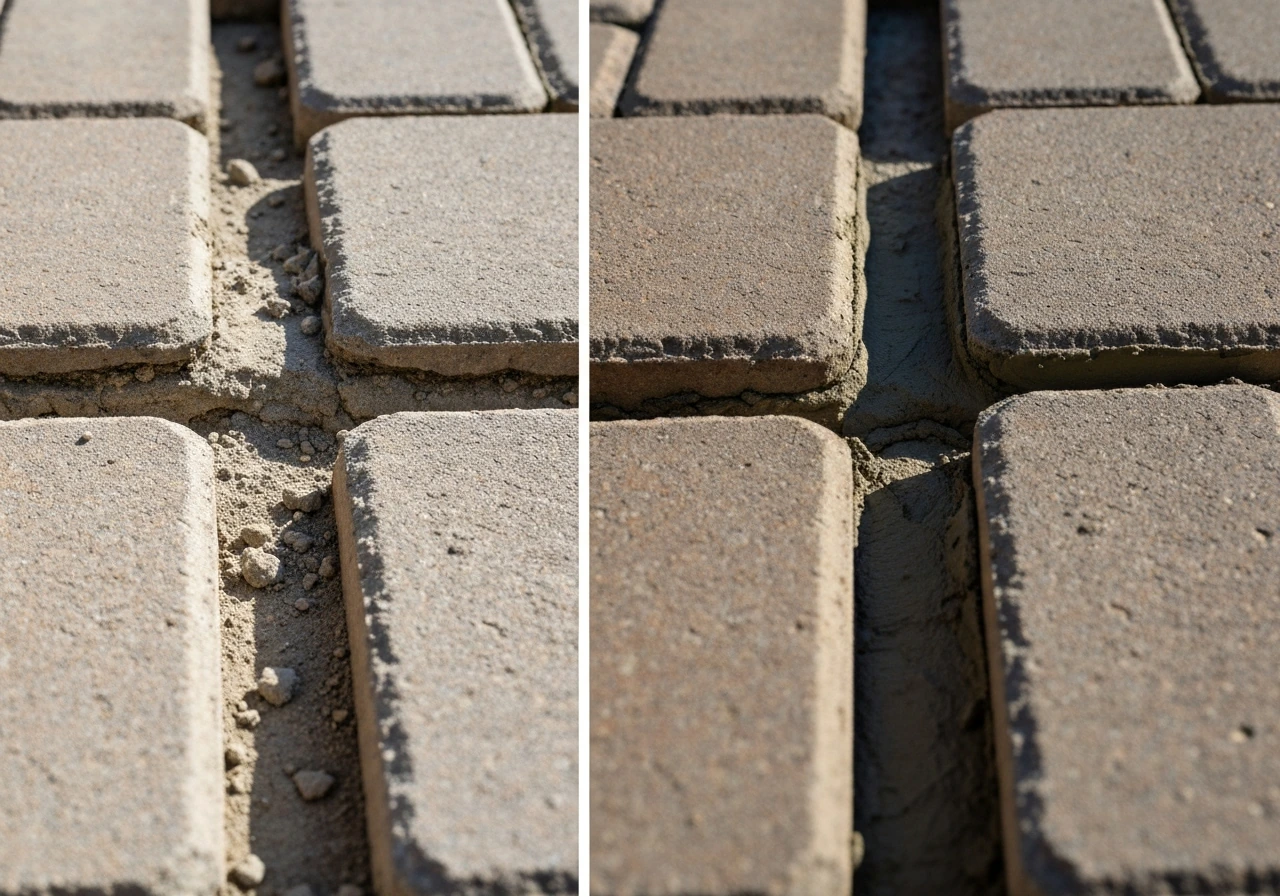
Pointing mortar for flagstone joints
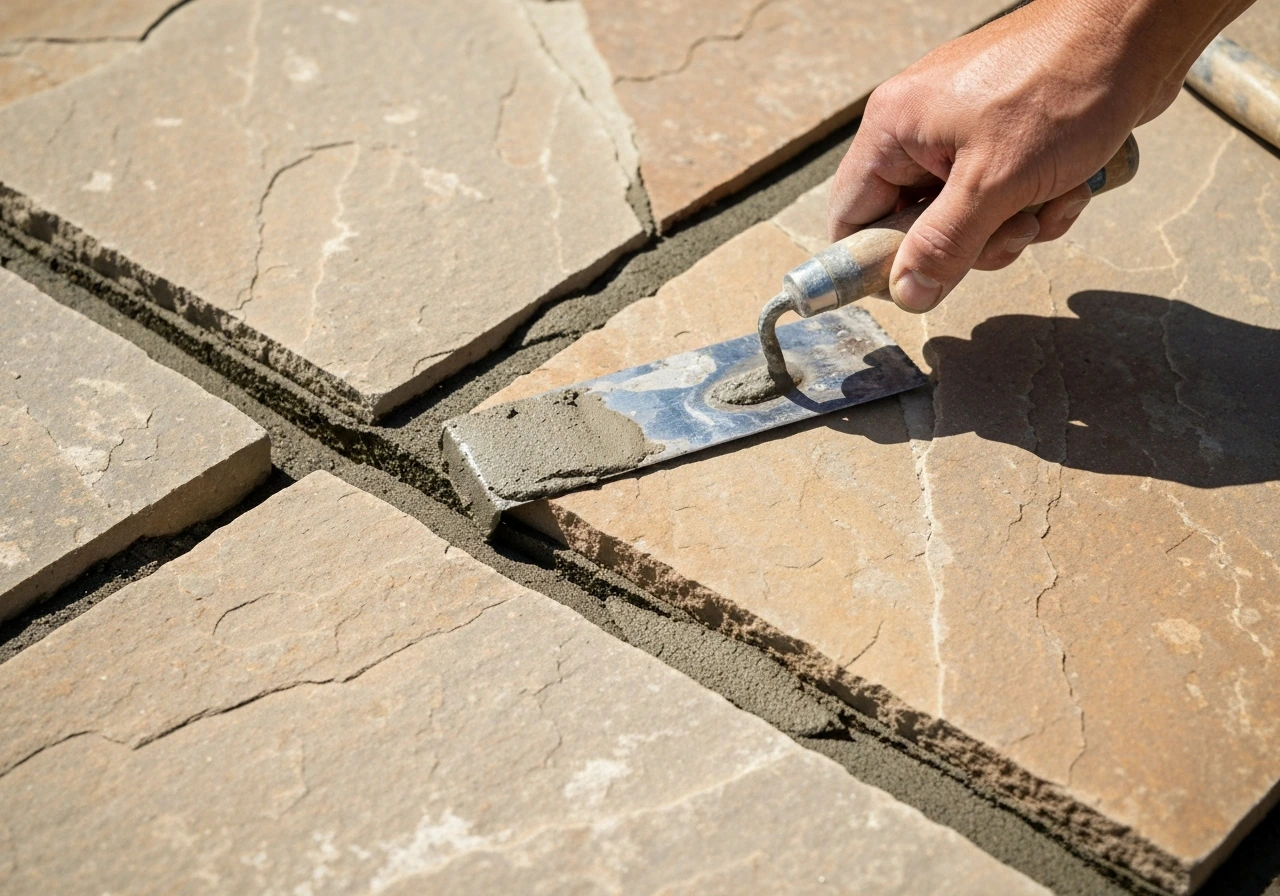
Once the stone is set and cured (at least 24 to 48 hours), you can point the joints. For joints 1/2 inch or wider, Type S mortar works well and is easy to color-match with pigment. Pack it in firmly with a grout bag or pointing trowel, tool it slightly concave so water sheds off, and clean up residue before it skins over. For tighter joints under 3/8 inch, a polymer jointing mortar (sold pre-bagged by brands like Sakrete or Techniseal) flows better and bonds more reliably in narrow gaps. The difference between setting mortar and pointing mortar is covered in more depth in articles on the best mortar for patio pointing and best pointing for patio slabs, if you're focused purely on the joint side of things. For more on selecting the right product, see our guide to the best mortar for patio pointing. For concrete patio slabs, choosing the best pointing for patio slabs helps you get joints that shed water and stay intact through freeze-thaw.
Mortar for concrete patio slabs and large-format pavers
Large concrete patio slabs and oversized pavers (anything 18 inches or larger on a side) need a medium-bed polymer-modified mortar rather than standard thinset. Standard thinset can't support the weight variation across a large slab and tends to produce hollow spots under the center. Medium-bed mortar, sometimes labeled as large-tile mortar or heavy-duty mortar, is specifically formulated to stay stable in layers up to about 3/4 inch thick, which gives you more tolerance when the base isn't perfectly level.
For mortar-set paver overlays over existing concrete (a popular renovation method where you're laying new pavers over an old slab), brands like Belgard specify using a thinset layer directly on the cleaned concrete surface, then a mortar bed on top of that, then thinset on the back of the paver itself. This double-bond system is more work but creates a much more durable connection, especially where the old slab has minor surface variation. Don't skip the back-buttering step on large pavers; it's what fills the air gaps that cause hollow spots and eventual cracking under foot traffic.
If you're setting pavers from scratch and have the option, sand-set installation (where pavers bed into a compacted layer of coarse sand or gravel) is a completely different method that avoids mortar entirely and allows easier individual paver replacement later. Mortar-set is the right choice when you want a fixed, permanent surface, you're working over an existing slab, or you need very tight joints. The flagstone mortar vs sand comparison is worth reading if you're on the fence about which approach suits your project. The flagstone patio mortar vs sand debate comes down to whether you need a fixed, permanent stone installation or a more removable surface.
Mortar for brick patios
Brick patios are traditionally set in a full mortar bed, and the standard specification for outdoor brick work is Type S mortar. It's stronger than Type N (which is fine for interior or very mild climates) but less brittle than Type M (which tends to crack the brick face before the joint fails in freeze-thaw cycles). The same mix ratio applies: 1 part Portland cement, 0.5 part lime, 4.5 parts sand. Pre-bagged Type S mortar is widely available and perfectly fine for patio work; just make sure you're not buying Type N by mistake since the bags look similar.
For jointing brick, point the joints to a slightly concave or rodded profile so water doesn't pool on the joint face. Avoid flush joints on outdoor brick because water sits on them and accelerates spalling in cold climates. If you're repointing old brick joints, rake out the existing mortar to at least 3/4 inch depth before packing in new mortar so it has something to grip. Shallow repointing over degraded old mortar peels off within a year or two.
How to pick the right mortar for your specific situation
Run through these four factors before you buy anything, and you'll land on the right product almost every time.
- Stone or brick type and thickness: Thick, heavy, or irregular stone needs a full mortar bed (Type S). Thin, dense, or low-porosity stone needs polymer-modified thinset. Brick needs Type S for both setting and jointing.
- Joint width: Joints wider than 1/2 inch need a proper mortar mix that won't shrink and crack. Narrow joints under 3/8 inch are better served by polymer jointing mortar or fine-grout products.
- Climate and freeze-thaw exposure: If you get hard winters, don't go below Type S. The lime content is what gives it flex. In mild, dry climates (think southern California or Arizona), Type N is workable and easier to tool.
- Bed depth required: If you need more than 3/4 inch of buildup to level the stone, you're in thick-bed territory. Never pile up thinset to compensate for an uneven base; it doesn't cure correctly and you'll get hollow spots.
One thing worth noting: if you're looking at pre-mixed jointing mortars (the kind you sweep in or press from a bag), these are covered in detail in articles on no-nonsense patio jointing mortar and best patio mortar mix options. If you want specific recommendations and real-world performance comparisons, check out no nonsense patio jointing mortar reviews before you buy no-nonsense patio jointing mortar. If you want the quick answer, choosing the best patio mortar mix comes down to matching the mortar type to your stone or pavers and your climate. They're great for speed on joint-only work but aren't substitutes for a structural setting mortar when you're actually embedding stone.
Installation steps, weather windows, and curing
Step-by-step: setting stone in mortar
- Prepare the base: You need a solid concrete slab or compacted gravel and concrete base. Mortar-set stone over bare dirt or uncompacted gravel will crack and heave. Clean the slab surface and remove dust, oil, or old sealers.
- Dampen the base and stone: Lightly mist the concrete slab and the back of each stone before setting. This slows the water absorption from the mortar, which gives you better bond and working time. Don't soak them, just dampen.
- Mix your mortar: For Type S, mix to a stiff but workable consistency. It should hold a ridge when you run your trowel through it. If it slumps, it's too wet and will cause stones to sink and shift.
- Spread the mortar bed: Lay a consistent bed of 3/4 to 1.5 inches for thick stone, or apply thinset with a notched trowel for thin stone. Work in sections you can cover in 15 to 20 minutes.
- Set and tap each stone: Press each stone firmly into the bed, twisting slightly as you press to collapse air voids, then tap with a rubber mallet to bring it to level. Check level frequently with a straightedge.
- Back-butter large pieces: For any stone or paver over 12 inches in any direction, apply a thin coat of the same mortar or thinset to the stone back before pressing it down.
- Allow initial set before jointing: Wait 24 to 48 hours before filling joints so the setting bed has time to firm up and you don't disturb the stone positions.
- Point the joints: Pack mortar firmly into joints with a grout bag or trowel, tool to a concave profile, and clean residue with a damp sponge before it cures on the stone face.
Temperature and weather rules
- Don't lay mortar when air or surface temperatures are below 40°F (4°C). Cold slows the cement hydration process and can cause the mortar to fail before it gains strength.
- Avoid working in direct hot sun or high wind when temperatures exceed 90°F (32°C). Mortar skins over too fast, reducing bond time. Work in the morning or shade the work area.
- Protect fresh mortar from rain for at least 24 hours. Cover with plastic sheeting if rain is forecast.
- In cold weather, cover finished work with insulating blankets for 48 to 72 hours to maintain curing temperature.
- Full cure takes 28 days for Portland cement-based mortar. Avoid heavy foot traffic for the first 72 hours and heavy loads for the first week.
Repointing, repairs, and knowing when to start over
Most patio mortar repairs are joint failures, not setting bed failures. You'll notice crumbling, hollow, or recessed joints before the stones themselves start to move. The fix is straightforward: rake out the old joint to at least 3/4 inch deep using a grout saw or cold chisel, brush out the dust, dampen the joint cavity, and pack in fresh Type S mortar or a polymer jointing mortar. Tool it, clean it, and protect it from rain for 24 hours.
Color-matching is the tricky part of repairs. Mortar always dries lighter than it looks when wet, so test a small batch on a scrap piece and let it cure for 48 hours before committing to a large repair. Many pre-bagged mortars come in a range of standard colors (gray, buff, tan, charcoal), and you can adjust with cement pigment powder if needed. Getting within one shade is usually fine; an exact match is almost impossible on weathered mortar.
When stones are rocking, hollow when tapped, or have lifted at the edges, you have a setting bed failure, not just a joint problem. In that case, you need to lift the affected stones, chip out the old mortar bed, re-level the base, and reset in fresh mortar. This is more labor than most people expect, but trying to inject mortar under a hollow stone is rarely a lasting fix. I've seen those patches fail within a single winter.
If more than 30 to 40 percent of a patio's joints are failed or more than a quarter of the stones are hollow or rocking, a full redo is usually more cost-effective than piecemeal repairs, especially if the concrete base itself has cracked or heaved. At that point, it's worth evaluating whether the base needs to be addressed first before any new mortar work goes down.
What to buy and how much
For a mortar-set flagstone or brick patio, a practical starting materials list looks like this. For a 100-square-foot area with a 1-inch mortar bed, you'll need roughly 3/4 cubic yard of mortar mix, which works out to about twelve 60-pound bags of pre-mixed Type S mortar, plus extra for jointing. If you're mixing from scratch, buy Portland cement, hydrated lime, and coarse sand separately for larger jobs since it's significantly cheaper per cubic foot.
| Material | Use | Rough quantity for 100 sq ft |
|---|---|---|
| Pre-bagged Type S mortar (60 lb) | Setting bed + pointing | 10–14 bags |
| Polymer-modified thinset (50 lb) | Thin stone or slab overlay | 4–6 bags |
| Medium-bed large-tile mortar (50 lb) | Large-format paver setting | 5–7 bags |
| Polymer jointing mortar (44 lb) | Joint pointing only | 2–4 bags |
| Portland cement (94 lb) | From-scratch mixing | 1–2 bags |
| Hydrated lime (50 lb) | From-scratch mixing | 1 bag |
| Coarse washed sand (60 lb) | From-scratch mixing | 8–10 bags |
For tools, you'll need a margin trowel, a rubber mallet, a 4-foot level, a pointing trowel or jointing tool, a grout bag for joints, and a bucket and paddle mixer (or a rented mortar mixer for jobs over 50 square feet). Don't try to hand-mix more than a couple of bags at a time; inconsistent mixing is a major cause of weak patches and color variation in the finished joints.
FAQ
Can I use Type S mortar for both setting stone and pointing joints on the same patio?
Yes, Type S works for both setting and joints when you have typical outdoor joint widths (about 1/2 inch or wider). Just keep the pointing mix consistent with your setting mix, and tool the joints promptly, because Type S can skin over faster than many polymer joint mortars in hot or windy weather.
What mortar should I choose if my stone patio is in a freeze-thaw climate but the stone is very dense, like bluestone?
Use polymer-modified thinset for setting dense, low-porosity stone because plain cement mortar can fail to bond reliably. If you are also doing repairs, match the joint product to the joint width, since dense stone often still has narrow joints that benefit from polymer jointing mortar.
How do I tell whether my problem is mortar joint failure or a setting-bed failure before I buy more mortar?
Tap-test a few suspect stones and look for rocking. If joints are crumbling or recessed but stones stay solid, it is usually a joint-only failure. If stones lift, sound hollow, or rock, injecting mortar usually will not hold, you will need to remove and reset those pieces.
Is it okay to “thin” mortar with extra water if it feels too stiff or sandy?
Avoid it. Adding water after mixing usually weakens the cured mortar and increases cracking, especially for Type S setting mixes. If your batch is too stiff, discard it and remake, or adjust by following the bag or mix instructions exactly during the initial water addition.
What trowel size or spread thickness should I use for thinset on stone that is under 1 inch thick?
Stick to a notched trowel sized for the job, typically around 1/2 inch notches for many stone-and-concrete setups, and back-butter the stone. The goal is consistent contact without creating thick, uneven patches, since thick thinset can cure poorly and trap voids.
Do I need to butter the back of every stone and paver, or only large ones?
For best performance, back-butter every piece you can, especially on irregular flagstone or large pavers. This is less about size alone and more about filling micro-voids so you do not end up with hollow spots that lead to cracking under foot traffic.
Can I use mortar to level a badly uneven base under a stone patio?
Only to a limited extent. Mortar can help with small corrections, but if the base is significantly uneven, a better fix is re-leveling the base and then using the correct mortar bed depth. Large leveling attempts with thinset can create hollows, and thick-bed mortar still needs a stable substrate.
How long should I wait before walking on a mortar-set patio and before pointing joints?
Do not rush. The common safe approach is at least 24 to 48 hours before disturbing the setting mortar and then pointing after the setting has cured, typically once it is firm enough to avoid shifting. If it is cool, damp, or windy, curing time can extend, so err on the longer side.
What should I do if my joints keep washing out or getting recessed after rain?
Recessed joints usually mean the mortar was too weak, too wet during installation, or not compacted and tooled to shed water. Rake out and repack to the required depth (often at least 3/4 inch for repointing), dampen the cavity before filling, and tool with a slight concave profile.
How can I get a closer color match when repointing older patio joints?
Test color in a small area and let it cure fully. Mortar typically dries lighter than it looks when wet, so curing for about 48 hours is important before you judge the shade. For tighter matches, you can often adjust with cement pigment, but weathered old mortar rarely matches perfectly.
What’s the best mortar choice if I have very large-format pavers, 18 inches or more on a side?
Use a medium-bed polymer-modified mortar rather than standard thinset. Medium-bed mortar is designed to stay stable in thicker layers (often up to about 3/4 inch), which helps prevent voids and hollow spots when the substrate is not perfectly level.
Should I seal mortar and stone after installation?
It depends on the stone and the product, and sealing is not always necessary for mortar joints. If you are considering sealing, confirm it is compatible with your stone type and the specific mortar, since some sealers can trap moisture and affect long-term freeze-thaw performance if the wrong combination is used.
When is a full patio redo more practical than mortar repairs?
If a large portion of joints are failing (roughly 30 to 40 percent) or many stones are hollow or rocking (around a quarter or more), spot repairs often cost more over time. A common trigger is base movement, heaving, or cracking, which mortar alone cannot fix.