For most residential garden patios, porcelain outdoor tiles (20mm thick) or concrete interlocking pavers (60–80mm) give you the best all-around combination of durability, slip resistance, low maintenance, and freeze-thaw performance. If you want the best low maintenance patio slabs, start with porcelain outdoor tiles or well-made concrete pavers and then prioritize a properly compacted base and correct drainage. Natural flagstone and sandstone look stunning but need more upkeep. Composite and brick-style pavers sit in the middle. The single biggest factor in which slab lasts longest is not the slab itself, it is the compacted aggregate base underneath it.
Best Garden Patio Slabs: How to Choose, Install, and Maintain

Nolan Ellison
4 Jul 2026
What 'patio slabs' actually means, and what to measure before you buy anything
The term 'patio slab' covers a wide family of products: natural stone cut to paving thickness, concrete cast slabs, porcelain tiles made for exterior use, clay brick pavers, and engineered composites. What they share is that they sit flat on a prepared base to form a hard, stable outdoor surface. What makes them different is how they handle water, freezing, foot traffic, weight, and long-term wear. If you want help narrowing down options, the best outdoor patio slabs for your conditions usually come down to the material, slip resistance, and drainage you plan for. Knowing this up front saves you from buying beautiful slabs that crack, frost-heave, or turn into a slip hazard within two winters.
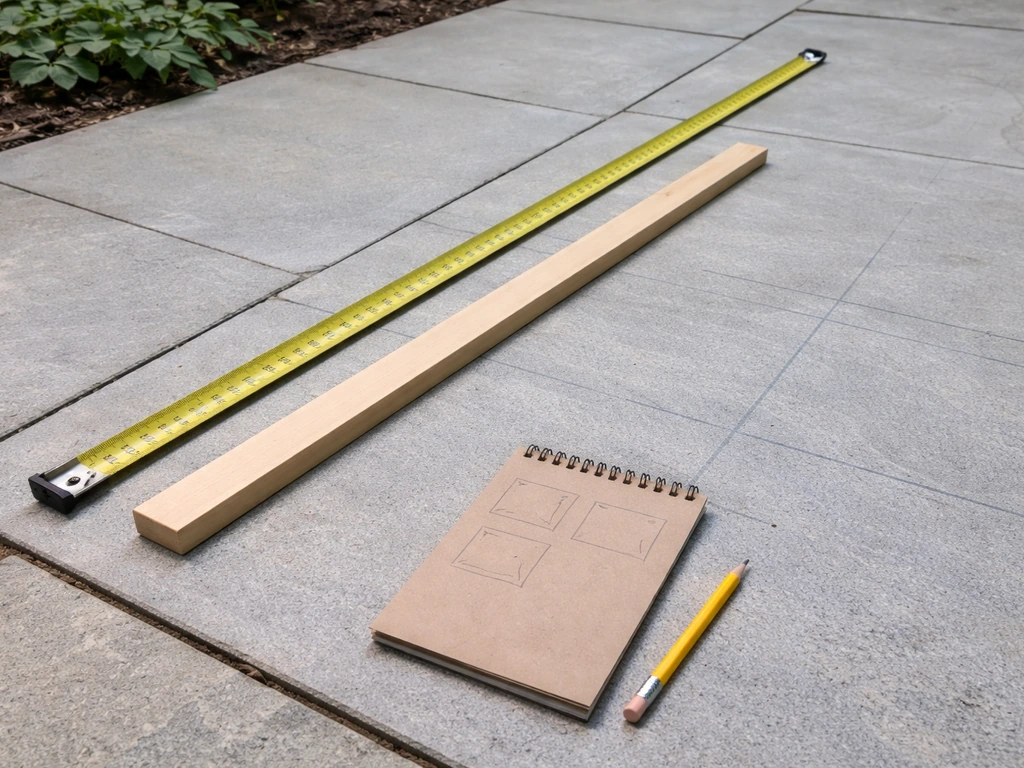
Before you price a single slab, measure your space properly. Walk the patio footprint and record the length and width in metres or feet. Subtract any cut-outs for planters, steps, or door thresholds. That net area (length × width) is the baseline for calculating how many slabs you need, how much bedding sand to order, and how deep to excavate.
Also note which way the ground slopes, water must drain away from your house, and that grade direction will influence how you set your base layers. Finally, dig a test hole about 12 inches deep and identify what is below: topsoil, compacted fill, sand, clay, or an existing concrete/asphalt base. This tells you how much excavation you actually face and how thick your new aggregate base needs to be.
The main slab materials: what each one actually delivers
Here is a plain-language breakdown of the six material families worth considering. Each has a real use case, and none is universally 'best.'
Natural stone (sandstone, limestone, flagstone, travertine)
Natural stone is the hardest to beat on looks and the most variable on performance. Sandstone is warm and textured but porous enough to absorb staining, moss, and moisture. Limestone is denser and more formal-looking. Travertine has a classic Mediterranean feel but the surface pits can trap dirt. Flagstone is a broad term, it just means flat, irregular-cut stone, which could be any of the above. All natural stone should be evaluated under EN 1341, the European outdoor paving standard, which covers water absorption and freeze-thaw resistance. In freeze-thaw climates, choose stone with a low water absorption rating, because wet stone that freezes expands and spalls. Sealing is typically required and must be repeated every two to three years.
Porcelain outdoor tiles
Porcelain is fired at very high temperatures to produce a tile with water absorption under 0. 5%, which is what makes it so resistant to frost, staining, and algae. In freeze-thaw climates, this is the closest thing to a set-it-and-forget-it material. For outdoor use, you need tiles specifically rated for exterior wet areas.
Verify the DCOF (Dynamic Coefficient of Friction) value on the product datasheet: the minimum for exterior wet surfaces under ANSI A326. 3 is 0. 55. Polished finishes rarely hit that threshold in wet conditions, so always choose matte or textured finishes for a garden patio.
Frost resistance should be confirmed via ISO 10545-12 or ASTM C1026 testing, which cycles tiles 100 times between +5°C and -5°C in the presence of water. The main downsides: porcelain requires a rigid mortar base (not sand-set), costs more upfront, and chips rather than cracks gracefully.
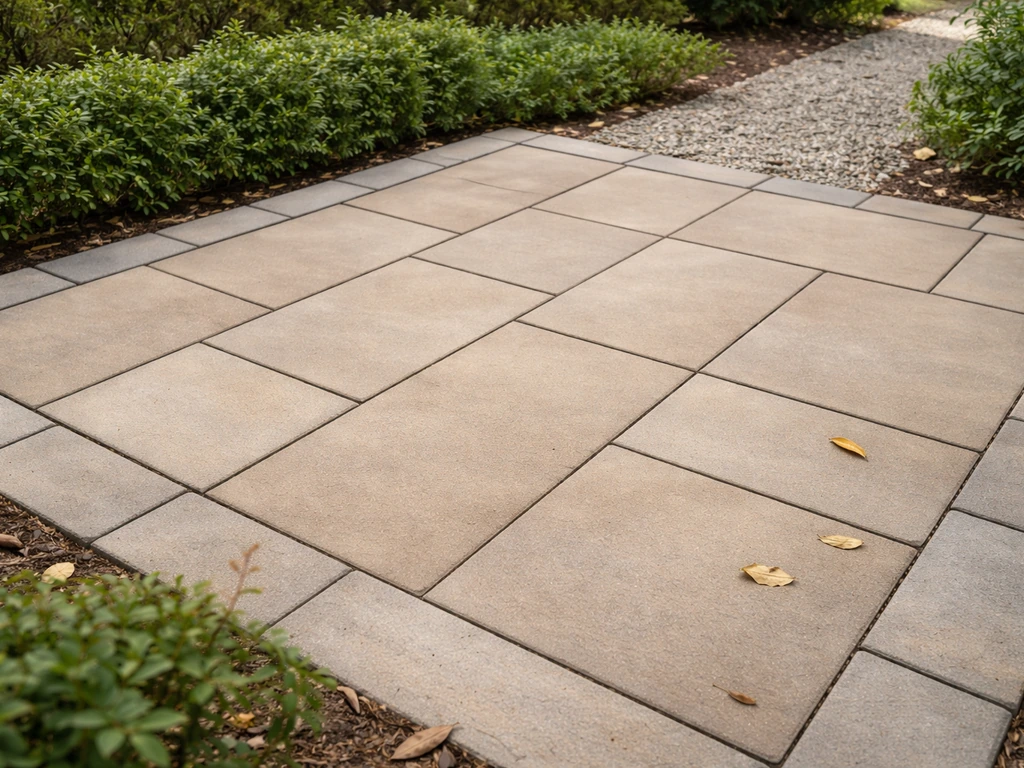
Concrete pavers and slabs
Concrete pavers (interlocking or slab format) are the workhorses of residential patios. They are sand-set on a compacted aggregate base, which means individual units can be lifted and re-laid without tearing up the whole patio. Thicknesses for pedestrian patios typically run 60–80mm (roughly 2.5–3 inches). They are consistent in dimension, easy to source, and available in a wide range of colors and textures. Freeze-thaw performance depends on the concrete mix quality; look for products that meet ASTM C936 or equivalent local standards. They are not quite as crisp-looking as porcelain or natural stone but hold up extremely well under heavy furniture and foot traffic.
Brick-style pavers
Clay brick pavers are dense, durable, and develop a lovely patina over time. They handle freeze-thaw well when manufactured to SX (severe weathering) grade. Their narrower format means more joints, which can be either a design feature or a weed-management headache depending on your jointing approach. They are sand-set like concrete pavers and are repairable the same way. Budget-wise, they sit slightly above standard concrete pavers but below premium porcelain.
Composite and engineered slabs
Composite paving typically combines recycled materials (often rubber or plastic aggregate) with a concrete or resin binder. Because composite and engineered paving can use a resin binder, costs and performance may be different from traditional slabs, so compare the full installed price before deciding is a resin patio cheaper than slabs. The appeal is slip resistance, light weight, and environmental credentials. Performance varies considerably by manufacturer.
Some products are excellent; others soften in direct sun or fade within a few years. If you go this route, demand independent test data rather than relying on marketing claims. They are not the focus of most of the comparisons on this site, but worth knowing about if you have a deck-adjacent area or need a lighter-weight solution.
| Material | Water Absorption | Freeze-Thaw Risk | Slip Resistance (Wet) | Maintenance Level | Relative Cost | Best For |
|---|---|---|---|---|---|---|
| Porcelain (outdoor rated) | < 0.5% | Very Low | High (textured/matte, DCOF ≥ 0.55) | Low | Medium–High | Freeze-thaw climates, minimal upkeep |
| Natural Sandstone | Moderate–High | Moderate–High | Medium (textured) | High (seal every 2–3 yrs) | Medium | Warm/dry climates, natural aesthetic |
| Natural Limestone/Travertine | Low–Moderate | Moderate | Medium | Medium–High | Medium–High | Dry/warm climates, formal look |
| Concrete Pavers | Low–Moderate | Low (quality mix) | Medium–High (textured) | Low–Medium | Low–Medium | All-purpose, DIY-friendly, repairable |
| Clay Brick Pavers | Low (SX grade) | Low | Medium | Low | Medium | Classic look, long-term durability |
| Composite/Engineered | Varies | Varies | High (rubber-based) | Low–Medium | Medium | Deck transitions, light traffic areas |
Picking the right slab for your climate, drainage, and traffic situation
The three questions that should drive your material choice are: Does my patio freeze? Does water drain off it quickly? And how hard is it used?
Freeze-thaw climates (most of the northern US, Canada, UK, northern Europe)
If your ground freezes regularly, standing water in or under a paver/slab will expand when it freezes and eventually crack or heave the surface. Porcelain (under 0.5% water absorption, frost-tested per ISO 10545-12 or ASTM C1026) is the most resistant material. Dense concrete pavers and SX-grade clay brick are solid choices too. Avoid porous sandstone and travertine unless you are prepared to seal them meticulously every two years and accept some surface spalling over time. Whatever material you choose, drainage is the real freeze-thaw solution: a properly graded base that moves water away from the patio dramatically reduces freeze-thaw damage risk across all material types.
Wet or coastal climates
Persistent moisture feeds moss, algae, and staining. Porcelain's near-zero absorption makes it naturally resistant. Textured concrete pavers are also fine but need occasional pressure washing and possibly a sealer to limit algae. Natural stone in a wet climate without diligent sealing will green up within a season, not necessarily a structural problem, but a slip hazard and an aesthetic one. Slip resistance is especially critical here: always verify the DCOF value on the product spec sheet and aim for 0.55 or higher for exterior wet conditions.
Hot and dry climates
Thermal expansion and contraction become the main concern. Rigid mortar-set systems (like full mortar-bed porcelain) can crack if expansion joints are not designed in. Sand-set concrete or brick pavers handle movement better because the joints flex slightly. Light-colored slabs reduce surface heat buildup if you use the patio barefoot in summer. Natural limestone or sandstone looks fantastic in hot dry climates and performance is much better here than in wet/freeze conditions.
Foot traffic and load
For a normal residential patio with garden furniture and foot traffic, 60mm concrete pavers or 20mm porcelain tiles on a proper base are entirely adequate. If you are driving a vehicle over the area, riding a lawn tractor across it regularly, or placing a very heavy spa/hot tub, you need thicker pavers (80–100mm for concrete) and a deeper aggregate base, potentially 8–12 inches rather than the standard 4–6.
The ICPI installation guidance links base depth to traffic category, with pedestrian use requiring about 4, 6 inches of compacted aggregate base and vehicular use needing substantially more pedestrian use gets 4–6 inches of compacted aggregate base; vehicular use needs significantly more. .
The ICPI approach to base depth is straightforward: pedestrian use gets 4–6 inches of compacted aggregate base; vehicular use needs significantly more.
Installation essentials: subbase, leveling, laying, edging, and joints
I have seen more patio failures caused by bad base work than by bad slabs. A cheap slab on a perfect base will outlast an expensive slab on a bad one. Here is what a proper installation looks like.
Excavation and subgrade
Total excavation depth equals paver thickness + bedding layer (~1 inch of sand) + compacted aggregate base (4–6 inches for pedestrian use). If your pavers are 60mm (2. 4 inches) thick, you are looking at roughly 8–9 inches of total excavation for a standard pedestrian patio. Remove all topsoil and organic material, plant roots under a patio base are a slow-motion heaving machine.
The subgrade soil should be compacted to at least 95% Standard Proctor density before you add anything on top. Poor subgrade compaction is consistently identified as the leading cause of long-term patio settlement. In an r/DIY discussion on base leveling and compacted structure, contributors emphasize first-hand that maintaining a properly compacted base helps paver patios stay stable and durable over time [Poor subgrade compaction is consistently identified as the leading cause of long-term patio settlement. ](https://www.
reddit. com/r/DIY/comments/gnbszn).
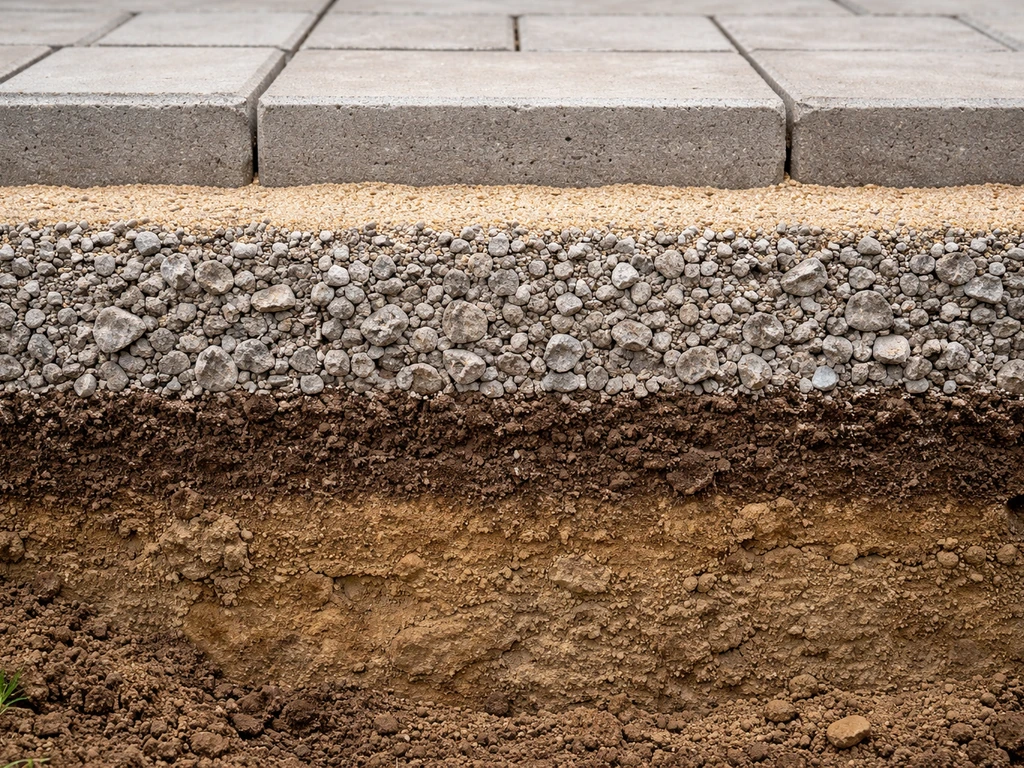
Aggregate base and bedding sand
Use a dense-graded crushed stone (not pea gravel, not builder's sand) as your compacted base. Compact it in lifts, no more than 4 inches per pass with a plate compactor. After compaction, you should have 4–6 inches of stable, dense base. On top of that goes approximately 1 inch of coarse bedding sand, screeded level. Keep the bedding sand layer close to 1 inch. Making it thicker does not improve drainage, it actually reduces the stability of the system because sand at depth cannot be re-compacted once pavers are on top.
Laying the slabs
Set your edge restraints first, secured into the compacted aggregate base (not into loose sand or soil). This is what prevents the entire perimeter of your patio from creeping outward over time. Then lay your slabs from a corner, working outward. Do not slide pavers into place, drop them straight down onto the bedding sand to avoid disturbing the screeded surface. Use spacers or slab legs to maintain consistent joint widths. Cut slabs to fit perimeter and cut-outs after the field is placed. Run a plate compactor (with a protective pad on the surface for porcelain or natural stone) over the finished surface to seat the slabs into the bedding layer.
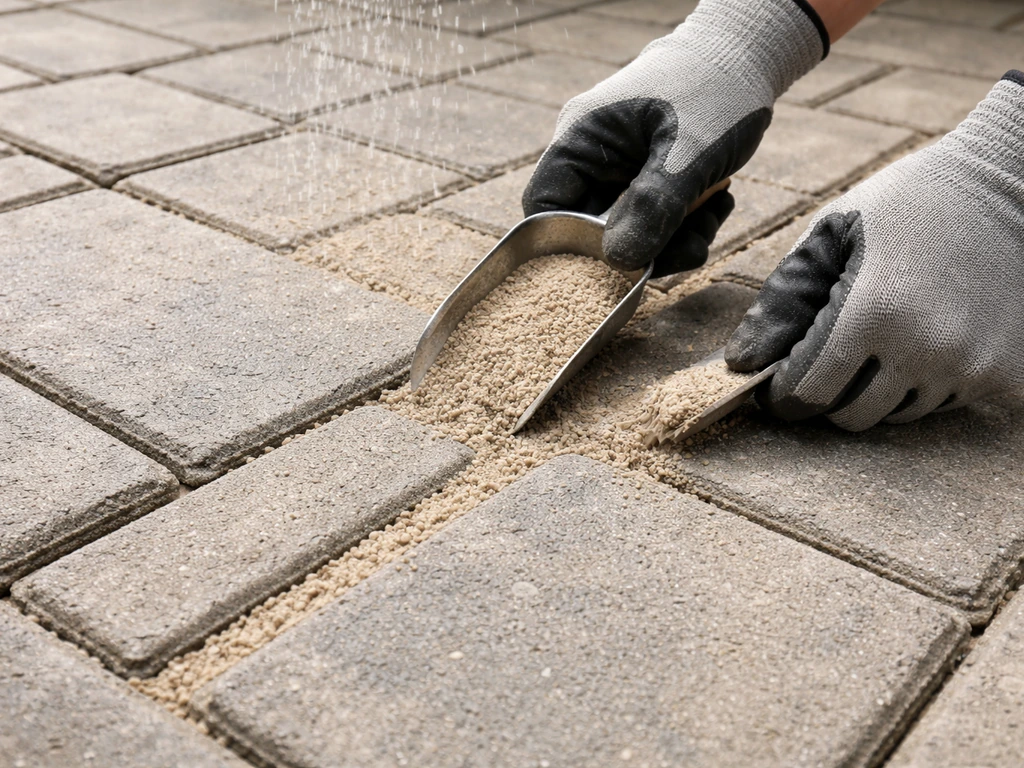
Jointing
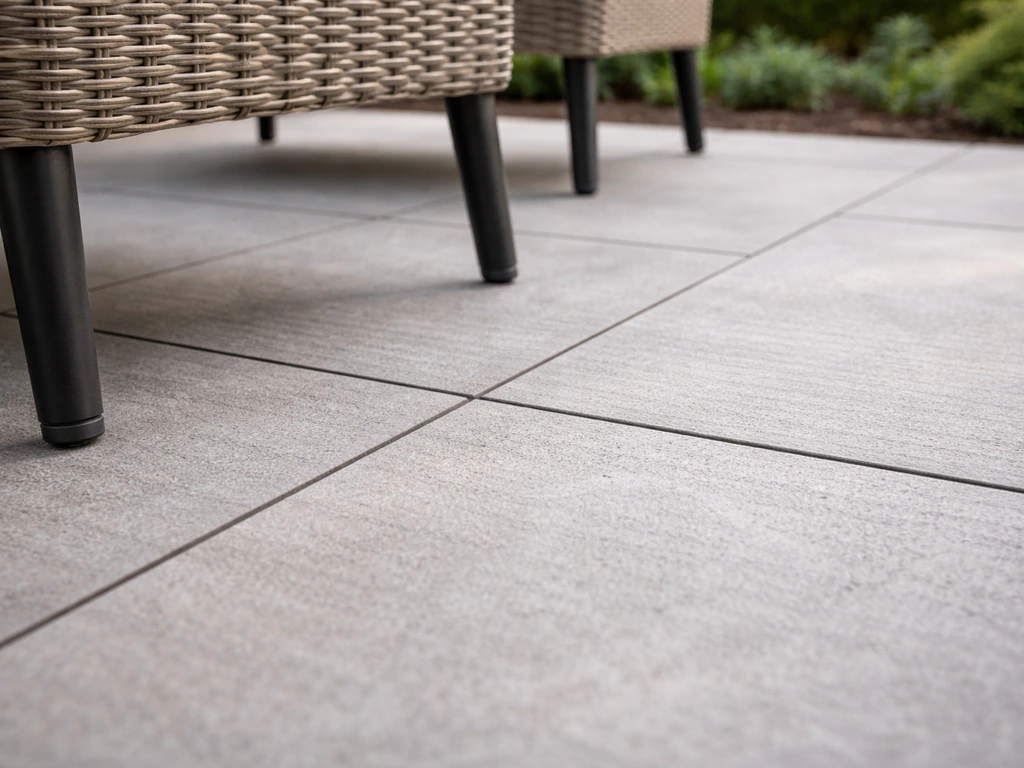
For sand-set concrete or brick pavers, polymeric jointing sand is the best everyday choice. Sweep it into the joints, blow off the excess, then activate it with water. It locks the joints against weed intrusion and ant excavation without becoming rigid and prone to cracking. Make sure the joint sand sits at least 1/8 inch below the top of the slab or chamfer edge, overfilling causes surface staining when you wet it. For mortar-set porcelain on a rigid base, use an exterior-rated tile grout or jointing compound designed for outdoor thermal movement. Do not use standard interior tile grout outside.
Safety and comfort: slip resistance, thickness, and what to know about load
Slip resistance is the safety spec that most homeowners skip when buying slabs, and it is the one most likely to cause an injury. The key metric in the US is DCOF (Dynamic Coefficient of Friction), tested under ANSI A326.3 using a tribometer. For any area that gets wet, which is every outdoor patio, the minimum acceptable DCOF for exterior wet conditions is 0.55. This is not a suggestion; it is the industry threshold. Polished stone and glossy porcelain tiles frequently fall below this in wet conditions. Textured, matte, or brushed finishes consistently perform better.
When you are comparing products, ask the supplier for the actual DCOF value from the spec sheet, and confirm the test was conducted under the ANSI A326.3 exterior wet (EW) category. Some products also carry a DIN 51130 R-rating (R9 through R13), which is common on European products, R11 or higher is generally appropriate for a wet exterior patio. Do not assume 'outdoor rated' on the packaging automatically means the slip resistance is adequate.
On thickness: for pedestrian-only patios, 40–60mm concrete pavers and 20mm porcelain are standard and adequate. Do not go thinner than 20mm for any mortar-set outdoor slab, thinner tiles have a higher chip and crack risk during installation and under point loads like chair legs or heavy planters. If you are placing a large hot tub or pergola post footings on the patio surface, plan separate concrete footings rather than relying on the paving to distribute that load.
Maintenance, sealing, and how long each material actually lasts
Every patio material needs some maintenance. The question is how much, how often, and how forgiving it is when you skip a year.
| Material | Sealing Needed? | Cleaning Frequency | Common Problems | Expected Lifespan (well installed) |
|---|---|---|---|---|
| Porcelain (outdoor) | Usually not required | Annual pressure wash | Grout joint cracking, edge chips | 30–50+ years |
| Natural Sandstone | Yes, every 2–3 years | Seasonal (moss, staining) | Frost spalling, algae, staining | 15–30 years (varies hugely) |
| Limestone/Travertine | Yes, every 2–3 years | Seasonal | Acid etching, pitting, frost damage | 20–40 years in dry climate |
| Concrete Pavers | Optional (enhances look) | Annual pressure wash | Joint weed growth, color fade | 25–40+ years |
| Clay Brick Pavers | Generally not needed | Annual pressure wash | Joint weed growth, efflorescence | 40–60+ years |
| Composite | Varies by product | Annual wash | UV fade, surface softening | 10–25 years (product-dependent) |
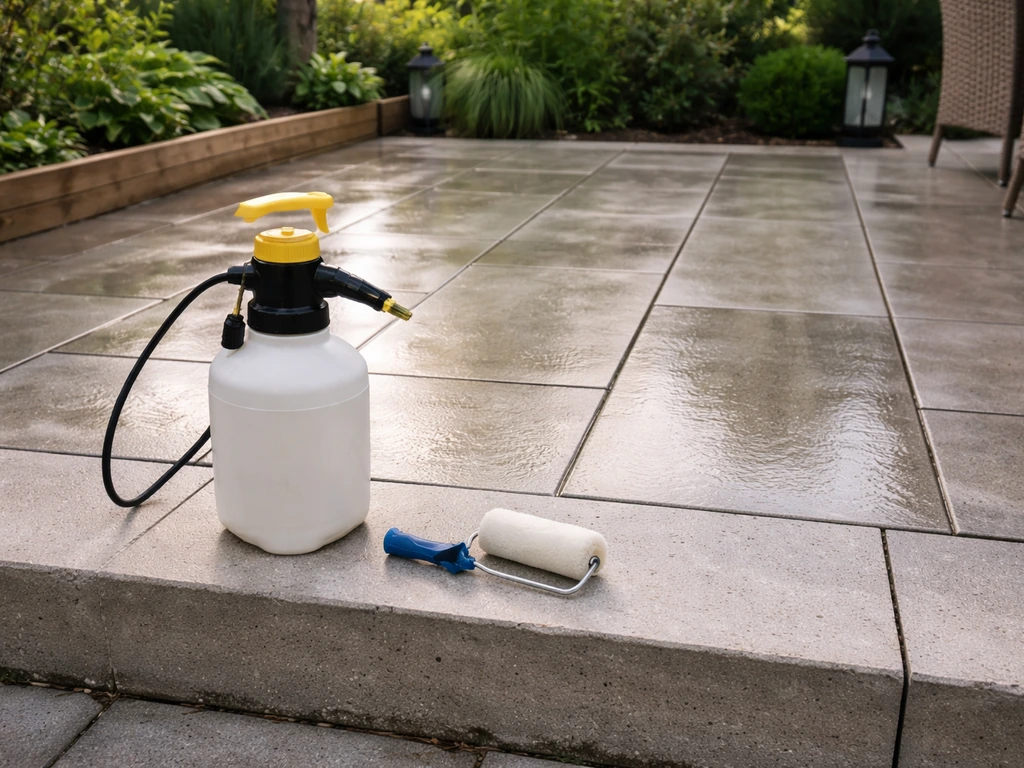
Sealing natural stone
Use a penetrating impregnator sealer on sandstone, limestone, and travertine, not a surface coating. Penetrating sealers work by filling the pores without creating a film that can peel. Apply before first use and reapply every two to three years, or when water stops beading on the surface. In very wet or freeze-thaw climates, sealing alone will not fully protect porous stone; you also need excellent drainage so water does not sit on the surface.
Weed and joint maintenance
Even polymeric sand joints eventually degrade and allow weed seed germination. Plan to inspect and top up joints every three to five years. Do not use a high-pressure washer directly on polymeric sand joints, it will blast the material out. A lower-pressure rinse is fine for cleaning the slab surface. If weeds are a persistent problem, a residual weed killer applied to joints in spring keeps them in check without damaging the patio.
Moss and algae
Shaded, moist patios will grow moss and algae regardless of material. A dilute bleach solution or proprietary patio cleaner applied in autumn kills the growth before it gets slippery. Pressure washing in spring removes the dead material. This is a once-a-year task that takes about 30 minutes on a standard patio, skip it two years running and the surface becomes genuinely slippery.
How to buy: quantities, specs, samples, and common mistakes to avoid
Calculating how much to order
Start with your net patio area in square metres or square feet. Add 10% for standard cutting waste on a simple rectangular patio, or 15% for diagonal or complex patterns. That is your slab order quantity. For bedding sand, multiply your area by 0.
025m (1 inch nominal depth) to get cubic metres, or use an online paver sand calculator. For jointing sand, the volume is smaller and depends on joint width and paver thickness, most paver suppliers will size this for you if you give them the paver dimensions and joint width. Order aggregate base material by multiplying area by your required base depth (0.
For an ICPI-style paver system estimate, start from a compacted subgrade, then add a compacted aggregate base (typically 4, 6 inches for residential pedestrian patios), about 1 inch of bedding sand, the pavers, and finally jointing sand 4–6 inches of compacted aggregate base. 1–0. 15m for most residential patios) and adding 15–20% for compaction shrinkage.
Specifications to check before you buy
- Water absorption rate (especially for freeze-thaw climates — below 0.5% for porcelain; as low as possible for natural stone)
- Frost resistance certification: ISO 10545-12 or ASTM C1026 for tile/porcelain products
- DCOF slip resistance value (minimum 0.55 for exterior wet conditions under ANSI A326.3, or DIN 51130 R11+ for European products)
- Thickness: 20mm minimum for porcelain; 60–80mm for concrete pavers in pedestrian use
- Weathering grade for clay brick: SX (severe exposure) for freeze-thaw climates
- Batch consistency: natural stone especially varies by batch; order all from the same batch or quarry run
Get samples and check them outside
Always order physical samples before committing to a full pallet. Look at them in natural daylight, not showroom lighting. Wet them to see how the color changes (all stone darkens when wet, and some dramatically). Check the surface texture with your fingertip, a finish that feels smooth and glassy indoors will be slippery outside. If you can, rub the sample underfoot on a wet surface. That five-minute check can save you from a several-hundred-dollar mistake.
The most common buying mistakes
- Ordering by 'looks in the catalogue' without checking frost resistance or DCOF ratings for your climate and use case
- Underestimating quantities and ending up with a batch mismatch on the reorder — natural stone color varies between quarry batches, and even concrete paver color can shift between production runs
- Choosing a thin tile format (under 20mm) to save money, then cracking them during installation or under point loads
- Ignoring base material costs — the gravel, bedding sand, edge restraints, and polymeric jointing sand often cost as much as the slabs themselves on a mid-size patio
- Buying interior-grade tile or glossy polished stone assuming 'it looks like outdoor tile' — always confirm the product is rated and tested for exterior wet conditions
Your practical next steps: a decision checklist
Use this checklist to move from browsing to buying with confidence. If you want to dig deeper on specific angles, the pricing comparison for patio slabs, low-maintenance patio slab options, and resin-versus-slab alternatives are all worth exploring once you have narrowed down your material. If you are shopping around, use a patio slabs best price guide to compare total installed costs, not just the slab unit price pricing comparison for patio slabs.
- Measure your patio area (L×W minus cut-outs) and note the drainage direction
- Identify your climate: does it freeze? How wet is it in winter?
- Decide on expected foot traffic and any heavy load points (hot tub, pergola posts, vehicle access)
- Shortlist two or three materials based on climate fit and budget using the comparison table above
- For each shortlisted product, confirm: water absorption rate, frost resistance certification, DCOF slip rating, and thickness
- Order physical samples and test them wet and underfoot before ordering pallets
- Calculate quantities: area + 10–15% waste for slabs; area × 1-inch depth for bedding sand; plus aggregate base and jointing sand
- Plan your base depth: 4–6 inches compacted aggregate + 1 inch bedding sand + paver thickness = total excavation depth
- Order all slabs from the same production batch where possible
- Budget for base preparation, edge restraints, polymeric jointing sand, and any sealer — not just the slabs
If you want a single concrete recommendation to walk away with: for a new garden patio in a climate that sees any frost, 20mm exterior-rated porcelain tile on a mortar base or 60mm concrete pavers on a compacted sand-set base are the two options that will give you the least trouble over 20-plus years. Pick the concrete pavers if you want to DIY it; pick the porcelain if you want near-zero long-term maintenance and do not mind paying a professional to install it properly. Either way, spend as much attention on your base as you do on the slab itself, that is where patios are won or lost.
FAQ
Can I use the same porcelain or stone slabs for a patio that gets wet from sprinklers or shade?
Yes, but only if the product is rated for exterior wet conditions and the finish is designed for traction. Even when a tile is frost-tested, glossy or “polished” surfaces often do not meet the exterior wet DCOF threshold, so check the datasheet for ANSI A326.3 exterior wet testing and a matte or textured finish option.
What’s the biggest mistake when people install porcelain slabs themselves (sand-set vs mortar-bed)?
Avoid installing thin porcelain as a sand-set patio. If the manufacturer specifies a rigid mortar bed, follow it, because sand-set increases point-load damage risk and can cause chipping around chair legs and planters. If you already have sand under an existing slab, upgrading to a rigid system may require lifting, rebuilding the base, and re-leveling.
Can I use regular interior tile grout for mortar-set porcelain on a garden patio?
Generally, no. Standard interior grout is usually not formulated for outdoor thermal movement, water exposure, and freeze-thaw cycling, it can powder, crack, or open gaps. For mortar-set porcelain, use an exterior-rated tile grout or jointing compound specifically described for outdoor use and designed for thermal movement.
How do I prevent patio slab settlement when the base feels “level” during installation?
For pedestrian use, the common failure is not just depth, it is poor compaction and using the wrong aggregates. Subgrade should be compacted to at least 95% Standard Proctor density, then use dense-graded crushed stone in lifts and compact each lift (typically no more than about 4 inches) with a plate compactor.
How often should polymeric joint sand be topped up, and can I pressure wash the patio joints?
Polymeric jointing sand is fine on sand-set pavers, but you still need a realistic maintenance plan. It is common for joints to need inspection and top-ups every few years, especially after heavy rain, freeze-thaw cycles, or if weeds are present. Plan on lower-pressure cleaning only, pressure washing can blast the joint material out.
If my garden patio slopes toward the house, can I fix that without fully rebuilding?
Yes, but do it with drainage in mind. If you want to keep water away from the house, the patio should slope so runoff sheds away from foundations and into a controlled discharge point. Also confirm that your chosen drainage plan does not create a low spot under a door or stair landing where water can pond and freeze.
What happens if I use too much bedding sand under pavers or porcelain tiles?
Not exactly. Hitting 1 inch of bedding sand is a target, thicker bedding often reduces stability because sand at depth cannot be re-compacted once slabs are installed. The reliable method is to screed to the target thickness, keep the base dense and level, and seat slabs with a plate compactor using a protective pad.
Can I park a car or place a heavy spa directly on the patio slabs?
Wheelbarrows, lawn tractors, and especially a hot tub or spa are different from foot traffic. For vehicular loads, plan thicker pavers and a deeper compacted base, and for heavy point loads like spa or pergola footings, use separate concrete footings rather than relying on the patio to distribute weight.
How do I create a maintenance schedule for moss and algae that won’t make the patio unsafe?
For most patios, a once-a-year cleaning is the practical baseline, but “skip a year” depends on shade and moisture. Shaded, moist areas tend to get slick growth sooner, and pressure washing in spring after growth dies back is usually safer than blasting while algae is actively growing. If using bleach, apply in autumn so you reduce regrowth before it becomes slippery.
What’s the best way to stop weeds in paver or slab joints long-term?
If weeds persist, the jointing failure is often incomplete sand penetration, surface grading that traps moisture, or joint sand loss. After re-filling joints, manage weeds by treating joints in spring with a residual weed killer designed for paver joints, avoid saturating the surface or harming joint material.
How much extra should I order for cutting waste, and how do I avoid running short on edge pieces?
Yes, but only after you account for cutting pattern waste. For ordering, use your net patio area and then add cutting allowance, for example around 10% for simple rectangles and up to 15% for diagonal or complex layouts. Also remember that cut pieces at edges can shift the look, so confirm your layout before buying full quantities.
What should I check when I request samples of the best garden patio slabs before ordering pallets?
Wetting the samples is helpful, but also verify texture and traction before deciding. A surface that feels “smooth” indoors can be dangerously slick outdoors after it darkens when wet. If possible, test the sample under wet conditions by stepping on it, and keep the same finish type you see in the sample, not a different production lot.
If I want the “least trouble” option in any frost climate, what material should I default to and why?
In freeze-thaw climates, prioritize low water absorption and real wet slip performance over appearance. Porcelain with water absorption under 0.5% and tested exterior wet DCOF is the most forgiving, dense concrete pavers and SX-grade clay bricks are strong alternatives, and porous natural stones require disciplined sealing plus great drainage.