For most flagstone patios, steel or aluminum paver edging is the best choice. It holds the perimeter tight, bends for curves, anchors deep into the ground, and lasts decades without rotting or corroding. If you want a more decorative look, a mortared brick or natural stone border edges out the competition for curb appeal. Plastic edging works on a tight budget but tends to fail faster in freeze-thaw climates. Landscape timbers are easy to install but rot eventually. The right pick depends on your patio style, climate, base type, and how much you want to spend. This guide walks through all of it so you can make a decision today.
Best Edging for Flagstone Patio: Types, Pros, and Install

Nolan Ellison
28 Jun 2026
Why edging matters more than most people think
A flagstone patio without solid edge restraints is essentially a slow-motion failure waiting to happen. Without lateral compression holding the perimeter in place, the outer stones start migrating outward. Once that movement starts, joint sand erodes, gaps widen, weeds move in, and you end up with an uneven, trip-hazard-prone surface. This is one of the most common flagstone patio problems I see, and it almost always traces back to edge restraint failure rather than the stones themselves.
Edging does three jobs at once: it keeps the field stones laterally compressed so they can't drift, it creates a clean visual border between your patio and lawn or garden beds, and it acts as a barrier that slows weed and grass migration from outside the patio. Skip it or install it poorly and you're dealing with a domino effect: movement leads to eroded joints, eroded joints invite weeds, weeds accelerate movement, and eventually the whole pavement system loses structural integrity. The fix at that point usually means pulling everything up and starting fresh.
Best edging material options and when each one wins
There are six realistic options for flagstone patio edging, and each one has a clear use case. Here's an honest breakdown of all of them.
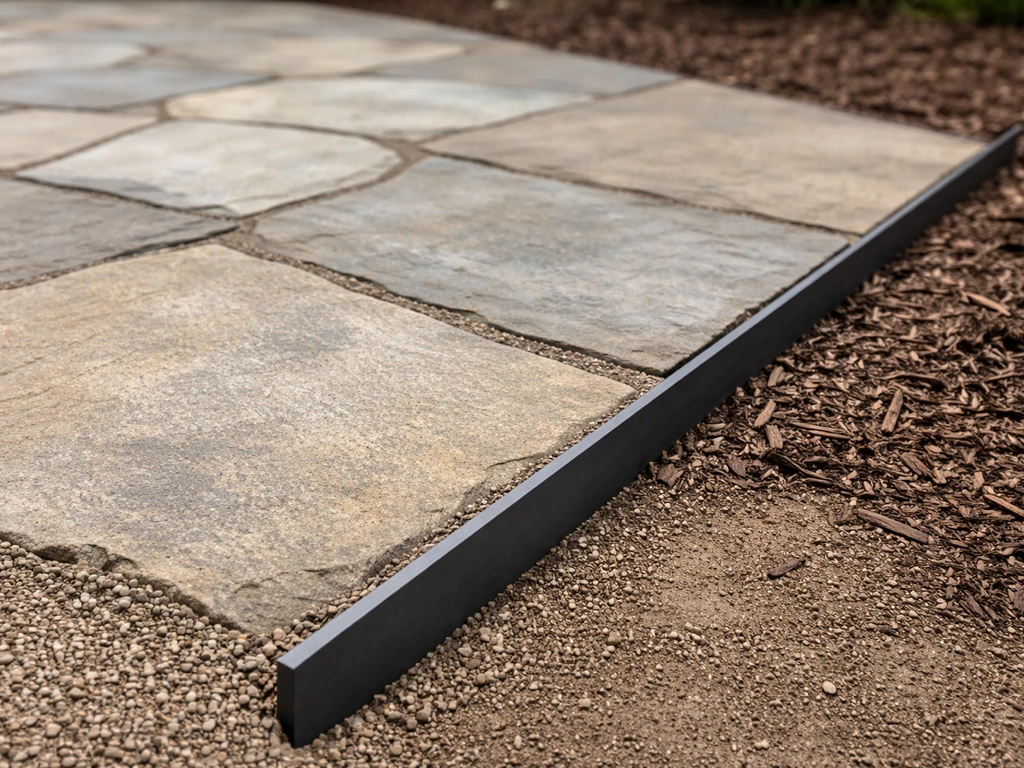
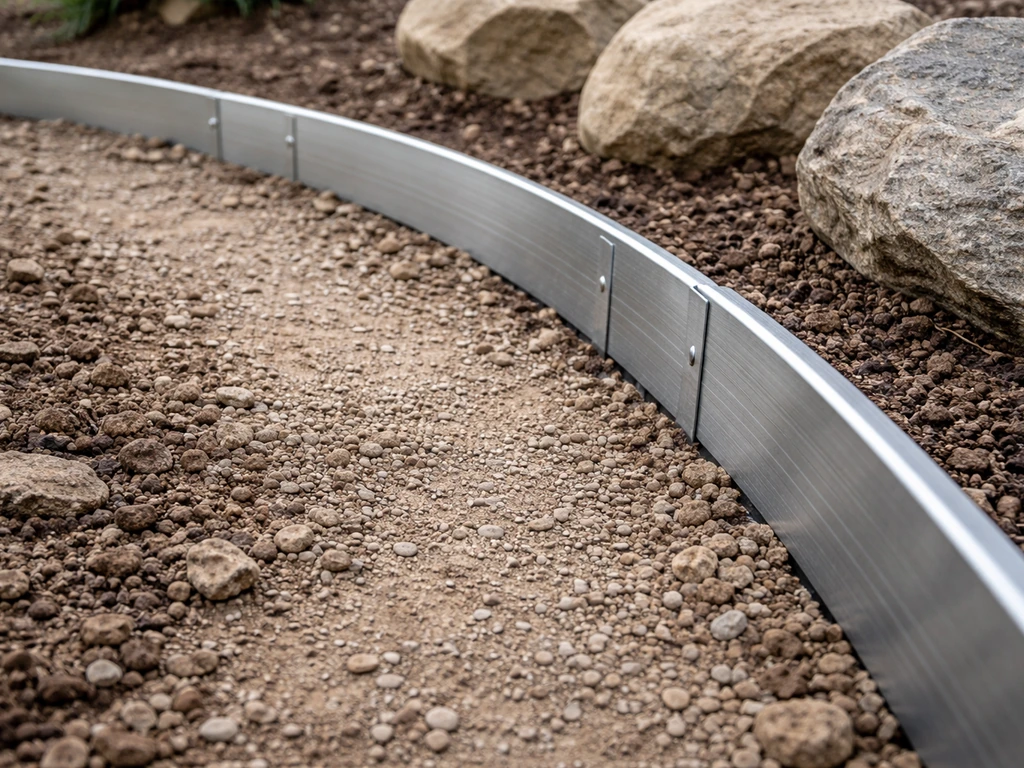
Steel edging
Steel edging is the most durable option on the market. It holds its shape under heavy loads, resists freeze-thaw movement better than most alternatives, and gives a crisp, almost invisible edge when installed correctly. Thick steel (3/16 inch or more) sits toward the higher end of the installed cost range, roughly $10 to $28 per linear foot when professionally installed, but it's a set-it-and-forget-it solution for high-end flagstone work. The main downside is weight and stiffness: tight curves require kerf cuts or flex steel, and working with it on a solo DIY project can be awkward. If you're doing a formal, straight-edged flagstone patio and want it to look right for 20-plus years, steel is worth the cost.
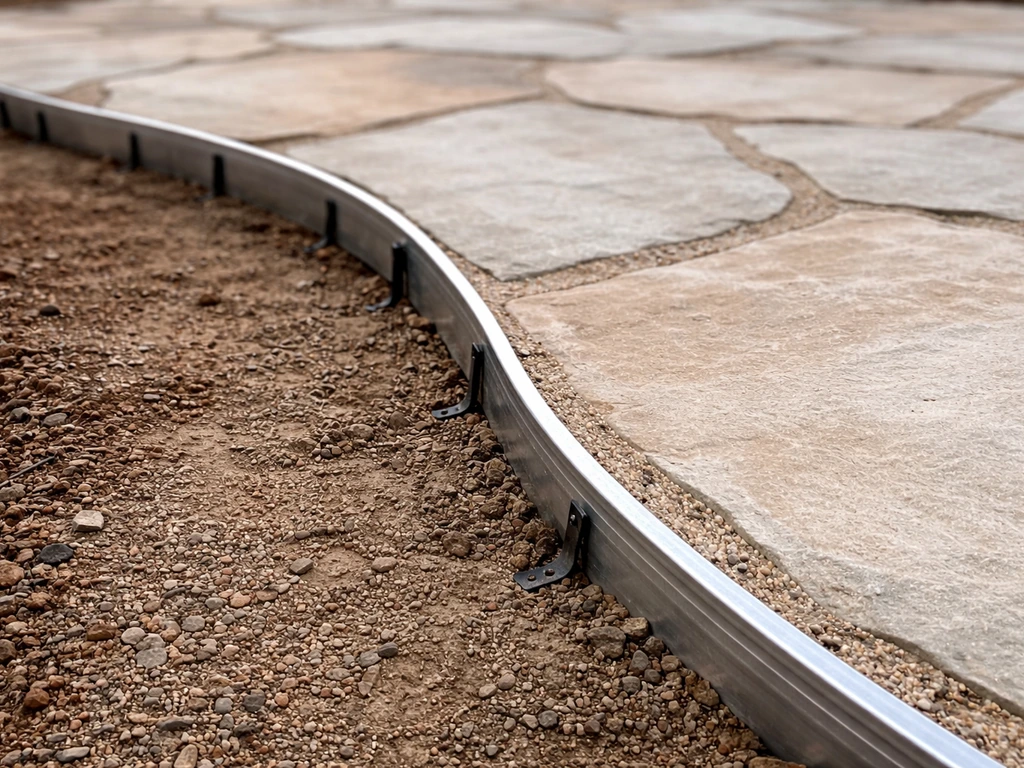
Aluminum edging
Aluminum paver edging is my go-to recommendation for most DIYers. It's lightweight, bends easily around curves, doesn't rust, and is widely available at home improvement stores. Brands like ProFlex, Sure-Loc, and EasyFlex are all solid. ProFlex recommends a minimum of 3 anchoring spikes per 6-foot piece, and Sure-Loc specifies 3/8-inch by 10-inch spiral steel spikes for secure anchoring. Follow those specs: under-spiking is the most common installation mistake and it's why aluminum edging sometimes gets a bad reputation. Material cost runs about $1.50 to $6 per linear foot for DIY supply, putting it well within reach of most budgets.
Plastic and flexible polymer edging
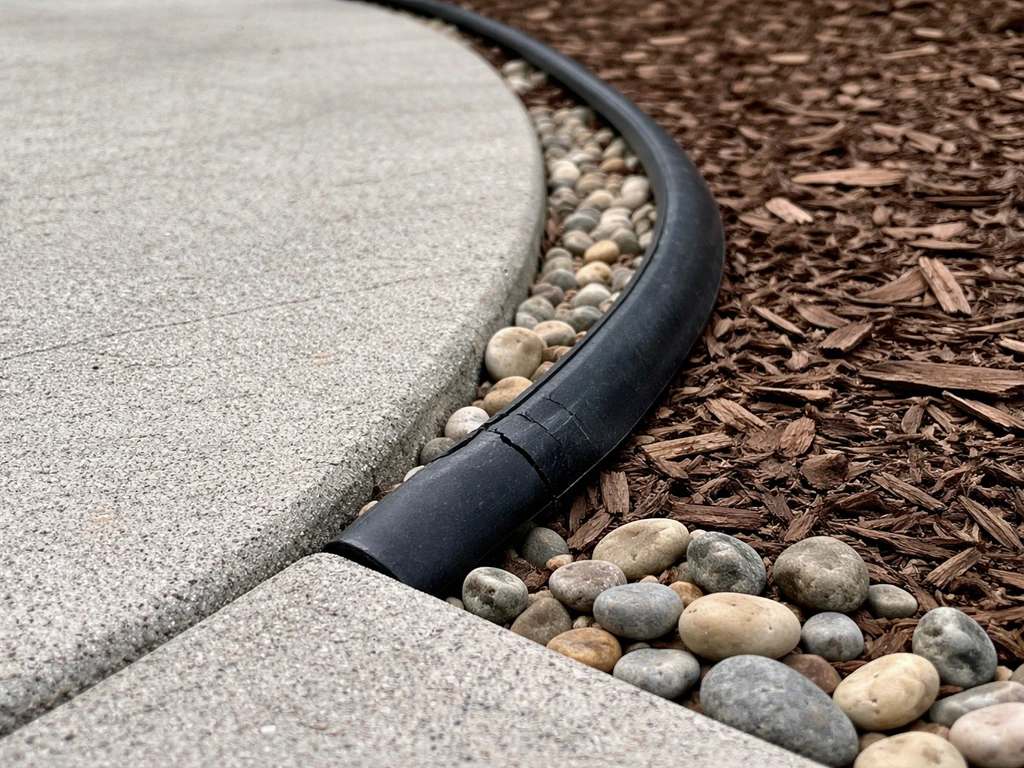
Plastic or resin edging is cheap, easy to install, and flexible enough for almost any curve. The problem is longevity. It becomes brittle with UV exposure and in cold climates, it can crack or pop out of the ground after a few freeze-thaw cycles. I've seen homeowners report their plastic edging getting pushed up by winter expansion within a couple of years. For a dry-laid flagstone patio in a mild climate on a tight budget, it's an acceptable short-term solution. For anything else, spend a little more on aluminum.
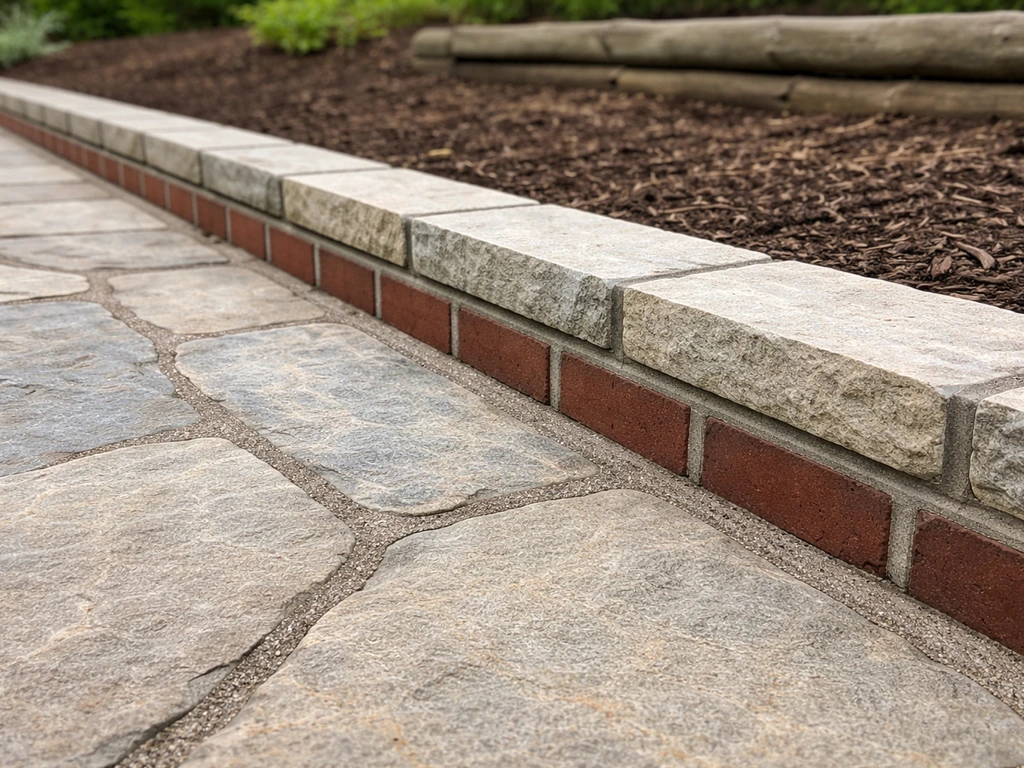
Brick and natural stone borders
A mortared brick or cut stone border is the most attractive option and works beautifully on formal flagstone patios. It adds real visual weight, complements the stone naturally, and when done right, lasts indefinitely. The trade-off is installation complexity: you need to set a proper concrete footing or stable base, the mortar needs time to cure (at least 48 hours before foot traffic), and this isn't really a beginner DIY project. It's also the most expensive option by material and labor. That said, if you're already hiring a mason for a mortared flagstone patio, adding a mortared brick border is a logical upgrade.
Concrete edging (poured in place)
Poured concrete edging involves digging a trench around the perimeter, pouring concrete into it, and shaping it into a wedge or flat strip before it cures. It's extremely durable and holds flagstones in place well. The downside is that it's permanent and hard to adjust if you ever need to relay a section. It also cracks over time in freeze-thaw climates if it's not reinforced. Best suited for mortared patios on stable soil where you're confident in your layout and don't anticipate future changes.
Landscape timbers
Treated landscape timbers are inexpensive (typically $3 to $15 per timber, with most landing around $5 to $10), easy to work with, and can look quite natural next to flagstone. They're fine for casual, informal patios. The real issue is longevity: even treated timbers eventually rot, and once they soften they stop functioning as lateral restraints. In wet climates or direct soil contact, expect 8 to 15 years before replacement. Use them on dry-laid patios in mild climates where you want a natural look and plan to refresh the border eventually.
Matching edging to your patio build
Dry-laid flagstone on a sand or gravel base
Dry-laid flagstone is the most common DIY approach: excavate, compact a granular base (typically 4 to 6 inches of crushed stone in mild climates, 6 to 8 inches in freeze-prone areas), add a sand setting bed, and lay the stones. This build is the most vulnerable to edge movement because there's no mortar holding anything together. Aluminum or steel edging installed with deep anchoring spikes is the right call here. The edging should sit so the visible portion is roughly halfway up the edge of the flagstone, which on a 2-inch thick stone means about 1 inch of edging showing. This keeps the lateral force contained without the edging being too visible from above.
On a dry-laid build, also consider running a geotextile fabric on top of the compacted native soil before you place your gravel base. Without it, soil can migrate up into the gravel over time and destabilize your base from below. The geotextile acts as a permanent separation barrier and also helps reduce weed intrusion from beneath the patio. If there's any possibility of sand loss under or around your edge restraints, wrapping the geotextile up and behind the edging is worth the extra few minutes.
Mortared flagstone on a concrete base
A mortared flagstone patio on a concrete slab is a fundamentally different structure. The mortar locks the stones together and the slab provides rigid support, so outward stone migration isn't really the issue. If your slab patio is already broken or shifting, the same movement can loosen joints and make edging less effective until the underlying slab problem is addressed mortar locks the stones together. Here, edging is primarily aesthetic and serves to create a clean transition between the patio and surrounding landscape. For this build, mortared brick, cut stone borders, or poured concrete edges are the best fits. If you go with metal edging on a concrete base, it typically has to be drilled and anchored directly into the slab rather than spiked into soil. The flexibility advantage of aluminum edging matters less here since you're working with a rigid surface anyway.
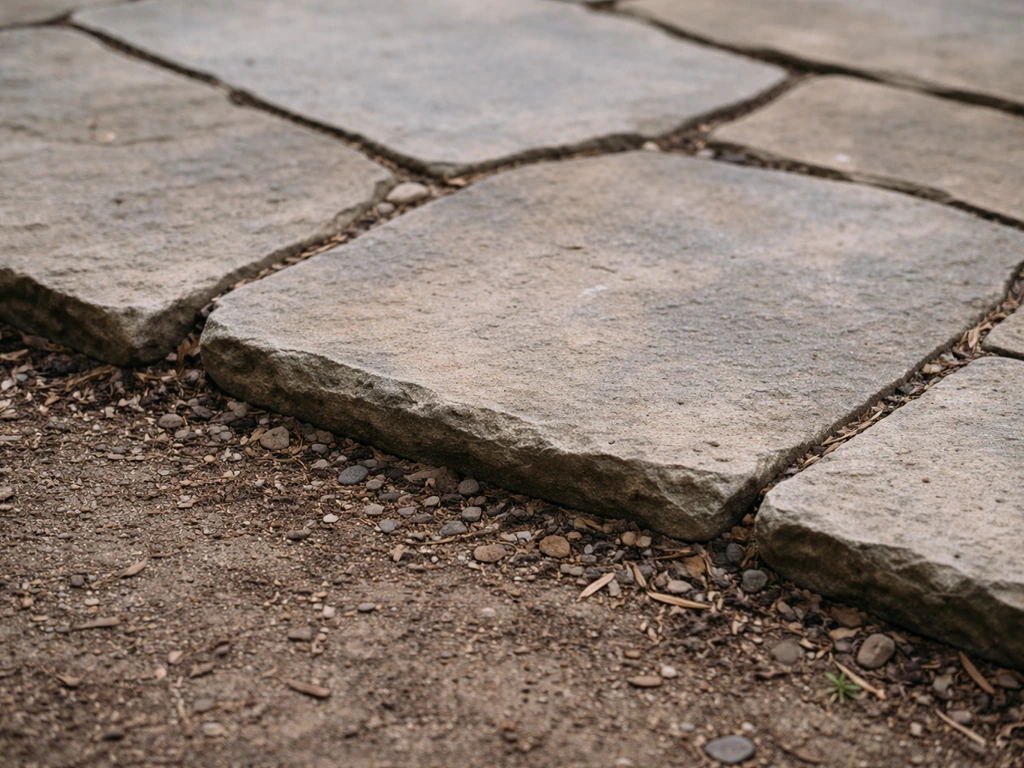
Flagstone on compacted soil (no formal base)
Some informal flagstone setups are laid directly on compacted native soil or a thin sand layer with minimal sub-base. This works in stable, well-draining conditions but is highly susceptible to edge movement and freeze-thaw heave. For this type of build, aluminum edging with full spike depth is the minimum protection. In freeze-prone areas, honestly consider rebuilding with a proper gravel base rather than just adding edging to a compromised setup. Edging alone can't compensate for a weak base, and adding it on top of poor drainage or thin soil prep is treating the symptom, not the cause.
How to install flagstone patio edging
Step 1: Plan and mark your layout
Start by marking your patio perimeter with spray paint or a garden hose. For straight runs, use stakes and string lines. For curved sections, a garden hose or rope gives you a smooth, natural curve you can eyeball from a distance before committing. Mark where each edging section starts and ends, and note any inside corners (which require additional cutting or overlapping).
Step 2: Excavate and prep the trench
Dig a trench along the perimeter, outside the patio footprint, deep enough that the top of your edging will sit at the target height relative to your flagstone surface. The edging should contact the side of the stone at roughly the midpoint of its thickness. For most flagstone (1.5 to 2.5 inches thick), that means the edging top sits about 1 to 1.5 inches above your setting bed surface. The trench should be tight enough that the edging sits snugly against the stone edge without a gap.
Step 3: Set height and anchor
For aluminum edging, press the edging strip into the trench against the stone edge and drive spikes through the factory-drilled holes. Use 3/8-inch by 10-inch spiral steel spikes and drive at least 3 spikes per 6-foot section. Under-spiking is the most common reason edging fails. On curved sections, use a rubber mallet to gently form the aluminum to the curve before spiking, and overlap connecting sections according to the manufacturer's minimum overlap requirement. For bender board or flexible plastic edging, stake every 4 feet and use a rope or hose as a guide to maintain a smooth curve.
Step 4: Backfill and compact
Once the edging is anchored, backfill the trench on the outside of the edging with soil or compacted gravel and tamp it firmly. This compaction is what locks the edging in place laterally from the outside. Skipping this step leaves the edging with support only from the spikes, which is enough in good conditions but not in freeze-thaw or high-moisture environments. On the inside, make sure your bedding sand is packed tight against the edging face before laying or re-laying any perimeter stones.
Handling curves and expansion
Aluminum edging handles gentle curves naturally. For tight radius curves, score the edging at intervals (without cutting through) to increase flexibility. Steel edging requires either flexible steel or kerf cuts. On poured concrete borders, leave small expansion gaps every 8 to 10 feet and fill them with a flexible backer rod and sealant to prevent cracking under thermal expansion. On mortared brick borders, consult a mason about proper expansion joint placement based on your climate.
Weed control, drainage, and preventing movement over time
Edging controls lateral stone movement, but weeds and drainage are separate battles that edging alone won't win. Here's how to handle all three together.
For weed control in the joints, polymeric sand is the most effective product available right now. When properly activated with water, it hardens and resists washout, stays in place through freeze-thaw cycles longer than regular sand, and creates a barrier to weed germination. Good polymeric sand products claim 10-plus years of weed and joint stability when installed correctly. Pre-emergent herbicide around the patio perimeter adds another layer of defense, though its effective window is only about 6 to 12 weeks per application, so it requires seasonal reapplication rather than a one-and-done treatment.
Drainage is where I see the most overlooked problems. A patio should slope away from the house at a minimum 1 to 2 percent grade (about 1/4 inch drop per foot). Without that slope, water pools at the edges and under the stones, which in freeze-thaw climates means repeated heave cycles that lift and shift your flagstones and edging. If your patio stones are already broken, the repair starts with fixing the base and replacing the damaged stones before you reinstall edging broken patio stones. Adding geotextile beneath the base not only stabilizes the sub-base but also helps water move laterally without carrying fine soil particles with it. In genuinely freeze-prone areas, consider adding a capillary break layer (like a frost blanket geotextile product) to reduce groundwater rise into the frost zone. Terram describes its Frost Blanket as being installed to form a capillary break that helps prevent groundwater rise into the frost zone, reducing freeze-thaw damage potential (frost heave) capillary break layer (like a frost blanket geotextile product).
For preventing movement, the real solution is a combination of factors: a proper base depth (6 to 8 inches of compacted crushed stone in freeze-thaw zones, 4 to 6 inches in mild climates), secure edging with adequate spike depth, geotextile under the base, polymeric sand in the joints, and a drainage slope. Each of these builds on the others. If one element is missing, you're relying too heavily on the rest.
Cost, durability, and maintenance side by side
| Edging Type | DIY Material Cost (per LF) | Installed Cost (per LF) | Longevity | Freeze-Thaw Performance | Maintenance Level |
|---|---|---|---|---|---|
| Steel | $4–$8 | $15–$28 | 30+ years | Excellent | Very low |
| Aluminum | $1.50–$6 | $10–$18 | 20–30 years | Very good | Low |
| Plastic/Resin | $1–$3 | $3.50–$8 | 5–10 years | Poor to fair | Moderate (replacement likely) |
| Brick/Stone border | $5–$12+ | $18–$35+ | Indefinite | Good (if proper footing) | Low to moderate |
| Poured concrete | $3–$7 | $12–$22 | 20+ years | Fair (can crack) | Low (repair cracks as needed) |
| Landscape timbers | $2–$5 | $8–$15 | 8–15 years | Fair (heave risk) | Moderate (eventual replacement) |
Maintenance across all types is fairly minimal if installed correctly. With metal edging, check annually that no spikes have worked loose and that the edging hasn't pulled away from the stone face. Re-tamp backfill if needed. With brick or stone borders, check for cracked mortar joints and repoint with matching mortar before water gets in and accelerates cracking. Landscape timbers need annual inspection for soft spots or rot, especially at ground contact points. For all types, refill any eroded polymeric sand joints in spring before weed season starts.
My top picks by scenario
Best for budget-conscious DIY
Aluminum paver edging. Buy a reputable brand (ProFlex, Sure-Loc, or EasyFlex), use the correct spike size and spacing, and don't skip the backfill compaction. You'll spend $1.50 to $6 per linear foot on materials and end up with a system that performs close to steel at a fraction of the cost. This is the right pick for the majority of dry-laid flagstone patios.
Best for high-end or formal patios
A mortared brick or natural stone border. It looks intentional and refined, complements flagstone naturally, and if you're hiring a mason anyway for a mortared flagstone patio, the cost premium is worth it. Make sure the border has a proper footing, especially if you're in a climate with ground frost.
Best for freeze-thaw climates
Steel edging, installed with deep spikes (10 inches minimum) and well-compacted backfill, combined with a properly built base of 6 to 8 inches of compacted crushed stone, a geotextile separation layer, and a 1 to 2 percent drainage slope. This is not the cheapest setup, but freeze-thaw cycles are brutal on every component of a patio, and under-building here means rebuilding in 5 years. Avoid plastic edging entirely in these climates. If you've already had edging pop out due to frost heave, that's a sign your base depth or drainage is the real problem, not just the edging choice. If your broken flagstone patio is showing loose stones or failed joints, the edging and base setup usually need to be corrected first.
Best for curved or organic-shaped patios
Aluminum edging handles curves better than steel, especially for gentler radii. For very tight curves, use a flexible aluminum product or score the edging carefully. Bender board is another option for purely aesthetic edging on informal or naturalistic layouts, though it's not suitable as a primary lateral restraint for a full flagstone field.
Best for the homeowner who wants low maintenance forever
Steel edging or a mortared stone border, paired with polymeric sand joints and geotextile under the base. This is the combination that minimizes annual upkeep. The polymeric sand handles the joints for years without washout, the geotextile keeps the base stable, and good metal or stone edging holds the perimeter indefinitely. You'll still want to check things annually and touch up any eroded sand, but you won't be resetting shifted stones or replacing failed edging on a 3-year cycle.
One last thing worth noting: even a perfect edging system can't fix a bad base. If your flagstone patio is already showing movement, widening gaps, or sinking sections, those are signs the base or drainage needs attention before you address edging. If you’re dealing with a broken tile patio, the same base and drainage checks usually reveal why the surface is shifting and lifting flagstone patio. That kind of widespread instability is its own problem, related to broader flagstone patio issues that often require base repairs alongside any perimeter work. Getting the edging right matters most when the rest of the build is solid.
FAQ
Is edging still necessary for a mortared flagstone patio on a concrete slab?
Before choosing edging, confirm whether your patio is dry-laid or mortared, and whether it sits on a gravel base or a concrete slab. If it is mortared on a slab, the outward movement issue is usually minimal, so metal edging must be drilled and anchored into the slab instead of being spike-set into soil.
What’s the most common reason metal edging fails even when I buy the right material?
For aluminum or steel edging on a dry-laid patio, use deep spikes and do not rely on surface-level support. A common failure is under-spiking, where the edging can lift or bow during freeze-thaw, even if the material is the right type.
How should I handle inside corners when installing flagstone patio edging?
If you have inside corners, you usually need either overlapping cuts or specially planned segments so the edge stays tight at the corner radius. Plan inside corners first, because fixing corner gaps after the patio is laid often requires lifting perimeter stones or reworking the edging trench.
What should I do if my patio already shows frost heave or shifting stones?
In freeze-thaw climates, a weak base will override any edging choice. If you notice heaving, rocking stones, or repeatedly widening joints, rebuild the gravel base and drainage, then install edging as a restraint layer. Edging alone can only slow movement, not stop it from a compromised sub-base.
Can I install edging higher or lower than the recommended midpoint contact with the stone?
Yes, but only if your edging system is rated for it and you keep the visible height aligned with the stone thickness. Plan the edging so it contacts the stone around the midpoint of thickness, and ensure backfill is compacted firmly on the outside, otherwise water and movement will defeat the restraint.
Will edging fix poor drainage if water pools near the patio border?
Yes. For steep slopes or drainage-challenged areas, you may need more than a border. Use a 1 to 2 percent slope away from the structure, and consider additional drainage solutions like a French drain or catch basins if water repeatedly pools along the patio edge.
Where exactly should geotextile go, and do I need it around the edging too?
Use geotextile at the correct interface, not under random spots. The goal is separation between native soil and the gravel base, and if sand could migrate toward the edging, wrap the fabric up behind the edging so fines cannot work their way into the base over time.
Can I use polymeric sand in all climates and joint conditions?
Avoid polymeric sand when the joints are not staying clean and dry enough for proper activation. If you are sealing too soon or washing it out during installation, polymeric sand may not lock correctly, leaving joints vulnerable to weed growth and washout.
Why do weeds keep growing in my flagstone joints even after I added edging?
If weeds are coming back fast, first verify that joints are filled with the right material and that water is not flushing sand out of the perimeter. Then spot-treat with a pre-emergent on schedule, but rely on joint integrity and drainage as the primary defense.
How often should I refill the joints, and when is the best time to do it?
Yes, but treat it as a maintenance problem rather than a full rebuild. If the sand is washing out, re-tamp and refill polymeric joints in spring before weed season, and check annual backfill compaction so the edging remains laterally locked.
If my edging popped out after winter, should I just reattach it?
If the edging has popped up due to frost, it is often a sign the base depth, drainage slope, or spike depth was insufficient. Fix the underlying base and drainage first, then reinstall edging with proper spike spacing and fully compacted backfill.
Are treated landscape timbers a good long-term solution for the best edging for a flagstone patio?
Landscape timbers can be used for informal, dry-laid borders, but only expect a finite lifespan, especially where timbers touch moisture or sit in wet soil. If you want a long-term perimeter restraint that performs through freeze-thaw, aluminum or steel is typically the safer choice.