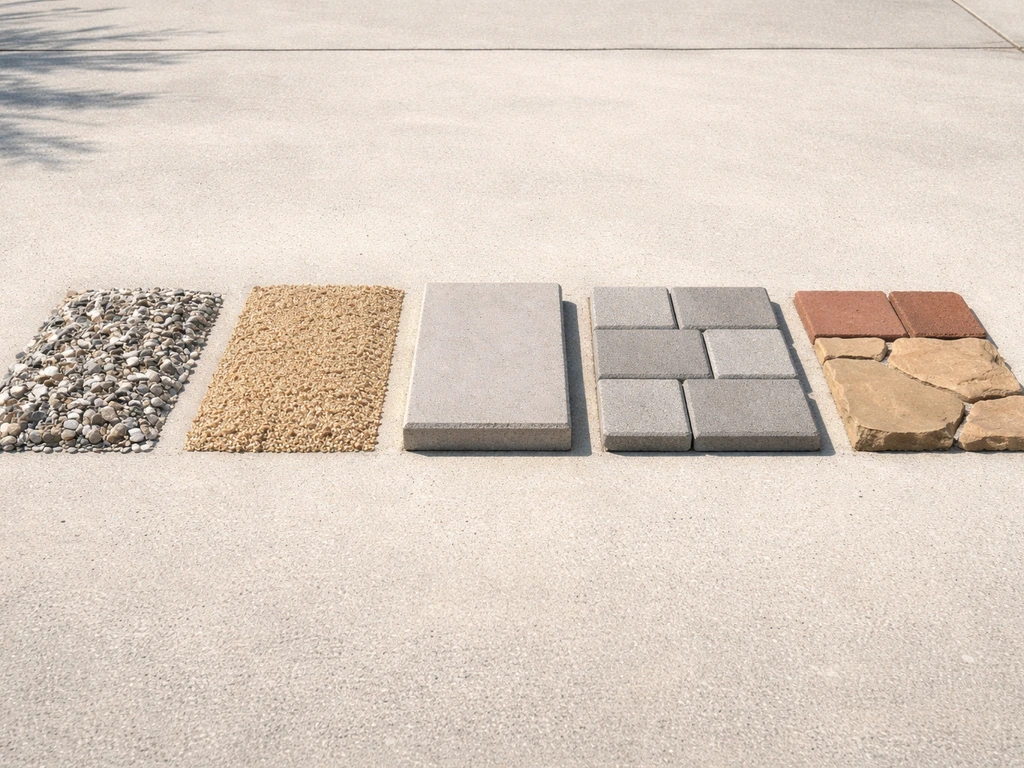
Gravel and decomposed granite are the cheapest patio materials when you look at surface cost alone, running as low as $1 to $4 per square foot installed for pea gravel and around $800 total for a standard 20x20 decomposed granite patio. If you are starting from scratch and wondering what materials you need, start with the surface type plus the base materials that support it patio materials.
What Is the Cheapest Material for a Patio? Costs and Best Options

Nolan Ellison
19 May 2026
But the real cheapest option depends on what you're building on, how well your yard drains, your climate, and whether you're doing the work yourself. A concrete slab at $4 to $8 per square foot DIY can actually beat gravel's long-term cost if you're in a wet or freezing climate where gravel washes out or migrates. Here's how to figure out which one is actually cheapest for your situation.
Cheapest patio materials compared by upfront cost
Let's put all the main options side by side. These are material costs and typical installed ranges for a straightforward patio with standard base prep. Numbers reflect 2025 and 2026 data from contractor and supplier sources across the US and Canada.
| Material | Material Cost (per sq ft) | Installed Cost (per sq ft) | DIY Friendly? |
|---|---|---|---|
| Pea gravel | $0.50–$1.50 | $1–$4 | Yes |
| Decomposed granite (DG) | $0.50–$1.00 | $2–$3 (varies by project size) | Possible, back-breaking |
| Crushed stone/compacted base rock | $0.75–$1.50 | $2–$4 | Yes |
| Concrete slab (basic, no finish) | $2–$5 | $4–$12 | Moderate |
| Concrete pavers (standard) | $2–$5 | $8–$15 | Yes with prep |
| Brick pavers | $3–$6 | $10–$18 | Moderate |
| Flagstone/natural stone | $3–$8 | $15–$30 | Difficult |
| Porcelain tile (outdoor) | $3–$8 | $12–$25 | Difficult |
Gravel and DG win on sticker price every time. Flagstone and porcelain tile are the most expensive end of this spectrum. If you want the absolute lowest number on a receipt, gravel is it. But that number changes fast once you factor in what goes underneath and around it.
The real cost breakdown: base prep, supplies, and labor
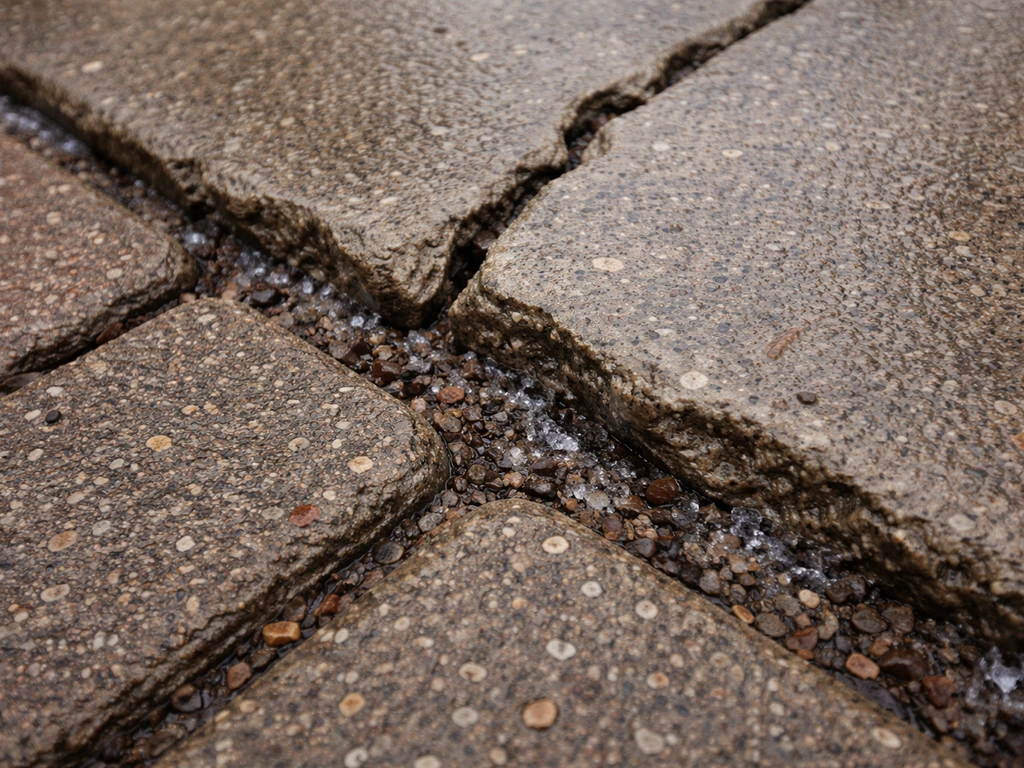
Here's the part most budget guides skip over. Every patio, regardless of surface material, needs a prepared base. Without it, you're just putting pretty materials on top of a problem waiting to happen. I've seen gravel patios turn into muddy sinkholes and brand-new pavers sink unevenly after one winter because someone cut corners on the sub-base.
What goes under every patio
- Excavation: typically 200 to 250mm (8 to 10 inches) deep for rigid surfaces like pavers or concrete; shallower for gravel
- Compacted gravel sub-base: 75 to 100mm layers, compacted in stages
- Weed membrane (geotextile fabric): $0.10 to $1 per sq ft installed; suppresses weeds and separates layers
- Bedding sand (for pavers and brick): 1 inch layer, typically 0.5 to 1 cu ft per 10 sq ft
- Edge restraints: plastic or aluminum edging to contain loose or segmental materials
- Drainage slope: every patio needs at least a 1:80 fall (about 1cm drop per 80cm run) away from the house
The base accessories themselves, including geotextile, bedding sand, and compacted gravel, add roughly $0.10 to $1 per square foot in materials. That's actually a small line item. The bigger cost variable is labor for excavation and grading. If you hire a pro for a concrete patio, expect to pay $5 to $15 per square foot in labor alone. For a 200 sq ft patio, that's $1,000 to $3,000 just in labor before a single bag of concrete is poured.
DIY vs. hiring a pro: where the savings actually live
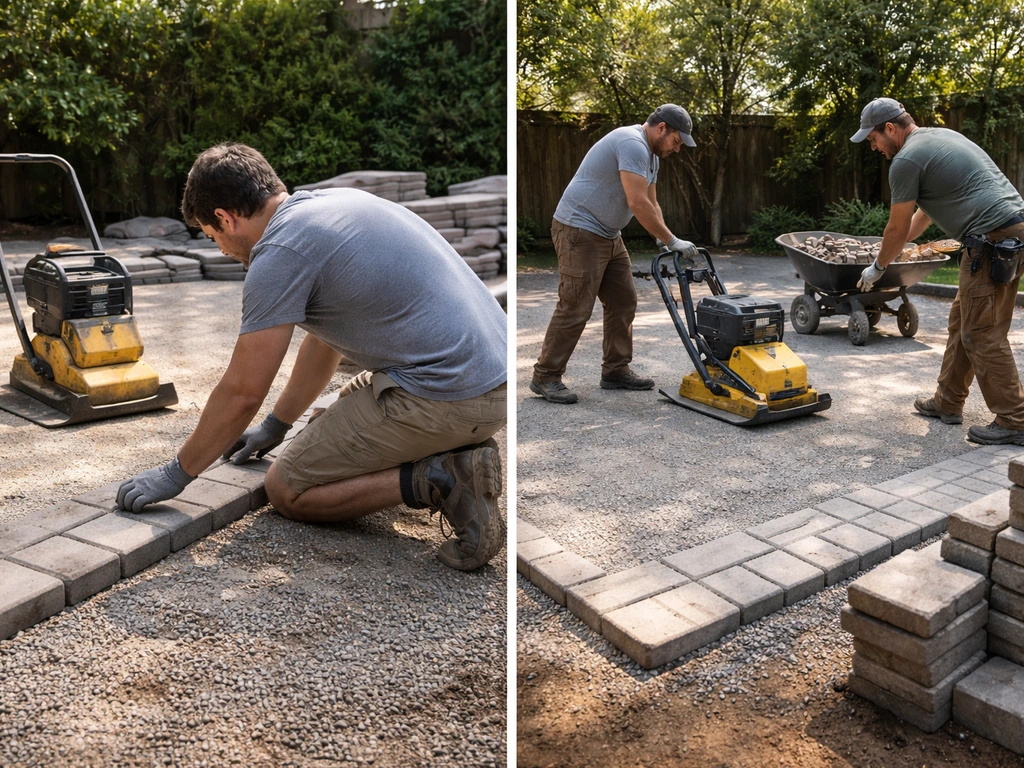
Going DIY on a gravel or DG patio can save you $350 to $800 in labor costs on a typical project, but you'll need a plate compactor (rent one for $80 to $120 a day) and a willingness to move a lot of material by hand. Decomposed granite especially is back-breaking work because it needs precise compaction in thin layers to perform properly.
DIY concrete slab work is doable but requires forming, mixing or ordering ready-mix, and finishing before it sets. Pavers are arguably the most forgiving DIY option because you can work at your own pace and fix mistakes easily. The honest advice: DIY excavation and base prep on any patio type saves real money. DIY the surface finish on gravel, DG, or pavers.
Consider hiring out only the concrete pour if that's the route you choose.
Best cheap option by style and use case
Not every cheap material works for every situation. Here's how to match the lowest-cost option to what you actually need.
Gravel: best for casual, low-traffic spaces
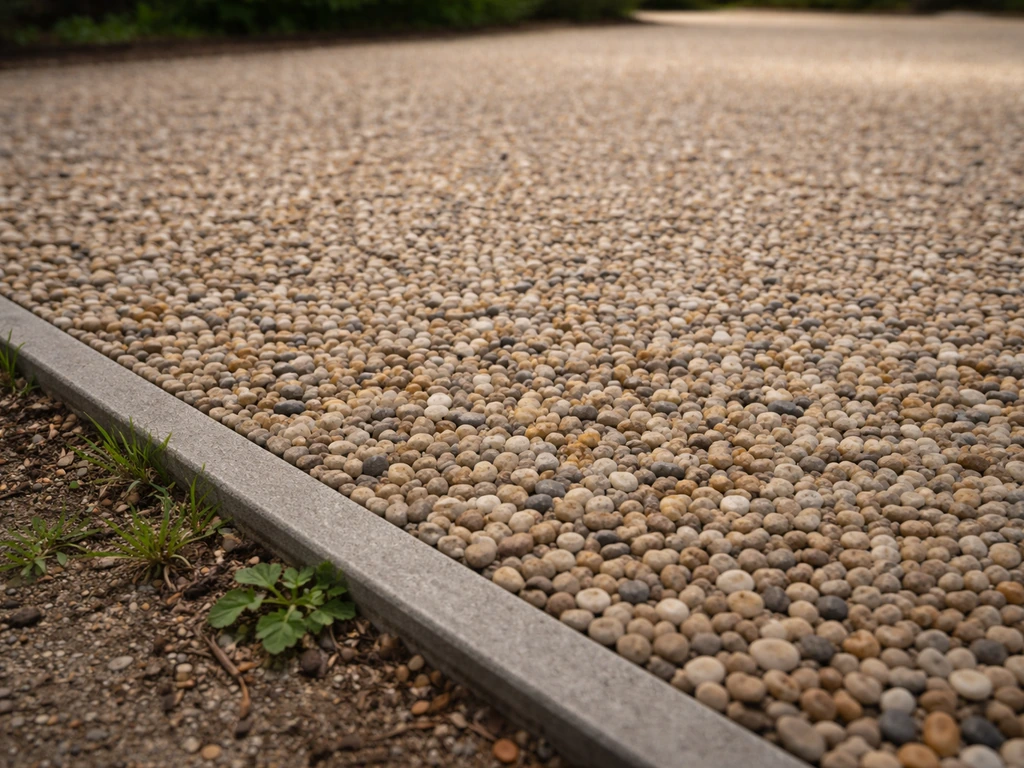
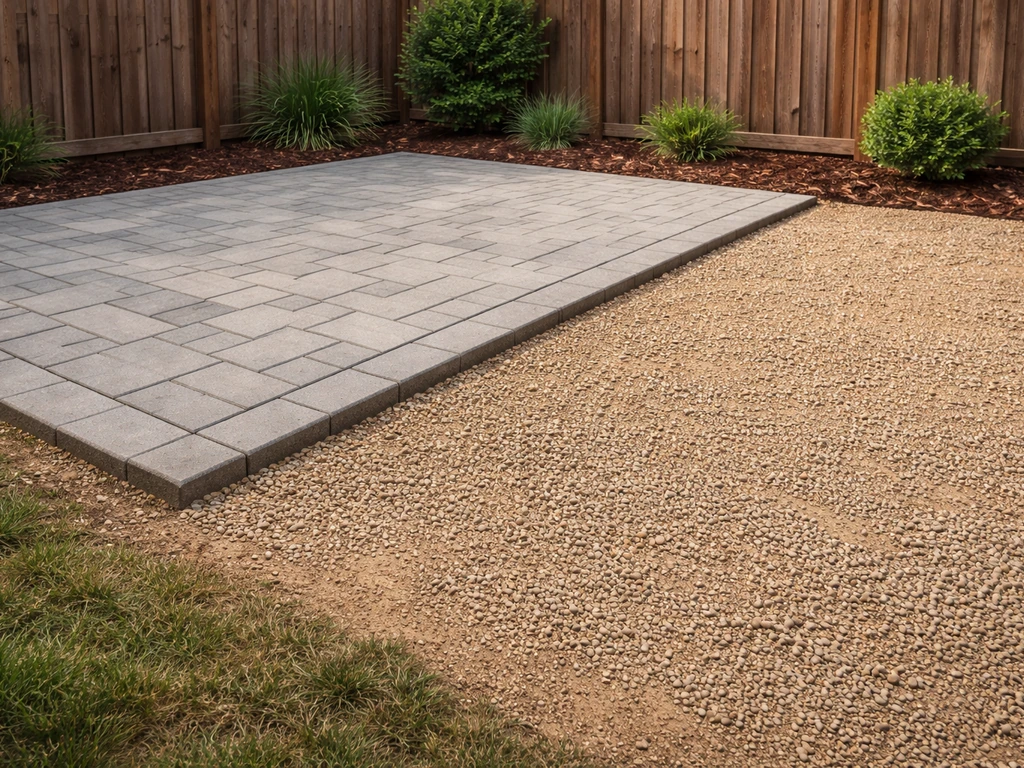
Pea gravel at $1 to $4 per square foot installed is your cheapest possible patio surface. It drains naturally, which is a genuine advantage in wet climates, and it looks decent in informal garden or firepit settings. The catch: it's not great under furniture (chairs sink and wobble), it migrates into grass edges without solid edging, and it needs occasional raking and top-ups. Use it for a firepit surround, a side yard seating area, or a low-traffic path. Not ideal for a primary dining patio where you're moving chairs constantly.
Decomposed granite: best for dry climates with a clean, natural look
DG compacts into a firm, semi-solid surface that looks polished and works well for outdoor dining areas in dry or low-rain climates. A 20x20 patio can come in around $800 total installed by a pro, which is genuinely impressive. The problem is that heavy rain or irrigation erodes it, and it needs periodic refreshing. In wet or freeze-thaw climates, it's not the cheapest option over time because you'll be reapplying material every couple of years.
Concrete slab: best for maximum durability at a moderate price
A plain concrete slab is the cheapest hard-surface patio you can build. If you want to know what is best material for patio overall, it usually comes down to durability, maintenance, and how well the surface matches your climate and drainage. At $4 to $12 per square foot installed (and toward the low end if you DIY the forming and hire only the pour), it gives you a solid, flat, furniture-friendly surface that lasts decades with minimal maintenance.
Keep it simple: no stamping, staining, or exposed aggregate, and you stay in the $4 to $8 range. Angi's 2026 data confirms that simple, unfinished slabs sit at the lower end of the concrete cost spectrum. If you want the cheapest hard surface that holds up year after year, a basic slab is hard to beat.
Concrete pavers: best for DIY-friendly hardscape on a budget
Standard concrete pavers run $2 to $5 per square foot in material cost and are widely available at big-box stores and landscape suppliers. Canadian suppliers like Toemar list specific products in the $5 to $6 per square foot range retail, which is a useful benchmark for budgeting. Installed by a pro you're looking at $8 to $15 per square foot, but the DIY savings here are real and accessible because the skill ceiling is low. You can also repair individual pavers without redoing the whole surface, which reduces long-term cost.
Brick pavers: best for traditional look on a mid-range budget
Brick costs more than basic concrete pavers upfront at $3 to $6 per square foot in material, but it's extremely durable and holds color well over time. If you can source reclaimed or salvage brick, the material cost drops significantly. It's worth checking local salvage yards before buying new. Brick is also a good DIY candidate since installation technique is similar to concrete pavers.
Flagstone and tile: where cheap stops being cheap
Flagstone averages $15 to $30 per square foot installed, and outdoor porcelain tile isn't far behind. These are not budget choices for most homeowners. If you're interested in the cheapest stone options specifically, that's a separate comparison worth exploring in depth. Similarly, if your focus is on the overall best material rather than the cheapest, there's more nuance around climate performance and aesthetics to weigh.
Durability and maintenance tradeoffs for the lowest-cost options
Cheap upfront and cheap over time are two very different things. Here's an honest look at what each budget option costs you in maintenance over a 10-year horizon.
| Material | Expected Lifespan | Main Maintenance Issues | Estimated 10-Year Upkeep |
|---|---|---|---|
| Pea gravel | Indefinite (with top-ups) | Migrates, weeds, needs raking and edging | Low–moderate ($50–$200/yr) |
| Decomposed granite | 5–10 years before refresh | Erosion, rutting, weed breakthrough | Moderate ($100–$300/yr in wet climates) |
| Basic concrete slab | 30–50 years | Cracking, efflorescence, occasional sealing | Low ($20–$100/yr) |
| Concrete pavers | 25–40 years | Joint weed growth, occasional resetting | Low ($30–$100/yr with polymeric sand) |
| Brick pavers | 50+ years | Joint maintenance, occasional re-leveling | Low ($30–$80/yr) |
Polymeric jointing sand makes a big difference for paver and brick maintenance. Products like QUIKRETE's polymeric jointing sand resist erosion, weed growth, and insects, and can suppress weeds for up to about 5 years when properly installed. That's a meaningful reduction in the "cheap choice becomes expensive over time" problem. Budget around $50 to $100 per application per 200 sq ft patio, and plan to reapply every 5 years or so.
The concrete slab is genuinely the lowest-maintenance option over 10 years. You might seal it every 3 to 5 years if you want to protect it from staining, but that's optional on a utility slab. For gravel and DG, plan to spend real time (and occasional money) keeping them looking good and contained.
How climate and drainage change which option is actually cheapest
This is the section most people skip and later regret. I've talked to homeowners who picked DG because it was cheap, then watched it wash into their lawn after the first major rainstorm. Climate is a real cost driver because it determines how fast a material degrades and how much you'll spend correcting problems.
Freeze-thaw climates (northern US, Canada, UK)
Freeze-thaw cycles are brutal on porous materials. Water gets into cracks or joints, freezes, expands, and pries things apart. Decomposed granite becomes a muddy mess after a freeze-thaw winter. Basic concrete slabs can crack if they weren't poured thick enough or properly reinforced. Concrete pavers actually handle freeze-thaw better than poured slabs because individual units can move slightly without cracking the whole surface. Outdoor porcelain tile with water absorption under 0.5% is technically freeze-thaw safe, but it's also expensive and the grout joints still need careful sealing. In freeze-thaw zones, concrete pavers on a proper compacted base are the cheapest reliable option.
Heavy rain and poor drainage
If your yard has drainage issues or you get sustained heavy rain, gravel and DG both fail fast. Gravel redistributes and DG erodes. The real cost of those "cheap" surfaces in wet climates includes re-grading, restocking, and the frustration of doing it repeatedly. A solid slab or properly installed pavers with good edge restraint and a 1:80 drainage fall away from the house will save you money over 5 years even if they cost more upfront.
For many homeowners, the best material for a pool patio is the one that stays stable and drains well, so a solid slab or properly installed pavers are often strong choices. Always establish your drainage slope before choosing a surface material. Without it, no material performs well.
Hot, dry climates
In arid regions, DG and gravel actually thrive. Minimal rain means minimal erosion. Heat can cause concrete slabs to crack if there are no proper expansion joints, but that's a construction issue, not a material failure. Gravel and DG are legitimately cheap and durable in desert or dry Mediterranean climates. Just make sure edging is solid to prevent migration during occasional heavy rainfall events.
Humid, temperate climates
Moderate rain, no extreme freezing, decent drainage: this is where you have the most flexibility. Concrete pavers, basic slabs, and even well-edged gravel all work. This is also where your total project budget and aesthetic preference can drive the decision more than climate necessity.
How to choose and source the cheapest material today
Once you've matched your climate and use case to the right material category, sourcing is where you actually lock in the savings. Here's a practical sequence for getting the best price.
- Measure your patio footprint accurately: length x width in square feet, then add 10% for waste and cuts.
- Determine your base depth requirement: 4 inches of compacted gravel base for pavers or slabs, 2 to 3 inches for gravel-only surfaces.
- Get quotes from at least two local landscape supply yards (not just big-box stores): landscape suppliers often have bulk pricing on gravel, DG, and concrete pavers that beats retail by 20 to 40%.
- For concrete pavers, ask suppliers specifically for their standard or economy line: basic gray or tan pavers cost significantly less than premium textured or colored options and perform identically.
- Request pricing per ton (for gravel and DG) and per square foot (for pavers): compare both to make sure you're getting a true apples-to-apples price.
- Check local classifieds and salvage yards for reclaimed brick or stone: this is where you find genuine bargains, though you need to inspect for damage and check quantities carefully.
- If hiring a pro, get three itemized bids and make sure each one includes base depth, geotextile, edging, and drainage slope: bids that skip these items look cheap but will cost you more in repairs.
- For a concrete slab, contact two or three ready-mix suppliers and ask about partial-load pricing for smaller patios: some will deliver short loads at a reasonable surcharge rather than requiring a full truck.
The bottom line is this: gravel and decomposed granite are cheapest when your climate allows it and your drainage is solid. A basic concrete slab is cheapest when you want a hard surface that requires almost no upkeep over decades. Concrete pavers hit the sweet spot for most homeowners because they're DIY-friendly, repairable, freeze-thaw tolerant, and moderately priced.
Concrete pavers are often a top pick if you want the best material for patio paving that balances cost, durability, and easy repairs. Whatever you choose, spend the money on proper base prep. For the posts themselves, choosing the best wood for patio posts helps you avoid rot and warping so the structure stays secure proper base prep.
Skipping the sub-base to save $200 on a 200 sq ft patio is the single most expensive mistake you can make in this project.
FAQ
What is the cheapest material for a patio if I care about long-term stability, not just the upfront price?
If your goal is lowest cost per square foot that stays put, the winner is usually a simple, unfinished concrete slab or properly installed concrete pavers, because they depend far less on ongoing raking and edge maintenance than pea gravel or DG. Gravel can be cheaper on paper, but the first time chairs sink or DG washes into the lawn, the “cheap” math changes.
Is pea gravel always the cheapest patio choice, even for a dining patio?
Pea gravel is typically the cheapest surface option, but it becomes impractical anywhere you regularly push a grill, lawn furniture, or a wheelbarrow across it. If you expect frequent chair movement or want a smooth dining area, DG or a slab is often the more cost-effective choice after factoring in leveling and top-ups.
What’s the most budget-friendly option for a patio that needs to be furniture-friendly?
For a flat, furniture-friendly cheap build, choose an unfinished concrete slab or DIY pavers with solid edge restraint. If you go with gravel or DG, budget time for periodic top-ups and plan for a confined area, otherwise you will spend money repeatedly re-leveling the surface and cleaning up migration into landscaping.
How do I prevent gravel or DG from washing out if I live in a rainy area?
To avoid washout, the base must be built to the right depth and compacted in layers, then topped with a stable bedding layer appropriate to the surface. Also make sure you have a drainage fall away from the house (often about 1 inch per 8 feet) and edging that actually holds the material, not just “border rocks.”
Which cheapest options survive freeze-thaw the best?
If freeze-thaw is common, avoid treating DG like a permanent “set it and forget it” surface. Concrete pavers on a properly compacted base typically tolerate movement better than a porous, erosion-prone surface, while a slab works if it is built thick enough and correctly reinforced with proper joints.
What should I do first if my yard drains poorly before choosing a patio material?
If you have heavy water issues, the cheapest surface material is the one you can drain properly. A simple test is to observe where runoff ends up during a storm, then correct grading before selecting gravel or DG. If you cannot fix drainage, plan on a more stable hard surface like a slab or pavers, because “adding more gravel” rarely solves the root problem.
Can DIY concrete still be the cheapest option compared with gravel and DG?
Yes, a DIY concrete slab pour can beat the installed cost of gravel, but only if you manage forming, curing, and jointing correctly. If you are not set up for mixing, finishing, and timely work, hiring only the pour (while doing excavation and base prep yourself) is often the safest way to keep costs down.
Why does the total patio cost change so much after I include the base and prep materials?
The cheapest “material” can be misleading when you need geotextile, bedding sand, and correct base stone. If you skip or underbuild the base, you may save money upfront but pay for re-excavation and reinstallation later. Budget for compaction gear or rentals, because poor compaction is a top cause of sinking and uneven surfaces.
When should I use polymeric jointing sand, and are there any caveats?
Polymeric jointing sand is most helpful for pavers and brick when joints are cleaned and installed according to label requirements, because it reduces weed growth and joint erosion. However, it can be tricky in certain climates because it needs moisture to activate and you should avoid over-wetting right after application.
What’s the cheapest material for a pool patio if I’m concerned about wet footing and maintenance?
If the patio is near a pool or you need slip resistance, avoid assuming the lowest-cost surface is best. DG and gravel can shift and become uneven when wet, while a basic slab or pavers can be detailed to be safer, but the cheapest path still depends on getting drainage right and choosing the right surface texture.
Which approach minimizes the risk of getting a cheap patio that needs major repairs quickly?
If you want to keep the budget low but reduce future repairs, focus on “total system” choices: proper base, adequate thickness, correct edging, and joints that are maintained. For example, concrete pavers often cost more than pea gravel at purchase, but the ability to replace individual units can protect your budget after a freeze-thaw season.