Real-world flagstone patios range from a simple 12x16 ft rectangular dry-laid slab in a backyard to an elaborate courtyard with curved borders, built-in steps, and mortared joints on a concrete base. What ties every successful example together is the same short list of decisions: what stone type and finish, how the joints are filled, what the base looks like underneath, and whether the design matches the local climate. Get those four things right and the style almost takes care of itself.
Examples of Flagstone Patios: Styles, Layouts, and Build Tips

Nolan Ellison
4 Jul 2026
Common patio layouts and what they actually look like
Walking through a few real layout types makes the abstract suddenly concrete (no pun intended). Here are the five you'll see most often, along with what makes each one work.
Straight rectangular patio
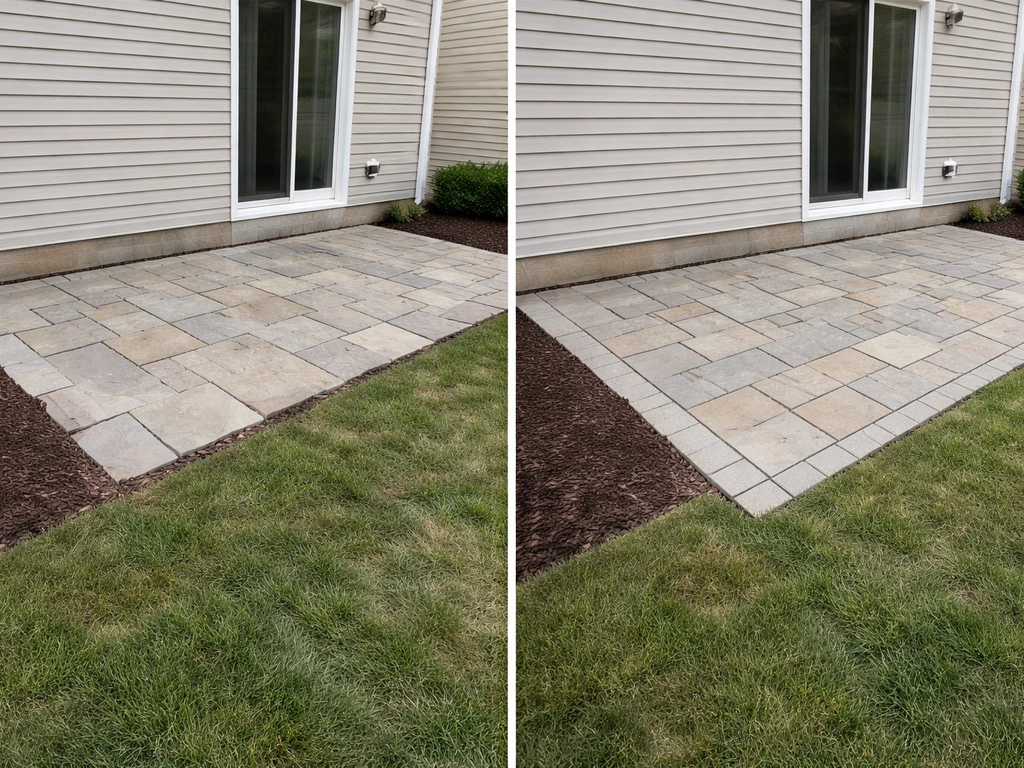
This is the workhorse layout: a clean rectangle or square tucked against the back of a house, usually 150 to 300 square feet. It's the easiest to estimate, excavate, and build because all your edges are straight. Most examples use cut flagstone (bluestone, travertine, or sandstone in 2-inch nominal thickness) set in an ashlar or offset-course pattern. The straight geometry means joints line up predictably, which also means any deviation in joint width is easy to spot, so precision matters more here than on an irregular layout.
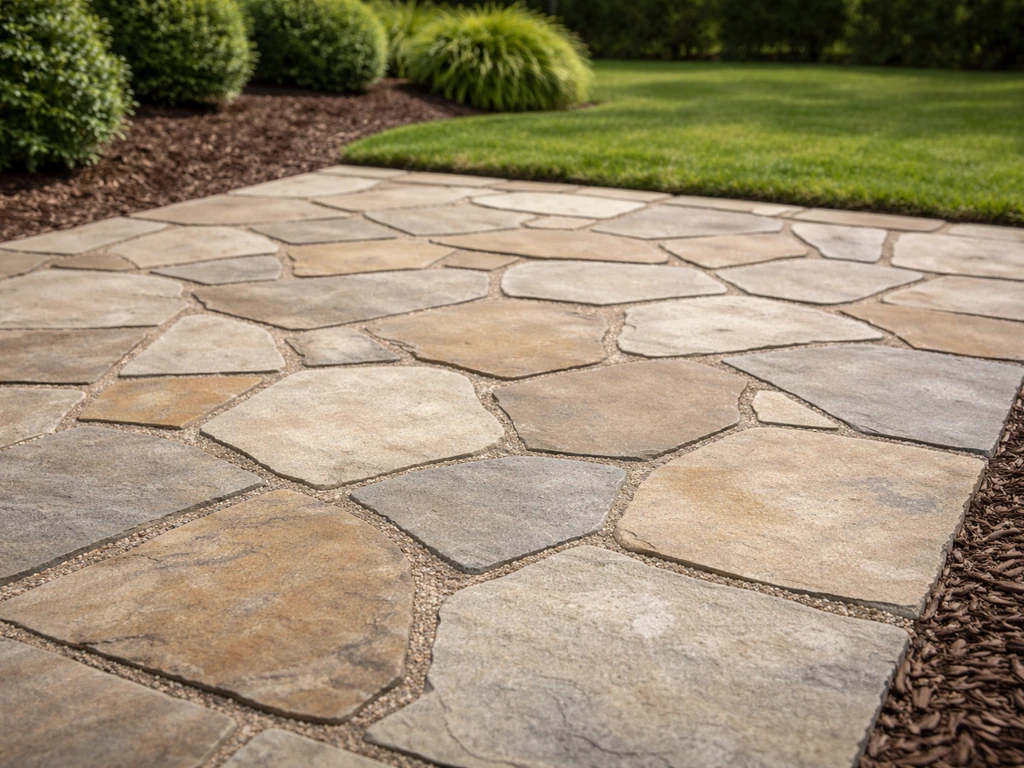
Random/irregular flagstone patio
This is the look most people picture when they hear "flagstone patio": irregular-shaped stones puzzle-pieced together with natural gaps between them. The stones vary in size and outline, so joints naturally vary from about 3/4 inch to 1.5 inches in a dry-set application. Managing joint-width variation is the main challenge here. Experienced installers start in one corner, work outward, and wiggle or tamp each stone into place so it nests tightly against its neighbors. Suppliers who stock a range of piece sizes, including smaller "filler" flags, make this dramatically easier.
Curved border or freeform patio
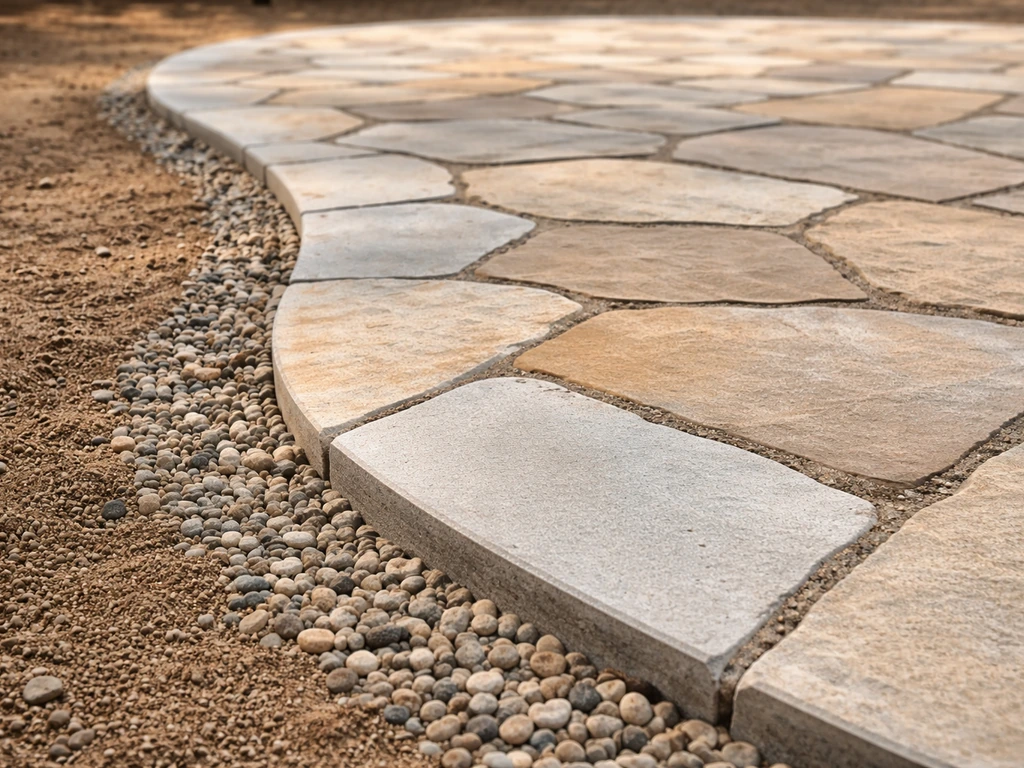
Curved patios follow a sweeping organic edge rather than 90-degree corners. The curves are traced by cutting irregular flagstones to shape on-site with a wet saw or angle grinder. Landscaping Network’s photo idea collection shows both straight walkway layouts and curved layouts that use irregular flagstones cut and arranged to trace curves and even circles. The interior can still be random-set or ashlar; it's only the perimeter stones that get custom cuts. This layout photographs beautifully and works especially well when the patio blends into a planted border or transitions to a lawn. Budget for extra labor and material waste (roughly 10 to 15 percent) because of all that cutting.
Courtyard or enclosed patio
A courtyard-style patio is typically enclosed on two or more sides by walls, fences, or the house itself. These spaces often mix flagstone with other materials: a band of brick at the perimeter, a central focal point of cut flagstone, or a fountain base. Because courtyards have limited natural drainage outflow, getting the slope right (at least 1/4 inch per foot, or about 2%, away from any structure) is non-negotiable. Because enclosed patios have limited natural drainage, it’s important to maintain a slope away from the house when patios abut structures getting the slope right (at least 1/4 inch per foot, or about 2%, away from any structure) is non-negotiable. Mortared joints on a concrete base are common here because the enclosed environment limits frost heave movement in mild climates.
Steps and multi-level patios
Flagstone steps connecting a lower patio to an upper deck or grade change are one of the most striking applications. Typical steps use flat fieldstone or thick-cut bluestone (2.5 to 3 inches) for treads, stacked or mortared onto a compacted gravel base or concrete footing. Risers are usually between 6 and 7 inches. Each tread should have a slight forward pitch (about 1/8 inch per foot) so water runs off the front rather than pooling at the back. These integrate naturally with a main patio layout and are worth planning from the start rather than adding as an afterthought.
Stone type, finish, and thickness: what each example actually uses
The flagstone you choose shapes the look and the maintenance load more than almost anything else. Here's how to think through the main variables.
Cut vs. irregular flagstone

Cut flagstone (also called sawn or dimensional flagstone) comes in consistent rectangles or squares, making it ideal for ashlar and offset-course patterns. Irregular flagstone is quarried and split into random shapes. Both can use the same stone species (bluestone, slate, limestone, sandstone, quartzite), but the look and install complexity differ significantly. Cut stone is faster to lay but costs more per square foot. Irregular stone is less expensive per piece but takes more time to fit and has higher labor costs if you're hiring out.
Surface finish and slip resistance
Natural cleft (split face) is the most common finish for outdoor flagstone and the benchmark for slip resistance in wet conditions. The texture from the split provides grip that a honed or polished face cannot match. Tumbled flagstone has a softer, worn appearance with rounded edges, which works well for a rustic or Mediterranean aesthetic but can have slightly lower texture depth. If slip resistance is a real concern, especially around pools or in rainy climates, natural cleft is the right call.
Thickness
For a ground-level patio, 1. If you're wondering how thick flagstone for patio surfaces should be, start with the standard 1.5 to 2 inches to 2.5 inches range mentioned next thickness range for patios. 5 to 2 inches is the standard thickness range. Thinner pieces (under 1.5 inches) are prone to cracking under foot traffic and furniture loads. Thicker pieces (2.5 to 3 inches) are more forgiving on irregular bases and are the go-to for steps and high-traffic areas. Flagstone thickness directly affects your excavation depth, so nail this down before you start digging.
Joint style: sand-set, polymeric sand, or mortar
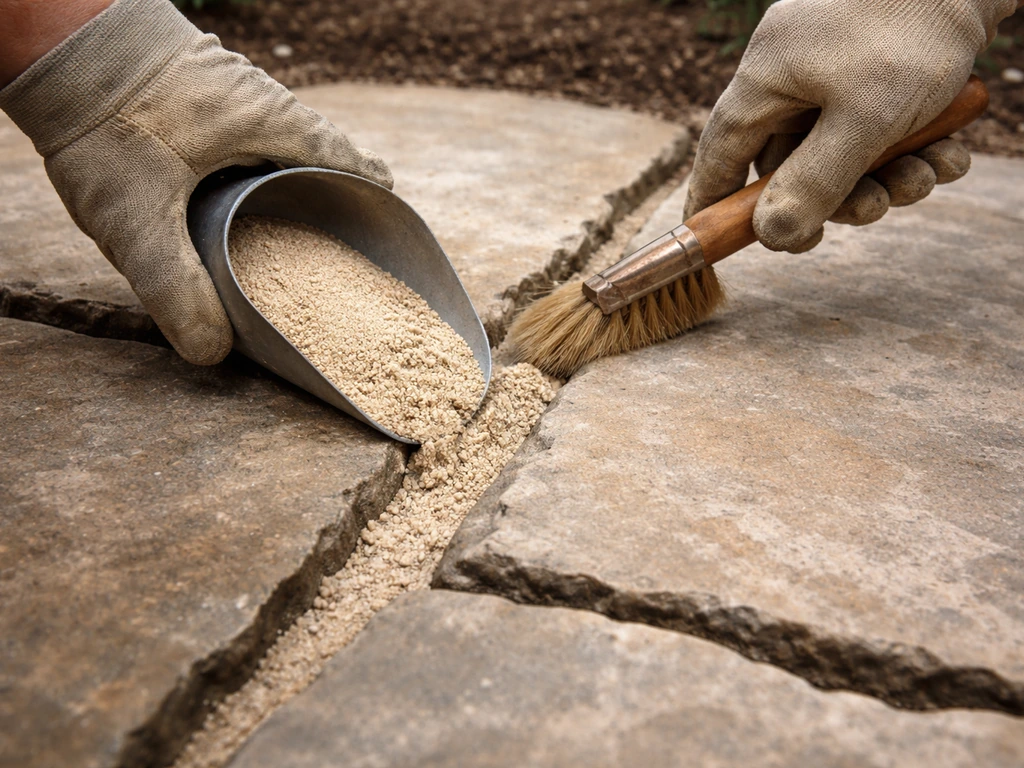
This is one of the most consequential decisions in any flagstone patio example. Dry-set joints filled with coarse sand or decomposed granite look natural and allow water to permeate, but weeds and ants eventually move in. Polymeric sand hardens when wet, resists weeds better, and works well for joint widths from about 1/8 inch up to 3/4 inch for standard products (though specialty products like Techniseal NOCO handle joints up to 2 inches wide with stone thicknesses up to 2 inches). Mortared grout joints, typically 3/8 to 1/2 inch wide, give a formal, locked-down look but require a concrete base and are harder to repair. For irregular flagstone with wide, variable joints, a specialty wide-joint polymeric product is usually the best middle ground.
| Joint Method | Best For | Joint Width Range | Weed Resistance | Repairability |
|---|---|---|---|---|
| Coarse sand / DG | Permeable, natural look, dry climates | 3/4 in to 4 in | Low | Easy (lift and relay) |
| Standard polymeric sand | Cut flagstone, uniform joints | 1/8 in to 3/4 in | Good | Moderate |
| Wide-joint polymeric (e.g., NOCO) | Irregular flagstone, variable joints | Up to 2 in (interstices to 4 in) | Good | Moderate |
| Mortar/grout | Formal look, concrete base | 3/8 in to 1/2 in | Excellent | Difficult |
Pattern ideas and how to pick the right one
Pattern choice affects how the patio looks, how long it takes to install, and how well it holds up under traffic. Here are the main options with honest notes on each.
- Random/irregular: Puzzle-piece layout using flags of different shapes and sizes. Works best with natural cleft stone and wide joints. Forgiving of size variation but requires patience and on-site fitting. Great for a relaxed, naturalistic look.
- Ashlar: Structured grid using cut rectangular or square flagstone. Clean, formal, and fast to lay. Joint widths are consistent, which makes polymeric sand straightforward. Best match for contemporary or traditional architecture.
- Fieldstone look: Similar to random but specifically using thick, rough-edged field stone. Joints are often wider and filled with gravel, ground cover, or moss. Extremely casual, great for garden settings.
- Offset/running bond: Rectangular cut pieces laid in staggered rows, like large-format brick. Easier than full ashlar, strong visual line, and forgiving of minor size variation.
- Herringbone: 45-degree interlocking pattern that redirects stress at each intersection, making it one of the strongest layouts for high-traffic areas like driveways or busy entertaining spaces. Requires more cuts at the perimeter but holds up exceptionally well.
- Stack bond: Perfectly aligned grid with joints running straight in both directions. Looks sharp but is unforgiving of any deviation in piece size or joint width. The rigid geometry amplifies imperfections, so it's best left to experienced installers with consistently sized material.
- Stacked/step pattern: Thick flagstone pieces stacked to form risers and treads on grade changes. Not a surface pattern per se, but a structural arrangement that integrates steps into the patio design.
Base build-up, substrate, and edge restraints
The base is invisible once the patio is done, but it determines whether the whole thing stays flat and solid for 20 years or starts rocking and sinking after two winters. This is the part most DIYers underestimate.
The standard dry-set base stack
- Excavate 6 to 8 inches below finished grade (accounting for base, bedding, and stone thickness).
- Compact the native subgrade. Aim for at least 98% standard Proctor density for residential pedestrian use.
- Lay a geotextile fabric over the compacted subgrade. This separates the base from native soil and suppresses weed migration from below. Keep it under the base, not between base layers.
- Spread 4 to 6 inches of crushed gravel (ASTM No. 57 or 3/4-inch minus crusher run) and compact in lifts.
- Add roughly 1.5 inches of fine 1/4-minus crushed rock or coarse sand as a bedding/screeding layer. Do not compact this layer before placing stones; it needs to remain workable for leveling.
- Set flagstone, wiggling each piece into the bedding and tamping level. Start from a corner or a straight edge and work outward.
- Fill joints with your chosen material (sand, polymeric sand, or mortar).
- Do a final check pass with a level or straightedge; reset any high or low stones before the bedding sets.
Mortared patio base stack
If you're mortaring flagstone (as in a courtyard or formal patio), the base needs to be a concrete slab, typically 4 inches thick on 4 inches of compacted gravel. The flagstone is then set in a mortar bed and grouted. This system is more rigid, which is an advantage in stable climates but a liability in freeze/thaw zones where frost can crack both the slab and the mortar joints.
Edge restraints
Without edge restraints, the outer stones gradually migrate outward and the whole patio loses its shape. For dry-set patios, plastic or aluminum edge restraint is installed on top of the compacted base (before the bedding layer) and spiked into the ground. It bends to follow curves, which makes it useful for freeform layouts. For straight patios, a soldier course of large flagstone pieces set on edge in mortar works well and looks much better than plastic restraint. Either way, plan the edge restraint before you start laying field stone.
Drainage and climate: examples by region
Where you live should directly influence which example style you build. I've seen patios that looked perfect on paper fail in a few years simply because the installation method didn't match the climate.
Freeze/thaw climates (Midwest, Northeast, Mountain West)
Dry-laid flagstone on a well-drained gravel base is the right choice here, not mortared stone on concrete. If you want an alternative to a flagstone patio, focus on materials that handle drainage and base prep the same way, like pavers or concrete stamped options Dry-laid flagstone. Mortar and concrete restrain differential movement; when frost heaves one section of base, the mortar cracks and the bond fails. With dry-set stone, individual pieces can move slightly and be reset in spring. The bedding layer of 1/4-minus material and the geotextile barrier both help by keeping water from saturating the base and freezing in place. For stone species, avoid porous, soft sandstone in hard freeze climates; quartzite, dense bluestone, and most granites are far more durable.
Hot, sunny climates (Southwest, Southeast)
Heat itself doesn't damage flagstone, but light-colored stone (light limestone, cream travertine) reflects heat better than dark stone (dark slate, black basalt) and keeps the surface more comfortable for bare feet. Sealers become more important here because UV exposure accelerates surface degradation on some stone types and because the intense sun can bleach out unsealed sandstone. Drainage is less about frost and more about occasional heavy rain events; a 2% slope (1/4 inch per foot) handles most situations.
Wet climates (Pacific Northwest, Gulf Coast)
Standing water is the enemy. In consistently wet regions, slope and permeability become the primary design concerns. A minimum slope of 1/4 inch per foot is the standard for rough/irregular flagstone surfaces where water can pool in the texture; smooth-faced cut stone with perfect drainage can get away with 1/8 inch per foot, but that's the floor. Permeable joints (sand-set or wide-joint polymeric) allow water to infiltrate rather than sheet off onto foundations or neighboring beds. This also reduces the need for added stormwater infrastructure. Natural cleft finish outperforms honed or smooth stone for slip resistance in these conditions.
| Climate | Recommended Base | Best Joint Method | Stone Species to Favor | Key Risk to Avoid |
|---|---|---|---|---|
| Freeze/thaw | Dry-set on 4–6 in compacted gravel + geotextile | Wide-joint polymeric or coarse sand | Quartzite, dense bluestone, granite | Mortar on concrete (cracks with frost heave) |
| Hot/dry (Southwest) | Dry-set or mortared slab OK | Polymeric sand or mortar | Travertine, limestone, sandstone | Porous stone without sealer (UV/moisture cycling) |
| Wet/rainy | Dry-set on well-draining gravel | Sand-set or wide-joint polymeric | Quartzite, slate, natural cleft bluestone | Inadequate slope (standing water, slipping) |
Maintenance, cleaning, and keeping joints weed-free
Every flagstone patio example looks great on day one. What separates patios that still look good in year ten is a simple, consistent maintenance routine.
Routine cleaning
For most patios, a monthly sweep and occasional rinse is enough. When it's time for a real cleaning, pre-wet the stone with clean water before applying any cleaner. This controls how fast the product absorbs and prevents aggressive cleaners from driving staining compounds deeper into the stone. A diluted vinegar-and-water solution (roughly 1:1) handles organic staining and light efflorescence on most natural stone. For tougher jobs, a pH-neutral commercial stone cleaner works better without damaging the texture that provides slip resistance. Avoid power washing at high pressure on natural cleft stone; it can erode the texture over time and damage polymeric sand joints.
Sealing
Sealing isn't mandatory on all flagstone, but it helps on porous stone types like sandstone, soft limestone, and slate. A penetrating impregnating sealer (not a surface film) is the right product for exterior flagstone. It repels water and salt, prevents efflorescence, and doesn't leave a slippery surface film. If you've just installed polymeric sand joints, wait at least 30 days before sealing so the polymeric fully cures. Reapply sealer every two to three years depending on traffic and climate.
Weed and joint control
Weeds in flagstone joints come from two sources: seeds blowing in from above, and roots pushing up from below. The geotextile fabric in the base handles the bottom-up problem. For seeds, the best defense is a well-installed polymeric sand joint that leaves no loose material for seeds to germinate in. If you have existing sand joints with weed problems, pull weeds manually, treat with a targeted herbicide if needed, then re-fill with polymeric sand. Polymeric sand does fail when joint geometry is off (too shallow, too narrow, or overfilled), so follow the product specs carefully. Standard polymeric sand works for joints roughly 1/8 to 3/4 inch wide; for wider flagstone joints, use a wide-joint rated product. If polymeric sand loosens over time, it usually means the joints weren't deep enough or the stone was set over wet sand. The fix is to clear the joint and re-install properly.
Releveling settled stones
Dry-laid flagstone patios are self-repairing in a way that mortared patios aren't. If a stone settles, rocks, or tips, you lift it out, add or remove bedding material, and re-set it. This is a 20-minute job per stone. It's one of the strongest arguments for dry-set installation, especially in climates where frost movement is common.
Budget reality, DIY vs. contractor, and where to source stone
This is where a lot of flagstone patio planning goes sideways. The stone itself is only part of the cost. Here's an honest breakdown of what actually drives the budget.
What drives cost in real examples
- Stone species and finish: Quartzite and premium bluestone cost more than local sandstone or limestone. Tumbled and honed finishes add cost over natural cleft.
- Cut vs. irregular: Cut/dimensional flagstone costs more per square foot but saves labor time. Irregular flagstone is cheaper per piece but takes longer to fit.
- Base depth and material: A 6-inch compacted gravel base on good soil costs less than an 8-inch base on clay or problem soils. Concrete slab bases for mortared installations add significant cost.
- Joint method: Polymeric sand is more expensive than coarse sand but saves maintenance time. Mortar grouting requires a skilled hand and more labor hours.
- Site conditions: Excavation in rocky or clay-heavy soil, removing existing concrete, or working in tight spaces with limited access all add cost.
- Patio size and shape: Curves and irregular outlines require more cutting and fitting time. A simple rectangle is the lowest-cost shape for a given square footage.
DIY vs. hiring a contractor
A straightforward dry-set rectangular flagstone patio is genuinely DIY-able for a homeowner comfortable with physical labor and attention to leveling. The base compaction is the hardest part to get right without experience. Renting a plate compactor (not just tamping by hand) is essential for a base that lasts. Curved layouts, step integration, mortared joints, and anything over about 400 square feet start to tip the scale toward hiring a contractor, mainly because the margin for error compounds with complexity and scale. Get at least three quotes, ask specifically about base depth and compaction approach (that's where you'll see quality differences), and clarify who supplies the stone.
Where to buy flagstone and how to spec it
Stone yards and landscape material suppliers are almost always better sources than big-box home improvement stores for flagstone. You can see the actual stone, assess color consistency, and often choose individual pieces. When you're buying for a random/irregular layout, ask the supplier about their mix of piece sizes and confirm they stock smaller filler pieces, because a bag of large-only pieces creates joint-width headaches on-site. For cut flagstone, order 10 percent more than your calculated square footage to account for cuts and breakage. Irregular flagstone needs 15 to 20 percent overage. Confirm the nominal thickness before ordering and measure a sample batch yourself, because thickness variation directly affects how much screeding and re-adjustment you'll do during installation.
If you're comparing flagstone to other patio materials, the decision often comes down to the specific look and feel you're after. Brick and slate are the most common alternatives that come up in this comparison, each with its own installation quirks and climate performance profile. Slate and flagstone also differ in how they break down outdoors and how they handle maintenance, so it helps to compare both before you decide. Flagstone's combination of natural variation, longevity, and repairability makes it hard to beat for most residential patios, as long as the base is done right.
FAQ
What’s the difference between ashlar and offset-course patterns for examples of flagstone patios, and does it affect durability?
Ashlar uses more uniform, “grid-like” stone faces, while offset-course staggers seams so no joints line up in the same way. For durability, both can last if the base is compacted and the joints are filled correctly, but offset-course tends to hide small variations in stone size and leveling because seam lines are broken up.
Can I install a flagstone patio over existing concrete, like cracked sidewalks, for a DIY-friendly example?
It usually only works if you remove the concrete or convert the project to a dry-set system with proper separation and drainage, because mortared flagstone on an unstable concrete slab can crack when the slab heaves or moves. If you keep existing concrete, expect limited ability to correct future movement, and plan for lifting and resetting as a long-term risk.
How deep should I excavate for examples of flagstone patios, and what’s the fastest way to estimate excavation depth?
Use a stack-up approach: subtract flagstone thickness plus bedding thickness plus base material depth, then account for edge restraint height so the surface ends at the right elevation. A common rule of thumb is to base your bedding and stone height on the exact nominal thickness you measured from your batch, because thickness variation changes screed depth and can force rework.
How do I prevent rocking in dry-laid flagstone patios if some stones sit higher after laying?
Lift the suspect stones, check that the base and bedding are even, then re-screed with correct bedding gradation and re-tamp. Rocking is almost always a base compaction or bedding thickness issue, not a “wrong joint filler” issue, so avoid adding extra sand on top as a quick fix.
What are common mistakes with polymeric sand joints in examples of flagstone patios?
The biggest issues are overfilling joints (polymeric sand needs space to hydrate and lock), underfilling or shallow joint depth (it won’t interlock), and wetting too aggressively or too early (can cause clumping before it cures). Follow the product’s specified watering method and cure time, and keep traffic off until it hardens fully.
Should I use polymeric sand or regular sand for joints if I live in a freeze-thaw climate?
For freeze-thaw areas, polymeric sand is often chosen because it resists weed growth and helps stabilize joints, but it must be installed to the correct joint width and depth. If you frequently get heavy rain, prioritize proper base drainage and slope first, because no joint product can compensate for standing water under the patio.
How do I choose between natural cleft and a honed finish for slip resistance in wet conditions?
Natural cleft generally performs best because it has real texture and grip depth, while honed faces can be slippery when wet even if they look smoother. If the patio connects to a pool, a driveway slope, or a frequently watered area, choose cleft for the walking surface and reserve honed finishes for accents farther from splash zones.
What should I do if my patio needs to drain away from the house but I can’t get a 2% slope?
If you cannot achieve the full slope, you’ll need to improve drainage elsewhere, such as using better base permeability, reducing pooling points by adjusting local elevation, or adding a drain line in the lowest area. The minimum slope concept still matters, so focus on eliminating any low spots, not just matching a single overall slope number.
Can I seal flagstone right after installation, and does sealing affect polymeric sand joints?
Wait at least 30 days after installing polymeric sand joints before sealing, so the polymeric has fully cured. Sealing too soon can interfere with how polymeric sand locks up and can lead to premature joint breakdown or uneven performance.
How do I clean flagstone patios without damaging polymeric sand joints?
Pre-wet the surface before applying cleaners, avoid high-pressure washing on textured cleft stone, and use pH-neutral cleaners for routine deep cleans. If you disturb joints with pressure or agitation, you may need to vacuum out loose sand and re-fill, especially along walkway edges where traffic loosens joints faster.
What’s the best way to repair a single cracked or loose flagstone in dry-laid examples of flagstone patios?
Lift the stone, remove any contaminated or saturated bedding, then reset it using the same bedding gradation and re-level. Refill joints to the correct depth and width, if you have polymeric sand, use the correct product type and don’t mix old and new material unevenly, because joint performance depends on consistent locking.
When should I consider hiring a contractor instead of building examples of flagstone patios myself?
If your plan includes mortared joints on a concrete slab, multiple step changes, tight curves requiring lots of custom cutting, or large footprints (around 400 square feet and up), the margin for error shrinks quickly. Contractors can also better manage base depth and compaction consistency, which is the hardest part for DIYers to get right without measuring and equipment experience.