
A crushed stone patio is a genuinely good option for a lot of homeowners, but it comes with real trade-offs you need to understand before you order a truckload of material. Done right, with a solid compacted base, proper edging, a geotextile layer, and a 2% slope, it drains beautifully, stays affordable, and lasts for years with minimal fuss. Done wrong, you end up with weeds pushing through, stones migrating into the lawn, and a muddy mess every time it rains. The goal of this guide is to help you build one that works.
Crushed Stone Patio Pros and Cons: Build Tips and Costs

Nolan Ellison
6 Jul 2026
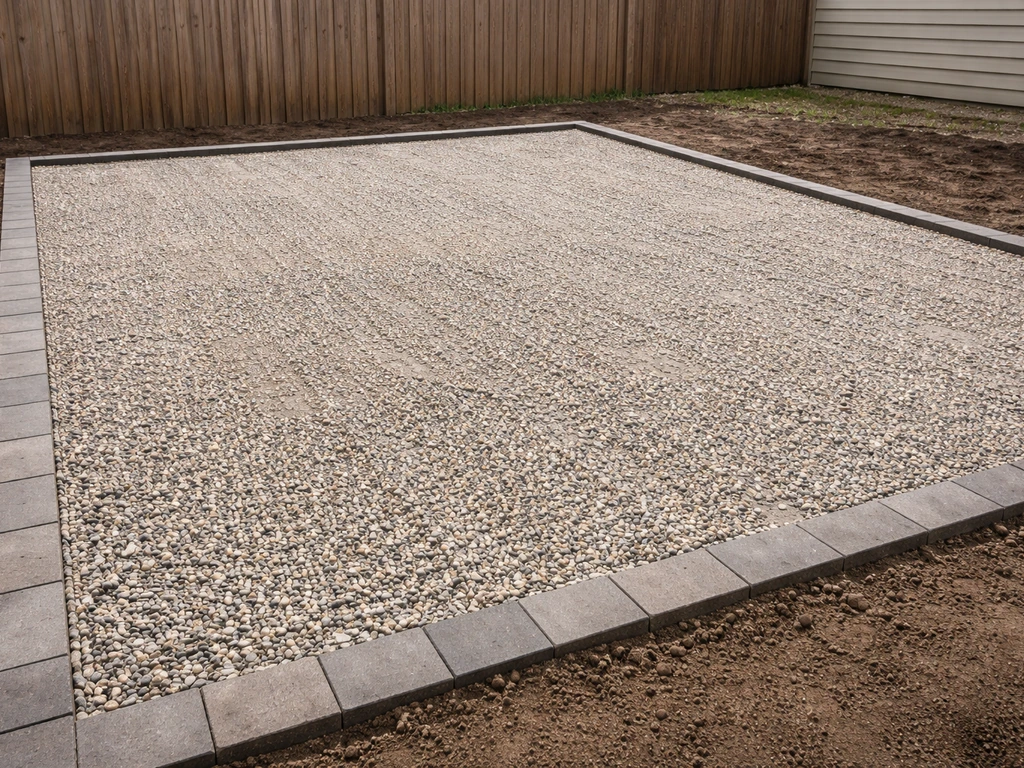
What a crushed stone patio actually is
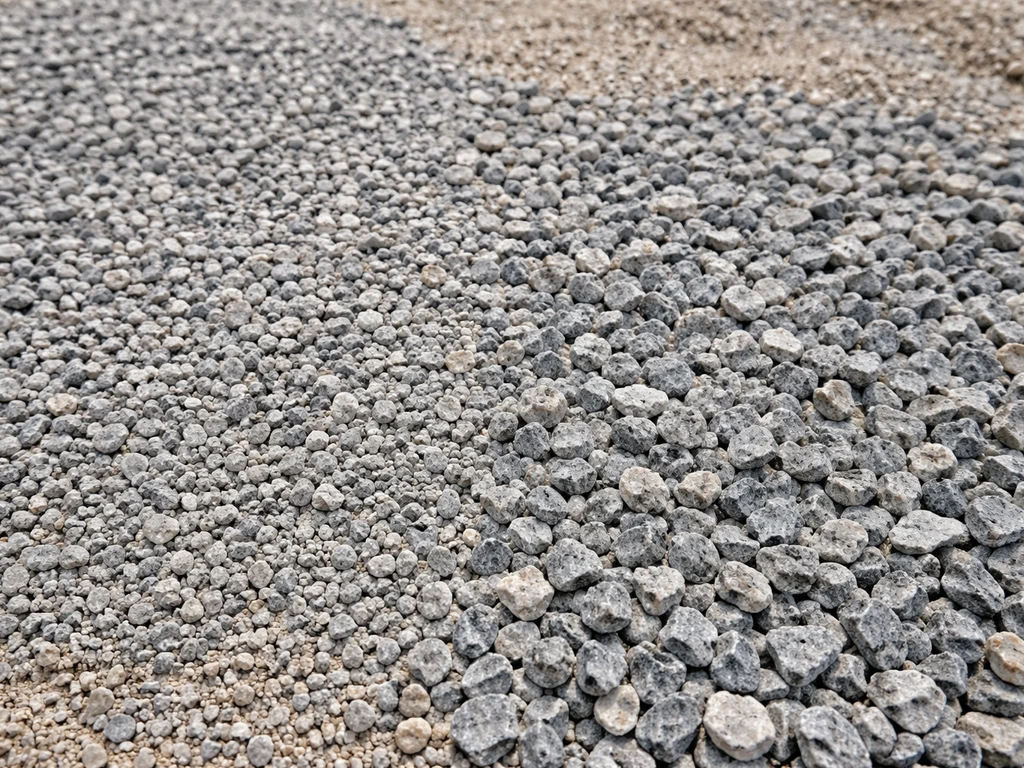
A crushed stone patio is a loose-aggregate surface built from mechanically crushed rock that has been sized and graded. Unlike smooth pea stone or rounded river gravel, crushed stone has angular, fractured faces. Those angular edges are what make it behave differently from other loose surfaces: the pieces lock together under foot traffic instead of rolling around. The most common materials are crushed limestone, crushed granite, and general crushed gravel (which can be a mix of rock types depending on your region). Crushed limestone is particularly popular in the Midwest and South because it is abundant and cheap. The surface sits on top of a compacted base layer, is usually contained by some form of edging, and allows rainwater to percolate straight through rather than pooling or running off. That permeable character is one of its biggest selling points compared to concrete or pavers.
Most finished patios use a top layer of 3/8-inch or 1/2-inch crushed stone, which is small enough to feel stable underfoot but large enough to drain freely. Below that sits a compacted base of 3/4-inch minus crushed stone (meaning it contains fines that help the material bind together when compacted), and beneath that is a geotextile fabric laid directly on the prepared subgrade. The whole system is shallow: most residential patios are done with 4 to 6 inches of total aggregate. It is worth knowing how this compares to close relatives. Decomposed granite patios use a naturally weathered granite that fractures into fine particles and behaves almost like a packed-dirt path. Pea stone uses smooth rounded gravel that shifts freely and feels softer underfoot. Crushed stone sits between those two in terms of stability and comfort.
The real advantages of going with crushed stone
Cost is the first thing that wins people over. Installed gravel and crushed stone patios typically land in the $3 to $10 per square foot range, which makes them one of the most affordable hard-surface options available. For context, a 300-square-foot patio could cost $900 to $3,000 installed, compared to $6,000 or more for the same footprint in concrete pavers. Material costs alone are low: crushed limestone can run under $10 per ton at the quarry, though delivered prices vary significantly by region.
- Permeable drainage: water moves straight through rather than ponding or running off the edge, which matters a lot in areas with heavy rain or heavy clay soil
- Freeze-thaw tolerance: because there is no rigid slab, crushed stone patios do not crack or heave the way concrete does in climates with hard winters
- DIY-friendly installation: no special tools, no curing time, no forms to set, and no heavy equipment required for a small patio
- Adjustability: you can re-grade, re-level, or add stone at any point without demolition
- Cooling effect: lighter-colored crushed limestone reflects heat rather than absorbing it, making it far more comfortable in direct sun than concrete, dark pavers, or porcelain tile
- Low upfront labor cost: a weekend project for most homeowners with basic excavation tools
- Natural look: blends well with garden beds, naturalistic landscaping, and wooded settings
The permeability point deserves more attention. If your yard has drainage problems, a crushed stone patio can actually help by giving water somewhere to go. Patios with impermeable surfaces (concrete, tile, solid pavers) require careful grading and sometimes dedicated drainage channels. With crushed stone, you still need to slope it, but you have much more forgiveness in the system.
The real problems: what goes wrong and why
I want to be direct about the downsides here because this is where a lot of homeowners get surprised. Crushed stone is a great surface in the right context, but it comes with genuine trade-offs that no amount of good installation fully eliminates.
Stone movement and migration
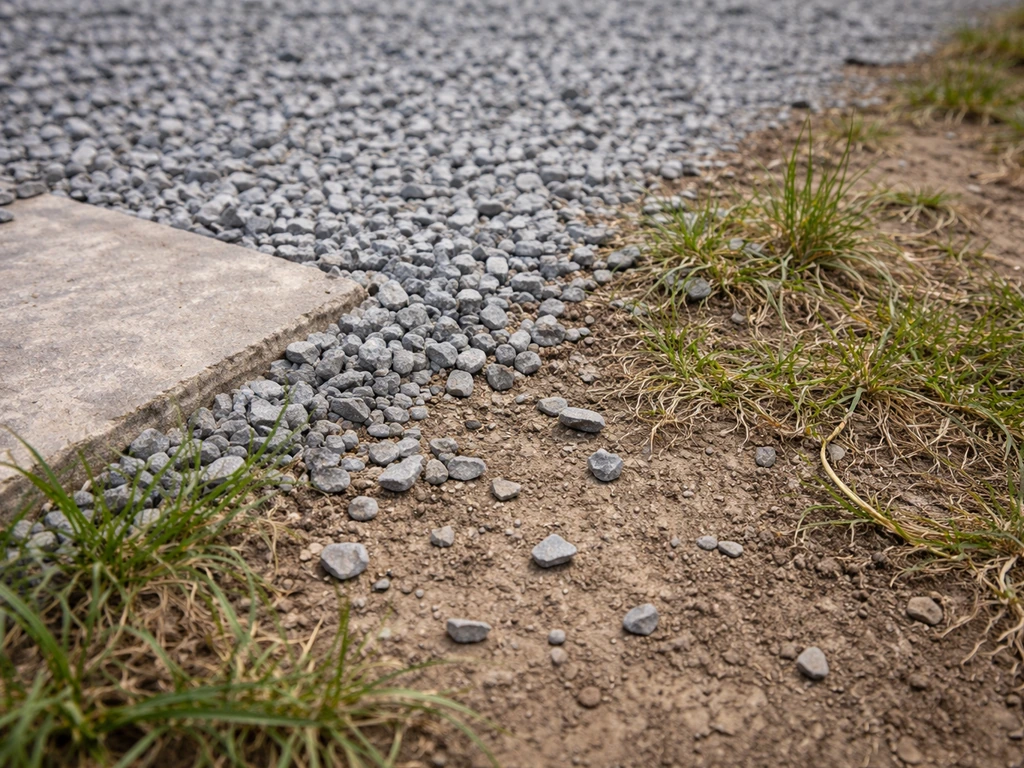
Even angular crushed stone moves over time. Traffic kicks pieces toward edges, mowing and string trimming sends stones flying, and freeze-thaw cycles shift the surface over winter. Without solid edging, stone walks off into the lawn within one or two seasons. This is not a minor inconvenience: it means you will need to top up and re-level the surface every year or two regardless of how well it was installed.
Weeds and vegetation
Weeds are the number one long-term maintenance headache. Even with a geotextile layer, weed seeds blow in from above and germinate in the stone itself. The fabric stops roots from penetrating the base, which makes weeding easier, but it does not prevent surface weeds entirely. You will need to pull weeds, apply an occasional pre-emergent herbicide, or accept that the patio will need periodic maintenance each spring.
Comfort and footing
Bare feet on crushed stone are not pleasant. The angular pieces are poky and uncomfortable compared to smooth flagstone, pavers, or even pea gravel. If you have kids who run around barefoot, elderly family members with mobility concerns, or anyone using a walker or wheelchair, crushed stone creates real accessibility challenges. Chairs also shift and sink, especially lighter furniture. This is a surface that works best when you are wearing shoes and using heavy, stable furniture.
Noise and tracking
Crushed stone crunches underfoot, which some people love and others find genuinely annoying. More practically, fine stone particles track into the house on shoes, which means more sweeping near doors. This is a small issue but worth knowing about before you commit.
Freeze-thaw and wet conditions
Crushed stone itself handles freeze-thaw cycles well, but the base beneath it needs to be compacted properly or frost heave will create low spots and uneven areas. In very wet climates or on clay-heavy soil, the subgrade can saturate and shift, causing the surface to become spongy or rutted over time if the base is not thick enough or properly separated from the soil below.
How to build it right: base prep, edging, geotextile, and slope
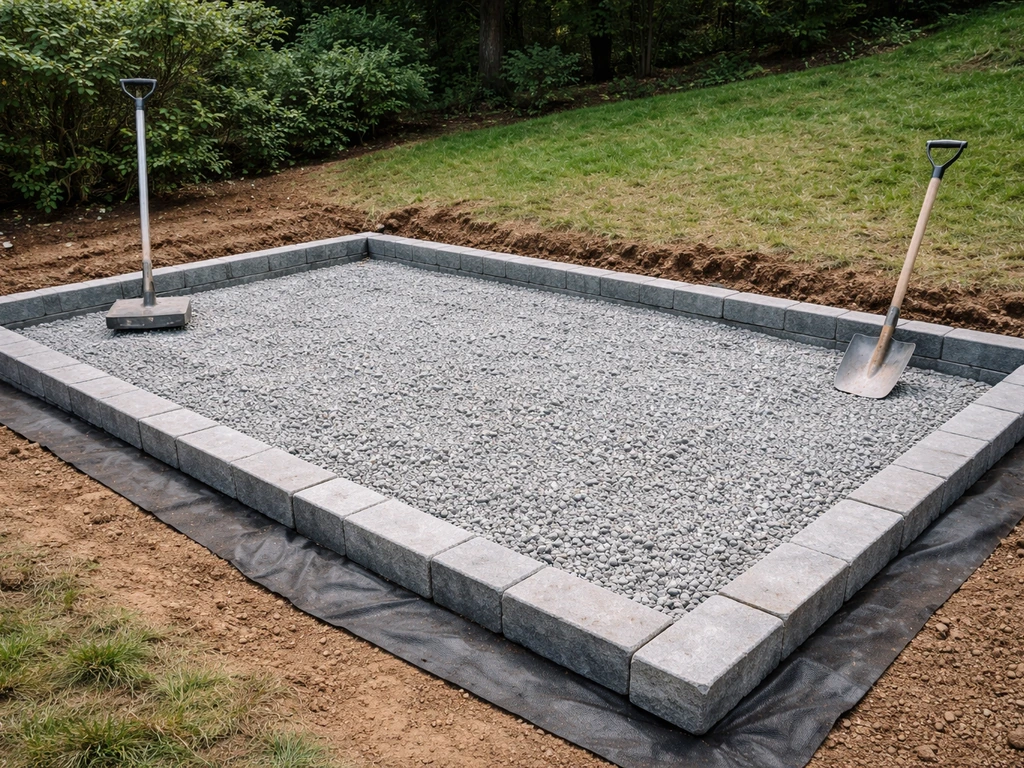
This is the section that determines whether your patio looks great in five years or turns into a weedy, uneven mess. The surface material is cheap; the prep work is where most of the value comes from.
Step 1: Excavate and prepare the subgrade
Excavate 4 to 6 inches below finished grade. Remove all sod, roots, and organic material. Tamp or compact the native soil with a hand tamper or plate compactor. If you have clay soil or a high water table, this layer matters even more: clay holds water and will eventually transmit moisture problems upward if the base is not properly separated from it. The goal is a firm, uniform base to build on.
Step 2: Lay the geotextile
Place a non-woven geotextile fabric directly on the compacted subgrade, overlapping seams by at least 6 inches. The fabric serves two purposes: it blank" rel="noopener noreferrer">prevents fine soil particles from migrating upward into your base (a process called fines migration), and it makes weed control more manageable by blocking root penetration from below. On clay soils, this layer is not optional. Cut the fabric to width and pin or stake it in place so it does not shift when you start shoveling base material on top of it.
Step 3: Build the compacted base
Add 3 to 4 inches of 3/4-inch minus crushed stone (also called crusher run or compactable gravel) as your base layer. This material contains fines that bind together when compacted, creating a stable, load-bearing foundation. Spread it in 2 to 4-inch lifts and compact each lift before adding more. Do not dump the full depth and compact once: you will get poor compaction at the bottom of the layer. On soft or clay soils, some builders add a 2 to 3-inch drainage layer of clean #57 stone (a coarser, open-graded stone) between the geotextile and the crusher run base, which improves drainage performance significantly.
Step 4: Set the slope
Slope is non-negotiable. The standard recommendation is 1 inch of drop for every 4 feet of run, which works out to a 2% slope. That is the same slope specification used for paver installations and it gives water a clear path off the patio surface without being steep enough to feel uncomfortable underfoot. Slope away from the house on all sides if possible. If you can only slope in one direction, make it the direction away from any foundation or structure. You do not need precision surveying equipment: a 4-foot level with a 1-inch block under one end works perfectly well for checking your slope during base compaction.
Step 5: Install edging
Edge restraints are what keep your patio from becoming a lawn over time. Metal landscape edging (steel or aluminum), plastic snap-together edging, or timber borders all work. Bury the edging deep enough that it sits flush with the finished surface or just below it. Stake it every 12 to 18 inches. Without edging, crushed stone will migrate outward with every rain event and every footstep, and you will be constantly chasing the perimeter.
Step 6: Add the finish surface
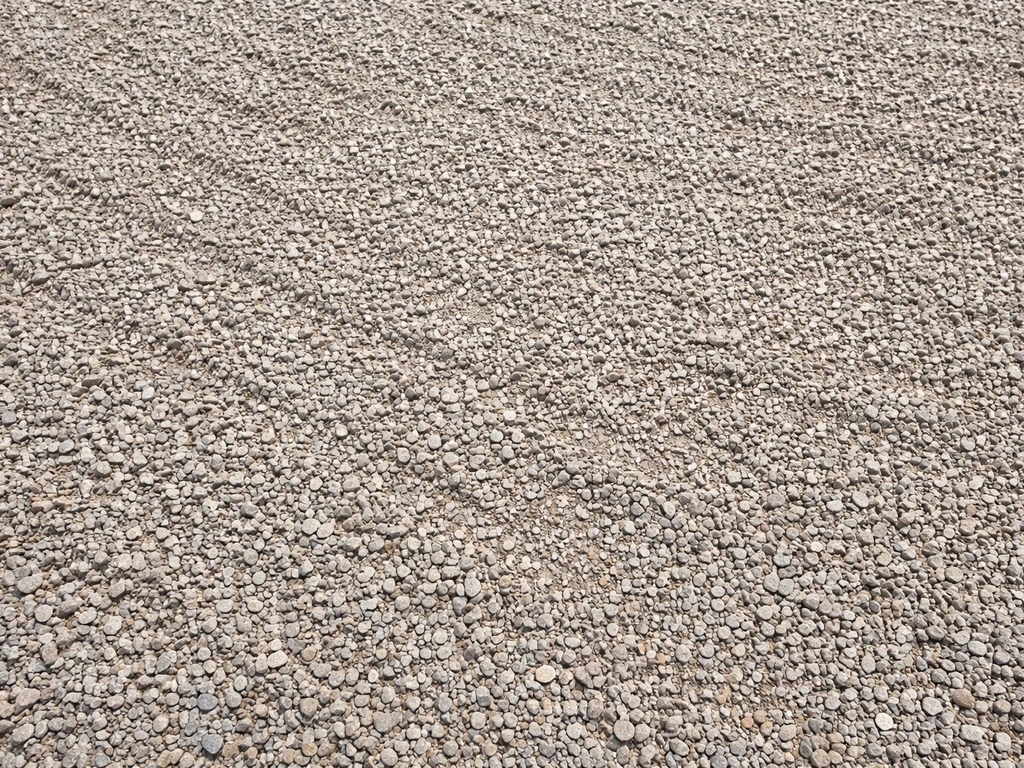
Spread 1.5 to 2 inches of your chosen finish stone on top of the compacted base. Rake it level. Do not compact the top layer: you want it to remain loose enough to shift slightly and self-level under foot traffic, but deep enough to feel stable. If you compact the finish layer, you lose the drainage characteristics that make this surface work. If you are also deciding on mulch for nearby garden beds, choosing the best mulch for patio areas can help reduce weeds and keep the look consistent.
Where crushed stone works best (and where it does not)
Crushed stone patios are not the right call for every yard or every homeowner. If you are deciding whether mulch is a better choice, it helps to weigh the mulch patio pros and cons alongside drainage and maintenance needs. Here is a practical breakdown of where this surface shines and where you should consider something else.
| Condition | Crushed Stone Performance | Better Alternative If Needed |
|---|---|---|
| Cold climate with freeze-thaw | Excellent: flexible surface handles heave without cracking | No change needed |
| Hot, sunny climate | Good: light limestone reflects heat well | Flagstone or porcelain for full shade patios |
| Heavy clay soil | Workable with proper base and geotextile | Pavers or flagstone if drainage is severe |
| Sandy or well-draining soil | Excellent: drainage flows freely through profile | No change needed |
| Low to moderate foot traffic | Excellent | Pavers or concrete for high-traffic commercial use |
| High foot traffic or accessibility needs | Poor: unstable for walkers, wheelchairs, bare feet | Concrete, pavers, or flagstone |
| Budget-constrained project | Excellent: lowest installed cost of any hard surface | No change needed |
| Strong weed pressure in region | Challenging: ongoing maintenance required | Pavers with polymeric sand for less weed upkeep |
Climate-wise, crushed stone is particularly well-suited to the northern US and Canada where freeze-thaw cycles destroy concrete and mortar joints. A rigid patio surface has nowhere to go when the ground heaves; a crushed stone surface just settles back down in spring. In the South and Southwest, crushed white limestone is popular specifically because it reflects sun rather than absorbing it, keeping the surface 10 to 20 degrees cooler than dark pavers or concrete in full sun.
If your patio will be used mainly for dining and entertaining by adults who wear shoes, crushed stone is a comfortable and practical surface. If it will be a play area for children, or if anyone in the household uses mobility aids, it is worth looking at firmer alternatives. The surface can also be combined: crushed stone fill between stepping stones or flagstone pavers gives you the drainage and cost benefits while the solid stones provide stable footing paths.
Maintenance, repairs, and what to expect over time
Crushed stone patios need regular but straightforward maintenance. There is no sealing, no re-grouting, and no power-washing required. What you will do instead is top up stone, pull weeds, and occasionally re-level low spots.
Annual maintenance routine
- Each spring, walk the patio and look for low spots where stone has compacted or migrated. Rake the existing stone to redistribute it before adding new material.
- Add a thin top-up layer (about 1/2 inch) of fresh stone every one to three years depending on traffic. This keeps the surface looking fresh and maintains depth.
- Apply a pre-emergent herbicide in early spring before weed seeds germinate. This dramatically reduces the in-season weed load.
- Pull any weeds that do appear before they set seed. They are easier to pull from loose stone than from soil, and the geotextile means their roots are shallow.
- Check edging stakes and re-secure any that have worked loose over winter.
- Inspect the perimeter for stone migration and rake escaped material back inside the border.
Repairing low spots and ruts
If you develop persistent low spots that come back after you re-rake them, the base beneath has likely shifted or settled. Rake the surface stone aside, add a small amount of compactable base material to the low area, tamp it firm, and then replace the finish stone on top. This is a 30-minute repair for most homeowners. It is one of the genuine advantages of this surface type: repairs are easy, cheap, and do not require matching materials to an existing pattern or color.
Long-term durability expectations
A well-built crushed stone patio with proper edging and base can last 10 to 20 years before any major rework is needed. The base itself essentially never needs to be replaced if it was compacted correctly. What wears out over time is the finish layer, which gets ground down and displaced. Topping up the surface stone every few years is inexpensive and keeps the patio looking good indefinitely. Compare that to a concrete patio, which may develop cracks in 10 to 15 years that require grinding, patching, or full replacement.
Costs, stone types, and how to source it
What you will spend
For most homeowners, a crushed stone patio runs $3 to $10 per square foot installed. The low end assumes you do all the labor yourself and stick to basic materials. The high end includes contractor labor, premium stone, and more elaborate edging or base work. Material costs at the quarry can be very low: crushed limestone, for example, can be priced around $9 to $10 per ton for the stone itself before delivery. You will typically need about 1 ton of finish stone per 100 square feet at a 2-inch depth, though this varies with stone density. Delivery and regional availability will move your actual cost more than the quarry price.
Choosing between crushed stone types
| Stone Type | Best For | Key Characteristic | Watch Out For |
|---|---|---|---|
| Crushed limestone (3/8"–1/2") | Budget builds, hot climates, Midwest/South | Light color, reflects heat, locks well | Can stain light-colored furniture; dusty when dry |
| Crushed granite | Higher-end look, varied colors | Hard, durable, less dust than limestone | More expensive and less available in some regions |
| General crushed gravel (3/4" minus) | Base layer, budget finish | Variable appearance, compacts well | Less uniform appearance; may include odd rock types |
| Pea stone (rounded) | Soft underfoot, decorative use | Smooth, comfortable barefoot | Rolls and migrates more than crushed; less stable |
For most homeowners building a patio specifically for entertaining and outdoor dining, 3/8-inch crushed limestone or 1/2-inch crushed stone is the sweet spot. It is small enough to feel solid underfoot, large enough to drain freely, and available almost everywhere. If you are comparing crushed stone to decomposed granite, the key difference is behavior: decomposed granite packs down almost like a hardscape surface and creates very little stone migration, but it does not drain as freely and can become muddy in wet conditions. Decomposed granite is described as blank" rel="noopener noreferrer">weathered granite that fractures readily into smaller pieces and is used as a pavement building material. Pea stone is the most comfortable underfoot but the least stable, and migration is a constant issue without excellent edging. Pea stone patio pros and cons come down to comfort versus stability, especially if you want minimal migration and easy long-term maintenance.
Color and appearance
Crushed limestone is typically light gray to cream-white, which makes it one of the brightest and most heat-reflective options available. Crushed granite comes in gray, pink, and buff tones depending on the source. Crushed trap rock (basalt) is dark gray to black and absorbs heat, making it less comfortable in full sun. Choose based on how the patio will read against your house color, garden beds, and surrounding hardscape. Lighter colors show dirt more but stay cooler; darker colors hide grime but get hot. For most patios in sunny locations, a mid-tone gray or light buff limestone is the most practical choice.
Where to source your stone
For large quantities (anything over about 1 cubic yard, which covers roughly 100 square feet at 2 inches deep), order directly from a local quarry or aggregate supplier and have it delivered by the ton. This is almost always cheaper than buying bags from a home center. Search for local crushed stone suppliers, landscape material yards, or ready-mix concrete companies: they typically also sell aggregate by the ton. For a small patio under 100 square feet, bagged stone from a home improvement store is convenient, but expect to pay three to five times the per-ton quarry price. Call ahead to confirm you are getting angular crushed stone and not rounded pea gravel, as the names are sometimes used loosely at retail.
FAQ
Do I really need both geotextile fabric and compacted base for a crushed stone patio?
Geotextile helps stop fines migrating upward and reduces weed spread from below, but it does not replace proper compaction. If you skip the compacted crusher-run base, you can still get settlement and ruts even with fabric. The best results come from treating them as a system (subgrade compaction, separation layer, then compactable base).
What slope should I use if my patio drains to a lawn rather than away from the house?
Aim for the same 1-inch drop per 4 feet (about 2%), but confirm the water has somewhere safe to go. If runoff will flow toward foundations, walkways, or basement window wells, you may need a swale, drain line, or re-grade so the water exits the site rather than pooling along building edges.
Will crushed stone patios sink under a grill, outdoor kitchen, or hot tub?
They can, unless you handle point loads. For heavy equipment, use additional compacted base thickness in that zone (often more than the standard 3 to 4 inches of finish stone plus base depth), and consider a small reinforced pad area or stepping-stone-style placement where the load lands.
Can I install a crushed stone patio on top of existing concrete or pavers?
Usually no, because the surface will trap water and the underlying elevation cannot be corrected to achieve the needed drainage slope. If you want crushed stone, plan on removing down to stable soil or an appropriately prepared subbase. Overlays often lead to uneven settling and ongoing migration because the base is not a true compacted layer.
Is 3/8-inch or 1/2-inch finish stone better for foot traffic?
If comfort matters, 3/8-inch often feels more stable underfoot. If you expect lots of traffic and want slightly more long-term “bite” against displacement, 1/2-inch can hold position a bit better. Either way, maintain the edging depth so stones do not drift out.
How do I control weeds if I still see them through the stone?
Surface weeds usually come from seeds blown in from above. Pulling alone is often temporary, so pair regular hand weeding with an early spring pre-emergent applied carefully over the stone. If weeds are returning quickly from below, the subgrade separation may be missing, undersized, or wrinkled at seams.
How often should I top up and re-level a crushed stone patio?
Expect minor maintenance every year or two, mainly around traffic lanes and near the perimeter. If low spots recur in the same locations after raking back flat, that points to base settlement, fix that spot by lifting the finish layer, adding compactable base, tamping, then restoring stone.
Does crushed limestone stay cooler than darker stones, and is color selection enough?
Lighter crushed limestone reflects more solar energy, so it typically feels cooler than dark trap rock in full sun. Color helps, but surface temperature can still be high during heat waves, so if you need truly cool seating areas, combine the patio with shade structures or pergola coverage.
What’s the biggest mistake when buying stone for a crushed stone patio?
Buying the wrong type or grading. At retail, crushed and “pea” terms can be used loosely, so confirm you are getting angular crushed stone for the finish and compactable crusher run (with fines) for the base. Also verify delivery amounts by depth, because 2 inches of finish stone will use less material than deeper builds.
Can I use a crushed stone patio as an accessible surface for a wheelchair or walker?
It is often challenging because the surface is loose and can shift under rolling wheels, especially near edges. If mobility accessibility is a priority, consider larger embedded stepping stones or a hybrid layout, and keep edging tight so you do not create uneven ruts.
What repairs are easiest, and when do I need to rebuild rather than patch?
Small issues like topping up displaced finish stone, re-spreading 1.5 to 2 inches, and fixing minor edge migration are straightforward. If you see persistent low spots, sponginess, or rutting after tamping and topping, the base separation and compaction likely need correction, which usually means lifting more than just the finish layer.