
Yes, you can use slate for a patio, but with conditions. Slate performs beautifully outdoors when you choose a frost-resistant, low-absorption grade (water absorption under 0.5% by mass), pick a riven or textured finish for wet-weather grip, use the right thickness for your expected loads (20–30 mm for pedestrian use, 30–40 mm or more for heavy traffic), and lay it on a properly drained, compacted base. Skip any one of those steps and you will run into cracking, spalling, or dangerously slippery surfaces within a few seasons. Get them right and a slate patio can last 30 to 50 years with minimal effort.
Can You Use Slate for a Patio? Guide to Choices & Care

Nolan Ellison
8 Aug 2026
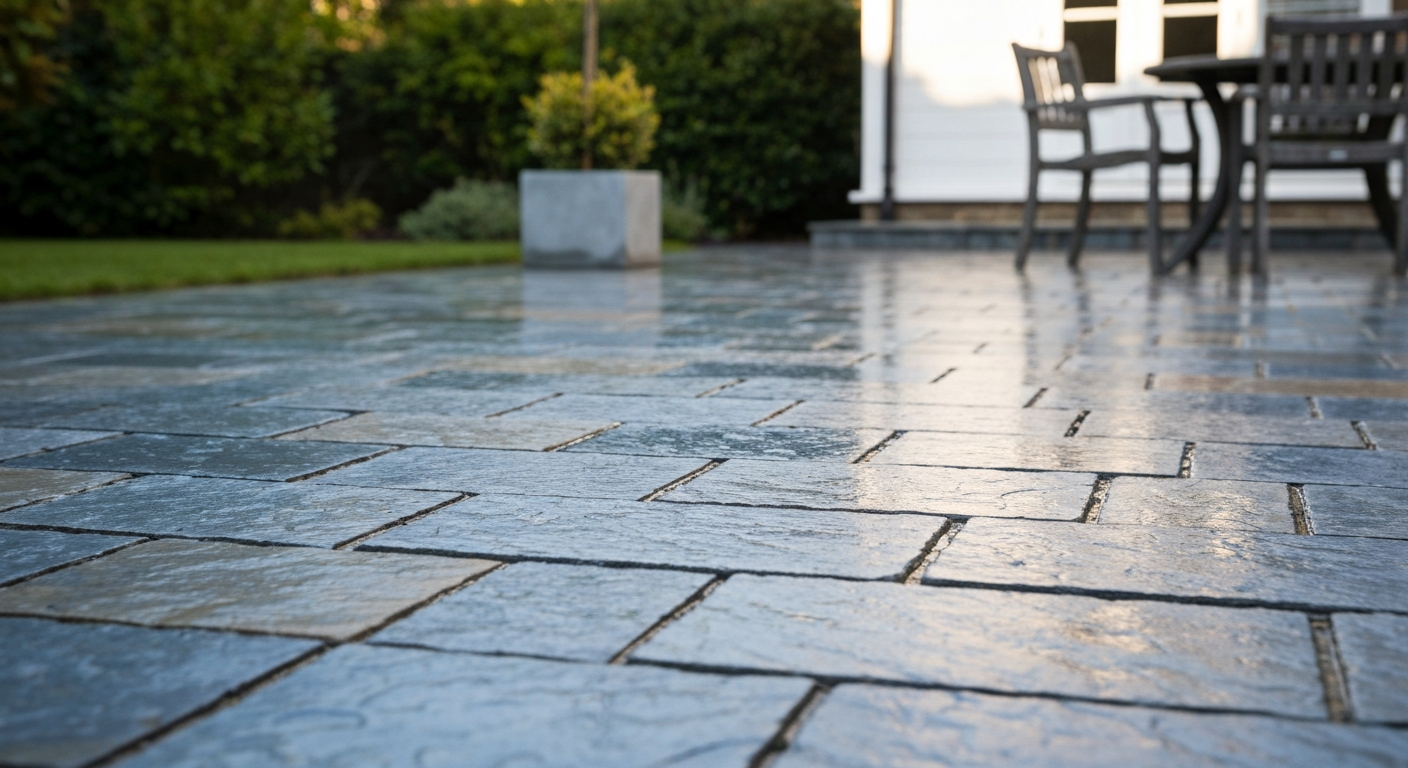
What slate actually is, types, grades, thicknesses and how they affect performance
Slate is a fine-grained metamorphic rock formed from compressed clay or volcanic ash. It splits cleanly along natural cleavage planes, which is why it has been used as a roofing and flooring material for centuries. For patios, the two things that matter most are where the slate comes from and how it has been processed, because both affect porosity, strength, and surface texture.
Common patio slate origins
- Spanish slate: Dense, consistently low absorption (some grades test at ≤0.17% by mass), hard, and widely considered the benchmark for outdoor durability. Available in blue-black and grey tones.
- Welsh slate: High quality, blue-grey appearance, historically used for paving. Relatively expensive and can be harder to source in large uniform batches.
- Indian slate: The most affordable and widely available option. Quality varies enormously between quarries. Some Indian slate — particularly multicolour and autumn-buff varieties — has higher absorption and a tendency to delaminate if not graded correctly. Always demand test data.
- Brazilian slate: Characterful appearance, often grey-green or rust tones. Quality varies; check EN 13755 or ASTM C97 absorption data before committing.
- Chinese slate: Usually grey or black; quality control is inconsistent across suppliers. Sourcing from a reputable importer with batch testing is essential.
- Reclaimed slate: Can be excellent if it has already survived decades outdoors, but thickness is irregular, and old finishing-quarry slate (originally a roofing product) may be too thin for paving.
Finishes and their patio suitability
- Riven/cleft: The natural split surface. Irregular texture provides the best wet traction and is the standard choice for outdoor paving.
- Calibrated riven: Same textured surface but machine-ground on the back face to a consistent thickness. Easier to lay to a flat, even plane.
- Honed: Smooth, flat, matte surface. Grip is significantly reduced when wet — generally not recommended for exterior use unless the area is sheltered and you accept the risk.
- Polished: Glossy and visually striking but genuinely slippery when wet. For outdoor patios, avoid it.
Thickness and load capacity
Calibrated paving slate is commonly sold in 20 mm, 25 mm, and 30 mm thicknesses. For a standard pedestrian patio, 20–30 mm on a full mortar bed is adequate. If you expect heavy point loads, outdoor furniture with narrow legs, wheelchair use, or occasional light vehicle access, go to 30–40 mm and consider a concrete slab base rather than a sand or mortar bed alone. Typical slate bulk density is around 2,600–2,800 kg/m³, so a 30 mm slab is around 78–84 kg/m², worth accounting for when reinforcing an existing deck or raised base.
Climate and use suitability: what slate can (and can't) handle
Freeze–thaw performance
The freeze–thaw question is the most critical one for anyone north of roughly USDA Zone 6 or anywhere with regular hard winters. Water absorption drives freeze–thaw damage: water that has entered the stone expands as it freezes and mechanically ruptures the surface. High-quality slate with absorption under 0.5% (tested to EN 13755:2008 or ASTM C97) is genuinely freeze–thaw durable. Typical slate water‑absorption reported in technical reviews is commonly 0.05–0.40% by mass, and slates with absorption under 0.5% are placed in the lowest absorption band indicating good freeze–thaw durability (Review / reference data: slate physical properties and standards (technical review)). The best Spanish slates test at ≤0.17%. Poorly graded Indian or Chinese slates can test at 1–2% or higher, which puts them in a completely different risk category. When specifying slate for a cold climate, always ask the supplier for a laboratory test certificate showing water absorption and freeze–thaw cycling results (ASTM C666 or EN 12371). If they cannot provide one, choose a different supplier.
Slip resistance
For any outdoor paved area that gets wet, UK and European guidance (BS 7976 / EN 16165 Pendulum Test) recommends a wet Pendulum Test Value (PTV) of at least 36 for low slip risk. See SlipTestingUK, Pendulum test, PTV guidance (BS 7976 / EN 16165) for the UK/HSE recommendation that external pedestrian areas should meet a wet PTV ≥36 SlipTestingUK — Pendulum test, PTV guidance (BS 7976 / EN 16165). Natural riven slate comfortably exceeds this threshold. Honed slate will often fall below it when wet. In the US, ANSI A326.3 uses the Dynamic Coefficient of Friction (DCOF) AcuTest; exterior wet applications generally call for DCOF ≥0.60. Again, riven finishes pass; polished finishes usually don't. I've seen more than one beautifully laid slate patio become a liability issue because the owner chose a smooth honed finish for aesthetic reasons. The riven surface is not just tradition, it is the practical choice.
UV and thermal behavior
Slate does not fade significantly under UV, the colour is mineral, not a coating. However, dense dark slates (especially black Spanish slate) absorb heat and can become uncomfortable to walk on barefoot in full summer sun. In very hot, low-rainfall climates, thermal cycling (repeated heating and cooling) can gradually stress mortar joints, making joint maintenance more frequent. In shaded or moderate climates, thermal movement is rarely a concern.
Load capacity
Slate's flexural strength (modulus of rupture) commonly ranges from roughly 40–90 MPa depending on grade, well above what a typical pedestrian patio demands. The failure point is almost always inadequate base support causing the slab to flex under load, not the slate itself cracking from compressive load. Solid, even, fully supported bedding is more important than slab thickness for most domestic applications.
Pros and cons of a slate patio
| Aspect | Pros | Cons |
|---|---|---|
| Appearance | Distinctive natural colour, texture, and layered character; ages attractively | Colour variation between batches; multicolour varieties can look busy or fade differently |
| Durability | Very long lifespan (30–50+ years) with quality slate and correct installation | Low-grade slate can delaminate, spall, or absorb water and crack in frost |
| Slip resistance | Riven finish provides excellent wet-weather traction | Honed or polished finishes are hazardous when wet |
| Maintenance | Low ongoing effort if sealed correctly; sweeping and occasional resealing | Needs resealing every 3–5 years; efflorescence and staining possible if unsealed |
| Installation | Calibrated slate is relatively forgiving for experienced DIYers | Irregular/reclaimed slate requires skill; mortar and base prep must be precise |
| Weight | Dense and stable once laid | Heavier than porcelain tiles; harder to handle and transport |
| Cost | Mid-range material cost; can be cost-effective long-term | Premium grades (Spanish, Welsh) are expensive; installation adds significantly to total cost |
| Eco credentials | Natural material with no synthetic coatings; long lifespan reduces replacement frequency | Quarrying has environmental impact; imported slate has a high transport footprint |
The biggest practical issue I have seen in the field is owners choosing visually striking low-grade Indian multicolour slate at a low price per square metre, then dealing with delamination within 2–3 winters. The material cost saving disappears immediately when you factor in relaying costs. Buy quality or choose a different material.
Slate vs. the alternatives: a side-by-side comparison
Slate is one of several strong natural and manufactured options for a patio surface. Here is how it stacks up against the most common alternatives across the dimensions that matter for a buying decision.
| Material | Durability | Slip resistance (wet) | Freeze–thaw | Maintenance | Approx. material cost (per sq ft) | Best for |
|---|---|---|---|---|---|---|
| Quality slate (riven) | Excellent — 30–50+ yrs | Good (riven finish) | Excellent if absorption <0.5% | Low–medium; seal every 3–5 yrs | $3–$8 | Traditional look, moderate climates, skilled DIY or pro |
| Flagstone (sandstone/limestone) | Good — varies by stone | Good (natural surface) | Moderate; depends on stone porosity | Medium; seal annually for softer stones | $3–$7 | Informal/rustic patios, dry climates |
| Porcelain tiles (exterior) | Excellent — 20–30+ yrs | Very good (textured/grip-rated grades) | Excellent if frost-rated | Very low; no sealing needed | $4–$12 | Contemporary look, low maintenance, high foot traffic |
| Brick | Very good — decades | Moderate–good | Good if frost-rated engineering brick | Low; occasional repointing | $2–$6 | Traditional or cottage gardens, cold climates |
| Gravel/loose aggregate | Moderate; replenish needed | Good (soft impact) | Excellent | Medium; raking, topping up | $1–$3 | Budget patios, informal areas, fast drainage zones |
| Composite decking/pavers | Good — 15–25 yrs | Good (textured) | Good | Low; no sealing, occasional clean | $5–$15 | Decked areas, pool surrounds, modern aesthetic |
My honest recommendation: if you want low maintenance and live in a very cold climate, frost-rated porcelain tiles or engineering brick are arguably lower risk than even good-quality slate, simply because the manufacturing quality control is more consistent. If you want the natural look and are willing to invest in material testing and proper installation, slate is genuinely one of the best-looking and longest-lasting surfaces available. For anyone comparing options in depth, the guide on what patio slabs should I use walks through the decision framework in more detail, and what are patio slabs made of covers material composition across all the main types.
Choosing and sourcing your slate
Matching batches and managing colour variation
Natural stone varies between quarry runs, and slate is no exception. Always order 10–15% more than your calculated area to account for cuts and to keep matching spares for future repairs. Ask the supplier whether all your material comes from the same quarry batch. Reputable suppliers will tell you batch numbers; some will send sample pieces before you commit to a full order. For large patios, request all material on the same delivery so it can be shuffled and blended during laying to avoid obvious colour banding.
Quarried new vs. reclaimed slate
Reclaimed slate, salvaged from demolished buildings or old roof projects, can offer beautiful aged character and is a genuine recycled material. The catch is thickness consistency: reclaimed roofing slates are typically 5–10 mm thick, far too thin for paving. Reclaimed paving slates from old quarry floors or industrial buildings can be suitable at 30–50 mm, but you must check each piece for existing cracking, delamination, and surface weathering. New quarried, calibrated slate is much easier to lay to an even surface and is the safer choice for DIY installations.
What to ask suppliers before you buy
- What is the water absorption test result (EN 13755 or ASTM C97) for this batch?
- Has it been tested for freeze–thaw cycling (ASTM C666 or EN 12371)?
- Is this calibrated (consistent back thickness) or natural cleft all round?
- What thickness tolerances can I expect — and is the stated thickness a minimum or nominal?
- What is the batch or quarry reference, and can all my order come from one batch?
- Do you have ASTM C629 compliance data for this slate?
Site assessment and preparation
Good preparation accounts for the majority of a slate patio's long-term performance. Most failures I have investigated, cracked slabs, sunken sections, frost heave, trace back to rushed or inadequate groundwork, not to the slate itself.
Slope and drainage
The finished patio surface must slope away from the house at a minimum of 1:80 (roughly 12 mm per metre / 1/8 inch per foot). A 1:60 fall (about 16 mm per metre) is more comfortable to work with when laying and gives a better drainage safety margin. Mark out the fall with string lines and a spirit level before you excavate. Poor drainage sitting under slate will accelerate joint failure and, in freezing conditions, will cause frost heave and spalling.
Excavation depth
Standard excavation depth for a pedestrian slate patio: allow for the slab thickness (20–30 mm), the bedding layer (25–40 mm mortar, or 25 mm sharp sand), plus the compacted aggregate sub-base (100–150 mm / 4–6 inches for stable, non-frost soils). Industry guidance for paver and sub-base work recommends placing the base in multiple thin lifts (typically ≤3–4 in / 75–100 mm) and compacting each lift in multiple passes to reach common field targets (commonly ≥95% Standard Proctor / relative compaction) to ensure long-term stability Compact aggregate sub-base in ≤3–4 in (75–100 mm) lifts and achieve a target of ≥95% Standard Proctor (relative compaction) for engineered bases.. In frost-prone soils or where subgrade is soft clay, increase the sub-base to 150–200 mm (6–8 inches) and consider placing a geotextile membrane between the subgrade and aggregate. Total excavation is typically 200–300 mm (8–12 inches) below finished surface level.
Subgrade assessment
- Test for soft spots by probing with a metal rod — any zone that takes the rod more than 150 mm by hand pressure alone needs excavation and replacement with compacted fill.
- Remove all organic material, topsoil, and roots. Organic matter decomposes and causes settlement.
- In clay-heavy soils, install a perforated French drain or herringbone drainage runs at the perimeter before backfilling.
- On sloping sites, install a drainage channel at the lower edge to intercept water running off the patio.
Base systems and drainage: building a foundation that lasts
The sub-base is the most important structural element of any patio and is the part most likely to be under-specified by first-time builders. Here is how to build it correctly for slate.
Recommended base build-up (pedestrian patio)
- Compacted subgrade: existing soil, cleared and proof-rolled (or hand-tamped).
- Geotextile separation membrane: non-woven geotextile laid over the subgrade to prevent sub-base aggregate from migrating into soft soil.
- Type 1 / crusher-run aggregate sub-base: lay in maximum 75–100 mm (3–4 inch) lifts and compact each lift to ≥95% Standard Proctor density with a plate compactor. Total compacted depth: 100–150 mm for good subgrade, 150–200 mm for frost-prone or soft subgrade.
- Bedding layer: either a 25–40 mm semi-dry mortar bed (for mortar-set slate) or a 25 mm screeded sharp sand layer (for dry-laid or sand-set installations).
- Slate pavers: laid to fall, with consistent joint widths.
- Pointing/jointing: mortar, polymeric sand, or natural sand joints (see lay patterns section).
Geotextile placement notes
Lay the geotextile with 300 mm (12 inch) overlaps at joins. Fold it up at the edges against any edging restraints. It does not replace drainage, it prevents fine particle migration that causes sub-base voids over time. In very well-draining sandy soils you can omit it; in clay or silt subgrade it is worth the minimal cost.
Installation methods: which one suits your project?
There are four main ways to lay slate for a patio, and the right choice depends on your climate, the slate type, your skill level, and how much load the surface will carry.
| Method | How it works | Best slate type | Climate suitability | Pros | Cons |
|---|---|---|---|---|---|
| Dry-laid on compacted gravel/sand | Slate laid on 25 mm screeded sharp sand over compacted aggregate base; no mortar | Calibrated, consistent thickness | Mild to moderate frost climates | Easy to adjust and re-lay; good drainage; DIY friendly | Can shift; not suitable for very irregular slate or heavy loads |
| Mortar bed (semi-dry 4:1 mix) | Slate bedded onto 30–40 mm semi-dry sand:cement mix, tapped level | Calibrated or riven; any thickness ≥20 mm | All climates if drainage is correct | Solid, very even surface; good for irregular ground | Less forgiving if base heaves; cracked slabs harder to remove |
| Concrete slab base + adhesive mortar | Reinforced concrete slab poured first; slate bonded on top with flexible tile adhesive or mortar | Calibrated, uniform back face | All climates; best for extreme cold or heavy loads | Maximum rigidity and load capacity; minimal slab movement | Highest cost and effort; drainage must be designed into the slab |
| Paver-setting bed (compacted bedding aggregate) | Coarse-graded angular setting bed, similar to permeable paver systems | Thicker slate pieces ≥30 mm | Good for free-draining areas | Permeable; low embodied energy | Less common for slate; requires thick, even-faced pieces |
Mortar mix, concrete specs, and slump guidance
For a semi-dry mortar bedding mix, the standard ratio is 4 parts sharp sand to 1 part Portland cement by volume. The mix should be damp enough to hold its shape when squeezed in your fist, but not wet enough to be workable like normal mortar, this is the 'semi-dry' consistency that supports the slate while allowing fine adjustment by tapping. For pointing joints, a slightly wetter 3:1 or 4:1 mix is typically used, pressed into joints and finished flush or slightly recessed.
If you are pouring a concrete slab base, target a mix of C20/25 (approximately 1 part cement : 2 parts sand : 3 parts aggregate, with a water:cement ratio around 0.55). For a concrete slab that you will then tile over, a slump of 75–100 mm (measured by slump cone) is workable without being too wet to cause aggregate segregation. Avoid adding excess water to make concrete easier to pour, it reduces strength and increases shrinkage cracking. If you need more workability, use a plasticiser additive rather than extra water. The topic of slump values is covered in more detail in the what slump for patio guide if you need to specify a mix for a contractor or ready-mix order.
Lay patterns, joint widths, and surface finish treatments
Common laying patterns
- Straight/grid (stack bond): Rows and columns aligned. Clean, contemporary look. Structurally the weakest pattern as joints are continuous — use with a rigid mortar or concrete base.
- Offset/brick bond (running bond): Each row offset by half a slab length. Stronger than grid; most common for rectangular slates. Suits both traditional and modern aesthetics.
- Herringbone: Slates laid at 45° to each other in a V-pattern. High visual interest; requires more cuts at edges. Best with square or near-square slates.
- Random/flagging: Irregular sizes mixed for a natural, organic look. Most commonly used with reclaimed or natural-cleft irregular slate. Requires skill to keep consistent joint widths.
- Ashlar: Rectangular slates of different widths laid in consistent courses. A middle ground between random and formal that suits large patios well.
Joint widths and pointing options
For calibrated slate, a 10–15 mm joint is typical and allows for any minor size variation while giving room for clean pointing. For irregular/reclaimed slate, joints can range from 10–25 mm. Wider joints allow slightly more drainage but collect debris faster. Pointing options include: traditional sand:cement mortar (pointed flush or slightly recessed for a shadow line effect); dry-brushed kiln-dried sand (informal look, suits dry-laid patios, not suitable for mortar-set); and polymeric jointing compound (flexible, weed-resistant, and durable, my preference for most mortar-set slate patios in cold climates).
Surface finish treatments
Beyond the natural riven surface, slate can be treated with an enhancing impregnator sealer to deepen colour and make the texture more uniform, or left unsealed for a dry, matte appearance. Some owners apply an oil-based enhancer to dark slate to give it a 'wet look' that lasts for 2–3 years. Anti-slip additive sprays exist but are generally a poor substitute for choosing the right surface texture from the start.
DIY installation: tools, materials, and step-by-step
Tool list
- Plate compactor (hire if not owned) — essential for sub-base compaction
- Tape measure, long straight edge (2–3 m), and builder's line and pins
- Laser level or long spirit level (1.2 m minimum)
- Spade, mattock, and wheelbarrow
- Rubber mallet
- Angle grinder with diamond blade (for cutting slate to size)
- Pointing trowel, gauging trowel, and a brick jointer
- Bucket and mixing drill, or cement mixer for larger jobs
- Stiff-bristle brush for joint cleaning and polymeric sand
- Knee pads — you will thank yourself
- Safety glasses and dust mask for cutting
Step-by-step installation (mortar bed method)
- Mark out the patio area with pegs and string lines. Set string lines to finished surface level with the correct drainage fall (minimum 1:80 away from the house).
- Excavate to the required depth: sub-base depth + 40 mm bedding + slate thickness + 10 mm for the fall. Remove all topsoil and organic material.
- Lay geotextile membrane over the subgrade with 300 mm overlaps at joins.
- Add Type 1 crusher-run aggregate in 75–100 mm lifts. Compact each lift with a plate compactor until firm and stable. Check levels against string lines.
- Set up your string grid lines for slate layout, accounting for joint widths. Dry-lay a trial run of slates to confirm your pattern and check that cuts at edges look balanced.
- Mix the 4: 1 semi-dry bedding mortar. It should hold shape when squeezed — not sloppy.
- Lay the bedding mortar at 30–40 mm depth, screed it roughly level, and set the first slate into position. Tap level with a rubber mallet. Check the surface level and fall with a spirit level every two or three slates.
- Work away from the house and along string lines. Avoid walking on freshly laid slates — use a kneeling board to spread weight if you must access a laid area.
- Cut slates at edges and around obstacles using the angle grinder with a diamond blade. Wear eye and breathing protection — slate dust is fine and dense.
- Allow the mortar bed to cure for at least 24 hours (48 hours in cold or damp weather) before pointing.
- Point joints with a 3: 1 or 4:1 mortar mix, or press in polymeric jointing compound. Keep pointing 2–3 mm below the slate surface to avoid a raised joint that could trap water.
- Clean excess mortar from the slate surface while it is still green (not fully cured). Dried mortar is very hard to remove from textured riven surfaces.
- Allow pointing to cure for 48–72 hours before foot traffic.
- Apply sealer once the patio has fully cured (typically 28 days for mortar-based installs) and the surface is completely dry.
Sealing a slate patio: timing, product types, and how to apply
Sealing is not optional for an outdoor slate patio, it is the single most effective maintenance step you can take. A good penetrating impregnator sealer fills the microscopic pores in the slate surface, reducing water absorption, blocking staining, and making cleaning vastly easier. It does not create a film on the surface, so it does not peel or change the texture.
Sealer types
- Solvent-based impregnator: Deeper penetration, longer-lasting protection (typically 5–10 years). Best for dense, low-absorption slate. Requires good ventilation during application.
- Water-based impregnator: Easier application, lower odour, shorter re-entry time. Suitable for most outdoor slate. Typically lasts 3–5 years before resealing is needed.
- Colour-enhancing impregnator: Deepens and saturates the natural colour while sealing. A popular choice for dark Spanish or Indian slate where owners want a richer appearance.
- Topical/film-forming sealer: Creates a surface coating. Not recommended for outdoor slate — it traps moisture underneath, can peel, and increases slip risk.
Application process
- Wait until the patio has cured for a minimum of 28 days after laying. The surface must be completely dry — check the forecast for a dry window of at least 48 hours.
- Clean the surface thoroughly. Remove any efflorescence, mortar residue, or staining with an appropriate stone cleaner (not household bleach, which can affect the stone surface).
- Test the sealer on a small, inconspicuous area first to check for colour change and confirm you are happy with the result.
- Apply the sealer with a low-pressure sprayer, roller, or brush, working in manageable sections. Apply generously but avoid puddling.
- Allow the first coat to penetrate for the time specified by the manufacturer (typically 10–30 minutes), then apply a second coat before the first has fully dried.
- Buff off any excess sealer with a clean lint-free cloth before it dries on the surface — dried sealer residue creates a patchy appearance.
- Allow to cure fully before foot traffic (usually 24 hours, longer in cold conditions).
For a deeper look at product recommendations, application troubleshooting, and a comparison of the top-rated sealers currently available, the best sealant for slate patio guide covers that ground in detail.
Maintenance and troubleshooting
Routine cleaning and resealing
Sealed slate requires very little day-to-day maintenance. Sweep regularly to prevent grit (which acts as an abrasive) from building up. Wash with clean water and a stiff brush once or twice a year. Avoid pressure washers above 1,500 PSI, they can dislodge joint mortar and force water under the slate. Reseal every 3–5 years depending on traffic and exposure. Do a simple water-bead test each spring: if water no longer beads and soaks in within a few seconds, the sealer has worn and it is time to reseal.
Spalling and delamination
Spalling (surface flaking) and delamination (the slate splitting along its natural planes) are both signs that water is getting into the stone and freezing. If you see this, the cause is usually a combination of inadequate base drainage, an unsealed or poorly sealed surface, and slate that was not tested for freeze–thaw durability. Individual slabs can be carefully prised up, the bedding checked and replaced if saturated, and new slabs laid in their place. If the problem is widespread, the base or drainage design needs to be addressed, just replacing slabs will not solve it.
Efflorescence
Efflorescence, white powdery salt deposits on the surface, is common in the first 12–18 months after a mortar-set patio is laid. It is caused by soluble salts migrating from the mortar through the slate surface as water evaporates. It is unsightly but generally harmless and will reduce over time as the salts are exhausted. Clean with a dilute efflorescence remover (dilute acidic cleaner specifically formulated for stone) and a stiff brush, rinse thoroughly, and allow to dry before resealing.
Stain removal
- Organic stains (leaves, algae, moss): Dilute sodium hypochlorite solution (1 part bleach to 10 parts water), applied and scrubbed, then rinsed well. Or use a proprietary stone-safe biocidal cleaner.
- Oil/grease stains: Poultice treatment — mix an absorbent powder (talc or fuller's earth) with a degreasing solvent into a paste, apply over the stain, cover with plastic film, and leave for 24 hours. Remove and rinse.
- Rust stains: Proprietary oxalic acid-based rust remover for stone. Test on a small area first.
- Mortar/cement residue: Dilute hydrochloric acid solution (1:10), applied carefully with a brush and rinsed immediately with clean water. Wear gloves and eye protection. Do not use on limestone-containing stone.
Cost guide: what does a slate patio actually cost?
Costs vary widely depending on slate grade, project size, location, and whether you DIY or hire. Here are realistic ranges based on 2025–2026 market pricing.
| Cost element | DIY range (per sq ft) | Professional install range (per sq ft) | Notes |
|---|---|---|---|
| Slate material (standard Indian riven) | $1.50–$3.50 | $1.50–$3.50 | Material cost same; quality varies — test before buying |
| Slate material (premium Spanish/Welsh) | $5–$10 | $5–$10 | Significant quality premium; worth it for cold climates |
| Sub-base aggregate + geotextile | $0.80–$1.50 | $0.80–$1.50 | Included in pro quotes; DIY hire of compactor ~$80–$150/day |
| Bedding mortar materials | $0.50–$1.00 | Included in labour | Cement, sharp sand |
| Labour (professional) | — | $8–$18 | Higher for complex patterns, small areas, or difficult access |
| Sealer | $0.30–$0.80 | $0.50–$1.50 (applied) | Solvent-based sealers cost more but last longer |
| Total typical range | $4–$10 (DIY) | $14–$28 (pro) | Large projects reduce per-sq-ft cost; small patios cost more |
Factors that push costs up: small or awkward-shaped areas (more cuts, more waste), complex laying patterns, poor subgrade requiring deep excavation or imported fill, remote location with high delivery costs, and premium slate grades. Factors that bring costs down: large, simple rectangular areas, accessible sites, locally quarried or regional stone, and experienced DIY installation.
DIY vs. hiring a professional
Laying a slate patio is a realistic DIY project for someone with basic construction confidence, good physical fitness, and the time to do it properly. The sub-base preparation and mortar laying are not technically complex, but they are unforgiving, mistakes made at the groundwork stage cause problems that only show up months later. Here is how to think about the decision.
DIY is a reasonable choice if you:
- Have experience with general landscaping, tiling, or outdoor construction
- Are using calibrated slate (consistent thickness) rather than natural cleft irregular pieces
- Have a straightforward rectangular area with no complex drainage challenges
- Are in a mild climate without extreme freeze–thaw cycles
- Have a weekend or two to dedicate, plus drying/curing time between stages
Hire a professional when:
- The area is large (over 40–50 sq m) — economies of scale and the physical effort make pro hire more practical
- The site has significant drainage issues, existing retaining walls, or a problematic slope
- You are in a cold climate and want a mortar or concrete-base install to last — base prep errors are costly to fix later
- You want a complex pattern (herringbone, random flagging) that requires consistent judgment calls on layout
- Your slate is premium-grade and irregular — mistakes with expensive material are expensive
- You need any element permitted or inspected (e.g., drainage connections to storm system)
What a typical contractor scope of work includes
A full-service patio contractor will typically cover: site clearance, excavation to required depth, supply and compaction of sub-base aggregate, forming and pouring a concrete slab (if that method is specified), supply and laying of slate with bedding mortar, cutting, pointing, and a first application of sealer. Waste disposal is sometimes included, sometimes quoted separately. Always get three written quotes, confirm the base depth specification in writing, and check that the contractor carries public liability insurance.
Decision checklist: should you use slate for your patio?
Use this checklist to make the call. If you answer 'no' to more than two of the first five questions, slate may not be the best choice for your situation, consider the alternatives covered in the what patio slabs should I use guide or review the full material range in what are patio slabs made of.
- Can I get laboratory water absorption data (EN 13755 / ASTM C97) showing <0.5% for the specific slate I want to use?
- Is the slate available in a riven or textured finish (not polished or heavily honed)?
- Is the slate 20 mm thick or more (calibrated), or will I be using 30 mm+ thicker pieces for added strength?
- Can I build or pay for a correctly compacted sub-base of at least 100 mm (150 mm in frost-prone areas)?
- Does my site have a natural fall or can I create a minimum 1: 80 drainage gradient away from the house?
- Am I in a climate with moderate or mild freeze–thaw conditions, OR have I confirmed freeze–thaw test data for the slate?
- Do I have the budget for quality material and correct installation, including sealing?
- Am I prepared to reseal every 3–5 years and carry out occasional maintenance?
Your next steps: buy, hire, or choose an alternative
If you're going ahead with slate
- Measure your patio area accurately. Add 10–15% for cuts and spare pieces.
- Contact 2–3 suppliers and request samples, batch numbers, and water absorption test certificates before placing an order.
- If hiring a contractor, get 3 written quotes specifying the base depth, bedding method, slate type/source, and warranty. Ask specifically: 'What will you do if a slab cracks or heaves within 12 months?'
- Timeline expectation: allow 1–2 weeks for material delivery, 2–4 days for a professional install of a typical 30–50 sq m patio (plus cure time), or a full weekend plus a second day for pointing and cleanup for a confident DIYer.
- Do not seal until 28 days after laying. Use that time to research your sealer choice — the best sealant for slate patio guide gives current product comparisons.
Sample questions for suppliers
- What is the country and quarry of origin for this slate?
- Can you provide an EN 13755 or ASTM C97 water absorption test certificate?
- Is the slate calibrated (consistent back thickness), and what are the thickness tolerances?
- What is the largest single batch size available, and can my full order come from one batch?
- What is your returns or credit policy for damaged, substandard, or unmatched pieces?
If slate is not the right fit
If your climate is severe, your budget is tight, or you want near-zero maintenance, frost-rated porcelain pavers or engineering brick are worth serious consideration, both offer excellent freeze–thaw performance with more consistent manufacturing quality control than natural stone. For informal areas or very tight budgets, gravel remains a practical and fast-draining option. The what patio slabs should I use guide and the what are patio slabs made of article walk through those alternatives in detail and help you match a surface to your specific climate, use, and budget.
Further reading
- Best sealant for slate patio — product comparisons, application steps, and resealing schedules to protect your investment.
- What are patio slabs made of — a material-by-material breakdown of how natural stone, porcelain, concrete, and composite pavers are made and what that means for performance.
- What patio slabs should I use — a structured decision guide for choosing the right surface for your climate, budget, and use case.
- What slump for patio — practical concrete mix and slump guidance for anyone pouring a slab base or specifying ready-mix concrete for a patio project.
FAQ
Can you use slate for a patio — yes, no, or qualified answer?
Qualified yes. Natural slate is suitable for patios if you choose frost‑resistant, low‑absorption grades (typically <0.5% by mass), use a textured/riven finish for slip resistance, select appropriate slab thickness for the load and installation method, and install on a properly prepared, well‑draining base. Poor‑quality, highly polished, or thin slate laid without the correct base or drainage is not recommended in freeze–thaw climates.
Which types of slate are appropriate for exterior patios?
Choose paving/roofing‑grade natural slates that have laboratory test data (EN/ASTM) showing low water absorption and freeze‑thaw resistance. Prefer riven/cleft or shot‑textured finishes rather than honed or polished. Common suitable origins include high‑grade Spanish and some Indian slates sold as paving slate; confirm EN 13755/ASTM C97 absorption, ASTM C629 dimension stone spec and freeze‑thaw (ASTM C666/EN 12371) data.
What thickness of slate should I use for a patio?
Typical pedestrian patio thickness: 20–30 mm (0.8–1.2 in) calibrated paving slabs for walkable areas. For heavier point loads, furniture, or occasional vehicular use increase to 30–40+ mm or use mortar/concrete backing. Very thin pieces (<20 mm) are riskier unless fully supported on a mortar/concrete bed.
How does climate affect slate suitability (freeze–thaw)?
Slate with measured water absorption ≪1% (commonly 0.05–0.40%) and proven freeze‑thaw tests will perform well in freeze–thaw climates. If your slate lacks certified low absorption or freeze‑thaw data, do not use it where repeated freezing and thawing occur. Also ensure the base drains well and joints do not trap water against the stone.
Is slate slip‑resistant enough for wet patios?
Finish determines slip risk. Riven/cleft slate, shot‑blasted or textured finishes give much better wet traction and higher Pendulum Test Values (PTV). Polished or honed slate can be slippery when wet and is not recommended for exterior patios. Aim for materials that test to a PTV ≥36 (UK guidance) or follow local DCOF/PTV thresholds.
Pros and cons of slate for patios
Pros: attractive natural look, thin calibrated slabs available, low water absorption (when high quality), durable compressive and flexural strength for walking areas, natural cleft textures available. Cons: some slates can delaminate or spall if low quality or improperly installed, polished finishes are slippery, variable colors/veins may make matching difficult, price can be higher than concrete or gravel, and thin slabs require correct support to avoid cracking.