
Yes, you can absolutely put patio furniture on gravel, and plenty of homeowners do it every day. The honest caveat is that gravel alone, especially loose rounded pea gravel, is not the most stable surface for furniture legs. With the right gravel type, a properly compacted base, and a few stabilizing tricks under the legs, a gravel patio can support a full outdoor dining set, lounge chairs, and a fire pit table without any serious issues. Skip those steps and you will deal with wobbly chairs, sinking table legs, and furniture that drifts a little more every time someone sits down.
Can You Put Patio Furniture on Gravel? Practical Guide

Nolan Ellison
28 Jul 2026
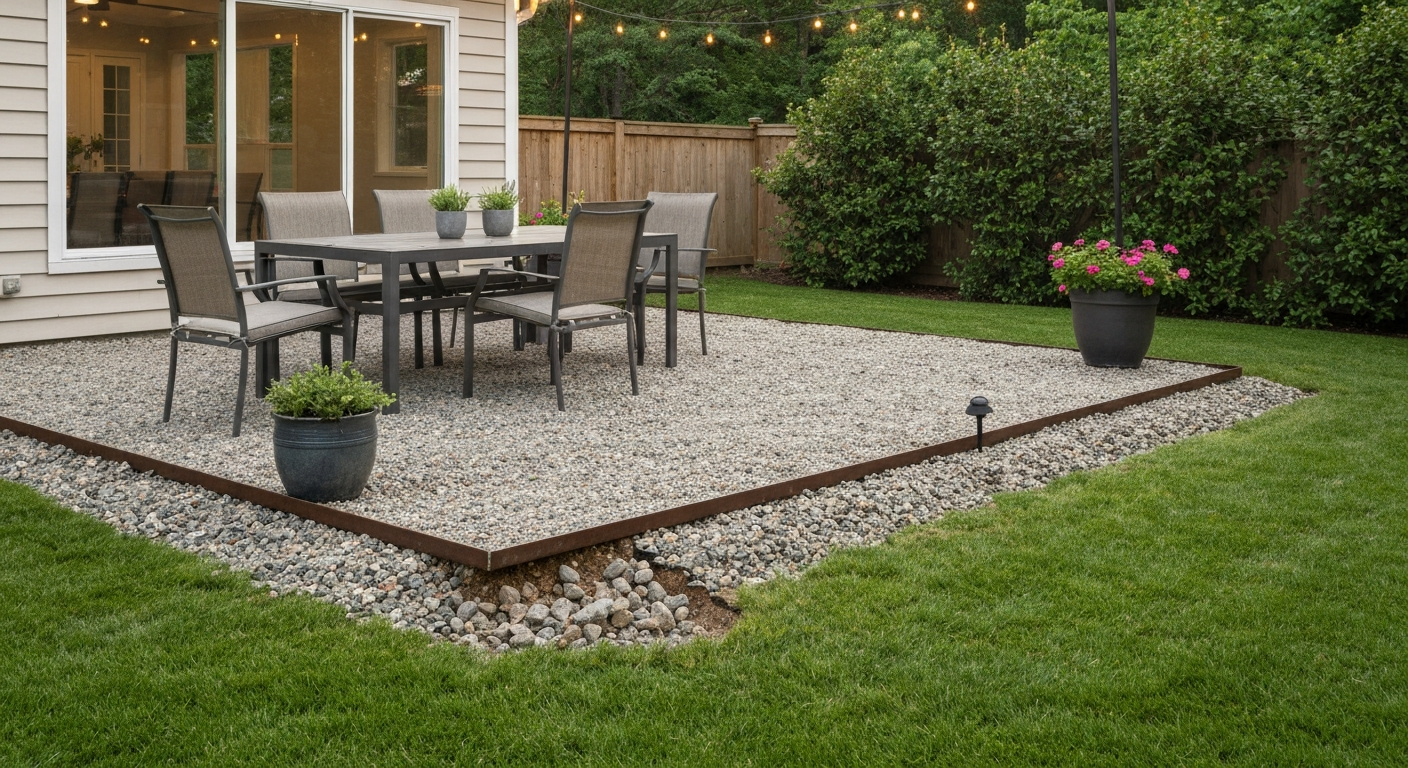
When gravel actually makes sense for a patio
Gravel earns its place when drainage is the top priority. A well-built gravel patio sheds rainwater fast, which matters enormously in wet climates or on lots where pooling is a constant headache. It is also one of the most budget-friendly hard surfaces available, and in most regions the materials are easy to source and straightforward to install yourself over a weekend. I have recommended it many times for transitional spaces like the area between a lawn and a fence line, for fire-pit circles, and for side yards where a full concrete or paver installation would feel like overkill.
That said, gravel has real limitations you need to accept before committing. It is not a firm, load-bearing surface the way concrete or flagstone is. The U.S. Access Board is explicit that loose gravel, including pea stone, does not meet ADA/ABA requirements for stable, firm, and slip-resistant ground surfaces unless it is mechanically stabilized with grids or binders. ASTM F1951-21 provides a standardized test method for determining the firmness and stability of playground and accessible surfaces, allowing designers to compare surfacing options and demonstrate when bonded or stabilized systems are required for wheelchair access ASTM F1951-21 provides a standardized test method for determining the firmness and stability of playground and accessible surfaces for wheeled mobility devices.. That makes loose gravel a poor choice anywhere wheelchair access, walkers, or canes will be used regularly. Gravel also shifts and migrates over time, needs periodic raking and topping off, and in freeze-thaw climates will heave without an adequately thick compacted base beneath it.
Best use cases for gravel patios
- Low-traffic fire pit areas and casual seating zones where mobility aids are not needed
- Side yards, dog runs, or utility areas where cost matters more than aesthetics
- Spaces that need excellent drainage and where standing water is a recurring problem
- Transitional zones between lawn and a hard-surface patio
- DIY weekend projects with a limited budget and flexible timeline
- Areas where you want a permeable surface to comply with local stormwater rules
Where gravel falls short
- Primary entertaining spaces where guests expect a firm, level floor underfoot
- Any area that needs to meet ADA/ABA accessibility requirements
- High-heeled footwear environments (heels sink and catch constantly)
- Sloped grades above roughly 3 to 5 percent, where gravel migrates downhill
- Spaces immediately adjacent to a house where gravel can migrate toward the foundation
Pros of putting patio furniture on gravel
The biggest advantage is cost. Compared to poured concrete, porcelain tile, or natural stone, gravel is dramatically cheaper per square foot, both in materials and labor. A gravel patio also installs faster, which matters if you are working toward a specific deadline or doing everything yourself. I have put together 200-square-foot gravel seating areas in a single weekend with a couple of friends and basic tools. Once the furniture is placed, gravel provides a visually relaxed, natural look that works well with informal garden styles and wood or rattan furniture.
Drainage is the other standout benefit. Rainwater passes straight through instead of pooling on the surface or sheeting toward your house. This also means the surface dries fast after a storm, so your furniture is usable again quickly. And because gravel is loose, it can be reconfigured easily. Want to move the dining zone a few feet? Rake it, re-level, and shift your furniture. Try doing that with a mortared flagstone patio.
Cons and drawbacks you should plan around
Stability is the main issue. Narrow furniture legs (especially those under wrought iron chairs) press into gravel and sink or tilt over time. Rounded pea gravel is the worst offender here because the stones do not interlock or compact, so point loads just push them aside. Angular crushed stone handles concentrated loads better because the particles lock together, but even crushed gravel is softer under a leg than concrete or tile.
Comfort underfoot is the second thing people notice. Walking barefoot on pea gravel is actually pleasant. Walking on sharp crushed gravel in bare feet is not. If you are building a space where family will be walking around without shoes, gravel choice matters quite a bit. The stones also tracked indoors on shoe soles is a minor but constant annoyance that comes with the territory.
Maintenance is ongoing. Gravel migrates, especially near the edges, and in freeze-thaw climates it can heave unevenly if the base was not built thick enough. Industry guidance recommends increasing the compacted base by 2 to 4 inches beyond the standard 4-inch recommendation in regions with deep frost lines or clay subgrades, because frost heave will displace a thin base significantly. You will need to rake, re-level, and occasionally top off with fresh gravel every season. It is not set-and-forget the way a properly laid paver patio is.
Wear under furniture is also real. The area directly under chair legs and table legs will compact differently than the surrounding gravel, creating small depressions that become more pronounced as the season goes on. If you move the furniture frequently or host large gatherings, this creates an uneven, lumpy surface that needs attention. Weed pressure through gravel is manageable with a properly installed weed barrier, but it never fully disappears.
The best furniture types for gravel surfaces
Heavy furniture with wide, flat feet wins on gravel. Anything with a large base footprint distributes load across more stones and resists sinking. Lightweight furniture with thin, pointed legs is the opposite: the concentrated load pushes straight into the gravel and the piece wobbles the moment someone leans on it.
| Furniture Type | Gravel Suitability | Key Reason |
|---|---|---|
| Adirondack chairs (wide sled or flat base) | Excellent | Large base footprint spreads load well |
| Teak or hardwood Adirondacks / loungers | Excellent | Heavy, wide base resists shifting |
| Cast aluminum with flat pad feet | Good | Rubber pad feet standard on most pieces |
| Wicker / rattan with wide sled base | Good | Sled bases prevent point-load sinking |
| Wrought iron with narrow ball or pointed feet | Poor without pads | Concentrated point loads sink into gravel |
| Folding metal chairs (camp style) | Moderate | Light, but thin legs can tilt on uneven gravel |
| Rolling carts or wheeled serving tables | Poor | Small hard casters jam and sink in loose aggregate |
| Large diameter-wheeled loungers or carts | Moderate | Wide pneumatic or soft-tread wheels perform far better than small hard casters on gravel |
If you already own furniture with narrow legs and you love it, the solution is not to swap the furniture. Use stabilizing pads or pavers under each leg, which is covered in the next section. For wheeled pieces, small hard casters are almost useless on loose aggregate. If you need a wheeled serving cart or drink trolley, look for one with large-diameter, wide pneumatic or soft-tread wheels, which roll over gravel instead of digging in.
Stabilizing solutions that actually work
There are four practical approaches to stabilizing furniture on gravel, ranging from a quick cheap fix to a more permanent structural solution. You can mix and match depending on how much effort you want to put into each area of the patio.
Furniture pucks and rubber pads
Rubber furniture pads and polymer pucks are the easiest solution. Many home‑improvement and DIY guides recommend rubber furniture pads or polymer 'pucks' and placing a small concrete or stone paver under each leg to spread load and reduce sinking or rocking on gravel; see Buyer guide: rubber furniture pads for floor protection and grip (commercial product guide). These slip under each leg and spread the contact area across a wider footprint, reducing the pressure on any single point of gravel. They also add grip, so the furniture resists sliding when someone sits down suddenly. Look for outdoor-rated rubber pads that will not degrade in rain and UV. This is a good starting point for anyone who wants a quick fix without any digging.
Individual concrete or stone pavers under legs
This is the solution I use most often and recommend most consistently. Set a single concrete stepping stone or a cut flagstone piece under each furniture leg. The paver sits on top of the gravel, distributes the load across its full surface, and gives the leg a firm, level platform. A standard 12-by-12-inch concrete paver costs almost nothing, and four of them under a dining table make an enormous difference in stability. This approach is reversible, costs next to nothing, and can be repositioned when you rearrange furniture.
Gravel grids and geocell stabilization
Interlocking gravel grids, sometimes called geocells or honeycomb stabilization panels (products like ECORASTER-type systems and Geoweb geocell panels), are the most thorough structural solution. These plastic or polymer grids are laid over the compacted base before the decorative gravel top layer is added. The gravel fills the individual cells of the grid and is confined there, meaning it cannot migrate sideways under load. The result is a surface that behaves much more like a solid patio than loose gravel does. Manufacturer technical data shows these systems can achieve high load-bearing performance when installed correctly. They cost more than a few rubber pads, but they transform the entire surface rather than just individual leg positions.
Partial paver zones within the gravel
A practical middle-ground approach is to install a small cluster of mortared or dry-laid pavers exactly where the furniture sits, and leave the surrounding area as open gravel. You get the firmness of a hard surface under the chairs and table, but the gravel drainage and look everywhere else. This is worth considering if your furniture placement is fixed, because it adds almost no cost over a full paver patio and solves the stability problem definitively.
Practical fixes to keep furniture level and safe
Even with the right gravel type and stabilizing pads, slight tilting and unevenness are common on gravel patios, especially after a season of use. Here are the hands-on fixes I come back to repeatedly.
- Rake the seating area flat before placing furniture at the start of each season. Use a landscape rake to redistribute gravel that has migrated to the edges and fill in the low spots left by last season's leg pressure.
- Use leveling blocks or composite shims under paver pads that sit on slightly uneven gravel. A 1/4-inch shim under one corner of a 12-inch paver makes a table go from rocking to rock-solid.
- Check and re-level at least once mid-season. After the first major rainstorm or a big gathering, walk around and test each piece of furniture for wobble. Ten minutes of raking and shimming saves guests from tipping chairs.
- For heavier pieces like a stone-top dining table, use anchored paver sets: set four 16-by-16-inch concrete pavers on a thin sand bed over the compacted gravel base, verify level with a spirit level, then place the furniture on top. The sand bedding lets you fine-tune level without digging.
- In windy areas or on slopes, use furniture strap anchors or ground anchors to secure umbrella bases and lightweight chairs. Gravel does not hold a stake the way compacted soil does, so use wide-flanged ground anchors designed for soft or loose surfaces.
- At the end of the season before winter, rake the entire surface flat, check edging for any areas where gravel has spilled out (replace or reset edging as needed), and top off any low spots with fresh aggregate. In freeze-thaw climates, store lightweight furniture to prevent it from shifting as the surface heaves and settles through winter.
How gravel compares to other patio surfaces for furniture use
If you are weighing gravel against other surfaces specifically for the purpose of placing furniture on it, this comparison covers the practical differences. Mulch sometimes comes up as an alternative to gravel for informal outdoor spaces, but the two behave very differently under furniture. For a concise side-by-side comparison, see our guide on mulch vs gravel patio for pros, cons, and when to choose each. Mulch compresses and decays, whereas gravel is permanent and holds its volume far better year over year.
| Surface | Furniture Stability | Drainage | Maintenance Level | Relative Cost | DIY Friendliness |
|---|---|---|---|---|---|
| Loose gravel (pea gravel) | Low without fixes | Excellent | Medium (raking, topping) | Low | High |
| Crushed angular gravel | Moderate | Excellent | Medium | Low | High |
| Gravel with geocell grid | Good to Excellent | Excellent | Low-Medium | Low-Medium | Medium |
| Flagstone (dry-laid) | Good | Good | Low | Medium-High | Medium |
| Concrete pavers | Excellent | Good (with gaps) | Low | Medium | Medium |
| Poured concrete | Excellent | Poor without grading | Very Low | Medium-High | Low (skilled labor) |
| Porcelain tile | Excellent | Poor without slope | Low | High | Low (skilled labor) |
| Mulch | Very Low | Good | High (decomposition) | Very Low | High |
The honest take: if your primary goal is a furniture-friendly surface, concrete pavers or flagstone beat gravel on stability without question. But if drainage, budget, and DIY simplicity matter more, a properly built gravel patio with stabilized furniture supports is a completely workable solution. Knowing the trade-offs upfront lets you build for what you actually need.
Building a gravel patio right: surface prep from start to finish
The quality of a gravel patio lives or dies on what happens below the gravel you can see. I have seen beautifully topped gravel patios turn into an uneven mess within a season because the base prep was skipped or rushed. Here is the full sequence done correctly.
Step 1: Plan and mark the area
Mark the patio perimeter with marking paint, stakes, and string. Confirm the area is large enough for your furniture with clearance on all sides (allow at least 3 feet beyond the furniture footprint for comfortable movement). Check the grade: you want a slight fall away from the house of about 1 inch per 8 feet for drainage. Identify where the edging will go before you dig, because the edge restraint system determines your excavation boundary.
Step 2: Excavate to the right depth
Excavate the area to accommodate the full build-up: typically 4 inches of compacted crushed-stone base plus 2 to 3 inches of decorative top gravel, giving you a total dig depth of 6 to 7 inches below your intended finished grade. In cold climates with deep frost lines or clay-heavy subgrade, increase the compacted base to 6 to 8 inches, raising total excavation to 8 to 11 inches. Remove all organic material, roots, and soft spots. The right tools matter here: a flat spade and a pointed digging shovel each have different roles in excavation, and for larger areas a plate compactor and possibly a small excavator will save significant time and effort. For detailed tool recommendations and rental vs. buy guidance, see our guide to the best equipment for digging patio.
Step 3: Install the weed barrier
Lay a commercial-grade geotextile weed fabric over the entire excavated area, overlapping seams by at least 6 inches. Use landscape staples every 18 to 24 inches to hold it in place. This layer does not stop all weeds forever, but it significantly slows encroachment from below and provides a separation layer between the subgrade and your aggregate base, which helps maintain drainage over time.
Step 4: Set edge restraints
Install your edge restraints before adding base material. Rigid plastic, aluminum, or steel edging spiked into the compacted subgrade holds the gravel in place and prevents lateral migration over the seasons. ICPI technical guidance is clear that edge restraints must bear on the compacted base, not just on loose soil or bedding material, and the restraint stakes should be as deep as the base is thick. Concrete or stone border edging is an attractive alternative that doubles as a visual boundary. Choosing the right edging type is worth careful thought because it directly affects how long your gravel stays where you put it. For help choosing a specific product and installation method, see my guide to the best edging for gravel patio which compares rigid plastic, metal, and stone options.
Step 5: Add and compact the base
Add crusher-run aggregate (also called dense-graded aggregate or DGA) in lifts of no more than 3 to 4 inches at a time. Compact each lift with a plate compactor until the surface does not deflect visibly underfoot. Industry-standard specifications for pedestrian patios call for the subgrade compacted to at least 95 percent relative compaction (Standard Proctor, ASTM D698) and the aggregate base to 95 to 98 percent. For a residential DIY patio you may not be running Proctor tests, but the practical equivalent is compacting until the plate compactor is no longer pushing material ahead of it and the surface feels hard underfoot. Do not skip this step. A soft base is the single most common reason gravel patios fail.
Step 6: Choose and add the top gravel layer
For a furniture area, angular crushed gravel in the 3/8-inch to 3/4-inch range (such as #8 or #57 stone) is a significantly better choice than rounded pea gravel. Angular stone interlocks under load, while rounded stone rolls. If you prefer the look and feel of pea gravel for aesthetics, use it as a 1 to 1.5-inch topdressing over a well-compacted angular base rather than as the full 2 to 3 inches. Spread the decorative layer to a finished depth of 2 to 3 inches and rake level. Do not go deeper than 3 inches on the top layer; more than that and you just create a deeper sink for furniture legs.
Step 7: Install gravel grid (optional but recommended for seating zones)
If you are stabilizing the seating area with a geocell or interlocking gravel grid, install it on top of the compacted base before adding the top layer. Snap or stake the panels together per the manufacturer's instructions, then fill the cells with your chosen top aggregate and tamp lightly. The gravel ends up flush with the top of the grid cells. This setup dramatically reduces migration and leg sinking under furniture.
Step 8: Final leveling, furniture placement, and stabilizer pads
Once the top layer is in, rake the surface flat and check level in multiple directions with a long spirit level or a straight 2-by-4. Place your furniture and add rubber pads or pavers under each leg. Check that each piece is stable before considering the project done. Note any low spots and fill before they become a problem after the first rain.
Quick installation checklist
- Mark patio perimeter and confirm finished grade and drainage direction
- Excavate 6 to 7 inches (or 8 to 11 inches in cold climates with deep frost)
- Remove all organic material and soft spots from the subgrade
- Lay geotextile weed barrier with 6-inch overlapping seams
- Install edge restraints staked to full base depth before adding aggregate
- Add crusher-run base in lifts, compact each lift to firm, non-deflecting density
- Verify total compacted base depth: 4 inches minimum (6 to 8 inches in freeze-thaw climates)
- Install geocell gravel grid over base if using (recommended for furniture zones)
- Add 2 to 3 inches of angular crushed gravel or decorative topping; rake level
- Place furniture and add rubber pads or concrete paver pads under each leg
- Check level; shim or rake as needed
Ongoing maintenance through the seasons
A gravel patio does not take a lot of time to maintain, but it does need consistent attention. In spring, rake the entire surface to redistribute gravel that has migrated toward the edges over winter, fill any depressions left by furniture legs, and top off with fresh aggregate wherever the layer has thinned below 2 inches. Inspect the edging for any sections that have shifted or heaved; reset stakes or reset border stones as needed. In climates with serious freeze-thaw cycles, the surface will look rougher in spring than it did going into fall, and some raking and re-leveling is simply part of annual maintenance.
Mid-season, give the surface a quick rake after any large gathering or significant storm. Spot-treat weeds as soon as they appear rather than letting them establish. In fall, do a final rake-and-level pass, check edging one more time, and store any lightweight furniture that could shift or blow around under winter frost-heave conditions. A few hours of maintenance per year is a reasonable trade for the cost savings and drainage benefits gravel provides.
FAQ
Can you put patio furniture on gravel?
Yes — but with conditions. Loose, unstabilized gravel (especially rounded pea gravel) will allow chairs and table legs to sink, rock, or tip and is not accessible for wheelchairs or walkers. Gravel is appropriate when you use the right aggregate, a compacted base or stabilization system, proper edging, and targeted load‑spreading under furniture legs. When installed and maintained correctly, a gravel patio can be durable, attractive, and usable for furniture.
When is gravel an appropriate surface for patio furniture?
Gravel is appropriate when: the design tolerates some texture, you don’t require full ADA wheelchair access, the subgrade drains well or is engineered for frost, and you commit to stabilization (compacted crushed base, grids, or confinement) or use leg‑pads/pavers under furniture. Avoid loose pea gravel if you need firm, level surfaces for mobility devices or heavy dining sets unless it’s mechanically stabilized.
What are the pros and cons of a gravel patio for furniture?
Pros: lower material cost, good drainage, easy to install and change, natural look, low dust if angular/crushed aggregate used. Cons: can be unstable under point loads, requires edging and maintenance (raking, refilling), not inherently accessible for wheeled mobility devices, can shift in freeze‑thaw or on wet soils, and may require additional stabilization for heavy furniture.
Which gravel types and sizes work best for furniture stability?
Preferred: crushed/angular aggregates (e.g., #8, #57, crusher‑run/DGA) compact better and interlock to form a firmer surface. Use a compacted base of crusher‑run or DGA beneath a decorative top layer. Decorative top: 3/8"–3/4" crushed rock or a 2–3" layer of pea gravel over a compacted base may be used, but pea gravel alone is least stable under concentrated loads.
What stabilization options keep patio furniture level on gravel?
Practical stabilizers: 1) Furniture leg pucks/pads (large rubber or polymer) or metal glides to increase contact area. 2) Set each leg on a small concrete or stone paver/stepping stone. 3) Install a gravel grid/cellular confinement (Geoweb/Ecoraster/Permagrid) to confine aggregate. 4) Use a compacted crusher‑run/DGA base under decorative gravel. 5) Install full pavers, flagstones or a screeded sand bed for larger seating areas.
How do I prepare the surface step‑by‑step for a stable gravel patio?
1) Mark and excavate area to remove topsoil to depth required for subgrade + base + top gravel (typical total: 6–12" depending on climate). 2) Grade for positive drainage away from structures (1–2% slope). 3) Install geotextile fabric if needed to separate soil and aggregate. 4) Place and compact subgrade (proof‑roll and compact to firm). 5) Install compactable base (crusher‑run/DGA) in 2–4" lifts and compact to ~95% relative compaction; typical base for patios = 4" compacted (increase in wet/frost zones to 6–8"). 6) Add 1–3" of decorative crushed/top gravel and rake smooth; compact lightly or install gravel grid if used. 7) Install rigid edging bearing on compacted base. 8) Set furniture leg pads or pavers under heavy pieces.