For most patio paving slabs, a polymer-modified cementitious grout or polymeric jointing sand is your best starting point. Which one wins depends on three things: what your slabs are made of, how wide your joints are, and how harsh your winters get. Porcelain tiles on a rigid base need a proper tile grout (sanded or unsanded, latex-modified). Concrete pavers, flagstone, and brick-style units with joints from 1/4" up to 2" wide are usually better served by a quality polymeric jointing sand. And if you're dealing with a wet, heavily used, or frost-prone patio, a polymer-modified or epoxy product will outlast plain cement grout every time.
Best Patio Grout for Paving Slabs: How to Choose

Nolan Ellison
6 May 2026
How to choose the right grout type for patio slabs
The word "grout" covers a surprisingly wide range of products when it comes to outdoor paving, and picking the wrong one is one of the most common reasons patios look rough within a couple of seasons. Here's how to think through the decision. If you want a quick overview of patio grout types and how they affect performance, see what is patio grout.
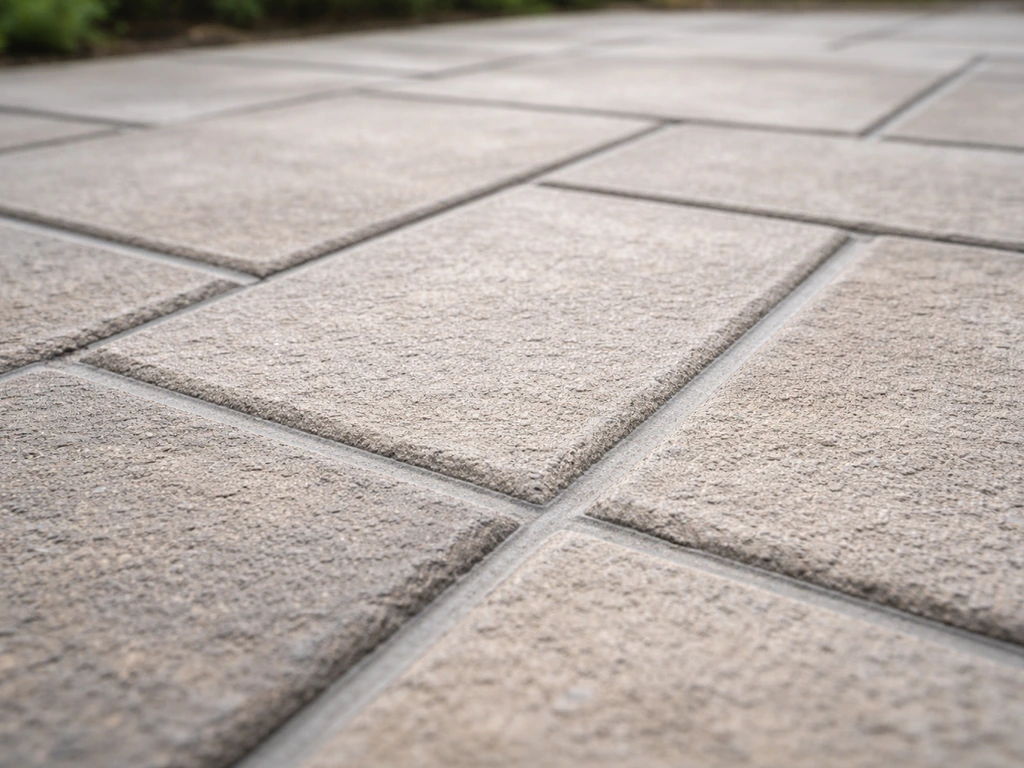
Joint width is the first filter
Joint width drives more of this decision than people realize. Very tight joints (under 3mm) need unsanded or fine-sanded grout. Joints from roughly 1/4" (6mm) up to about 1.5" are where polymeric jointing sands really shine. Joints wider than that, up to around 2", can still use a high-quality polymeric sand like QUIKRETE HardScapes Polymeric Jointing Sand, which is rated for joints up to 2" wide. Traditional cement grout or basic builder's sand will crack, wash out, or crumble in wide outdoor joints, especially once freeze-thaw cycles get involved.
Your climate matters more than you might think
If you're in a region that sees hard freezes, any moisture trapped in poorly bonded grout will expand and crack it out. Polymer-modified products handle freeze-thaw stress significantly better than straight cementitious mixes because the polymer gives the joint a small amount of flex. In warmer, wetter climates, the bigger enemy is biological growth and washout, so you want a product that locks up firmly and resists erosion. Polymeric sands address both these concerns better than their non-modified alternatives.
The four main grout types for outdoor paving
| Grout Type | Best For | Joint Width Range | Freeze-Thaw Rating | DIY Difficulty |
|---|---|---|---|---|
| Polymeric jointing sand | Concrete pavers, brick, flagstone, natural stone | 1/4" to 2" | Excellent | Low-Medium |
| Sanded polymer-modified cementitious grout | Porcelain/ceramic tile, tight-jointed stone | 1/8" to 1/2" | Good | Medium |
| Unsanded polymer-modified cementitious grout | Porcelain/ceramic tile, very tight joints | Up to 1/8" | Good | Medium |
| Epoxy grout (e.g., SikaTile-825, LATICRETE SpectraLOCK PRO) | Porcelain, glazed tile, high-traffic or chemical-exposed areas | 1/16" to 3/8" | Excellent | High |
Epoxy grout is worth mentioning because it genuinely is the most durable option available. SikaTile-825 Epoxy Grout is a 100%-solids, 3-component system that handles joints from 1.5mm up to 10mm wide. LATICRETE SpectraLOCK PRO Premium is similarly positioned as a high-performance stain-resistant product. The trade-off is cost and working time: epoxy sets fast, is harder to apply cleanly, and cleanup must happen quickly. For most homeowners doing a standard patio, it's often more than is needed, but if you have a shaded, constantly damp, or heavily trafficked patio with porcelain tiles, it's worth the extra effort.
Best grout choices by patio material and setting
Porcelain and ceramic tile patios
Porcelain slabs laid on a solid, fully bonded mortar bed need a proper tile grout, not polymeric sand. If your joints are under 3mm, go with an unsanded polymer-modified grout. For 3mm to 12mm joints, a sanded polymer-modified product is the right call. Where you have a shaded or north-facing patio that stays wet, or heavy foot traffic, epoxy grout is genuinely the upgrade worth paying for. The stain resistance and bond strength make a real difference in those conditions. One thing to watch: porcelain has a very low absorption rate, which makes it susceptible to grout haze sitting on the surface if you're not wiping as you go.
Natural stone and flagstone
Natural stone is where you need to be careful with grout selection. Porous stones like sandstone, limestone, and slate can absorb pigment from cementitious grouts and stain permanently. If you're working with flagstone or slate, use a light-colored or unsanded polymer-modified grout, and always test on a scrap piece first. For the best grout for slate patio results, choose an option that won’t be easily stained and that matches your joint width.
Polymeric jointing sand is often the better route for irregular flagstone with wider, uneven joints because it fills gaps better and doesn't require precision mixing. If you're specifically working with a slate patio, the grout considerations overlap with what applies to slate specifically, since the absorption and surface texture add extra complexity.
Concrete pavers and brick-style units
This is the category where polymeric jointing sand is the clear winner. For specific guidance on how the type and joint size affect results, see the best outdoor patio grout options for your setup. If you want the best patio grout UK guidance, polymeric jointing sand is typically the go-to choice for concrete pavers and brick-style patios. Concrete pavers are typically laid on a compacted gravel and sand base with joints ranging from 1/4" to well over 1".
That kind of joint width and the movement inherent in a flexible paving system rules out rigid cementitious grout. Polymeric sand sweeps into the joints, [compacts with a plate compactor or hand tamper, and then locks up when activated with water](https://www. techniseal. com/pub/media/catalog/product/pdf/t/d/tdshpnextgelusenmarch2023.
pdf). [Sakrete's guidance specifies a minimum joint of 1/4" (6. ](https://www. sakrete.
com/wp-content/uploads/2021/12/PermaSand-TDS. pdf)4mm) for their PermaSand product, and most other brands follow similar minimums. The result resists both weed growth and rain washout far better than plain kiln-dried sand.
Raised or frost-heave-prone settings
If your patio is built over soil that moves (expansive clay, frost-prone ground), rigid epoxy or cementitious grout will crack no matter how well it's mixed. In these settings, polymeric jointing sand is genuinely the smarter choice because it can accommodate minor movement without shattering. Epoxy grout is brilliant for bond strength but it's essentially inflexible once cured. On a patio that shifts even a few millimeters seasonally, that rigidity becomes a liability.
Installation essentials: joint width, prep, mixing, and grouting steps
Good prep work is where most DIY grouting jobs succeed or fail. I've seen beautifully chosen products perform terribly because the joints weren't cleaned out or the pavers were still damp when the polymeric sand went down. Here's what to actually do.
Prep your joints properly
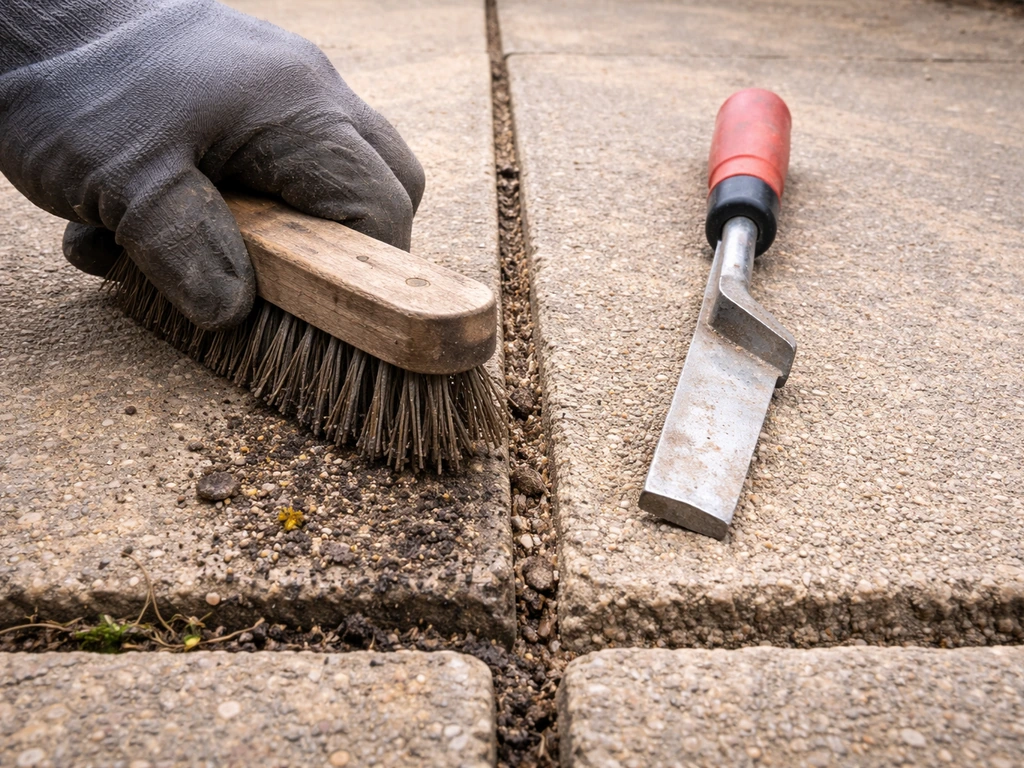
- Remove any existing sand, weeds, old grout, or debris from the joints. A stiff brush, a joint scraper, or a low-pressure washer works well. Make sure you're getting down to firm, stable material.
- Let everything dry completely before you start. This is non-negotiable for polymeric sand: if the pavers are damp, the polymer won't perform as designed, and you risk haze and patchy bonding.
- Check joint widths. If joints are narrower than 1/4", polymeric sand won't work well. If they're wider than 2", check your specific product's TDS to confirm compatibility.
- For tile grouting over a mortar bed, ensure the mortar has fully cured (typically 24-48 hours minimum) and that no lippage or movement is present in the tiles before you grout.
Applying polymeric jointing sand (concrete pavers, flagstone, brick)
- Pour or spread the polymeric sand across the dry paving surface and sweep it into the joints using a stiff broom, working in multiple directions.
- Compact the paving with a plate compactor (for concrete pavers) or tamp by hand for more delicate surfaces. This drives the sand down and seats it.
- Sweep a second pass of sand into any joints that look low after compaction. Keep the sand level approximately 1/8" below the paver surface — don't overfill.
- Blow off any excess sand from the paver surface using a leaf blower on low. Remove all surface residue before wetting — any sand left on the surface can dry as haze or cloudiness.
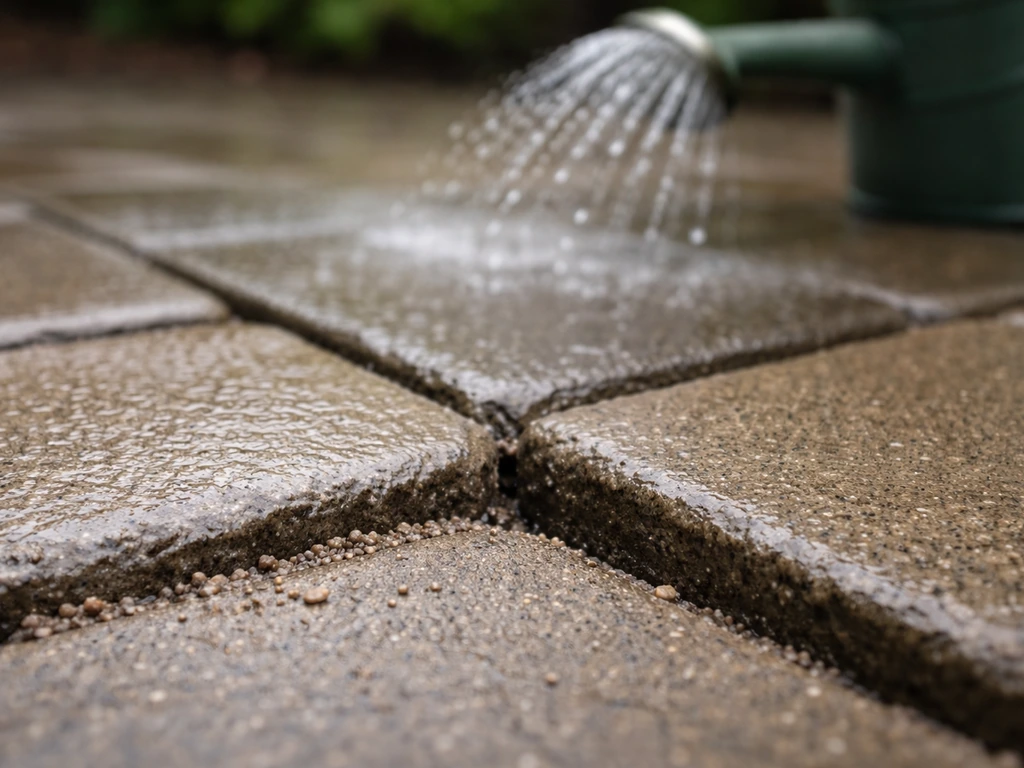
- Activate with water: use a gentle mist or fine spray setting. Do not use a jet spray that will wash sand out of the joints. Follow the specific brand's wetting guidance as amounts vary. Techniseal's HP NextGel, for example, has a specific spread-compact-activate sequence in its TDS.
- Allow to cure fully before allowing foot traffic. Most products need 24 hours minimum; check your specific brand's instructions.
Applying cementitious or epoxy grout (porcelain, tile, stone)
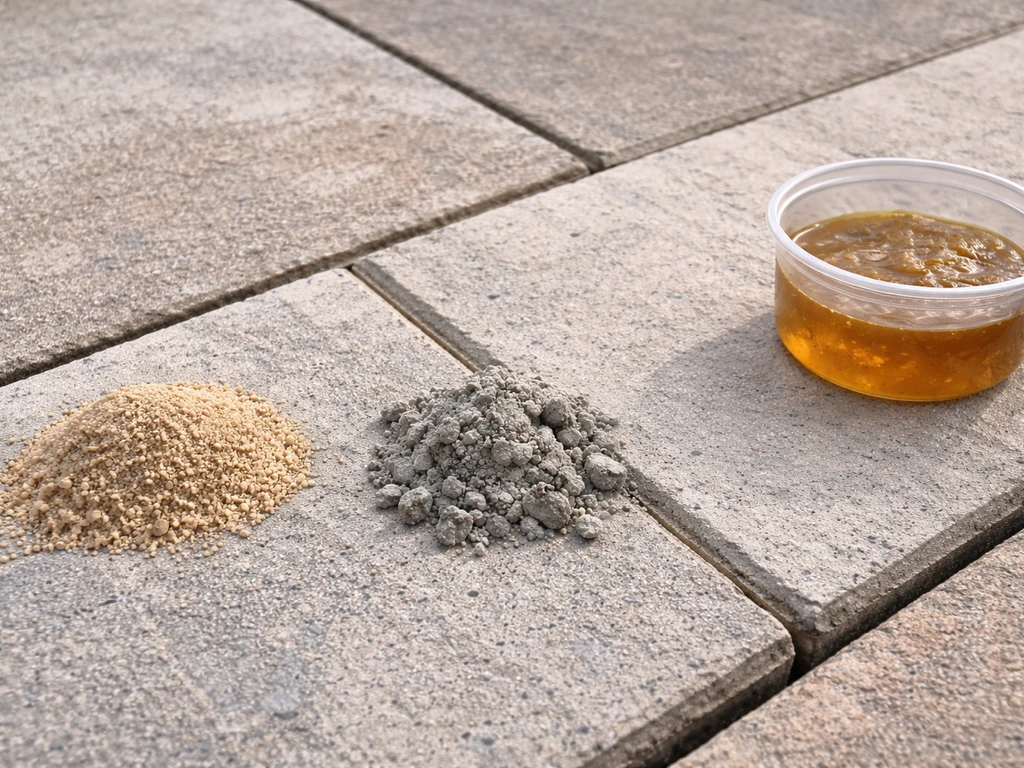
- Mix grout to a smooth, peanut-butter consistency. Too wet and it will shrink and crack; too dry and it won't press into joints properly. Follow manufacturer ratios exactly.
- Work in sections of about 1-2 square meters at a time, especially in warm weather. Epoxy grout sets fast and you need to stay ahead of it.
- Force grout into joints with a rubber float held at roughly 45 degrees, pressing firmly across the joint direction to pack it fully.
- Remove excess grout from the tile surface with the float edge before it starts to set.
- Clean the surface: for standard grout, wipe down with a damp (not soaking) sponge, rinsing frequently. For epoxy grout like SikaTile-825, apply cold water to the freshly grouted area for initial cleanup. Final cleaning with clean water can happen after 24 hours.
- For LATICRETE SpectraLOCK epoxy grout, begin haze removal about 1 hour after installation using their recommended haze cleaner product. Don't skip this step or you'll be fighting cured epoxy film on your tiles.
- Allow full cure before sealing or heavy traffic. Cementitious grout typically needs 72 hours; epoxy grout is generally walkable in 24 hours but check the product TDS.
Sealing, maintenance, and how grout performs over time
Should you seal patio grout?
For cementitious grout on natural stone or porcelain, sealing is strongly recommended. Grout is inherently porous and will absorb stains from oil, algae, leaf tannins, and general grime if left unprotected. Apply a penetrating (impregnating) sealer specifically rated for exterior use, not an acrylic surface sealer which can peel in frost. Wait at least 72 hours after grouting (ideally a full week in good drying conditions) before sealing. For polymeric jointing sand, sealing is optional but a paver sealer over the whole surface, joints included, significantly extends resistance to washout and biological growth.
Ongoing maintenance routine
- Brush the patio clear of leaf debris regularly. Wet leaves sitting in joints accelerate biological staining and break down grout over time.
- Rinse with a gentle hose spray after heavy rainfall or if sand or grit builds up on the surface.
- Re-apply sealer every 2-3 years for cementitious grout, or per the sealer manufacturer's recommendation based on wear.
- Check joints annually, especially after the first hard frost season. Top up polymeric sand in any joints that have lost depth, following the same dry-surface application process.
- Avoid high-pressure washing directly into joints. A fan-tip nozzle at moderate pressure on the slab surface is fine, but hammering jets into joints will erode grout and sand prematurely.
Realistic lifespan expectations
Well-installed polymeric jointing sand in joints that stay clean and dry can last 8-10 years before needing topping up, sometimes longer. Polymer-modified cementitious grout on a well-bonded, rigid patio typically holds 5-10 years depending on climate. Epoxy grout, properly installed, can genuinely last 20 years or more because it doesn't absorb water, doesn't support mold, and doesn't degrade in freeze-thaw cycles. The trade-off is cost and the skill required to install it cleanly.
Common grout failures and troubleshooting
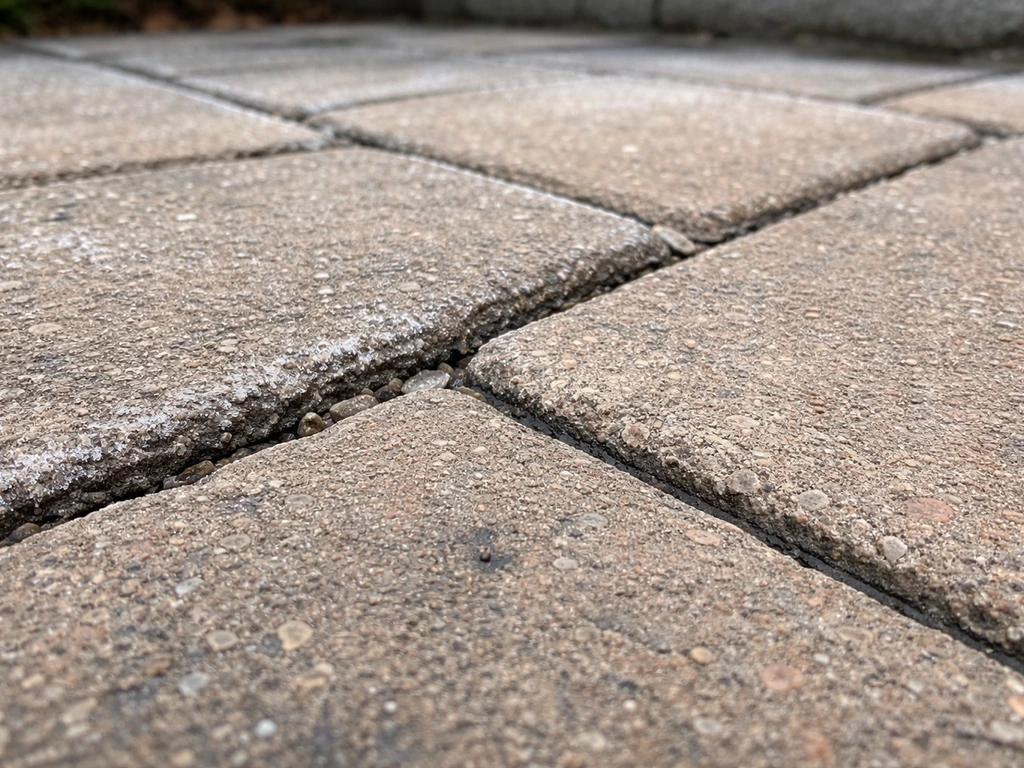
Cracking grout
Cracking is almost always caused by one of three things: movement in the substrate, grout that was mixed too wet, or a rigid grout used in a setting that flexes. If your patio base is moving (poor compaction, frost heave, tree roots), no grout will hold permanently until the base is fixed. If the mix was too wet, the grout shrinks as it cures and cracks. The fix for isolated cracks is to rake them out, clean the joint, and refill with fresh product. If cracking is widespread, you likely have a base problem that needs addressing first.
Sand washing out or disappearing joints
If your polymeric sand washes out in rain, one of two things happened: it wasn't activated correctly (wetting was too aggressive and pushed sand out of joints instead of activating the polymer), or the pavers were still damp when the sand went down, which prevented proper polymerization. The solution is to re-sweep fresh polymeric sand into the affected joints on a completely dry day, ensure you blow off all surface residue, and use a very gentle mist spray rather than a hose jet to activate it.
Efflorescence and discoloration
Efflorescence is that white, chalky bloom that appears on grout or pavers, caused by soluble salts migrating to the surface as water moves through the material and evaporates. It's common in the first season and usually resolves on its own with weathering. You can speed it up with a diluted efflorescence cleaner. Persistent staining from algae, moss, or tannins responds well to a proprietary patio cleaner or a diluted bleach solution (rinse thoroughly afterward). Dark or discolored grout in shaded areas is usually biological growth rather than grout failure, and a fungicidal patio wash handles it without the need to regrout.
Grout haze on slab surfaces
Grout haze is a film left on the surface of slabs when grout residue isn't cleaned off before it cures. With standard cementitious grout, a damp sponge during installation and a clean water rinse afterward prevents it. If it's already cured, a grout haze remover (typically a mild acid-based product) will lift it without damaging most slab surfaces.
Epoxy haze is a different beast: LATICRETE's guidance says to start haze removal about 1 hour after installation using their specific haze cleaner. If you miss that window with epoxy, removal is much harder and may require mechanical intervention.
With polymeric jointing sand, the equivalent problem is dry sand residue left on the paver surface: RCP Block & Brick specifically recommends blowing off all surface sand and gently wiping any residue before you wet the patio, since water will lock it to the surface as cloudiness.
Hollow or failed joints that won't bond
If you tap on grout and it sounds hollow, or if it pops out in chunks, the bond failed at installation. Common causes include: grouting over a dusty or damp surface, using old or clumped grout product, or applying too thin a layer that couldn't bond on both sides of the joint. The only real fix is to remove the failed material, clean the joint down to solid substrate, and regrout correctly. If your joints keep coming loose, use the best patio grout repair approach by removing the failed material and regrouting with the correct product for your patio type. There's no product you can paint over the top that will salvage a structurally failed joint.
Weed and moss growth in joints
Weeds and moss growing in joints mean the joint material has either failed, eroded, or was never properly filled in the first place. Polymeric sand, when correctly installed and polymerized, significantly reduces weed germination compared with plain sand because it doesn't provide the loose, moist medium that seeds root into easily. If weeds are a persistent problem, rake out the joints, treat with a path weedkiller, allow to dry, and refill with fresh polymeric sand. Going forward, keeping the surface swept and the joints topped up is the best prevention.
FAQ
Can I use polymeric jointing sand on porcelain slabs?
Usually no. Porcelain paving generally needs proper tile grout because the jointing sand is not designed to bond and protect like a cementitious tile grout. The main exception is if the system is specifically engineered for that tile format, but in normal patio installs, using polymeric sand on porcelain increases risk of haze and weak joint bonding.
What’s the easiest way to measure joint width so I buy the right grout or polymeric sand?
Measure the opening at multiple points, because paver and flagstone joints often vary. Use the narrowest and widest readings to select the product range. If you’re near a cutoff (for example, around 3 mm or around 6 mm), it’s safer to choose the category that matches the larger joints, since rigid cement products struggle more when joints widen over time.
How long should I wait before wet weather after grouting?
For polymeric jointing sand, activation needs time to fully polymerize, so avoid rain and heavy misting until the product’s activation window is met (commonly at least 24 hours, longer in cool conditions). For cementitious grout, follow the cure recommendation on the bag, and avoid sealing or washing before it has fully set. If you get caught in a sudden downpour, plan to re-sweep and re-activate only after the surface dries completely.
Do I have to seal polymeric jointing sand joints?
It’s optional, but sealing the whole paved surface including joints can improve resistance to washout and biological growth, especially on shaded patios that stay damp. Avoid sealing products that can interfere with the jointing sand’s final locked-in state, so if you choose to seal, wait until the jointing sand has fully cured and the patio is dry.
Why is my polymeric sand turning to cloudy residue on the surface?
Cloudiness is often dry residue that was left after spreading, or activation that was too aggressive (for example, a hose jet). Fix is to let the patio dry, then gently remove loose residue (blowing first), and re-apply fresh polymeric sand in the affected joints. During activation, use a very light mist and do it in small sections so sand can lock without being pushed out.
Can I patch a small area instead of regrouting the whole patio?
Yes, for isolated failures. Rake out only the failed sections to solid material, clean the joint thoroughly, and refill with the same product type appropriate to the paving and joint width. If bond failure is widespread, patching can mask an underlying substrate movement or installation error, and the safer route is to address the base issue first.
What should I do if my grout cracks even though the right product was used?
Check for one of three causes: movement in the substrate, water added during mixing that was too high, or using a rigid grout on a base that flexes. If the crack is localized, remove and regrout that section. If cracking returns in multiple areas, you likely need base correction (compaction, drainage, or frost movement control), because no grout choice fully fixes a shifting foundation.
How do I prevent grout haze when installing cementitious grout?
Keep a damp sponge and change it frequently, then follow with a clean water rinse once residue lifts, working in small areas so haze does not start to cure on the surface. If haze is already cured, use a haze remover made for the slab type, because overly strong cleaners can dull or etch some surfaces. On epoxy, removal timing is critical, so plan ahead if you choose epoxy for a patio.
Is efflorescence a sign the grout is failing?
Often it is not. Efflorescence is usually salt migration and commonly fades as the patio goes through its first wet-dry cycles. If it persists, it may be from ongoing moisture movement, so improve drainage if possible. For cosmetic removal, use a diluted efflorescence cleaner and rinse thoroughly, then reassess rather than regrouting immediately.
What’s the best way to stop weeds if polymeric sand already got washed out?
First, rake out any loosened jointing material, clean out weeds and debris, and then refill with fresh polymeric sand on a completely dry day. Activate with a gentle mist rather than a hose jet, and keep the joints topped up after the first wet weather cycle. If weeds keep returning quickly, it can indicate the joint material never fully polymerized or that the base is draining and moving enough to reopen joints.